1. Deep Learning Workstation
1.1 Configuration
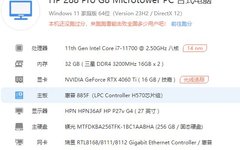
First, here is the computer configuration diagram: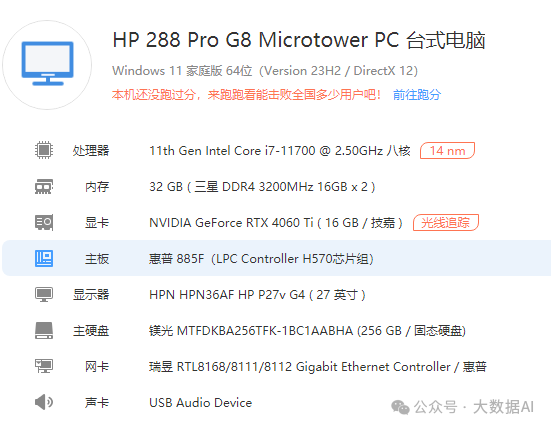 Upgraded the configuration using the company’s office computer. Except for the graphics card and power supply, other hardware is original from the company computer.
1.2 Graphics Card
If you have the budget, go directly for RTX4090, but cannot reuse the company computer as other configurations cannot keep up. For deep learning, in addition to considering computing power, you also need to look at video memory size. Finally, I chose between RTX3060 with 12GB of memory and RTX 4060 with 16GB of memory. I ended up buying the RTX 4060 with 16GB of memory. Regarding the size of the graphics card: there are single-fan, dual-fan, and triple-fan options; the more fans, the better the cooling performance. However, my computer is an ITX small case, so I finally bought a dual-fan graphics card.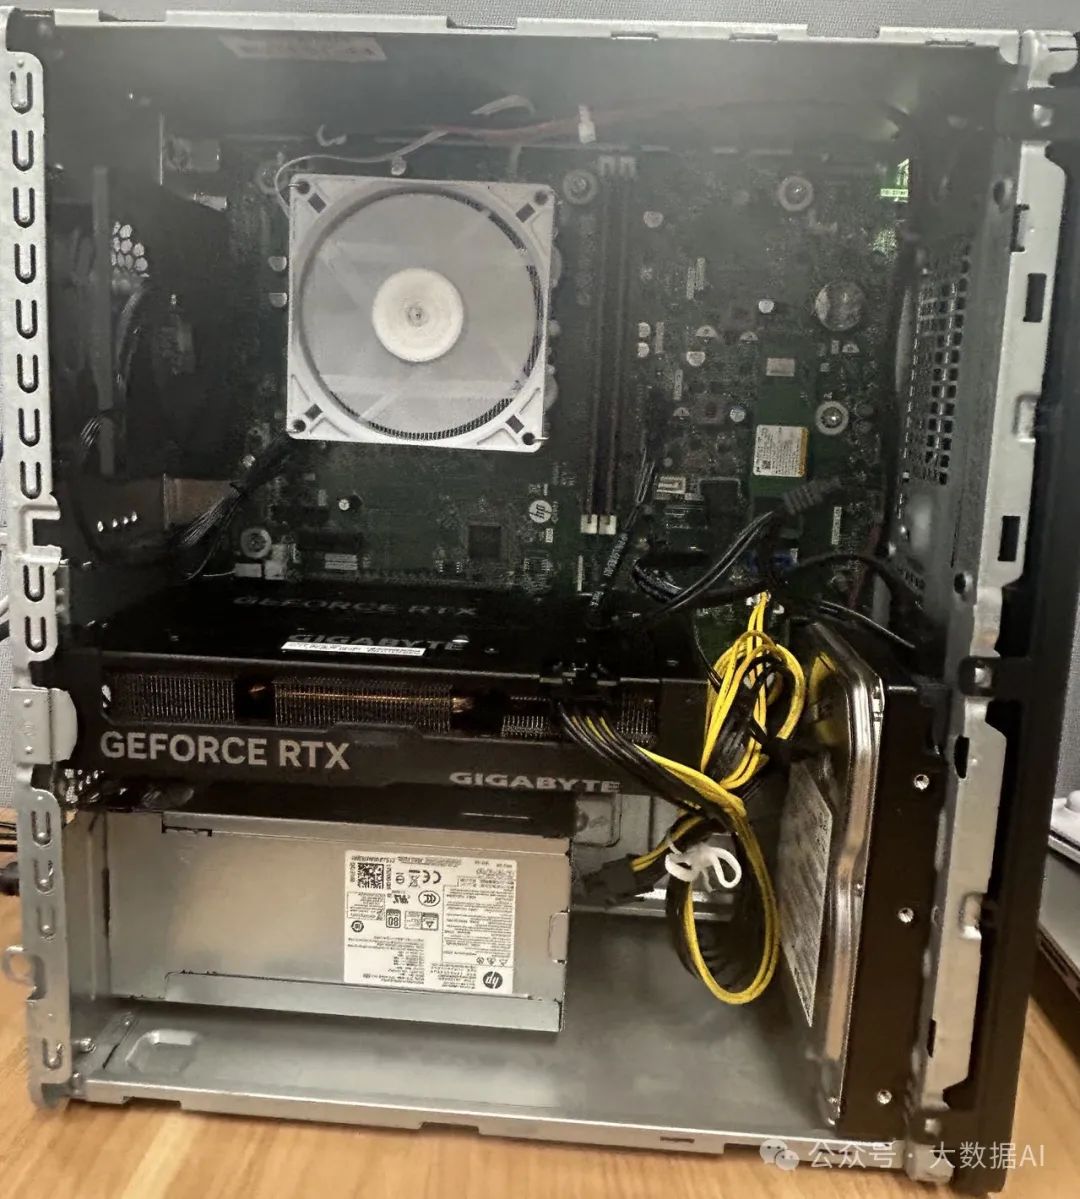
1.3 Power Supply
The original power supply was 310W, replaced with a 650W power supply. When buying a graphics card, the recommended power supply wattage is always written.
1.4 Fan
Worried about cooling issues, I replaced it with a better fan. Later found out it was not worth the trouble; it was too much hassle.
Thus, the hardware preparation for the deep learning workstation is complete. Haha.
2. Installing Graphics Card Driver
The installation method provided by official customer service:
Hello, this is the driver download link from NVIDIA's official website: https://www.nvidia.cn/Download/Find.aspx?lang=cn
Select your graphics card version and the corresponding system version, then click search.
If mainly for gaming, choose GeForce Game Ready; for design, choose Studio Driver.
How to select the corresponding graphics card version:
★★★★★★★★★
This part you need to read carefully~
★★★★★★★★★
Product Type:
Select Geforce
Product Series:
For example, for 4060, 4070, 4080, 4090, select Geforce RTX 40 series.
For 3050, 3060, 3070, 3080, 3090, select Geforce RTX 30 series.
For 2060, 2070, 2080, select Geforce RTX 20 series.
For 1650, 1660, select Geforce 16 series.
For 1030, 1050, 1060, 1070, 1080, select Geforce 10 series.
For 960, 970, 980, select Geforce 900 series.
For 710, 730, select Geforce 700 series.
★★★★ Important Note! (Do not choose the one with the suffix 'notebooks' as that is for laptops) ★★★★
Product Family:
Here you can select your specific graphics card model.
You can find the specific graphics card model through your product order or on the packaging of the graphics card.
Operating System:
Select your current computer's system.
Other options can be left as default.
A lot of driver versions will come up; just select any corresponding type to download and install.
For deep learning, choose the Studio driver.
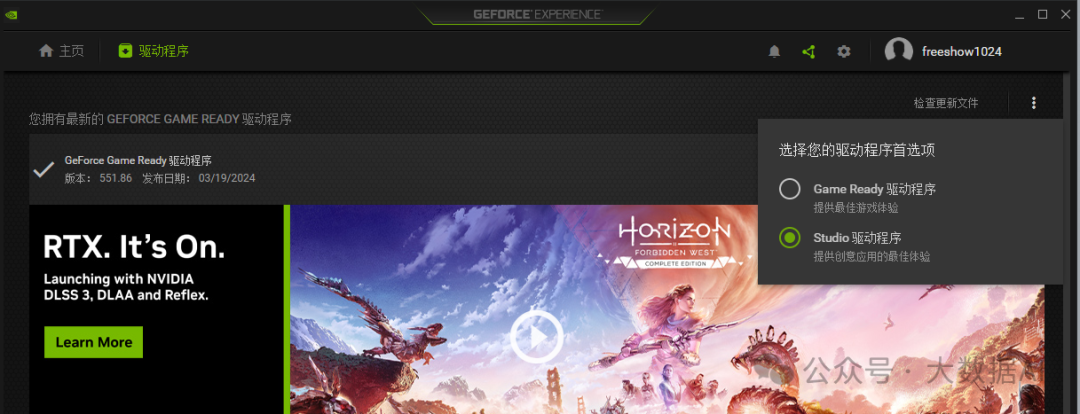 You can install two types of drivers simultaneously and switch freely.
If you do not install this graphics card driver, after connecting the graphics card via HDMI, my display shows issues.
3. Installing Python
Latest PyTorch requires Python 3.8 or later.
Download the corresponding version of Anaconda from https://www.anaconda.com/download. Open Anaconda and create a virtual environment named torch2_gpu, as shown in the following image:
Open the terminal to verify: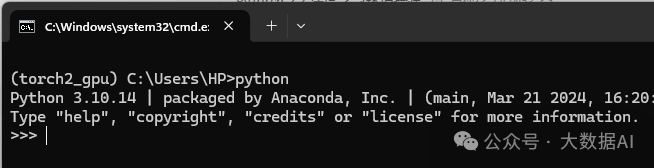
4. Install Visual Studio
Before installing CUDA, you need to install Visual Studio first; otherwise, you will encounter the following prompt: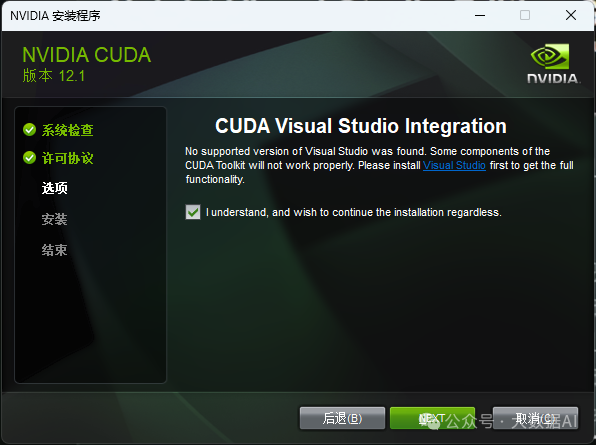 Download Visual Studio Community from https://visualstudio.microsoft.com/zh-hans/free-developer-offers/.
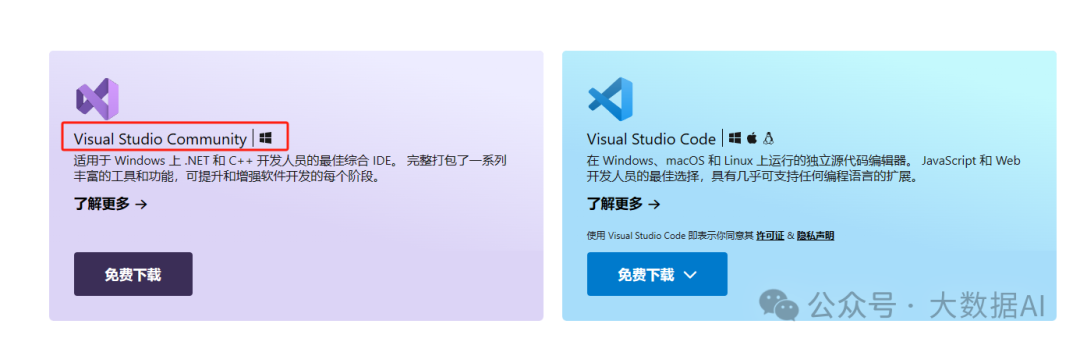 In the installation options, select Desktop Development with C++.
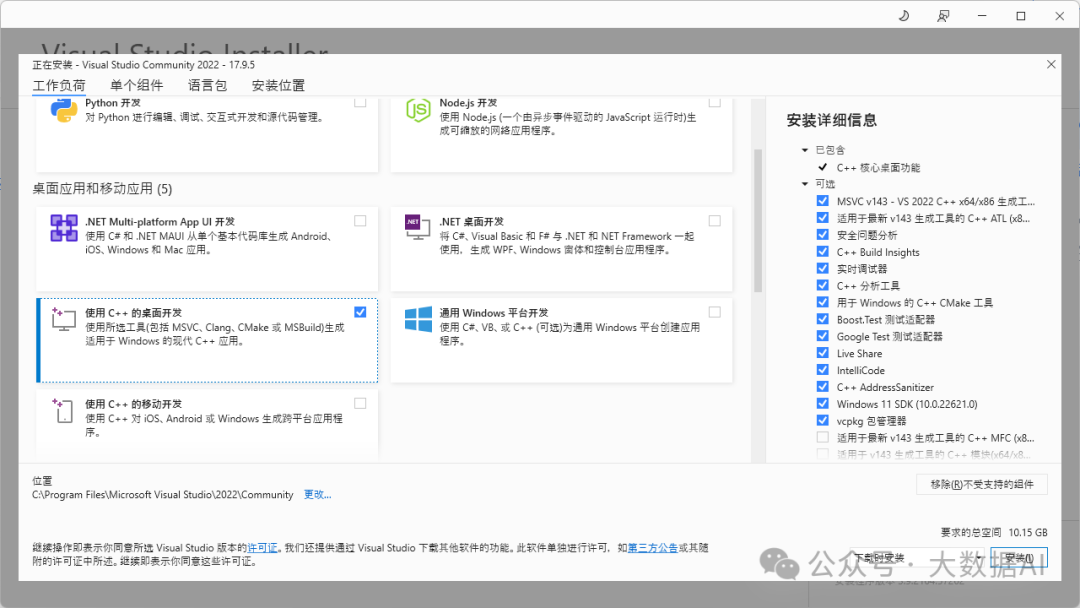
5. CUDA Installation
5.1 Introduction to CUDA
Official website: https://developer.nvidia.com/cuda-toolkit. CUDA (Compute Unified Device Architecture) is a parallel computing platform and programming model developed by NVIDIA to utilize NVIDIA GPUs (Graphics Processing Units) for general-purpose computing (GPGPU). It provides a high-performance and user-friendly software environment for GPU programming. The main goal of CUDA is to use the GPU as a computing accelerator to perform parallel computing tasks, especially in scientific computing and deep learning. It provides a set of programming interfaces (APIs) and toolkits that enable developers to leverage the massive parallel computing power of GPUs to accelerate compute-intensive tasks. Using CUDA, developers can write GPU-accelerated programs using programming languages such as C/C++, Python, etc. CUDA offers a range of libraries and tools, such as the CUDA Runtime Library, CUDA Tools (like the nvcc compiler), and NVIDIA Nsight development environment, for compiling, debugging, and optimizing CUDA programs. The advantage of CUDA lies in its close integration with the architecture of NVIDIA GPUs, allowing for fine-grained parallel processing of tasks and enabling hundreds to thousands of cores on the GPU to execute computing tasks simultaneously. This makes CUDA a widely used GPU programming platform in scientific computing, numerical simulations, deep learning, and other fields. It is important to note that programs developed using CUDA require hardware that supports CUDA, and the corresponding CUDA drivers and runtime libraries must be installed.
5.2 Checking CUDA Version
-
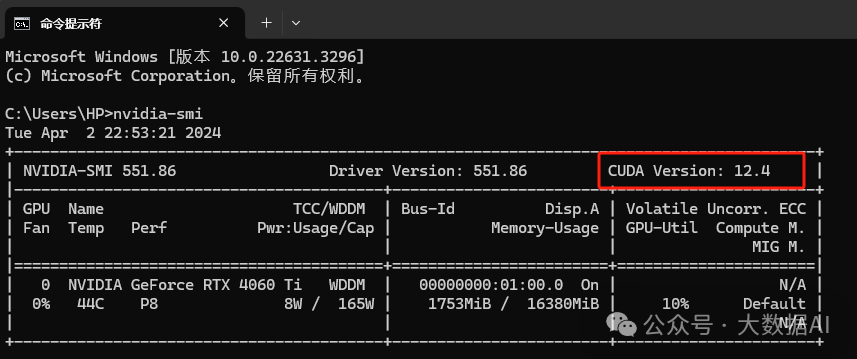
Check CUDA version via command line
-
Check CUDA version in the NVIDIA Control Panel
Open the NVIDIA Control Panel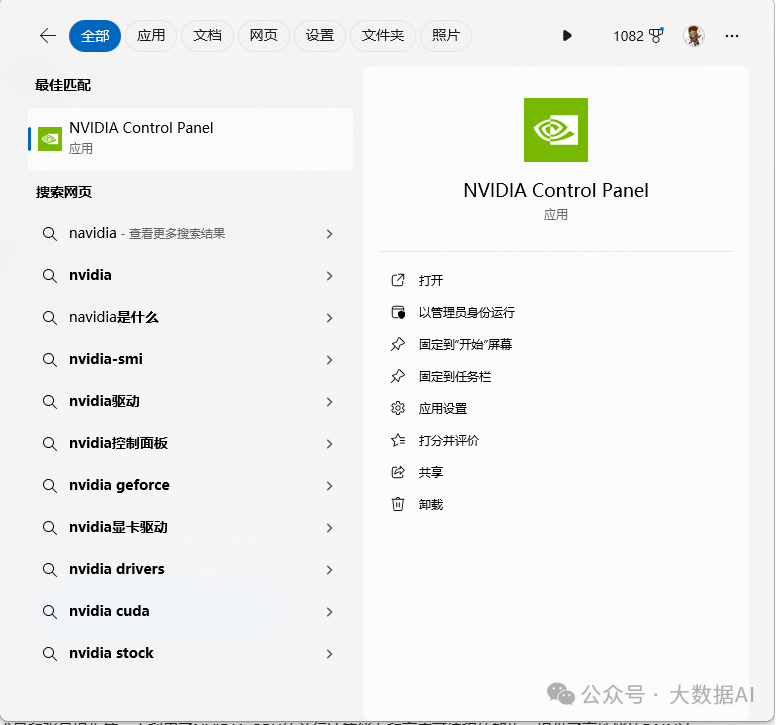 Click
Click Manage 3D Settings –> System Information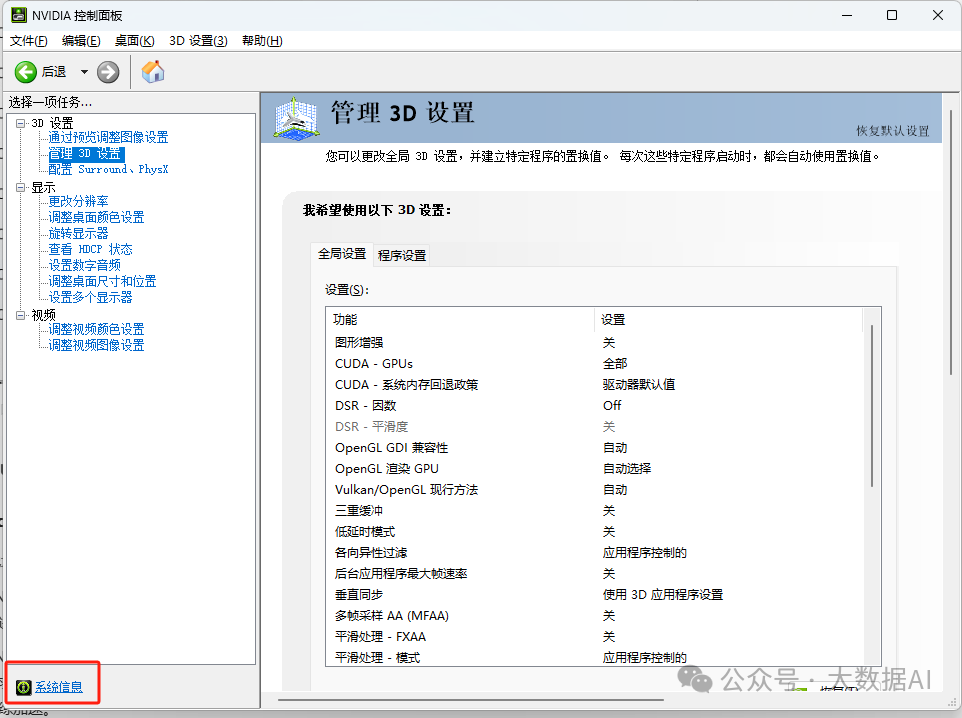 Check that the CUDA version is: 12.4
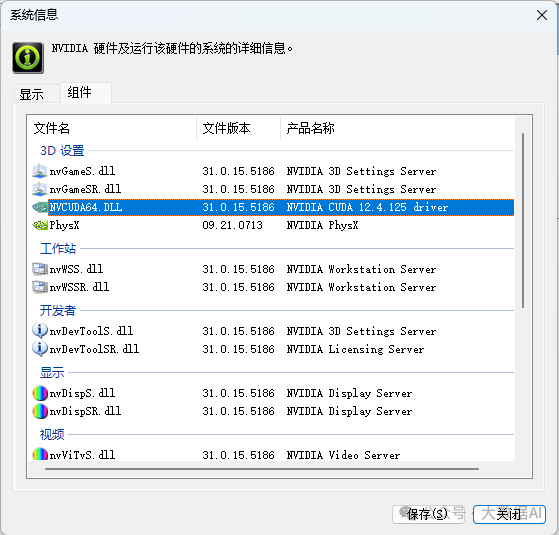
The above result indicates that CUDA version 12.4 and below can be installed. Do not rush to install this version of CUDA directly, as you also need to install the corresponding PyTorch.
5.3 Determine CUDA and PyTorch Versions
Determine the corresponding relationship from the PyTorch official website https://pytorch.org, as shown in the following image: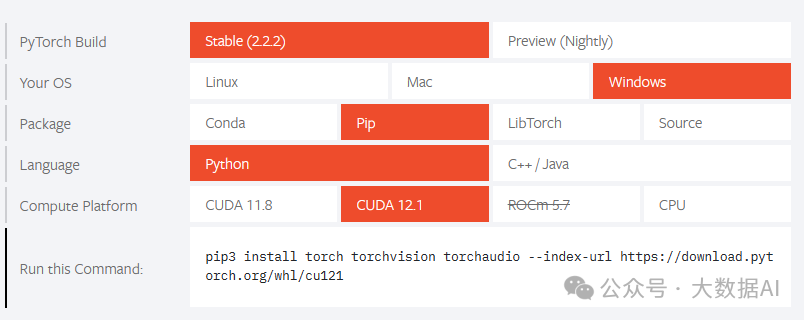 We choose to install the latest version
 PyTorch 2.2.2 and the corresponding computing platform CUDA 12.1.
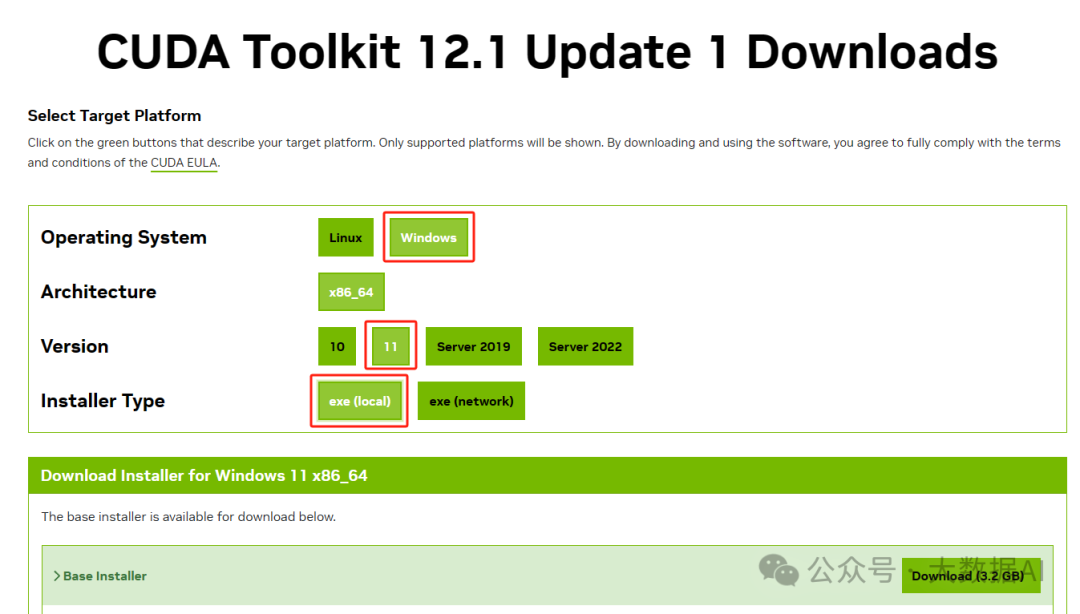
5.4 Download and Install CUDA
-
Go to the CUDA official website, download the corresponding version based on the above determined CUDA version.
-
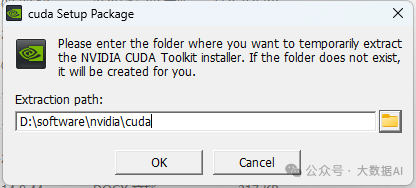
Click the downloaded exe file to install.

-
Select the installation directory.
-
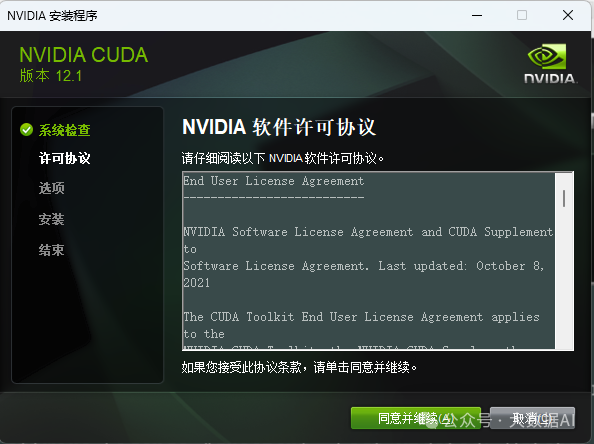
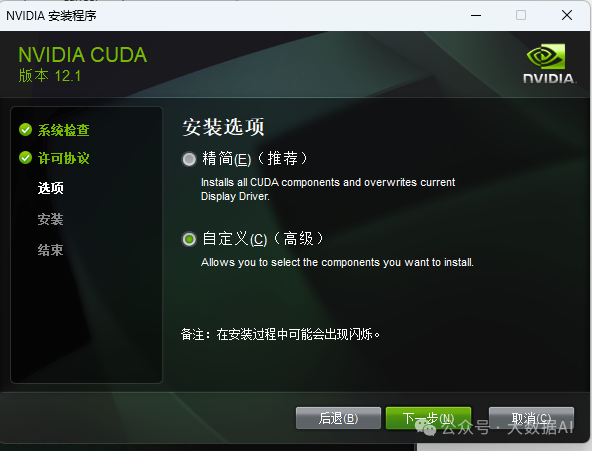
After the system check is complete, click agree.
-
Select Custom Installation and click Next.
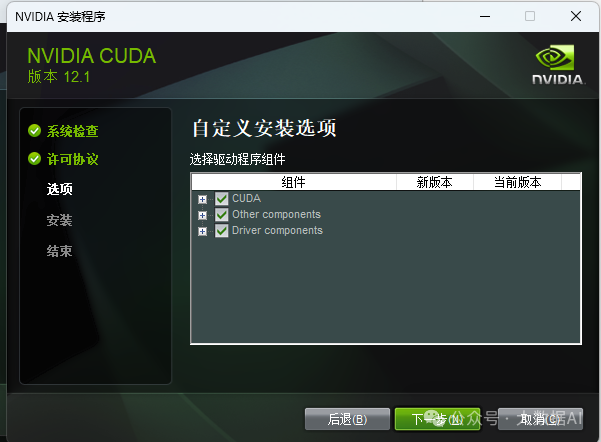
-
Continue clicking Next.
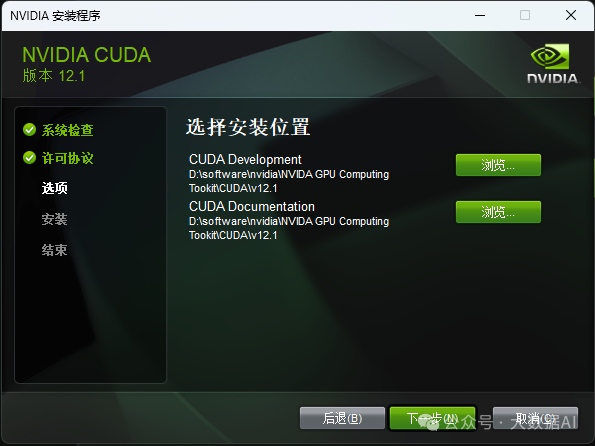
-
Select the installation path, usually default is fine.
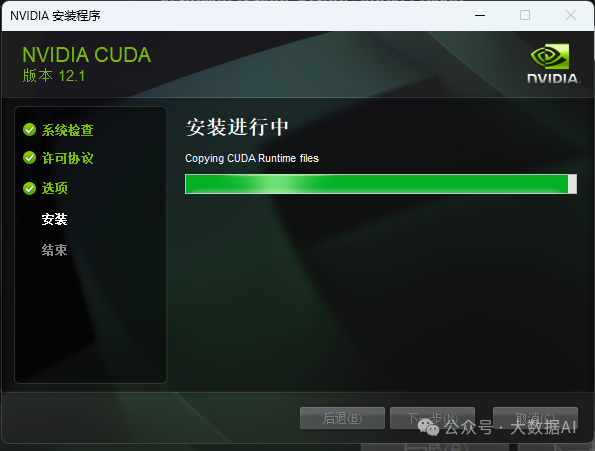
-
Wait for the installation to complete.
-
Click Next.
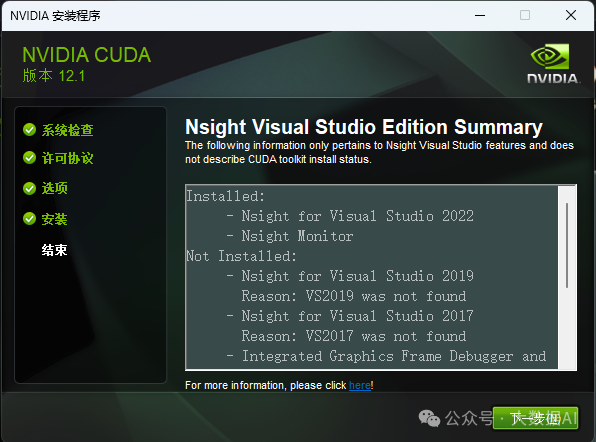
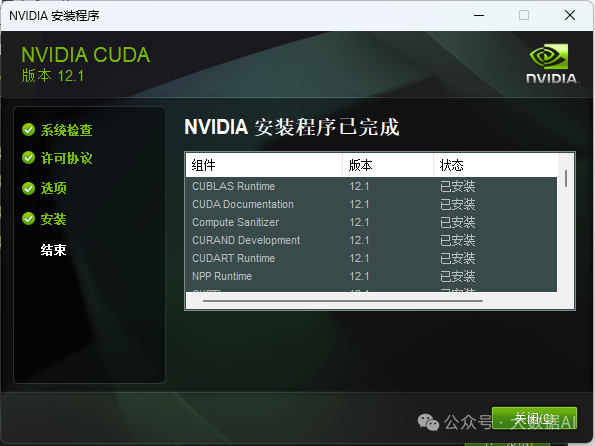
-
Click Close to finish.
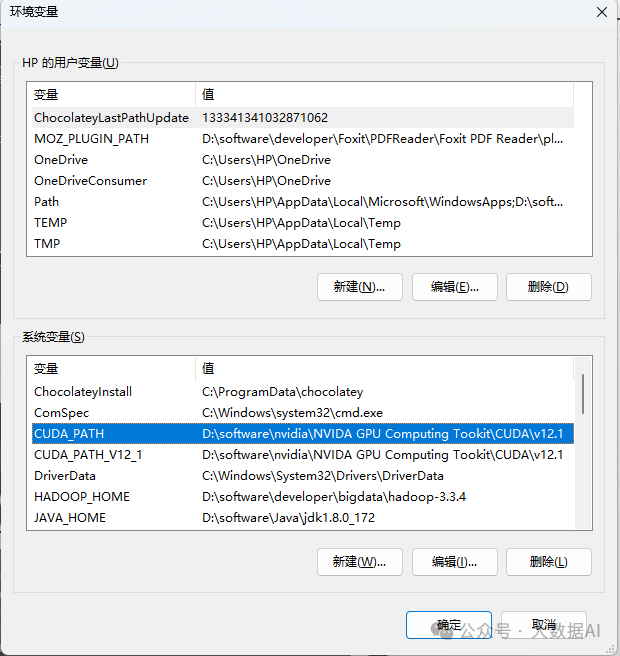
-
Check the environment variables; they have been configured automatically.
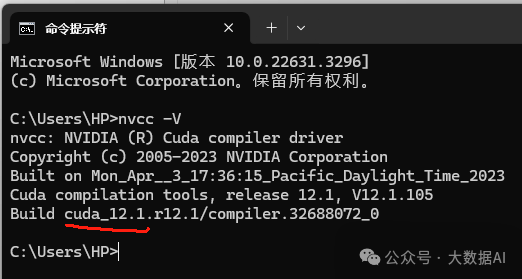
5.5 Verify if CUDA is Successfully Installed
6. cuDNN Installation
6.1 Introduction to cuDNN
Official website: https://developer.nvidia.com/cudnn
cuDNN (CUDA Deep Neural Network) is a deep neural network (DNN) acceleration library developed by NVIDIA specifically for accelerating deep learning tasks on the CUDA platform. cuDNN provides highly optimized DNN (Deep Neural Network) basic operations and algorithm implementations, such as convolution, pooling, normalization, activation functions, etc., as well as automatic differentiation and tensor operations. It leverages the parallel computing capabilities and highly programmable architecture of NVIDIA GPUs to provide high-performance DNN computation and training acceleration. By using cuDNN, deep learning frameworks (such as TensorFlow, PyTorch, etc.) can utilize its GPU acceleration capabilities to speed up training and inference. The cuDNN library implements efficient convolution calculations and other operations, optimizing the computation process and memory usage to maximize GPU utilization and performance. cuDNN also offers some advanced features, such as automatic performance and memory usage tuning, mixed precision computation, etc., to further improve the efficiency and performance of deep learning tasks. In summary, cuDNN is an important tool provided by NVIDIA for deep learning developers, which enables deep learning frameworks to effectively utilize CUDA and NVIDIA GPU performance to accelerate deep learning task execution. Its main features are as follows:
-
Tensor Core acceleration for various commonly used convolutions, including 2D convolution, 3D convolution, grouped convolution, depthwise separable convolution, and dilated convolution with NHWC and NCHW inputs and outputs. -
Optimized kernels for various computer vision and speech models, including ResNet, ResNext, EfficientNet, EfficientDet, SSD, MaskRCNN, Unet, VNet, BERT, GPT-2, Tacotron2, and WaveGlow. -
Supports FP32, FP16, BF16, and TF32 floating-point formats, as well as INT8 and UINT8 integer formats. -
Arbitrary dimension sorting, strides, and sub-regions of 4D tensors mean easy integration into any neural network implementation. -
Can accelerate fusion operations on various CNN architectures.
Note: cuDNN is supported on Windows and Linux systems that use Ampere, Turing, Volta, Pascal, Maxwell, and Kepler GPU architectures in data centers and mobile GPUs.
6.2 Download and Install cuDNN
-
Go to the cuDNN official website and select the corresponding version to download.
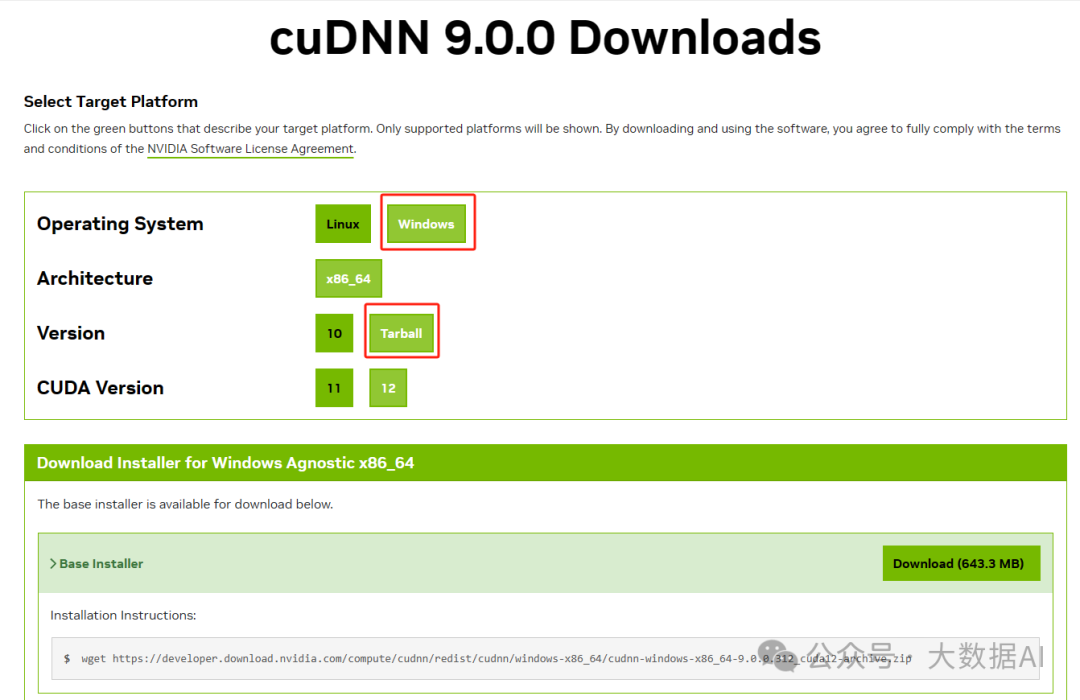 Since there is no option for Windows 11 at this time, I chose to download the Tarball.
-
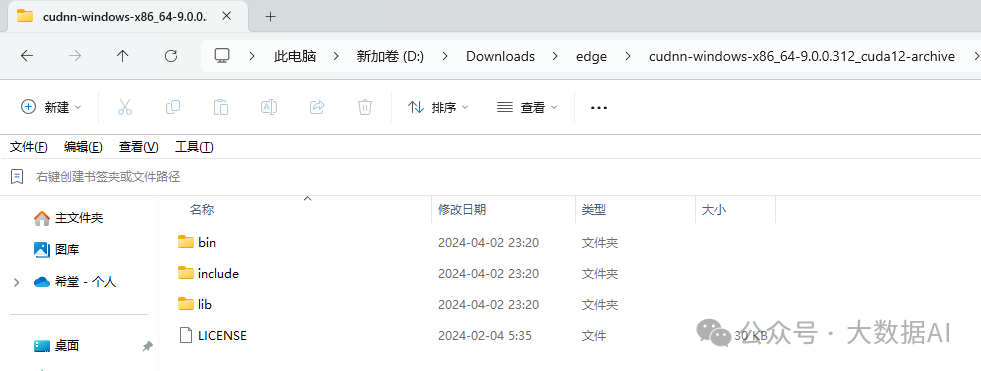
Extract the downloaded compressed package.
-
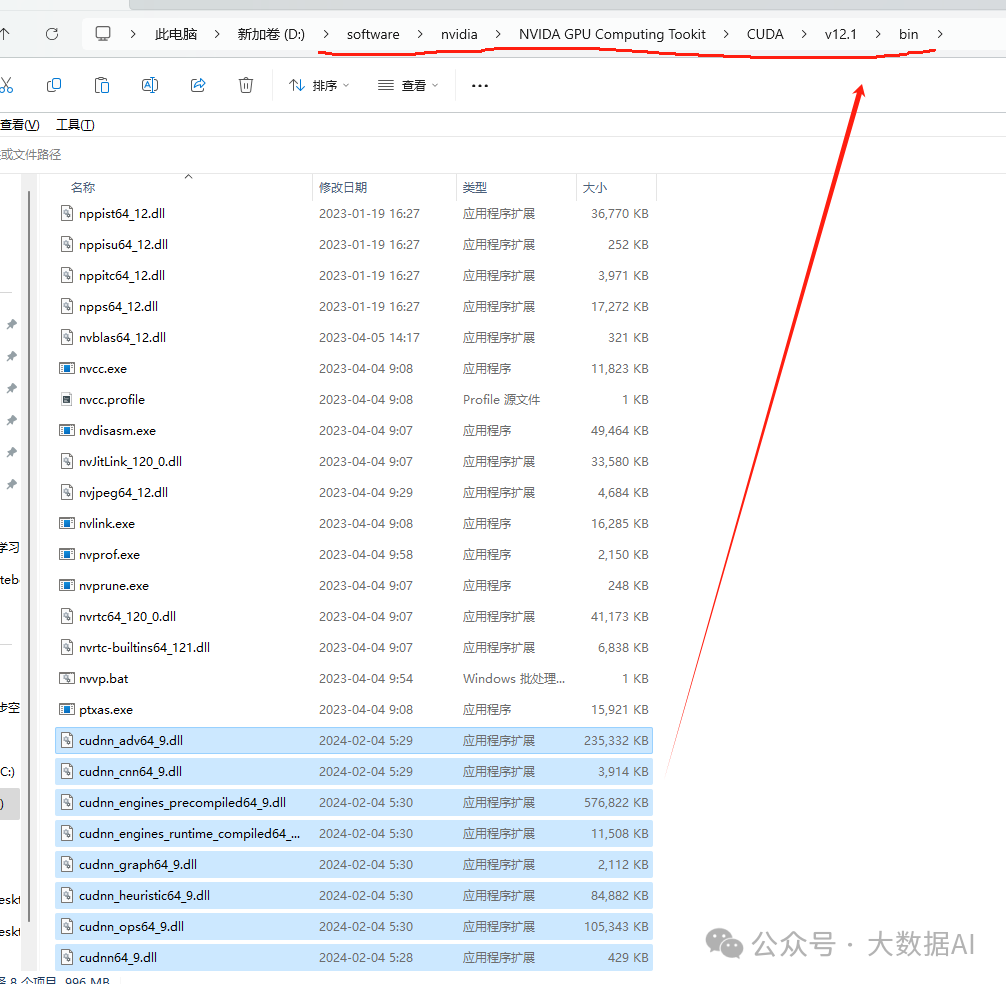
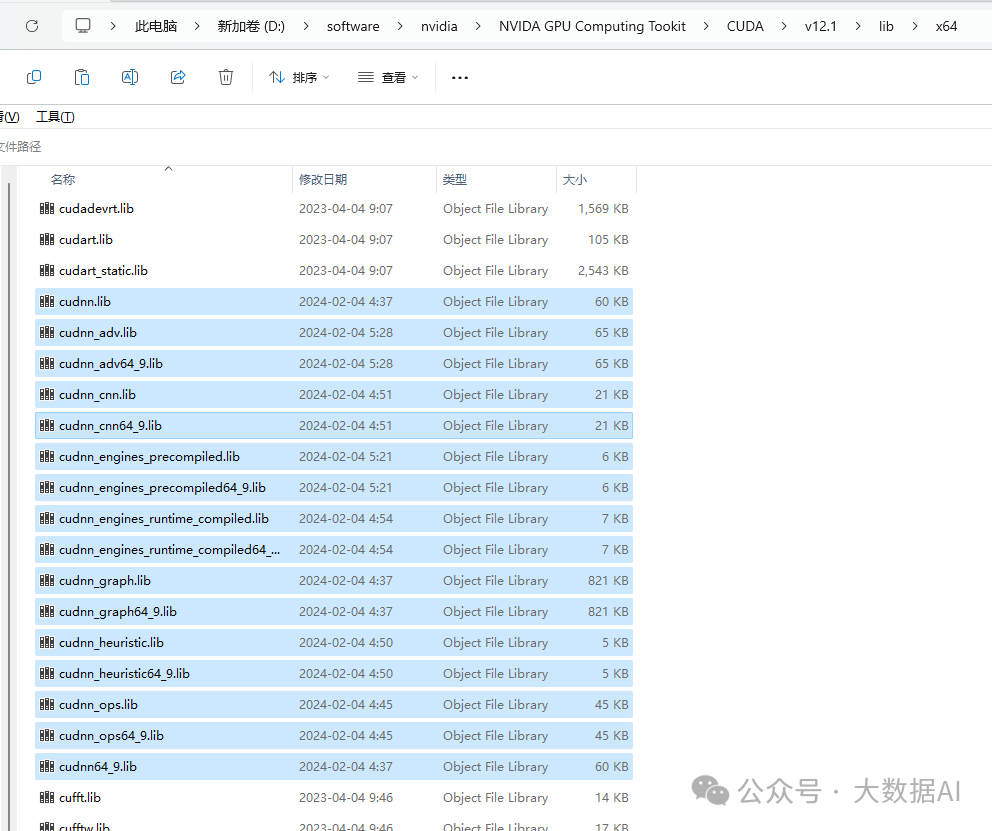
Place all contents of the extracted bin directory into the corresponding bin directory of CUDA.
-
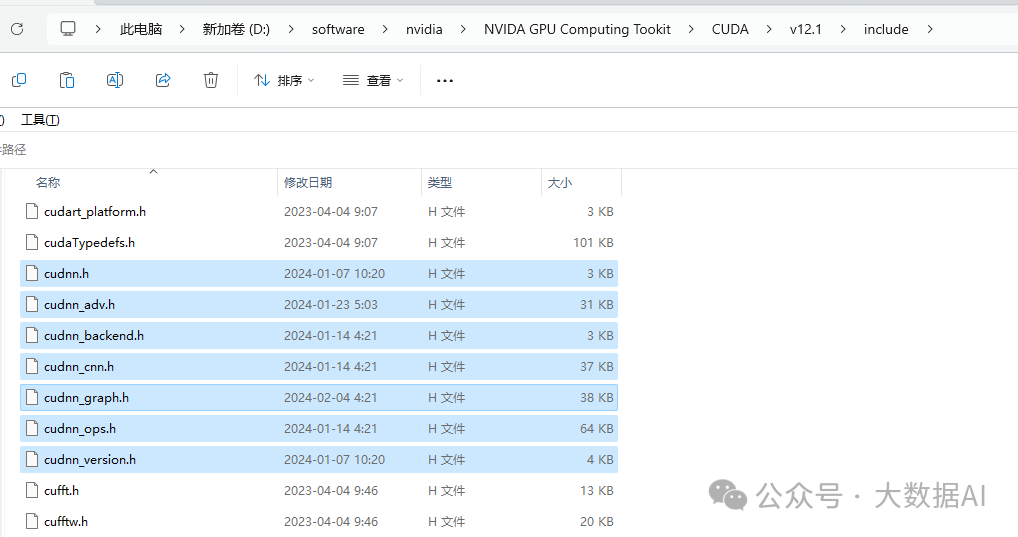
Place all contents of the extracted include directory into the corresponding include directory of CUDA.
-
Place all contents of the extracted lib directory’s x86 directory into the corresponding lib directory’s x86 directory of CUDA.
-
Configure environment variables, adding the CUDA bin/include/lib under x86 directory to the environment variables.
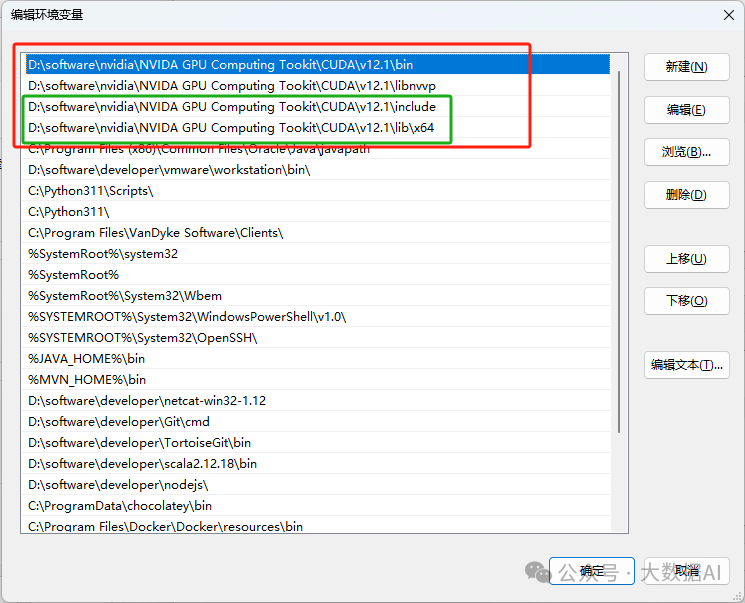 You only need to add the two environment variables in the green box, as the first two were automatically added when installing CUDA using the exe file.
6.3 Verify if cuDNN is Successfully Installed
Return the GPU model, then the installation is successful.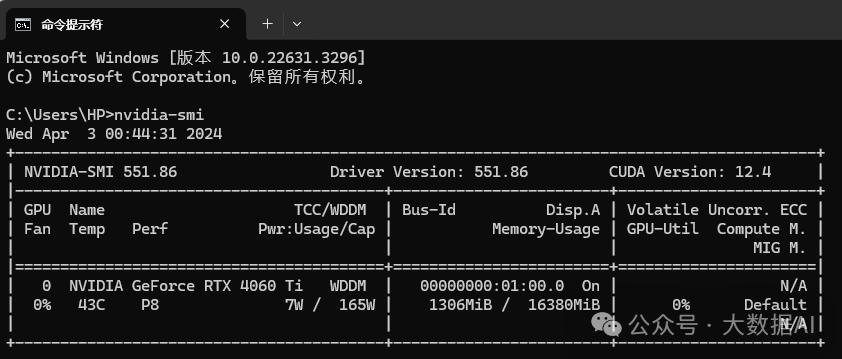
7. Installing PyTorch
7.1 Installation
Install according to the official installation information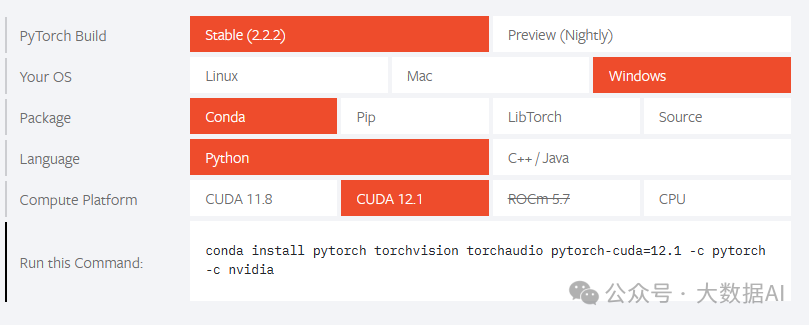 Use the following command for installation:
conda install pytorch torchvision torchaudio pytorch-cuda=12.1 -c pytorch -c nvidia
 If using pip for installation, the command is as follows:
pip3 install torch torchvision torchaudio --index-url https://download.pytorch.org/whl/cu121
Check the installation package, as shown in the following image: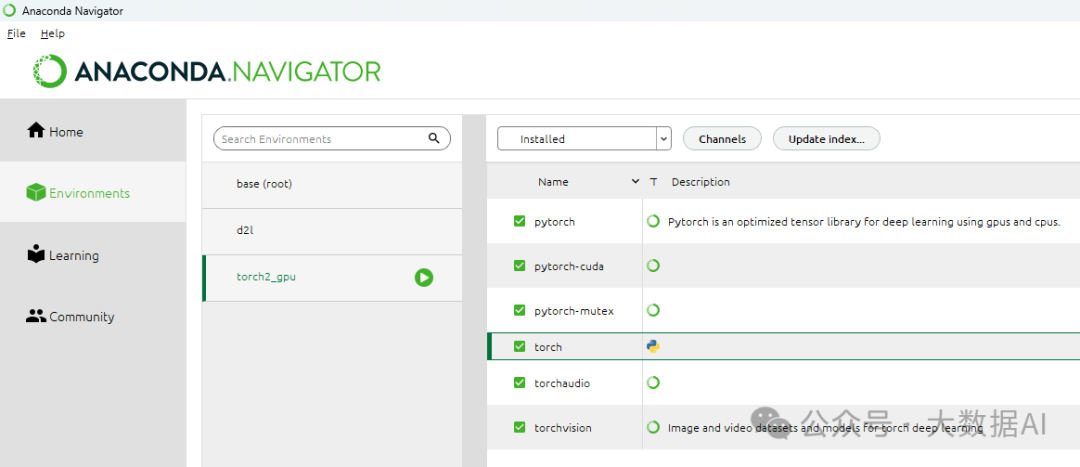
7.2 Verify if GPU is Available
torch.cuda.is_available() returns True if the GPU is available; False indicates it is not available.
import torch
print(torch.__version__)
print(torch.version.cuda)
# Output True indicates the installation is correct
print(torch.cuda.is_available())
Results are shown in the following image: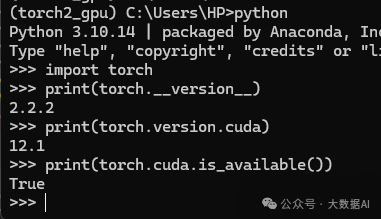
8. Reference Links
-
https://blog.csdn.net/m0_63007797/article/details/132269612 -
https://zhuanlan.zhihu.com/p/651151335