Using Google Gemini Model in China: A Step-by-Step Guide
Due to well-known reasons, friends in China cannot directly access <span>Google</span> related services and websites. In a previous article titled <span>FVM——A Powerful Flutter Version Management Tool: Flutter Version Management</span>, I mentioned that <span>Google</span> released the latest large model, and I wanted to see if its support for <span>flutter</span> has caught up with <span>Sonnet 3.5</span>. So I took a look around…
I found that—
<span>Google</span>
‘s <span>Gemini</span>large model can be used for free, and the<span>API</span>is also free!I also discovered an amazing project on the world’s largest code hosting site <span>Github</span>—<span>openai-gemini</span>
Next, I will detail the two major discoveries mentioned above and how they will create wonderful chemical reactions, as follows:
<span>openai-gemini Introduction</span>-
Material List -
Operation Steps -
Amazing Results
<span><span>openai-gemini</span></span> Introduction
<span>openai-gemini</span> is a lightweight proxy project that allows users to directly call the <span>Google</span> <span>Gemini</span> model through an <span>OpenAI</span>-compatible <span>API</span> interface.
The project uses a serverless architecture and can be easily deployed on platforms like <span>Vercel</span>, <span>Deno</span>, or <span>Cloudflare</span> with almost no maintenance cost.
The project has corresponding text tutorials for various deployment methods, which are somewhat concise. I ultimately chose to deploy it on <span>Deno</span> for reference.
Material List
The following materials are needed for the operations in this article:
<span>github</span>
account <span>deno</span>
account <span>gemini api key</span>
[Requires magic] <span>roo cline</span>
plugin
Operation Steps
<span>github</span> account— I believe those who can see this part are all owners of it; otherwise, you would have scrolled away after the first paragraph😀, <span>deno</span> can be logged in using the <span>github</span> account by default, so I won’t elaborate here~
I will mainly explain how to create the <span>gemini api key</span> and deploy <span>openai-gemini</span>
1. Create a gemini api key [Requires magic]
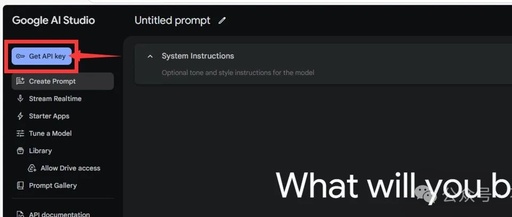
⚠ This step requires a scientific internet connection!1.1 Log in to <span>Google AI Studio</span>
1.2 Click on <span>Get API Key</span>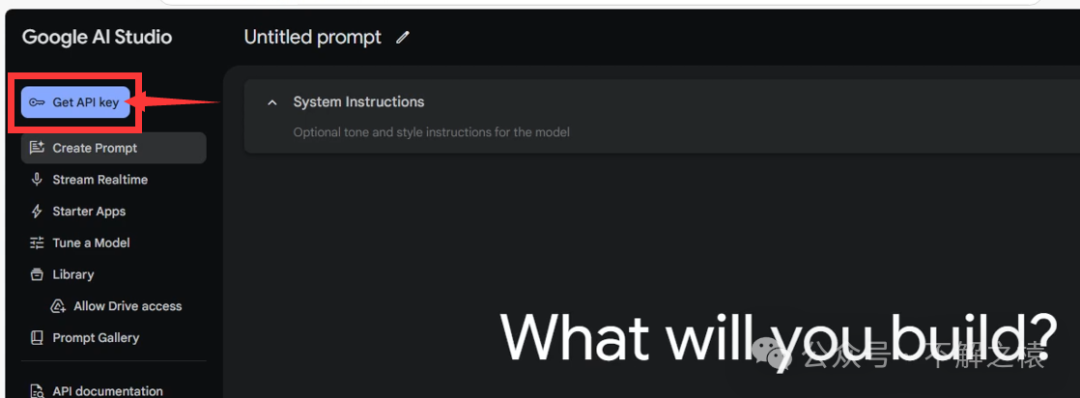
1.3 Click to create an <span>API</span> key
1.4 Select <span>Gemini API</span>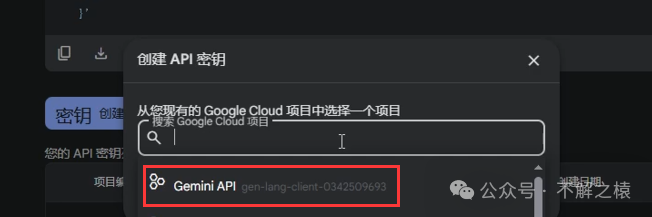
1.5 <span>API KEY</span> has been generated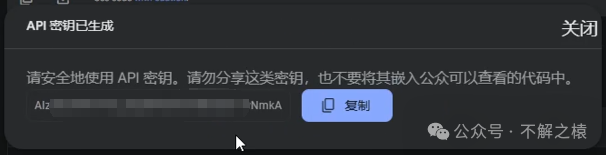 Copy the
 <span>API KEY</span> for later use
2. Deploy openai-gemini
2.1 <span>Fork</span> the amazing project <span>openai-gemini</span>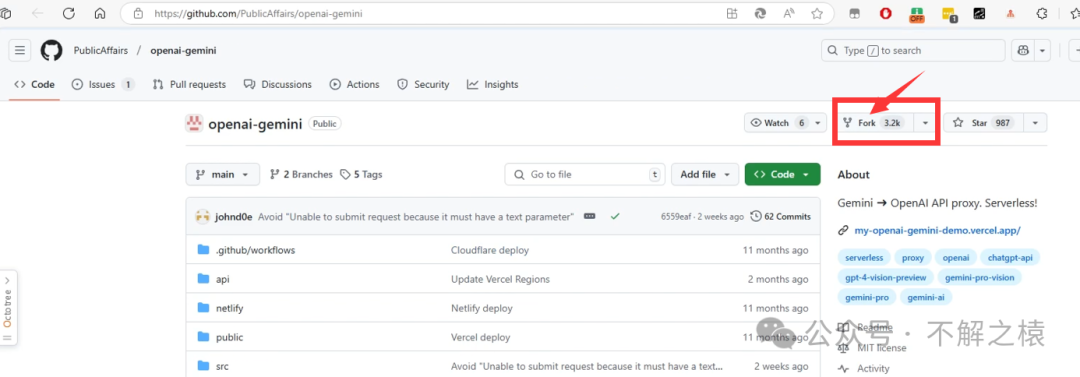
2.2 Log in to <span>deno</span>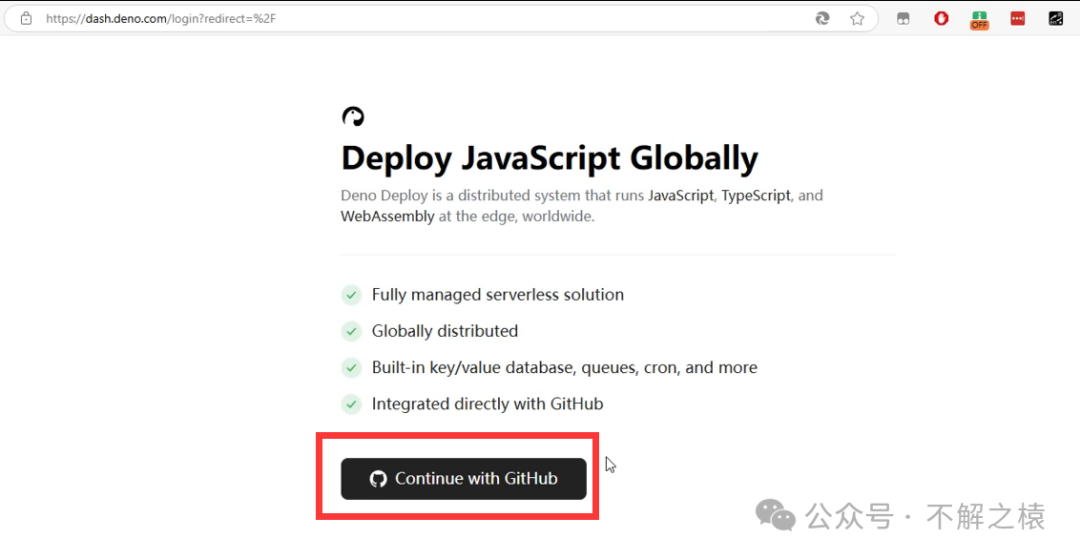
2.3 Authorize with your <span>github</span> account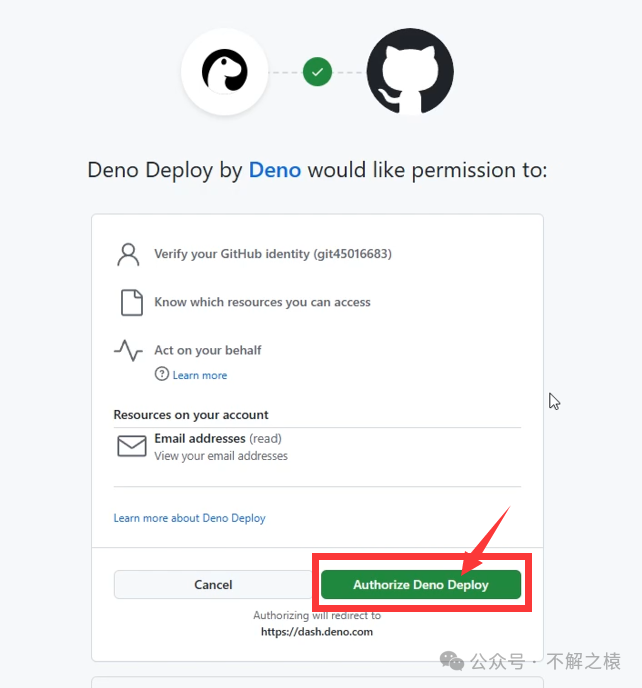
2.4 Create a <span>deno</span> project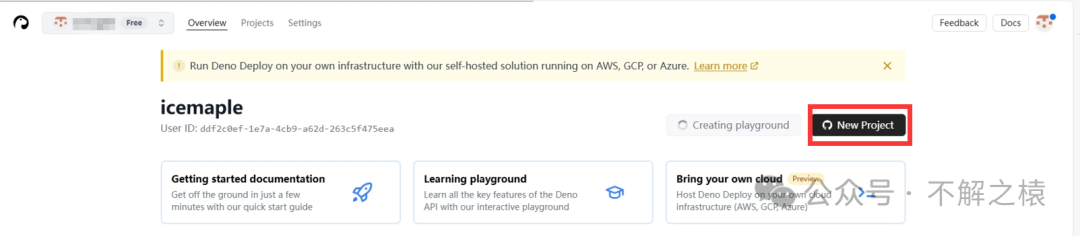
2.5 Select your <span>GitHub</span> account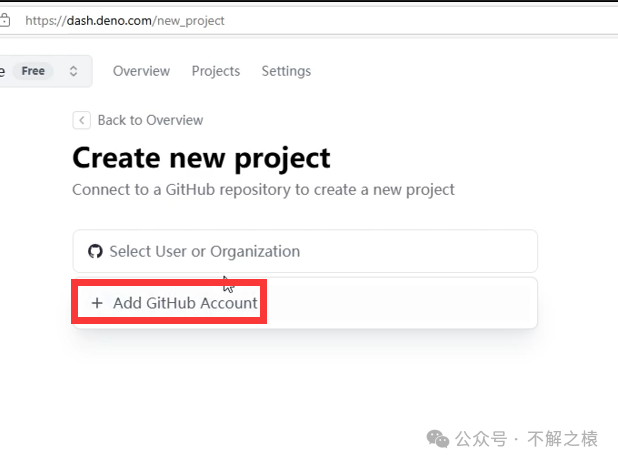
2.6 Choose accessible repositories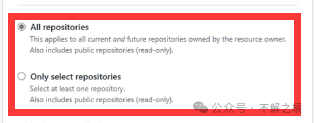
-
All repositories are accessible with one authorization -
Only the selected repositories are accessible, requiring multiple authorizations/selections, as follows: 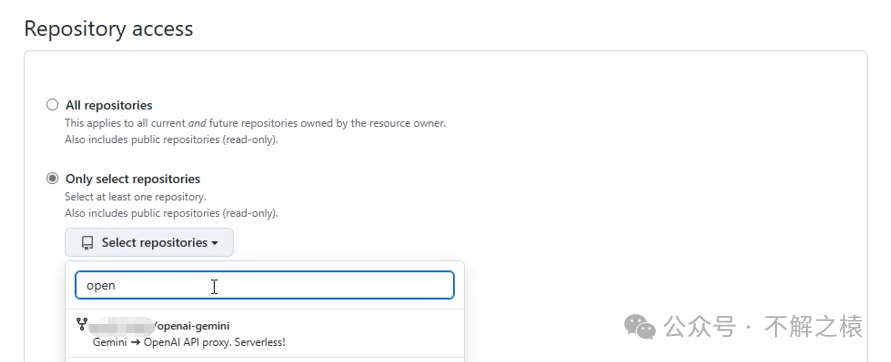
2.7 Install repository authorization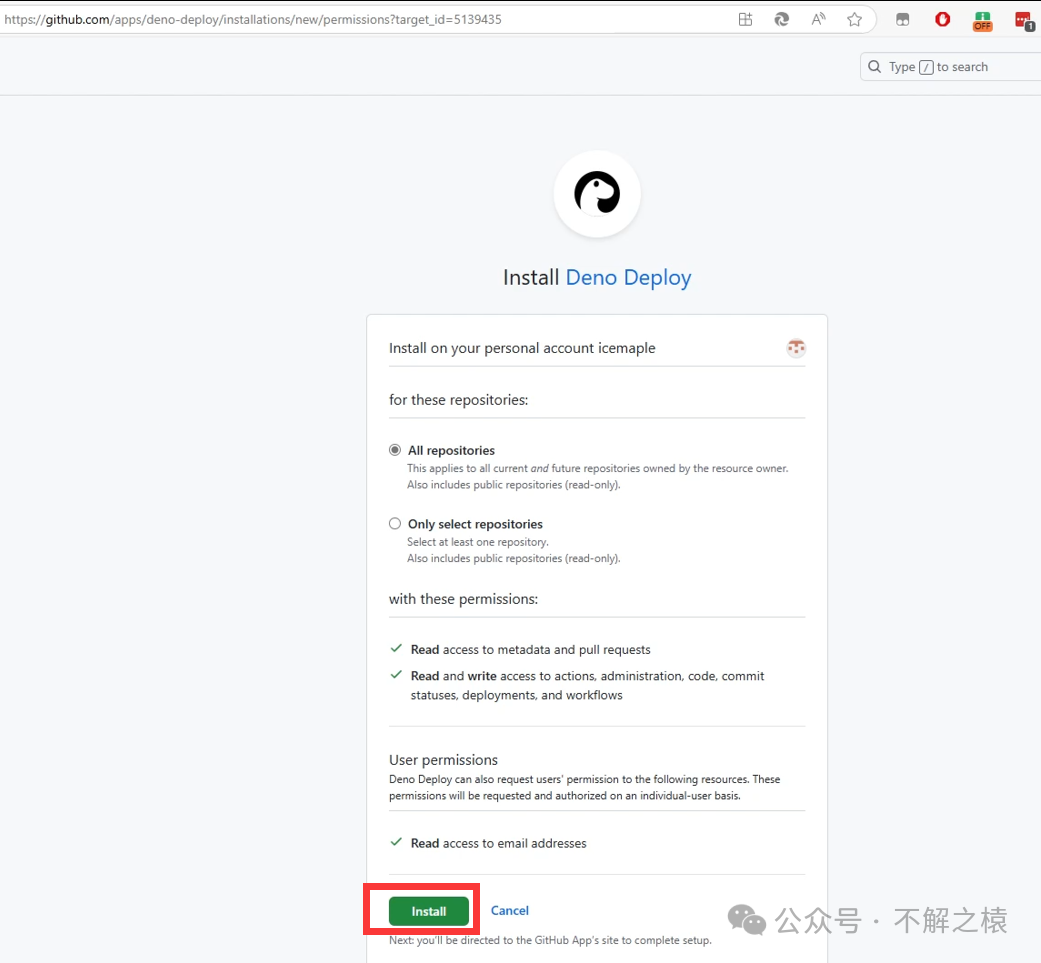
2.8 Select the project to deploy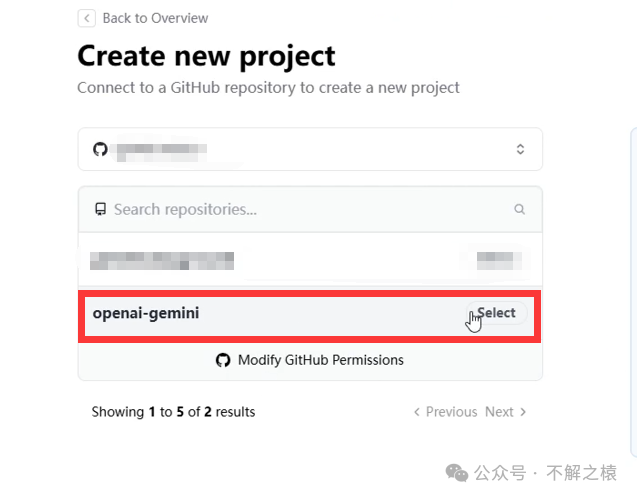
2.9 Configure the project name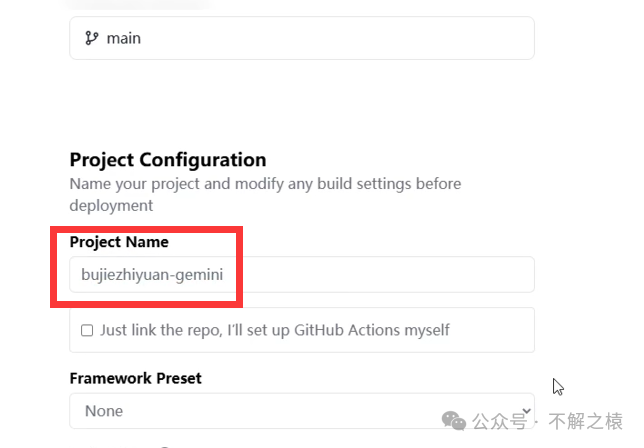 ⚠ Note: The project name will affect the final deployment success domain name, so be cautious when editing
2.10 Configure the entry point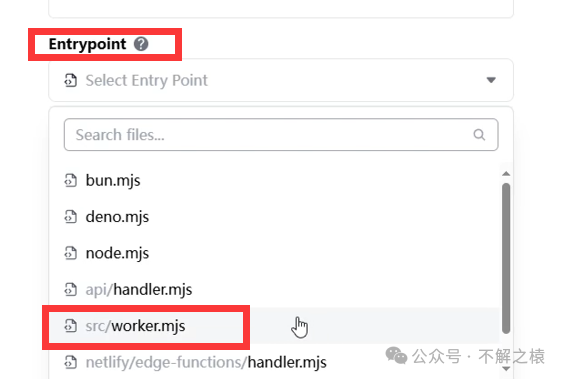
2.11 Deploy the project
2.12 Deployment completed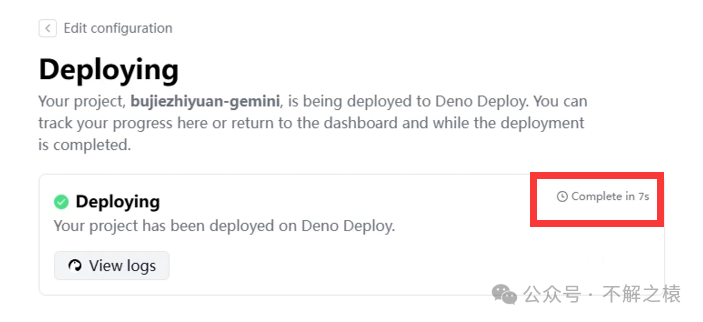
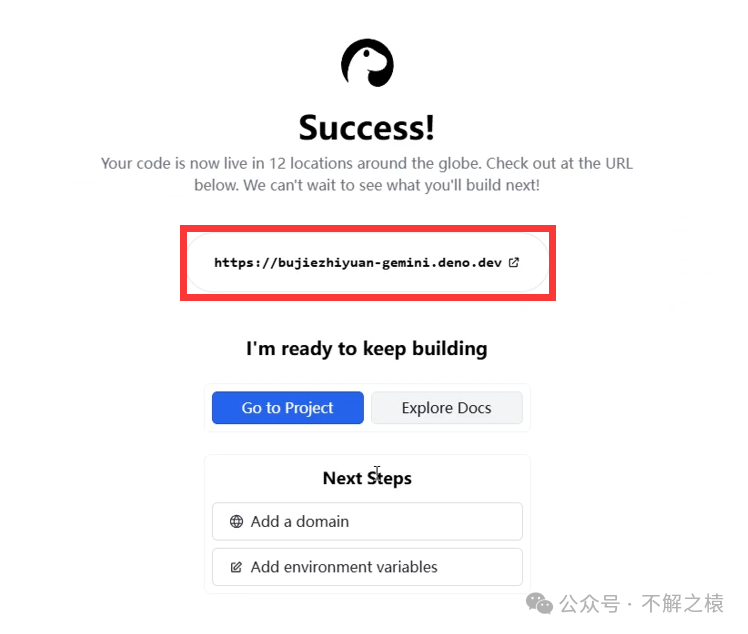 Copy the deployed project domain name for later use
Amazing Results
Great, now I have the domain name, the <span>Google Gemini</span> <span>API KEY</span> ready, and I have converted the <span>Gemini</span> <span>API</span> into an <span>OpenAI</span> format interface. Now everything is ready, we just need to experience the <span>Google</span> <span>Gemini</span> large model!
The answer is <span>Roo Cline</span> (Of course, you can also use your preferred programming plugins)
-
Install the
<span>Roo Cline</span>plugin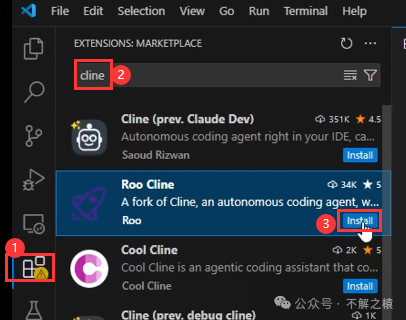
-
Select the
<span>API</span>compatible interface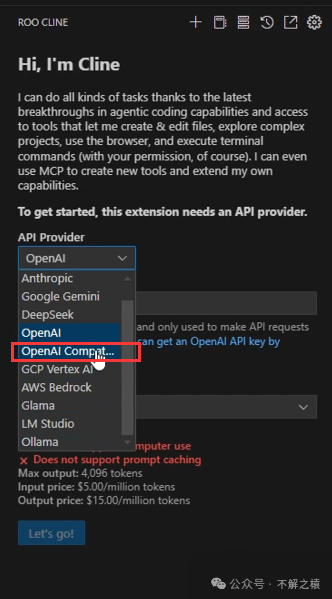
-
Enter the domain name copied from earlier
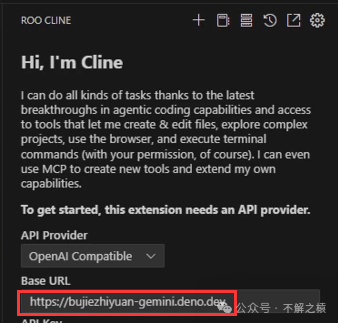
-
Enter the
<span>API KEY</span>copied earlier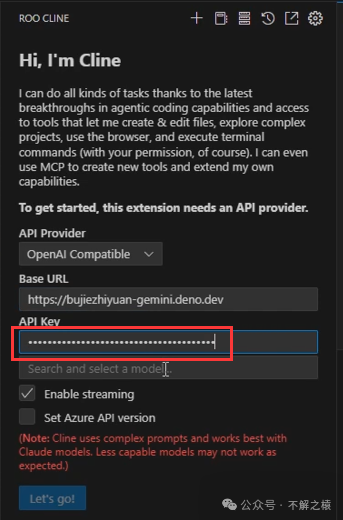
-
After filling in the
<span>API KEY</span>, the<span>Roo Cline</span>configuration is complete and automatically redirects to the chat screen
-
Ask about the
<span>flutter</span>project content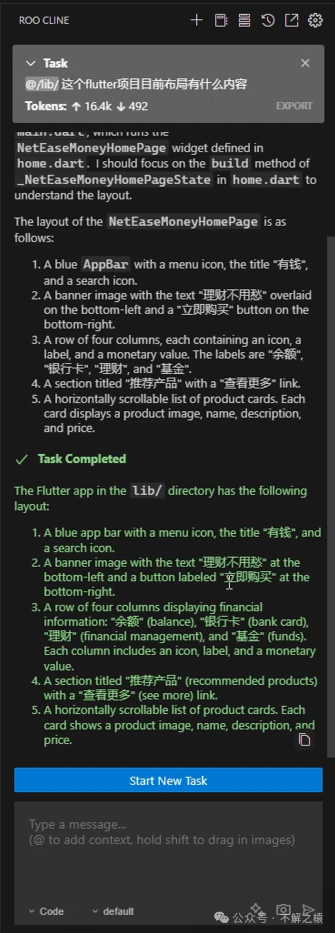 Looks good, the layout information is well understood
 <span>OK</span>.This is the<span><span>Google Gemini </span></span>large model, and it is now directly connected to the domestic operator network, no science, no magic!
Conclusion
Through the detailed introduction in this article, I believe everyone has seen the power of this amazing project! With <span>openai-gemini</span>, we can not only use the latest <span>Google</span> <span>Gemini</span> large model for free, but even more exciting is that it can be accessed directly in China without needing a scientific internet connection. This undoubtedly opens a new door for developers and friends in China, providing an opportunity to freely explore the infinite possibilities of <span>AI</span>! Feel free to try it out and share your experiences.
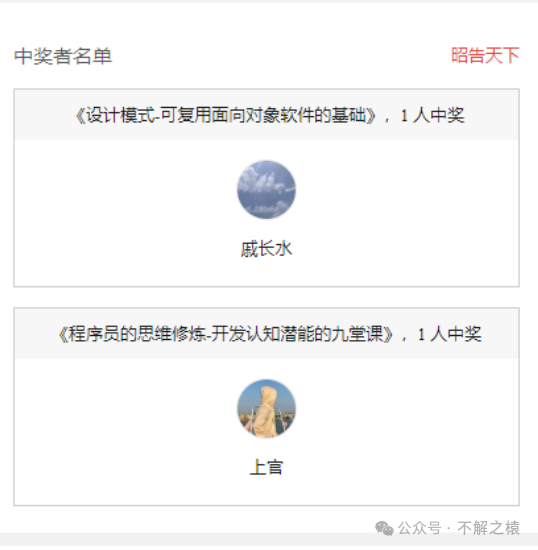
Final Note: During New Year’s, I initiated a book giveaway (not brand new) in the article titled <span>2025 New Hongmeng Next, New Open Source Hongmeng, New Flutter, New Lottery--No Bugs for a Whole Year</span>, congratulations to the lucky winners:
Having read and learned, sharing is caring. Thank you for participating😀 Shall we do it again during the Spring Festival?
Related Articles:
-
2025 New Hongmeng Next, New Open Source Hongmeng, New Flutter, New Lottery–No Bugs for a Whole Year -
FVM——A Powerful Flutter Version Management Tool: Flutter Version Management -
Windsurf Subscription Version Is Here: Cheaper Than Cursor, But More Expensive Than GitHub Copilot, Plus One Good News, One Bad News