
1. Basic Concepts
The K-nearest neighbors method (KNN) can be used for both classification and regression.
The difference between KNN for regression and classification lies in the decision-making process during the final prediction.
When KNN is used for classification, it generally employs a majority voting method.
When KNN is used for regression, it typically uses the averaging method.
The basic concept is as follows: for the instance to be tested, find the K nearest instances from the training dataset (the K neighbors mentioned above). If the majority of these K instances belong to a certain class, the input instance is classified into that class.
2. Three Key Elements of KNN Algorithm
KNN algorithm mainly considers: selection of k value, distance metric, and classification decision rule.
1) Selection of k value. In practice, a relatively small k value is usually chosen, and cross-validation is generally used to find the optimal k value.
When k is small, training error decreases, but generalization error increases, making the model complex and prone to overfitting.
When k is large, generalization error decreases, but training error increases, leading to a simple model that may make incorrect predictions (in an extreme case, if K equals the number of samples m, there is no classification at all; in this case, regardless of what the test set is, the result will belong to the class that is most frequent in the training set).
2) Distance metric. The Lp distance: the sum of the absolute values of the errors raised to the p-th power, followed by taking the p-th root. Euclidean distance: Lp distance with p=2. Manhattan distance: Lp distance with p=1. When p approaches infinity, the Lp distance is the maximum distance across all dimensions.
3) Classification decision rule. This refers to how to determine the classification of the object to be tested based on the k nearest neighbors. The classification decision rule for the k nearest neighbors generally uses majority voting.
3. Basic Execution Steps of KNN
1) Calculate the Euclidean distance between the object to be tested and each sample point in the training set.
2) Sort all the distance values obtained above.
3) Select the k samples with the smallest distances as “voters”.
4) Predict the classification or value of the object to be tested based on the “voters”.
4. Characteristics of KNN
1) Simple principle.
2) Requires storing all sample sets to save the model.
3) The training process is very fast, but the prediction speed is slow.
· Advantages:
High accuracy and insensitivity to outliers.
Can be used for both numerical and categorical data (it can be used for both regression and classification).
· Disadvantages:
High time complexity; high space complexity; requires a large amount of memory.
Imbalanced sample problem (i.e., some classes have a large number of samples while others have very few).
Generally, when numerical values are very large, this method is not used due to excessive computational load. However, if individual samples are too few, misclassification can easily occur.
The biggest drawback is that it cannot provide the inherent meaning of the data.
Questions to Consider:
How to select sample attributes? How to calculate the distance between two objects? How to handle the situation when the types and scales of sample attributes differ? How to handle the different importance of each attribute? How to evaluate the quality of the model?
5. Code Implementation
The general process of the K-nearest neighbors algorithm: Prepare data – Analyze data – Test algorithm – Use algorithm.
5.1 Implementation Using sklearn Package
For a detailed introduction to sklearn, please refer to the previous blog https://www.cnblogs.com/aitree/p/14331551.html
5.1.1
Introduction to sklearn’s K-nearest neighbors algorithm Official Documentation
5.1.2 KNeighborsClassifier Function – 8 Parameters
– n_neighbors: k value, selects the k nearest points, default is 5; different k values will yield different classification results.
– weights: the default is uniform; the parameter can be uniform (equal weight), distance (weights based on distance), or a user-defined function. Uniform means that all neighboring points have equal weight.
– algorithm: fast K-nearest neighbor search algorithm, default parameter is auto. In addition, users can specify search algorithms such as ball_tree, kd_tree, or brute method for searching.
– leaf_size: default is 30, which is the size of the constructed kd-tree and ball tree. This value affects the speed of tree construction and search, as well as the memory size required to store the tree. It needs to be optimally set based on the nature of the problem.
– metric: used for distance measurement, the default metric is Minkowski, which is the Euclidean distance (p=2).
– p: distance metric formula. Euclidean distance and Manhattan distance. This parameter defaults to 2 but can be set to 1.
– metric_params: other key parameters for the distance formula, which can be ignored; the default is None.
– n_jobs: parallel processing settings. Default is 1, which is the number of parallel jobs for nearest neighbor search. If set to -1, all CPU cores are used for parallel processing.
Note: Sample data – feature data must be of numeric type to perform calculations!
5.1.3 Example
(1) Classifying Movies
import pandas as pd
import numpy as np
from sklearn.neighbors import KNeighborsClassifier

# Read data
df = pd.read_excel('../../myfile.excel')

#1. Create model object
knn = KNeighborsClassifier(n_neighbors=3)

#2. Get sample data and classification result: extract target column, sample data must be two-dimensional
feature = df[['Action Lean','Love Lean']]
target = feature['target']

#3. Train model
knn.fit(feature, target)

#4. Test result
movie = np.array([13, 21])
res = knn.predict(movie)

#5. Scoring: the higher the score, the more accurate
knn.score(feature, target)
(2) Predicting whether annual income exceeds $50K
# Read adult.txt file, the last column is annual income, and use KNN algorithm to train the model, then use the model to predict whether a person's annual income exceeds 50K
# 1. Read data
data = pd.read_csv('../data/adults.txt')
data.head()
# 2. Get age, education level, occupation, and weekly working hours as machine learning data; get salary as corresponding result
feature = data[['age', 'education_num', 'occupation', 'hours_per_week']]
target = data['salary']
# 3. In KNN, feature data must be numeric to participate in calculations
# Data conversion, converting String type data to int
#### Using map method for data conversion
dic = {}
# unique() method ensures data uniqueness
occ_arr = feature['occupation'].unique()
# Generate mapping of characters to numbers
for i in range(occ_arr.size):
dic[occ_arr[i]] = i
# Numeric replacement of strings
feature['occupation'] = feature['occupation'].map(dic)
# 4. Slicing: training data and prediction data
# Check the shape of the data (training data must be two-dimensional)
feature.shape
# Training data
x_train = feature[:32500]
y_train = target[:32500]
# Testing data
x_test = feature[32500:]
y_test = target[32500:]
# 5. Generate algorithm
from sklearn.neighbors import KNeighborsClassifier
# Instantiate a knn object, parameter: n_neighbors adjustable, adjusted to achieve the best prediction result.
knn = KNeighborsClassifier(n_neighbors=10)
# fit() training function, (training data, training data results)
knn.fit(x_train, y_train)
# Score the trained model (testing data, testing data results)
knn.score(x_test, y_test)
# 6. Predict data
print('True classification results:', np.array(y_test))
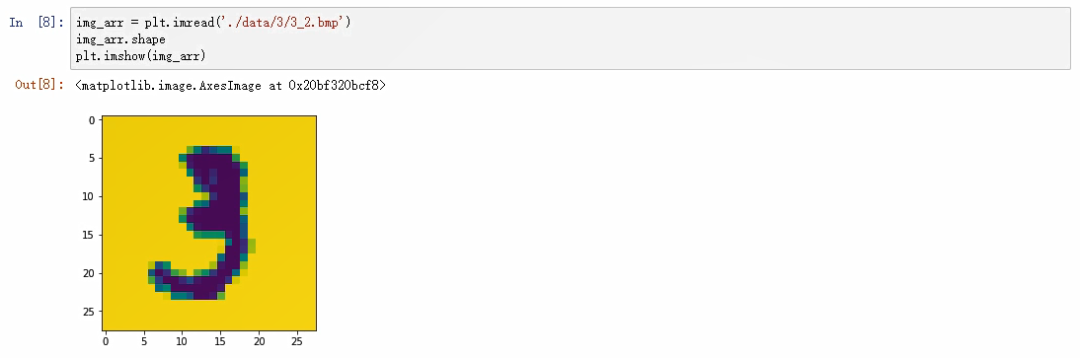
print('Model classification results:', knn.predict(x_test))(3) Example: Handwritten Digit Recognition System Based on sklearn
pylot reads the image: img_arr.shape checks the shape
import pandas as pd
import numpy as np
from sklearn.neighbors import KNeighborsClassifier

# 1. Sample data extraction: numpy array corresponding to each image: 0,1,2,3,4,5,6,7,8,9
feature = []
target = []
for i in range(10): # Folder names 0-9
    for j in range(1, 501): # Image names 1-500
        imgpath = './data/' + str(i) + '/' + str(i) + '_' + str(j) + '.bmp'  # Image path
        img_arr = pld.imread(imgpath)
        feature.append(img_arr)
        target.append(i)   # 2. Convert list to numpy array; feature must be two-dimensional;
feature = np.array(feature) # This feature contains multiple two-dimensional arrays;
target = np.array(target)
feature.shape # (5000, 28, 28) # There are 5000 28*28 two-dimensional arrays
# Extension: feature is a three-dimensional array; multiple two-dimensional arrays composed of arrays are three-dimensional arrays, and multiple one-dimensional arrays composed of arrays are two-dimensional arrays!
# 3. Reshape feature to two-dimensional array
feature.shape (5000, 784) # 4. Synchronize shuffle sample data and target data
np.random.seed(10)
np.random.shuffle(feature)
np.random.seed(10)
np.random.shuffle(target)
# 5. Split sample data into training and testing data
x_train = feature[:4950]
y_train = target[:4950]
x_test = feature[4950:]
y_test = target[4950:]
# 6. Train the model: parameter: n_neighbors adjustable, adjusted to achieve the best prediction score.
from sklearn.neighbors import KNeighborsClassifier
knn = KNeighborsClassifier(n_neighbors=8)
knn.fit(x_train, y_train)  # (training data, training data results)
# 7. Score the trained model (testing data, testing data results)
knn.score(x_test, y_test)
# 8. Test the model
print('True results', y_test)
print('Model classification results', knn.predict(x_test))
# 9. Save the trained model
from sklearn.externals import joblib
joblib.dump(knn, './knn.m')
# 10. Load the trained model
knn = joblib.load('./knn.m')
#-------------------------------------------------------------------------------------------------
# 11. Test the model with external images
# Note: The sample data of external images must be converted to the same dimensional array as the sample images used during training.
# The model can only test feature data similar to that in the testing data!
img_arr = plt.imgread('./数字.jpg')
eight_arr = img_arr[170:260, 80:70]  # Crop the image part
plt.imshow(eight_arr) # View the cropped digit image
# Reshape the image pixel to be consistent with the feature data in the testing data:
# (5000, 784) Each row is a one-dimensional array of 784 elements; pixels must be the same
# 12. Dimensionality reduction of eight_arr corresponding image (three-dimensional to two-dimensional): convert (65,50,3) to (28,28)
eight_arr.mean(axis=2)  # axis=2 means removing the third dimension, keeping (65,50) to ensure the image does not change!
# 13. Compress the pixels of the cropped image proportionally
import scipy.ndimage as ndimage
data_pre_test = ndimage.zoom(eight_arr, zoom=(28/65, 28/50))
eight_arr.shape   #(28,28)
# 14. Convert the compressed image from two-dimensional (28,28) to one-dimensional (1,784)
eight_arr = eight_arr.reshape(1, 784)
# 15. Recognize the externally compressed and reduced image
knn.predict(eight_arr) # array([8])
# -*- coding: UTF-8 -*-
import numpy as np
import operator
from os import listdir
from sklearn.neighbors import KNeighborsClassifier as kNN
"""
Function Description: Convert a 32x32 binary image to a 1x1024 vector.
Parameters:
filename - Filename
Returns:
returnVect - Returns the 1x1024 vector of the binary image
"""
def img2vector(filename):
# Create a 1x1024 zero vector
returnVect = np.zeros((1, 1024))
# Open the file
fr = open(filename)
# Read line by line
for i in range(32):
# Read one line of data
lineStr = fr.readline()
# Append the first 32 elements of each line to returnVect
for j in range(32):
returnVect[0, 32*i+j] = int(lineStr[j])
# Return the converted 1x1024 vector
return returnVect
"""
Function Description: Handwritten digit classification test
Parameters:
None
Returns:
None
"""
def handwritingClassTest():
# Labels for the test set
hwLabels = []
# Return the filenames in the trainingDigits directory
trainingFileList = listdir('trainingDigits')
# Return the number of files in the folder
m = len(trainingFileList)
# Initialize training Mat matrix, test set
trainingMat = np.zeros((m, 1024))
# Parse the class from the filename
for i in range(m):
# Get the filename
fileNameStr = trainingFileList[i]
# Get the class number
classNumber = int(fileNameStr.split('_')[0])
# Add the class to hwLabels
hwLabels.append(classNumber)
# Store each file's 1x1024 data into the trainingMat matrix
trainingMat[i, :] = img2vector('trainingDigits/%s' % (fileNameStr))
# Build kNN classifier
neigh = kNN(n_neighbors=3, algorithm='auto')
# Fit the model, trainingMat is the training matrix, hwLabels are the corresponding labels
neigh.fit(trainingMat, hwLabels)
# Return the list of files in the testDigits directory
testFileList = listdir('testDigits')
# Error detection count
errorCount = 0.0
# Number of test data
mTest = len(testFileList)
# Parse the class from the filename and perform classification testing
for i in range(mTest):
# Get the filename
fileNameStr = testFileList[i]
# Get the class number
classNumber = int(fileNameStr.split('_')[0])
# Get the 1x1024 vector for the test set, used for training
vectorUnderTest = img2vector('testDigits/%s' % (fileNameStr))
# Get the prediction result
# classifierResult = classify0(vectorUnderTest, trainingMat, hwLabels, 3)
classifierResult = neigh.predict(vectorUnderTest)
print("Classification returned result %d True result %d" % (classifierResult, classNumber))
if(classifierResult != classNumber):
errorCount += 1.0
print("Total of %d errors
Error rate is %f%%" % (errorCount, errorCount/mTest * 100))
"""
Function Description: Main function
Parameters:
None
Returns:
None
"""
if __name__ == '__main__':
handwritingClassTest()You can try changing these parameter settings to deepen your understanding of their functions.