
✨Hello, I am Xiaoke, welcome to the “Xiaoke AI Study Group”
Today’s article theme is:
Practical Development of an Intelligent Document Assistant Based on Streamlit and DeepSeekHere is a demonstration of the practical effects:
In this article, you will gain:
-
Basic interactive interface for large models -
Basic logic design for large model interaction -
Reading PDF files -
Loading environment variables -
Practical explanation of large model applications in intelligent documents
🚀 Keyword Tags: AI Practical Developers | Technical Growth Companions | RAG Frontier Explorers
🌈 Looking forward to collaborating with you: Become a partner in “AI + Growth”! Here you will gain:
-
✅ Weekly updated AI development notes -
✅ Reusable code example library -
✅ Dissection of cutting-edge technology application scenarios -
✅ Exclusive growth methods for students -
✅ Regular in-depth reading of good books
Technical Preview: In the next issue, we will introduce RAG (Retrieval-Augmented Generation) technology to achieve:✅ Semantic document chunking✅ Vector database retrieval✅ Better dynamic context management
Table of Contents
- Table of Contents
- Preface: Voices from Readers
- 1. Development Environment Preparation
- 1.1 Install Dependency Libraries
- 1.2 Environment Configuration
- 1.3 Run and Experience
- 2. Core Function Breakdown
- 3. Key Code Analysis
- 3.1 Document Processing Module
- 3.2 Stream Response Implementation
- 3.3 CRISPE Prompt Engineering
- 3.4 Streamlit Frontend Button Settings
- 3.5 File Upload Component
- 3.6 Chat History Display
- 3.7 Dialogue Logic Control
- 4. DeepSeek Intelligent Document Assistant Introduction Guide
- Project Overview
- Basics of Streamlit Framework
- Project Logic Design Breakdown
- 5. Limitations of the Current Version
- 6. Summary
- Appendix – Code Documentation
- DeepSeek Intelligent Document Assistant Application Documentation
Preface: Voices from Readers
Yesterday I received feedback from readers: “AI development tutorials are not satisfying enough when only theory is discussed. Can we go through the development process with real code?” Today we will useStreamlit as a small frontend, combined withDeepSeek large model, to guide everyone in developing an intelligent assistant capable of document analysis step by step. The code in this article has been tested (for the complete source code, see the appendix at the end). It is recommended to read while practicing.
Project open-source address:
https://github.com/li-xiu-qi/XiaokeAILabs.git
1. Development Environment Preparation
1.1 Install Dependency Libraries
# Core dependencies
pip install streamlit pymupdf python-dotenv openai
1.2 Environment Configuration
Create a<span>.env</span> file in the project root directory:
Note, the api-key comes from Silicon Flow, and you need to obtain the api-key at the following address: https://cloud.siliconflow.cn/account/ak
API_KEY=your_silicon_api_key
1.3 Run and Experience
streamlit run xiaoke_doc_assist.py
After starting, you will see:
-
Select the model and parameters on the left panel -
Upload documents and chat on the main interface
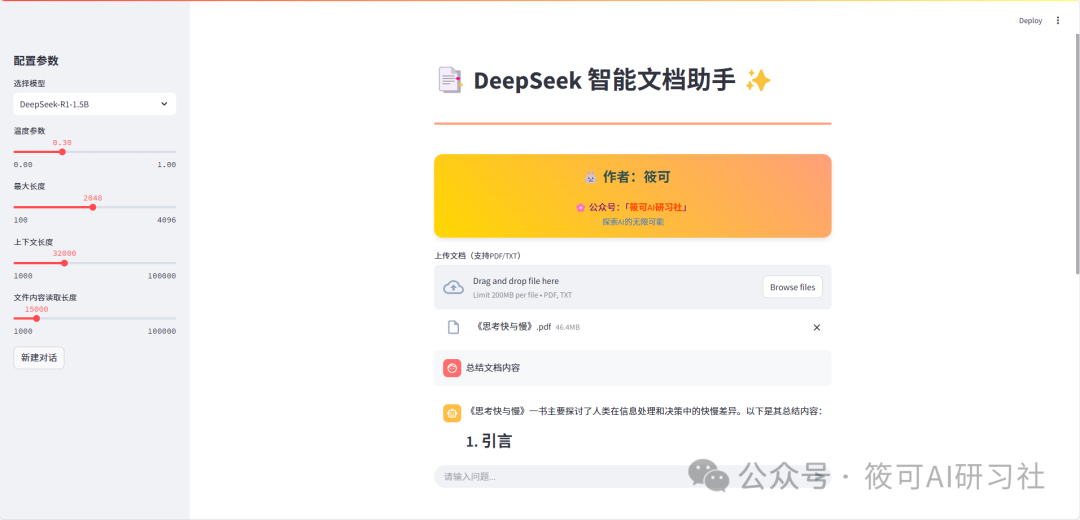
2. Core Function Breakdown
The intelligent assistant we designed needs to achieve:
-
📁 Multi-format document parsing (TXT/PDF) -
🤖 Dynamic switching of various large models -
🎚️ Adjust temperature/context length -
💬 Dialogue system with historical memory

3. Key Code Analysis
3.1 Document Processing Module
def process_uploaded_file():
    # Multi-format processing logic
    if PDF:  # PyMuPDF parsing
        with fitz.open() as doc:
            text += page.get_text()
    else:    # Decode text directly
        content = file.getvalue().decode()
    # Smartly capture the first N characters
    return content[:context_length] + "..."
3.2 Stream Response Implementation
with st.chat_message("assistant"):
    response_placeholder = st.empty()
    collected_response = []

    # Real-time get response segments
    for chunk in response:
        if chunk.choices[0].delta.content:
            token = chunk.choices[0].delta.content
            collected_response.append(token)
            response_placeholder.markdown("".join(collected_response) + "▌")  # Typing effect
3.3 CRISPE Prompt Engineering
<system>

    [Current Date] {CURRENT_DATE}

    [Role] You are a professional document analysis assistant, skilled at extracting key information from technical documents.

    [Background]

    - The user has uploaded the document: {uploaded_file.name}

    - Document type: {uploaded_file.type.split('/')[-1].upper()}

    - Document content: {processed_content[:st.session_state.file_content_length]}...

    [Core Tasks]

    1. When the user asks a question, prioritize finding the answer from the document.

    2. Think step by step for complex questions.

    3. Do not generate information not provided by the document.

    4. Maintain a professional and understandable tone.

    5. When uncertain, request the user to provide more information.

    [Interaction Requirements]

    - Maintain a professional and understandable tone.

    - Key data should be displayed in **bold**.

    - Code blocks should be wrapped in ```.

</system>
3.4 Streamlit Frontend Button Settings
  # Sidebar settings
with st.sidebar:
    st.header("Configuration Parameters")
    selected_model = st.selectbox(
        "Select Model",
        options=list(model_list.keys()),
        index=2
    )
    temperature = st.slider("Temperature Parameter", 0.0, 1.0, 0.3, 0.1)
    max_tokens = st.slider("Maximum Length", 100, 4096, 2048, 100)
    st.session_state.context_length = st.slider("Context Length", 1000, 100000, 18000, 500)
    st.session_state.file_content_length = st.slider("File Content Read Length", 1000,100000, 15000, 500)

    # New conversation button
    if st.button("New Conversation"):
        st.session_state.messages = []
        st.session_state.uploaded_content = None
        st.session_state.current_file = None
        st.success("New conversation created!")

st.title("📑 DeepSeek Intelligent Document Assistant ✨")
3.5 File Upload Component
# File upload component
uploaded_file = st.file_uploader("Upload Document (supports PDF/TXT)", type=["pdf", "txt"])

if uploaded_file and uploaded_file != st.session_state.get("current_file"):

    processed_content = process_uploaded_file(uploaded_file)

    if processed_content:

        st.session_state.uploaded_content = processed_content

        st.session_state.current_file = uploaded_file

        # Build CRISPE framework system prompt

        system_prompt = f"""

<system>

    [Current Date] {CURRENT_DATE}

    [Role] You are a professional document analysis assistant, skilled at extracting key information from technical documents.

    [Background]

    - The user has uploaded the document: {uploaded_file.name}

    - Document type: {uploaded_file.type.split('/')[-1].upper()}

    - Document content: {processed_content[:st.session_state.file_content_length]}...

    [Core Tasks]

    1. When the user asks a question, prioritize finding the answer from the document.

    2. Think step by step for complex questions.

    3. Do not generate information not provided by the document.

    4. Maintain a professional and understandable tone.

    5. When uncertain, request the user to provide more information.

    [Interaction Requirements]

    - Maintain a professional and understandable tone.

    - Key data should be displayed in **bold**.

    - Code blocks should be wrapped in ```.

</system>

        """

        # Clear history messages

        st.session_state.messages = [{"role": "system", "content": system_prompt}]

        st.success(f"Document {uploaded_file.name} parsed successfully!")

else:

    # Default system prompt template

    default_system_prompt = f"""

    <system>

        [Current Date] {CURRENT_DATE}

        [Role] You are a professional document analysis assistant.

        [Core Tasks]

        1. When the user asks a question, you can ask the user if they need to provide materials to enhance the answer.

        2. Think step by step for complex questions.

        3. Do not generate information not provided by the document.

        4. Maintain a professional and understandable tone.

        5. When uncertain, request the user to provide more information.

        [Interaction Requirements]

        - Maintain a professional and understandable tone.

        - Key data should be displayed in **bold**.

        - Code blocks should be wrapped in ```.

    </system>

    """

    if not st.session_state.messages:

        st.session_state.messages = [

            {"role": "system", "content": default_system_prompt}

        ]
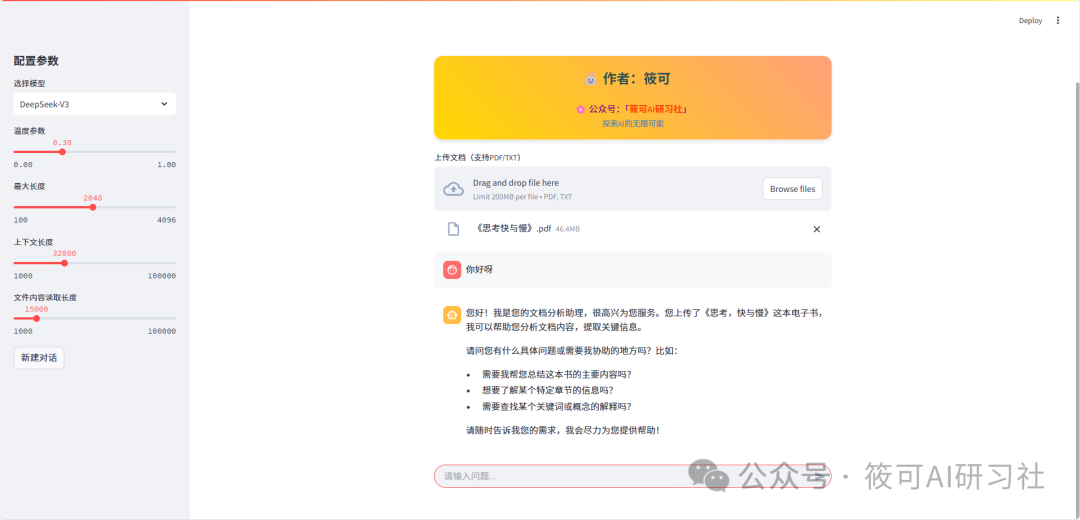
3.6 Chat History Display
# Chat history display
for msg in st.session_state.messages:

    if msg["role"] != "system":

        with st.chat_message(msg["role"]):

            st.markdown(msg["content"])
3.7 Dialogue Logic Control
# User input processing
if prompt := st.chat_input("Please enter your question..."):

    # Add user message

    st.session_state.messages.append({"role": "user", "content": prompt})

    with st.chat_message("user"):

        st.markdown(prompt)

    # Build API request

    keep_messages = 10

    system_message = st.session_state.messages[0]  # Keep the first system message

    messages_for_api = [

        {"role": m["role"], "content": m["content"]}

        for m in st.session_state.messages

        if m["role"] != "system"

    ]

    # Truncate context to meet context length requirements

    total_length = sum(len(m["content"]) for m in messages_for_api)

    while total_length > st.session_state.context_length:

        messages_for_api.pop(0)

        total_length = sum(len(m["content"]) for m in messages_for_api)

    messages_for_api.insert(0, system_message)  # Reinsert the system message to the first

    try:

        # Generate streaming reply

        with st.chat_message("assistant"):

            response_placeholder = st.empty()

            collected_response = []

            response = client.chat.completions.create(

                model=model_list[selected_model],

                messages=messages_for_api,

                stream=True,

                temperature=temperature,

                max_tokens=max_tokens,

            )

            for chunk in response:

                if chunk.choices[0].delta.content:

                    token = chunk.choices[0].delta.content

                    collected_response.append(token)

                    response_placeholder.markdown("".join(collected_response) + "▌")

            final_response = "".join(collected_response)

            response_placeholder.markdown(final_response)

            # Update message records

            st.session_state.messages.append(

                {"role": "assistant", "content": final_response}

            )
4. DeepSeek Intelligent Document Assistant Introduction Guide
Project Overview
This project is an intelligent document analysis assistant built on the Streamlit framework. It leverages DeepSeek’s large language model (LLM) to understand and analyze user-uploaded documents and provide answers based on user questions. The main features include:
-
Document Upload and Parsing: Supports uploading PDF and TXT documents, extracting document content. -
Intelligent Q&A: Users can ask questions about the uploaded document content, and the assistant will try to find answers from the document. -
Model Selection and Parameter Adjustment: Users can select different DeepSeek models from the sidebar and adjust parameters such as temperature and maximum length. -
Dialogue Management: Supports creating new conversations (clearing historical dialogue records).
Basics of Streamlit Framework
Streamlit is a Python library for quickly building interactive web applications, especially suitable for machine learning and data science projects. Its core philosophy is to “empower data scientists to easily create beautiful and powerful applications”.
In this project, Streamlit is mainly responsible for building the user interface (UI), including:
-
Sidebar: Used to place configuration parameters, such as model selection, temperature, maximum length, etc. Created using <span>with st.sidebar:</span>code block. -
File Uploader: Allows users to upload documents. Created using <span>st.file_uploader()</span>. -
Chat Input: The place where users input questions. Created using <span>st.chat_input()</span>. -
Chat Message Display: Displays the history of conversations between the user and the assistant. Created using <span>st.chat_message()</span>and<span>st.markdown()</span>combined. -
Session State: An important feature of Streamlit, used to persist data between different stages of user interaction with the application. For example, dialogue message history, uploaded document content, etc., are all stored in <span>st.session_state</span>.
Project Logic Design Breakdown
To better understand the code, we will break its logic down into several key modules and explain them in conjunction with the previously generated flowchart.
1. Initialization (init_session Function)
-
Function: The
<span>init_session()</span>function is responsible for initializing the<span>session_state</span>of the Streamlit application. Ensures that the application has the required state variables at startup. -
Process:
-
<span>messages</span>: A list that stores the history of dialogue messages, initially an empty list<span>[]</span>. -
<span>uploaded_content</span>: Stores the content of the uploaded document, initially set to<span>None</span>. -
<span>context_length</span>: Sets the model context length, initially set to<span>30000</span>. -
<span>file_content_length</span>: Sets the length of the content read from the file, initially set to<span>15000</span>. -
Check if <span>st.session_state</span>already contains the keys<span>messages</span>,<span>uploaded_content</span>,<span>context_length</span>, and<span>file_content_length</span>. -
If they do not exist, initialize them: -
Purpose: To ensure that the session state variables required for the application to run are correctly initialized, avoiding errors during subsequent use.
2. Sidebar Configuration (with st.sidebar Code Block)
-
Function: The
<span>with st.sidebar:</span>code block defines the content of the application sidebar, used for user configuration parameters. -
Process:
-
Use <span>st.header("Configuration Parameters")</span>to add a title to the sidebar. -
Use <span>st.selectbox("Select Model", ...)</span>to create a model selection dropdown, allowing users to choose a model from<span>model_list</span>. -
Use <span>st.slider("Temperature Parameter", ...)</span>to create a temperature parameter slider for adjusting the randomness of the model’s generated responses. -
Use <span>st.slider("Maximum Length", ...)</span>to create a maximum length slider that limits the maximum number of tokens generated by the model. -
Use <span>st.slider("Context Length", ...)</span>to create a context length slider that allows users to adjust the context length of the uploaded document. -
Use <span>st.slider("File Content Read Length", ...)</span>to create a file content read length slider that allows users to adjust the maximum length of the content read from the file. -
Use <span>st.button("New Conversation")</span>to create a “New Conversation” button that clears the historical dialogue and uploaded document when clicked. -
Purpose: To provide a user-friendly interface that allows users to configure models and parameters according to their needs.
3. File Upload and Processing
-
Function: To process the document uploaded by the user and extract text content.
-
Process:
-
Update <span>st.session_state.uploaded_content</span>with the processed document content. -
Update <span>st.session_state.current_file</span>with the current uploaded file object to determine if the file has changed. -
Build a system prompt (System Prompt), which is a key step in guiding the LLM on how to play a role, understand the background, execute tasks, and interact. The system prompt uses the CRISPE framework, including role, background, core tasks, and interaction requirements, and dynamically injects the uploaded file name, file type, and part of the document content into the prompt. -
Add the system prompt as the first message to the <span>st.session_state.messages</span>list. -
Use <span>st.success()</span>to display a message indicating that document parsing was successful. -
<span>process_uploaded_file</span>function internal logic: -
Determine whether the file type ( <span>uploaded_file.type</span>) is PDF or TXT. -
If it is PDF, use the <span>fitz</span>library (PyMuPDF) to open the PDF file and extract text content page by page. -
If it is TXT, directly read the file content and decode it as a UTF-8 string. -
Based on <span>st.session_state.file_content_length</span>, capture the first N characters of the document content and add “…” to indicate truncation. -
If an exception occurs during processing, use <span>st.error()</span><span> to display an error message.</span> -
Use <span>st.file_uploader("Upload Document...", type=["pdf", "txt"])</span>to create a file upload component that allows users to upload PDF or TXT files. -
When the user uploads a file, the code checks whether a new file has been uploaded and whether the uploaded file is different from the one recorded in the current <span>session_state</span>. -
Call the <span>process_uploaded_file(uploaded_file)</span>function to process the uploaded file: -
If file processing is successful ( <span>processed_content</span>is not<span>None</span>): -
Finally, the <span>st.session_state.messages = [{"role": "system", "content": system_prompt}]</span>part will clear the historical dialogue, reducing noise interference. If you want to optimize the user experience, you can choose to insert and replace the form to change the template; we choose the former here. -
Purpose: To receive documents uploaded by users, extract text content that can be used for analysis, and dynamically generate system prompts based on the uploaded documents to prepare for the subsequent intelligent Q&A phase.
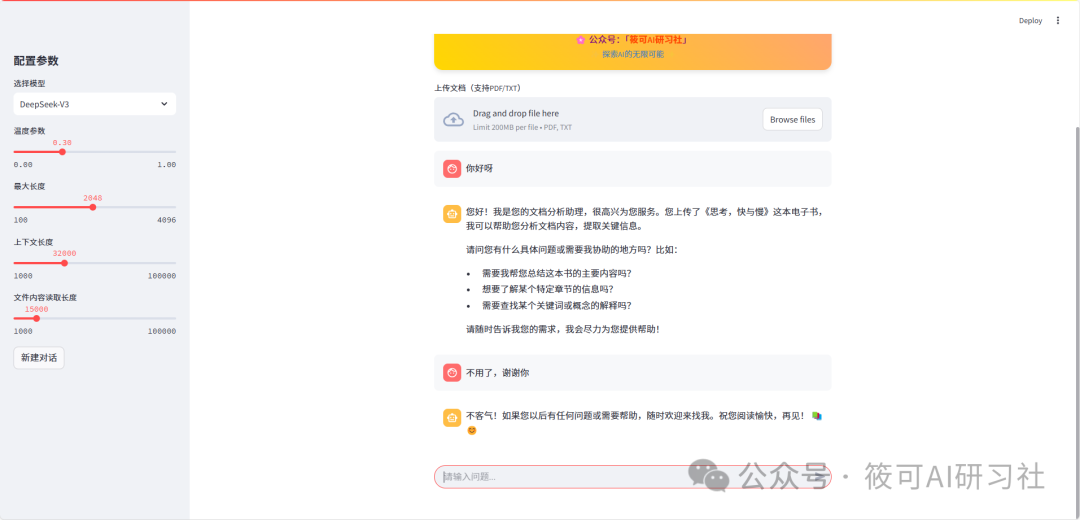
4. Chat Message Processing (User Input and Assistant Response)
-
Function: To process user chat input, call the DeepSeek API to obtain model responses, and display dialogue messages.
-
Process:
-
Add the user’s input message to the <span>st.session_state.messages</span>list, with the role set to “user”. -
Use <span>st.chat_message("user"): st.markdown(prompt)</span>to display the user message in the chat interface. -
Build the API request message list <span>messages_for_api</span>. To control the context length, the code only takes the last 10 messages (excluding system messages, only user messages and assistant messages) as the context for the API request. -
Call the DeepSeek API’s <span>client.chat.completions.create(...)</span>method to send the API request and obtain streaming responses: -
Process API Streaming Responses: -
Handle API Errors: Use <span>try...except openai.APIError as e:</span>to catch errors that may occur during API requests (e.g., context too long). If an<span>openai.APIError</span>occurs: -
<span>model</span>: Use the model selected by the user in the sidebar (<span>model_list[selected_model]</span>). -
<span>messages</span>: Use the constructed<span>messages_for_api</span>message list as context. -
<span>stream=True</span>: Enable streaming response mode, where the model returns results token by token rather than all at once. -
<span>temperature</span>: Use the temperature parameter set by the user in the sidebar. -
<span>max_tokens</span>: Use the maximum length parameter set by the user in the sidebar. -
<span>file_content_length</span>: Use the maximum read file length set by the user in the sidebar. -
For each chunk (data block), extract the token content from <span>chunk.choices[0].delta.content</span>. -
Add the token to the <span>collected_response</span>list. -
Use <span>response_placeholder.markdown("".join(collected_response) + "▌")</span>to dynamically update the content of the assistant message container, displaying the received tokens and adding the “▌” symbol at the end to indicate streaming output. -
Use <span>with st.chat_message("assistant"): response_placeholder = st.empty()</span>to create an assistant message container<span>response_placeholder</span>, used to dynamically display streaming responses. -
Initialize an empty list <span>collected_response</span>, used to store the tokens received. -
Iterate over the streaming <span>response</span>returned by the API: -
Assign the complete response content <span>"".join(collected_response)</span>to<span>final_response</span>. -
Use <span>response_placeholder.markdown(final_response)</span>to finally display the complete assistant response. -
Add the assistant response message to the <span>st.session_state.messages</span>list, with the role set to “assistant”. -
Build an error message containing error analysis and correction suggestions <span>error_msg</span>. -
Use <span>st.error(error_msg, icon="🚨")</span>to display error information on the interface. -
Display Chat History: Iterate over the <span>st.session_state.messages</span>list, displaying each message in the chat interface. System messages (<span>role == "system"</span>) are not displayed. User messages (<span>role == "user"</span>) and assistant messages (<span>role == "assistant"</span>) are displayed using<span>st.chat_message("user")</span>and<span>st.chat_message("assistant")</span>, respectively, and the message content is rendered using<span>st.markdown()</span>. -
Receive User Input: Use <span>prompt = st.chat_input("Please enter your question...")</span>to create a chat input box, where the user’s input will be assigned to the<span>prompt</span>variable after pressing the enter key. -
Process User Input: -
Purpose: To achieve dialogue interaction between the user and the intelligent assistant, sending user questions to the DeepSeek model for intelligent replies, and displaying the dialogue process and results in real-time in the chat interface. At the same time, handle potential API errors and provide friendly error prompts.
5. New Conversation Button
-
Function: Clicking the “New Conversation” button clears the current dialogue history and uploaded documents, starting a new conversation.
-
Process (Reference):
-
Clear the <span>st.session_state.messages</span>list, deleting all dialogue messages. -
Set <span>st.session_state.uploaded_content</span>to<span>None</span>, clearing the uploaded document content. -
Set <span>st.session_state.current_file</span>to<span>None</span>, clearing the current file record. -
Use <span>st.success("New conversation created!")</span>to display a success message. -
Use <span>st.button("New Conversation")</span>to create a button. -
When the button is clicked: -
Purpose: To provide users with a convenient way to start a new conversation, clearing old dialogue context and document information to avoid interference with new dialogues.
6. Code Structure and Process Summary
-
Initialization Phase: The <span>init_session()</span>function initializes the necessary session_state variables when the application starts. -
Sidebar Configuration: The <span>with st.sidebar:</span>code block sets various configuration components in the sidebar, allowing users to customize models and parameters. -
Document Upload Phase: Users upload documents through <span>st.file_uploader</span>, the<span>process_uploaded_file</span>function processes the document content and dynamically generates system prompts. -
Dialogue Interaction Phase: Users input questions in <span>st.chat_input</span>, and the application sends the questions and historical dialogue records to the DeepSeek API to obtain streaming responses and display them in<span>st.chat_message</span>. -
Session State Management: The <span>st.session_state</span>runs throughout the application’s lifecycle, storing and maintaining important data such as dialogue history and uploaded document content, allowing the application to remember the user’s context information and achieve continuous historical dialogue. -
Error Handling: The code includes the capture and handling of file processing exceptions and API request errors, improving the robustness of the application.
Advice for Beginners
-
Learn Streamlit Step by Step: The learning curve for Streamlit is relatively gentle, and you can start with the official documentation and examples to gradually master various components and functions. -
Understand the Importance of Session State: Session State is key to building interactive Streamlit applications, and understanding how it works and how to use it is essential. -
Focus on Prompt Engineering: The design of system prompts is crucial for the effectiveness of LLM applications. You can learn Prompt Engineering techniques such as the CRISPE framework to continuously optimize prompts and improve model performance. -
Practice and Experiment: Modify code, adjust parameters, and try different documents and questions to deepen your understanding of code logic and LLM applications. -
Refer to Documentation and Community: When encountering problems, refer to the official documentation related to Streamlit and OpenAI, or seek help in the community. You are welcome to ask me questions; I will do my best to answer them, and I am glad to have partners learning together with us.
5. Limitations of the Current Version
Although the basic functions have been implemented, there are still the following points to optimize:
-
Context Truncation: Simply taking the first N characters may lose key information. -
File Processing: High memory consumption when loading large files, and extraction effects are poor. -
History Management: Fixed round memory windows are not intelligent enough.
6. Summary
Through the practical development in this article, we have completed:
✅ Basic layout construction of Streamlit✅ DeepSeek API integration✅ Prototype development of document dialogue system
Challenge Yourself: Try changing the <span>file_content_length</span><span> parameter value to 30000, and observe the impact on long file processing. Share your findings in the comments!</span>
Readers who need the complete source code are welcome to reply “Intelligent Document Assistant” in the public account backend to obtain the GitHub repository address and source code. In the next issue, we will bring advanced modifications of RAG technology, so stay tuned!
🗺️ Content Map ──────
✨ If this content has inspired you, feel free to:
✅ Click “Looking” to let more partners see it.
🔄 Forward to share with those who need it.
⭐ Light up the star mark, so you won’t miss updates.
💬 Interaction Field ──────
🎙️ The comment section is waiting for you to chat:
1️⃣ Lightning Harvest: What struck you the most at this moment? What was your biggest gain after reading?
2️⃣ Action Code: The first action you want to try tomorrow, how do you plan to act next?
3️⃣ Content Co-creation: The theme of the next issue is lit by you. What other themes do you want me to write about?
⚡ Energy Circuit ──────
📮 Every message is an inspiration wave.
💌 I will carefully read every message. Your support is the motivation for my continuous creation! See you in the next article~
❤️🔥 Your interaction is powering the creative universe (System prompt: The next strategy is being generated…)
🙋♂️ Join the group for communication & material collection
1️⃣ Joining Method
-
Click “Community” in the public account menu, scan the code to join the group directly.
-
Reply with keywords “Join Group” or “Add Group”, and add the author’s WeChat for manual invitation.
2️⃣ Material Collection
-
After joining the group, check the group announcement to obtain learning resources.
-
Reply “Material” to the public account to automatically send the cloud disk link (updated regularly).
-
Click “Material Collection” in the public account menu.
Appendix – Code Documentation
DeepSeek Intelligent Document Assistant Application Documentation
Application Overview
This application is an intelligent dialogue assistant based on the DeepSeek large model, supporting the following core functions:
-
✅ Multi-model selection (providing 3 models of different scales) -
✅ Document analysis mode (supporting TXT/PDF file parsing) -
✅ Adjustable dialogue parameters (temperature, context length) -
✅ Real-time streaming response -
✅ Dialogue history management
Function Features
1. Multi-model Support
|
|
|
|---|---|
|
|
|
|
|
|
|
|
|
2. Document Analysis Mode
-
Supported formats: TXT/PDF -
Processing flow:
-
Automatically parse uploaded files -
Extract the first 15k characters as document content input (configurable) -
Retain the last 32k characters of context (configurable) -
Automatically switch between document/ordinary mode
3. Parameter Configuration
-
Temperature (0.001-1.2): Controls the randomness of generation -
Context Length (100-30k tokens): Manages the length of dialogue history -
Maximum Output Length (fixed at 8192 tokens)
Usage Guide
Environment Requirements
Python 3.10+
Dependency libraries: streamlit, pymupdf, python-dotenv, openai
Install Dependencies
pip install streamlit PyMuPDF python-dotenv openai
Running Steps
-
Configure environment variables
API_KEY=your_deepseek_api_key
-
Start the application
streamlit run xiaoke_doc_assist.py
Interface Operation
-
Model Selection Area (Left)
-
Dropdown to select model version -
Slider to adjust temperature value -
Set context length -
Control the length of document content read
Document Upload Area
-
Supports drag-and-drop uploads -
Automatically recognize file types -
Shows green prompt after successful loading
Dialogue Interface
-
User input box is at the bottom -
Real-time display of dialogue history -
Assistant responses with typing effect
Key Modules
-
File Processing (
<span>process_uploaded_file</span>) -
TXT files: Directly read UTF-8 encoding -
PDF files: Use PyMuPDF to parse text -
Content capture: Retain the first N characters (N=context_length) -
Message Management
-
Add document content when the file is updated -
Retain the last 10 messages (5 rounds of dialogue) -
System message processing rules: -
API Call
response = client.chat.completions.create(
    model=model_list[selected_model],
    messages=messages_for_api,  # Complete context including system prompt
    stream=True,                  # Enable streaming
    temperature=temperature,
    max_tokens=8192              # Fixed maximum output length
)
Precautions
-
The API key must be configured through the <span>.env</span>file -
PDF parsing depends on embedded fonts, which may affect format restoration -
Context length settings must consider the maximum length supported by the model -
Temperature settings below 0.3 may produce deterministic responses -
The file upload size is limited by Streamlit’s default limit (200MB)
Error Handling Mechanism
-
File parsing exceptions: Display red error prompts -
API call failures: Roll back the recent message records -
Streaming interruptions: Retain received content -
Type errors: Automatically filter invalid message types
Interaction Optimization
-
Use streaming responses -
Manage sliding context windows -
File content preprocessor -
Dialogue caching strategy (retain the last 5 rounds)
Performance Optimization Suggestions
-
Single dialogue context should be ≤16000 characters -
PDF file page count should be ≤50 pages -
For complex questions, it’s recommended to split them into multi-step inquiries
PS: Question: If it were you, how would you implement the code logic for this practical project? Do you think there is a better implementation plan?
Tip: Before sending this article, I showed it to friends in the community; some said the article was too long, while others said they couldn’t understand it. I tried to control the length. This article mainly covers these points; I will come back later with an article about the libraries used in this project, and I will also cover some basic knowledge about large model applications, such as the effects of some control parameters, etc.