
1. Download and install Visual Studio Code choose the appropriate version to install
2. Download and install conda and configure the environment
Download method one: official website download
Download method two: Tsinghua mirror installation
3. conda environment configuration
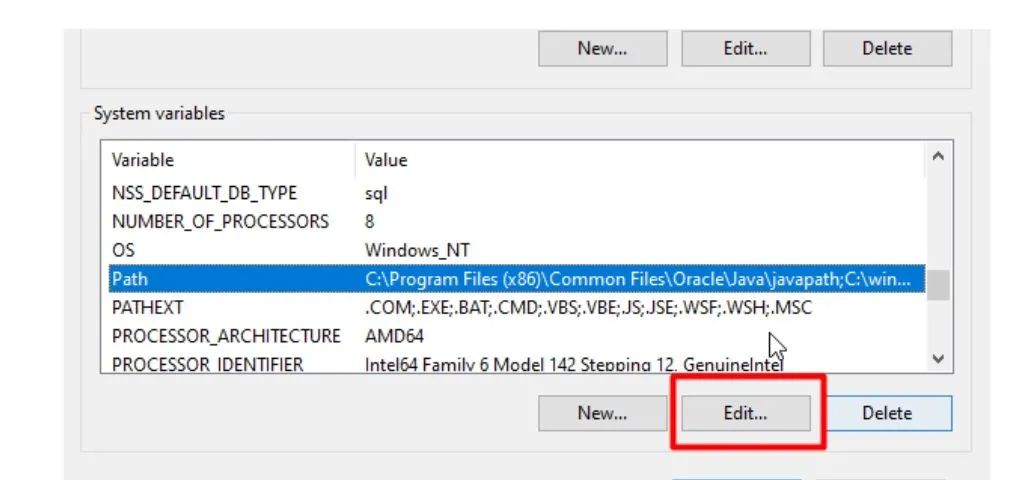
Open advanced system settings on your computer and click on system environment variables:

Find path and then click Edit or double-click directly:
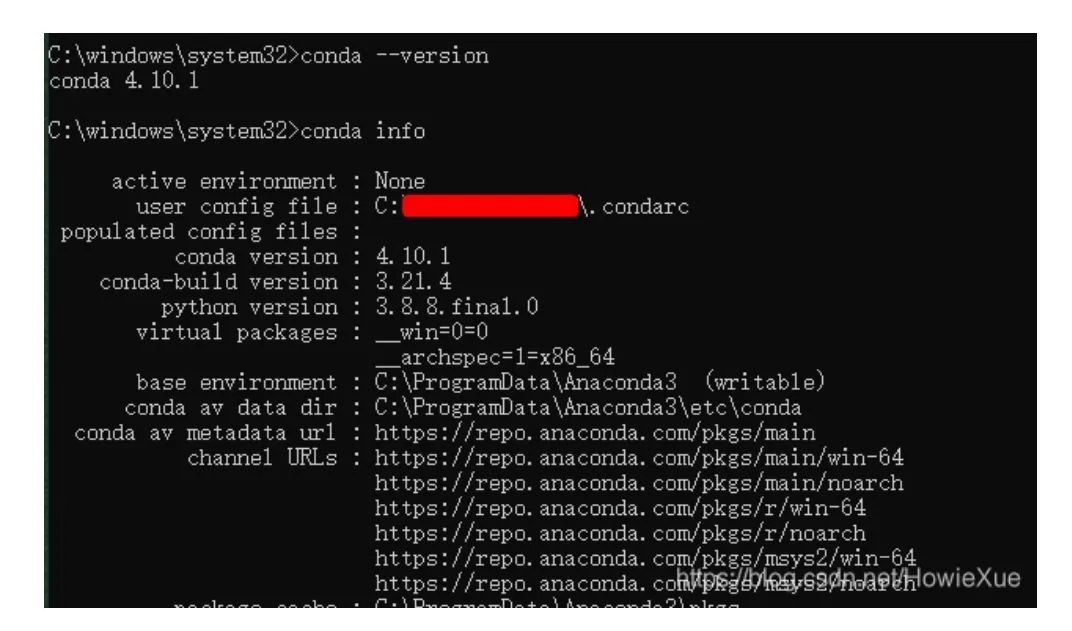
Then you can simply check if the installation configuration is successful by entering the conda command in cmd:
-
Create a PyTorch environment
Different projects require different virtual environments to handle compatibility issues between different versions of projects. Enter the Anaconda prompt command window.
PyTorch is the name of the virtual environment (can be set freely), the python version can be changed according to your needs, and you must specify a specific python version. After successful creation, enter the following command: conda info –envs
Configure Tsinghua TUNA mirror source: TUNA provides mirrors for Anaconda repositories and third-party sources (conda-forge, msys2, pytorch, etc., view the complete list) that can be modified in the .condarc file under the user directory.
Go to the PyTorch official website: https://pytorch.org/
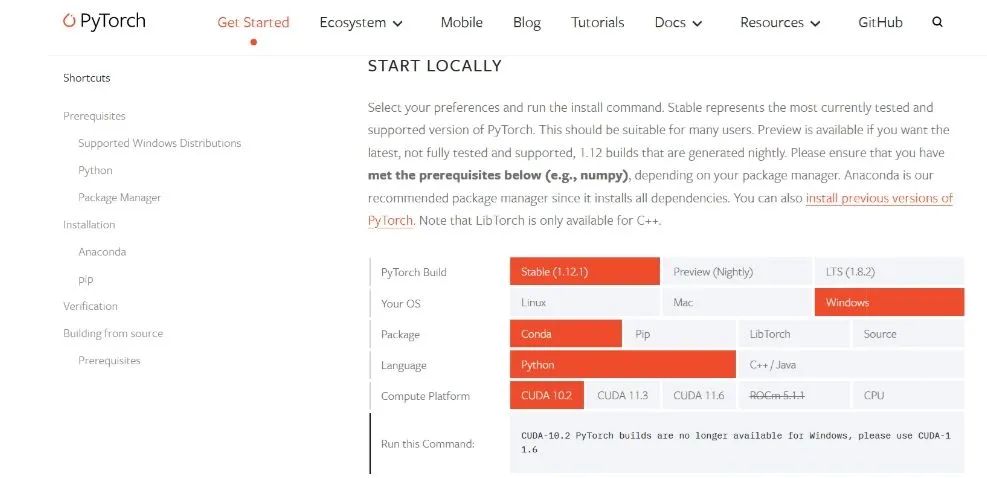 The official website will automatically display the CUDA version you can install based on your computer and provide the installation command.
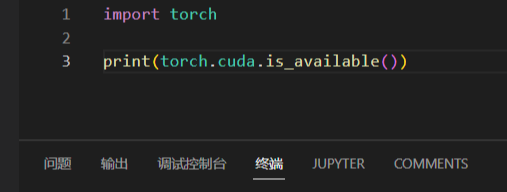
Check if the installation is successful by creating a file and trying to import the package. If there are no errors, the installation is complete.
Check if it is available
Summary: Create your own environment through Anaconda, and install torch, torchvision, and other packages. It can be imported normally in the Anaconda prompt command window, but will report an error in the PyCharm compiler.