Introduction: Don’t know how to make authentic Northeastern sticky bean buns? I will explain everything from making the red bean paste to the finished product, so you can satisfy your cravings anytime.
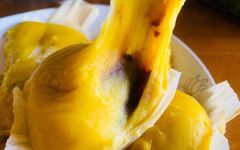
Sticky bean buns are a specialty food from Northeast China. Many friends from Northeast China are likely familiar with them. In the past, many families in rural Northeast would steam several pots of sticky bean buns before the New Year, let them cool, and freeze them for convenience, saving time for festivities and visiting relatives. When it’s time to eat, there’s no need to thaw; just steam them directly in a steamer until soft. The sticky, chewy outer layer paired with the rich sweet red bean paste is incredibly satisfying. It is one of the delicious foods many friends looked forward to during the New Year as children, and it’s a dish that one can never get enough of.

The authentic Northeastern sticky bean bun is made from yellow millet flour and flower beans, and it is the only food that can naturally ferment without using yeast.
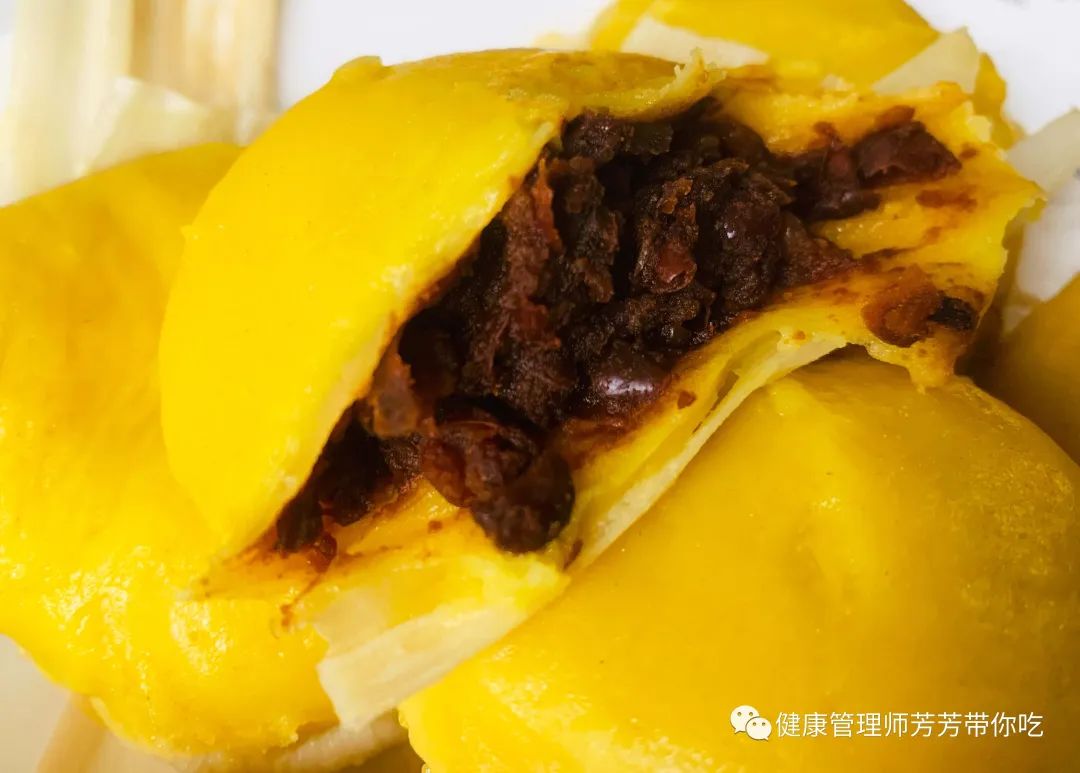
After scalding the yellow millet flour with hot water, it ferments naturally, and then we wrap it with homemade red bean paste and steam it until cooked, resulting in a sweet, sticky, and filling dish.
Recently, I saw fresh yellow millet flour at the supermarket, which reignited my cravings. I bought some and steamed a pot the next day. If you also don’t know how to make Northeastern sticky bean buns, follow me step by step. I will explain everything from making the red bean paste to the finished product, so you can satisfy your cravings anytime. Plus, you can make enough for a week, making it very convenient and time-saving.
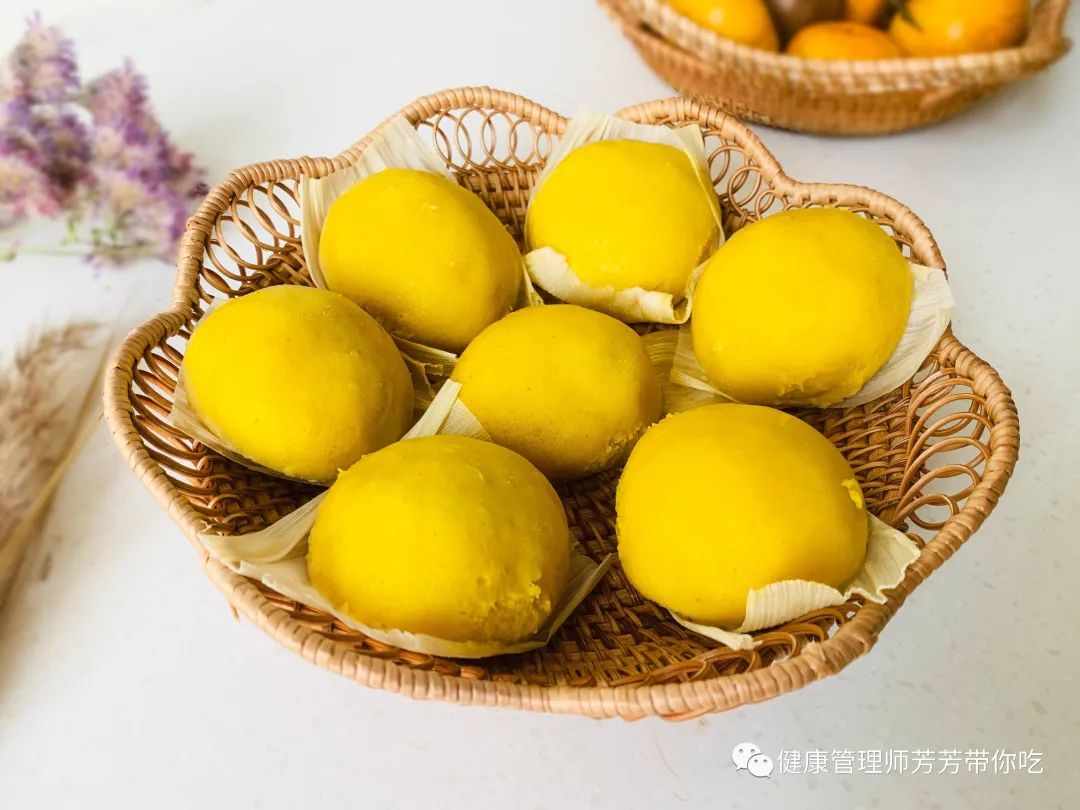
[Northeastern Yellow Millet Flour Sticky Bean Buns]
Ingredients: 300g yellow millet flour, 200g red bean paste, 150g brown sugar.
The yellow millet flour is made from millet that has been hulled and ground into flour. The quality of yellow millet flour is related not only to the origin of the millet but also to how long it has been processed and stored. If the origin cannot be guaranteed, it’s best to buy freshly milled flour, which means it has not been processed for long, ensuring a more authentic flavor.
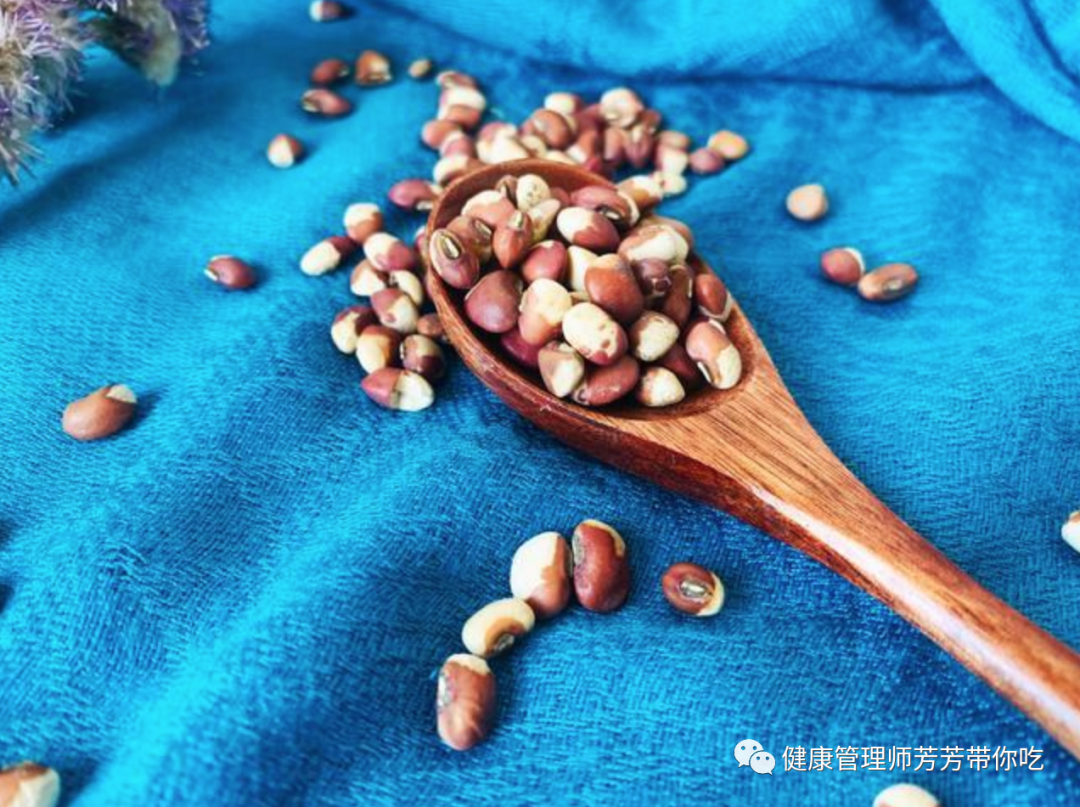
There are many varieties of beans that can be used to make red bean paste, but among all the beans, flower beans, commonly known as “climbing beans,” are the most suitable for making red bean paste. These beans have a red and white mottled skin, are thin-skinned and cook easily, with a texture that is sweet and soft, and a rich bean flavor.
[Red Bean Paste Making Process]:
1. First, remove any damaged beans and stones from the beans, then rinse the beans in clean water. Place the cleaned beans in a pressure cooker, adding enough water to cover the beans by about four to five centimeters. Cover the lid, bring to a boil over high heat, then turn off the heat and let it sit, allowing the beans to expand quickly under heat and pressure.
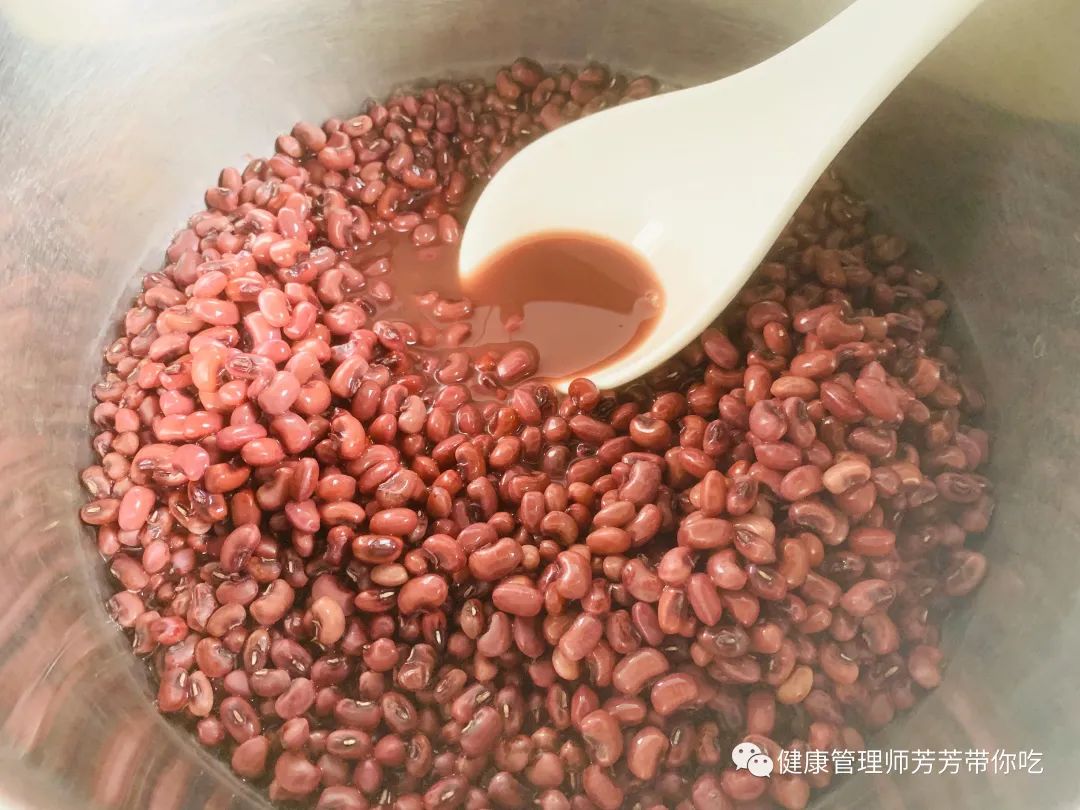
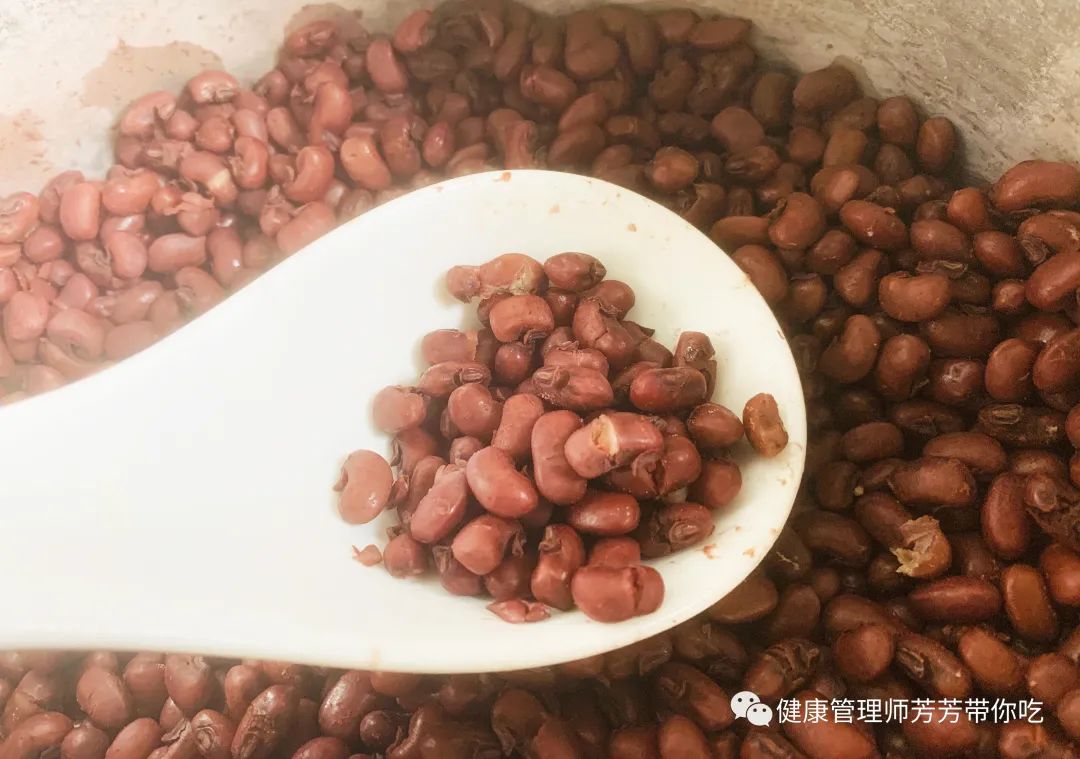
2. After about twenty minutes, open the pressure cooker lid and check if the beans have absorbed a lot of water and have plumped up. At this point, we will heat it again, simmer on low heat for about ten minutes, then turn off the heat. Open the lid to check; if the beans can easily be crushed with your fingers, it means they are cooked. At this time, there will still be a small amount of broth left in the pot.
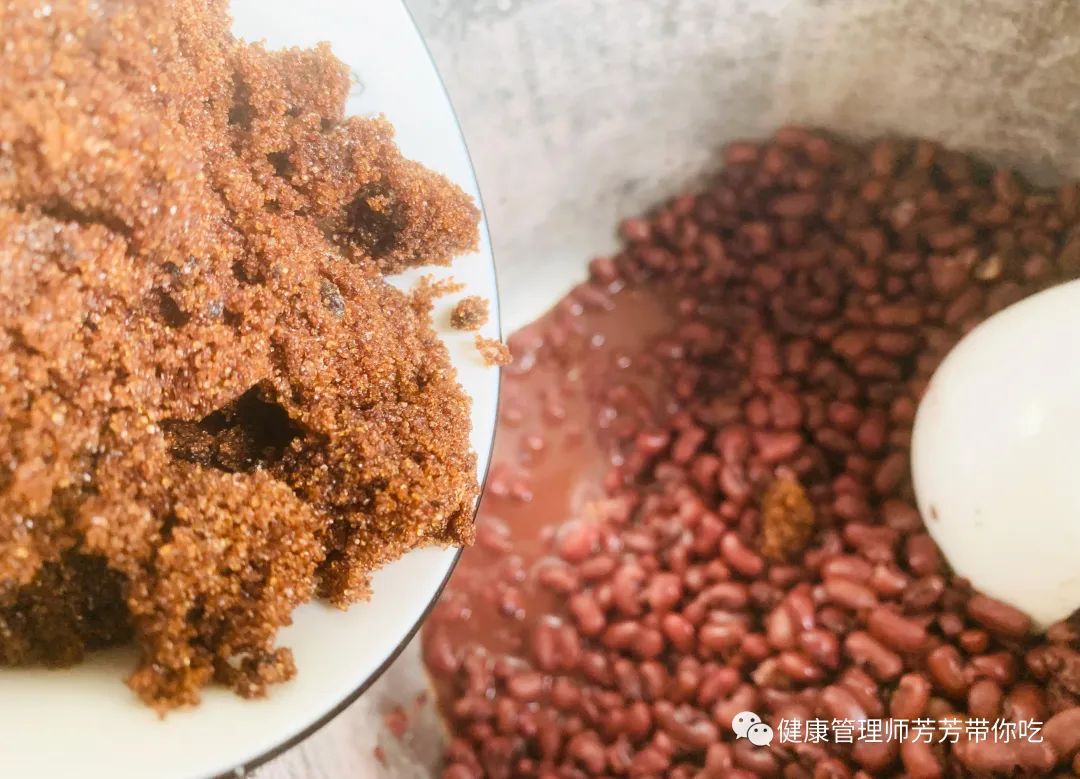
3. Add brown sugar to the pot and stir well, then heat again on low until the brown sugar is completely dissolved and the liquid reduces before turning off the heat.
4. Use a rolling pin or other tools to mash the cooked beans directly in the pot into red bean paste. There’s no need to mash them all; leaving some texture makes it taste better. At this point, the red bean paste is sweet and soft, and I often can’t help but eat a few spoonfuls, haha…

[Making the Bean Buns]:
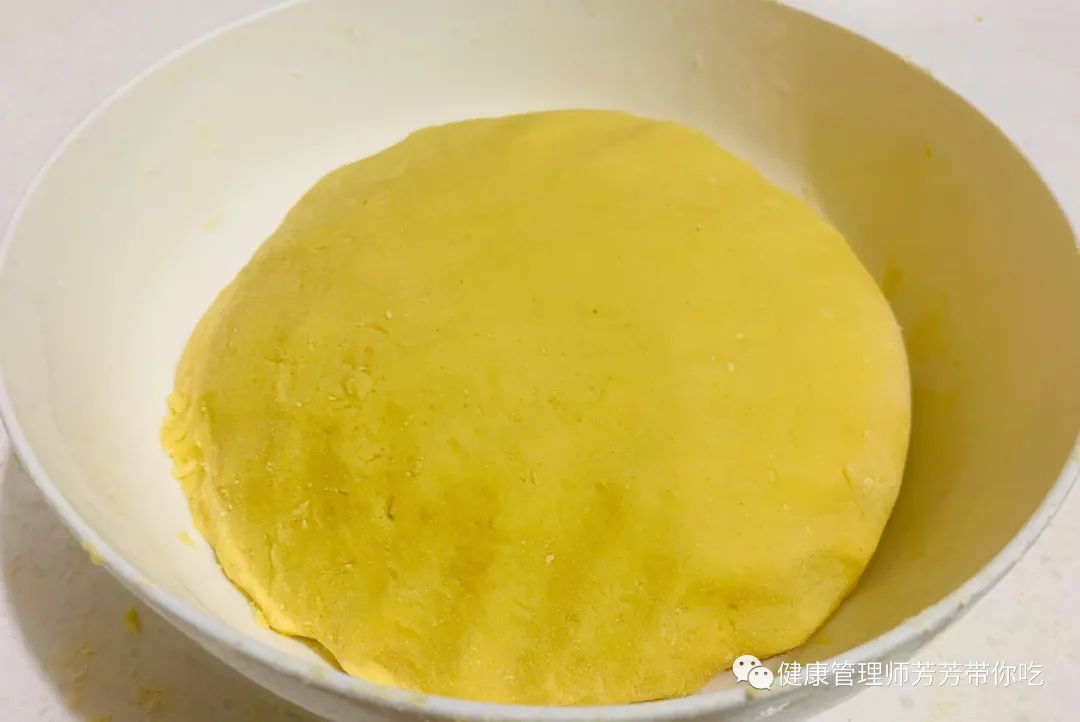
1. Pour the yellow millet flour into a bowl, and use chopsticks to draw a line down the middle of the flour. Pour hot water (about 70-80 degrees Celsius) into one half of the flour while stirring with chopsticks, and stop pouring when there is no dry flour.
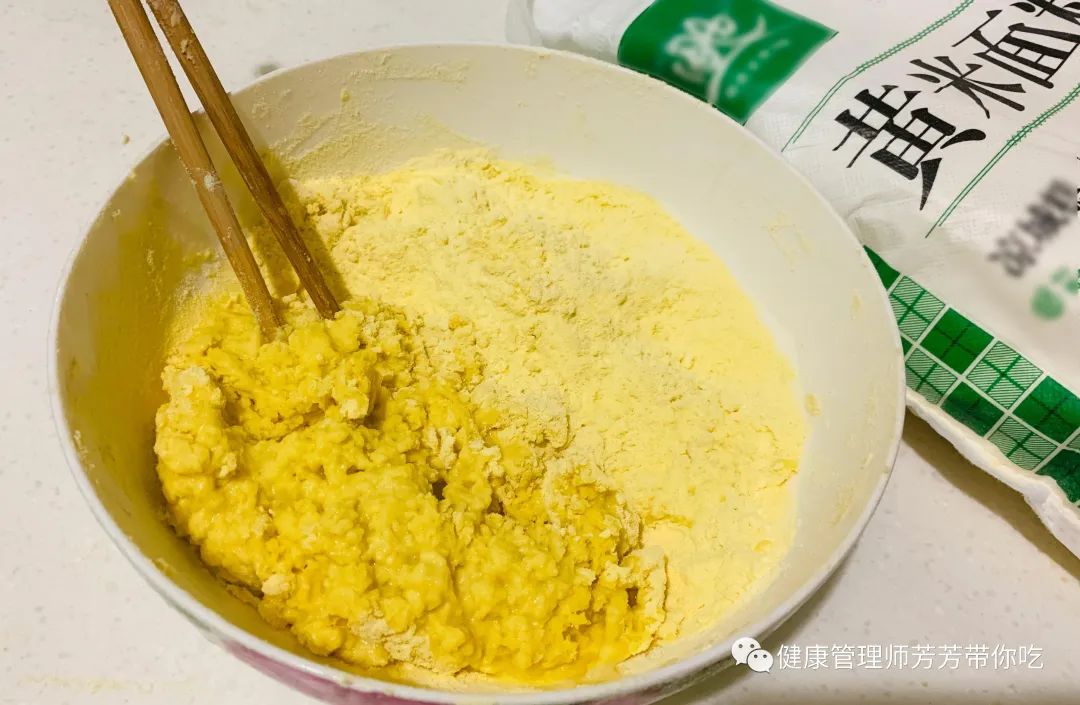
2. Once the temperature is bearable, knead the dough, combining both portions of flour. If you feel there is not enough water, you can add a little more. Finally, knead into a dough that is soft yet firm.
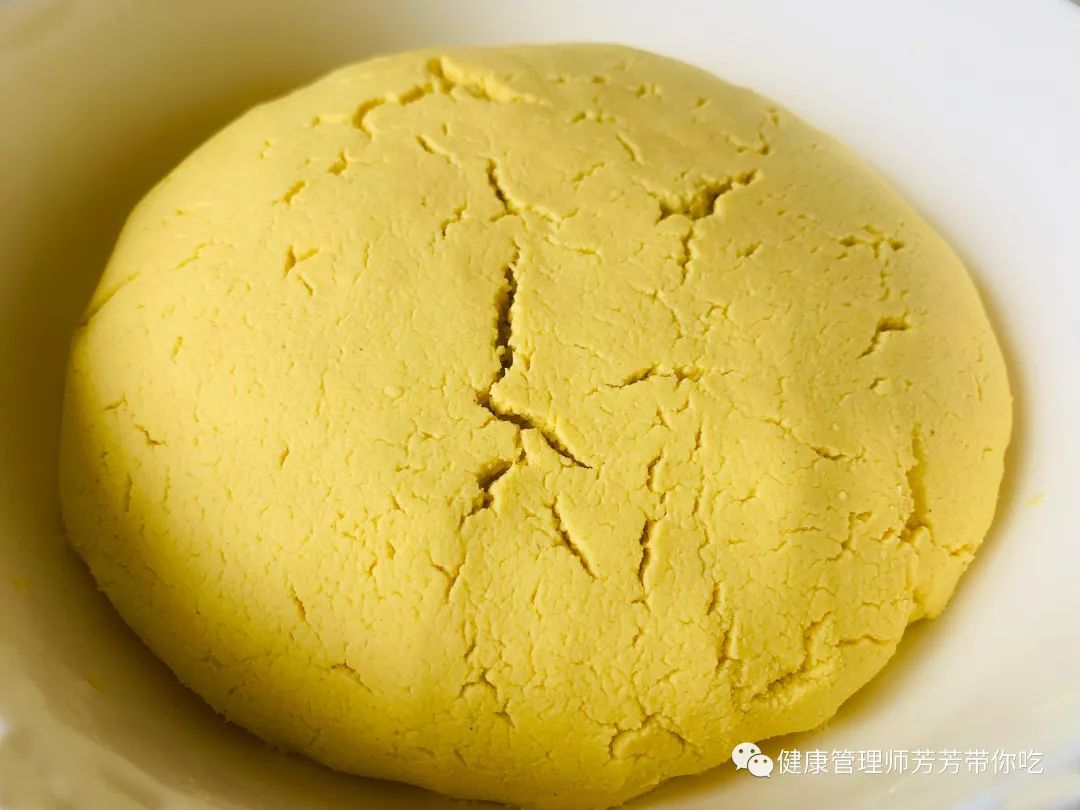
3. Cover the kneaded dough with plastic wrap and place it in a warm place to ferment. Generally, in autumn at room temperature, it will ferment in about twelve hours. The surface of the fermented dough will have cracks and the internal structure will be fluffy.
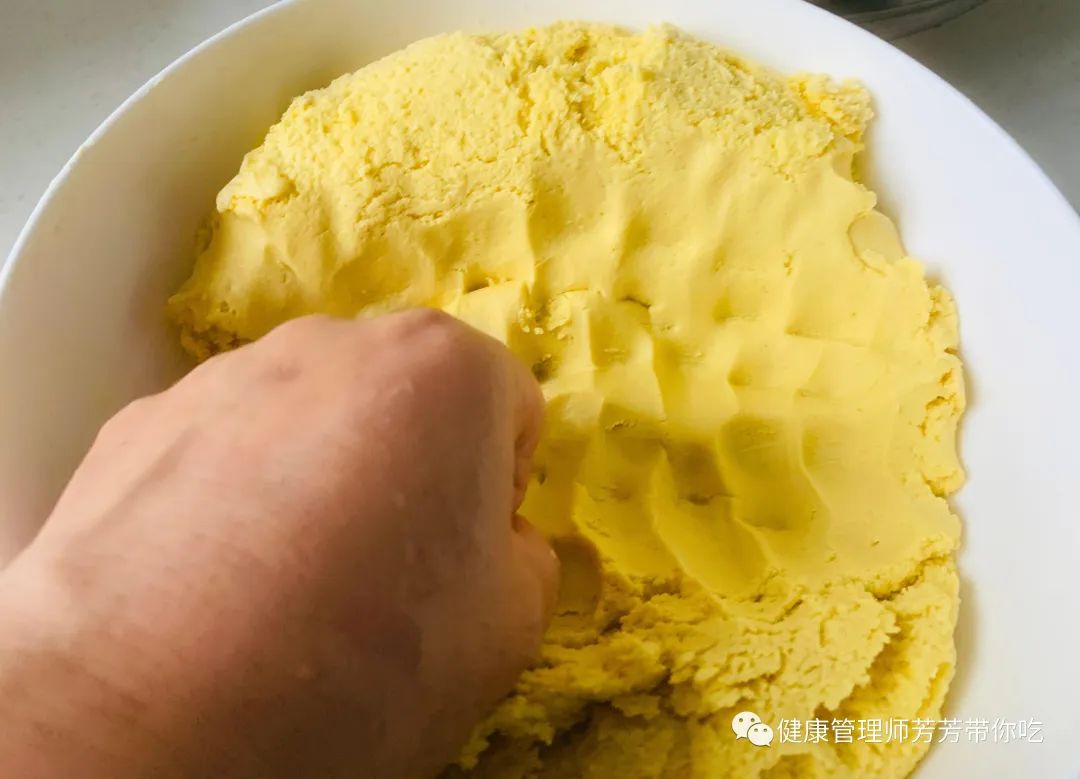
4. Knead the fermented dough for a few more minutes to expel the air, making the dough denser. This will result in a chewier texture when steamed (if you’re not in a hurry, you can let the kneaded dough rest in a cool place for a few hours, and then knead it again before wrapping, resulting in a chewier texture).
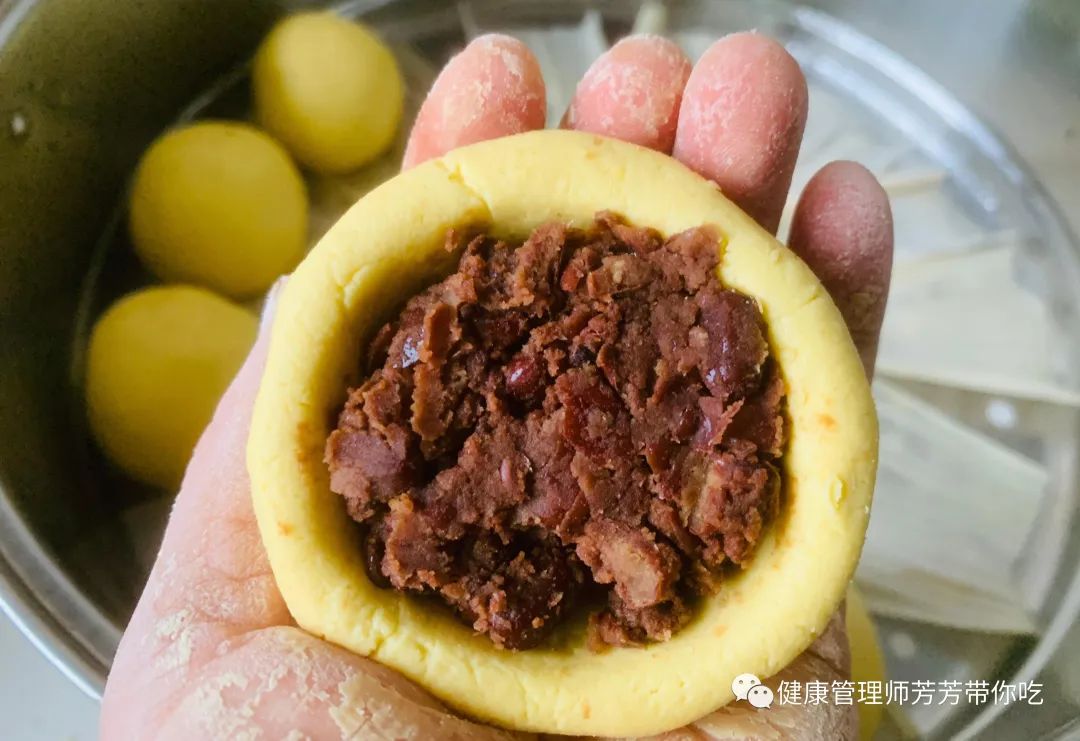
5. Divide the dough into small pieces of moderate size, roll them into balls, and then use your thumb to press down in the center to create a well. Fill it with the pre-made red bean paste, pinch the edges together, and roll it into a ball again. The raw sticky bean bun is now ready.
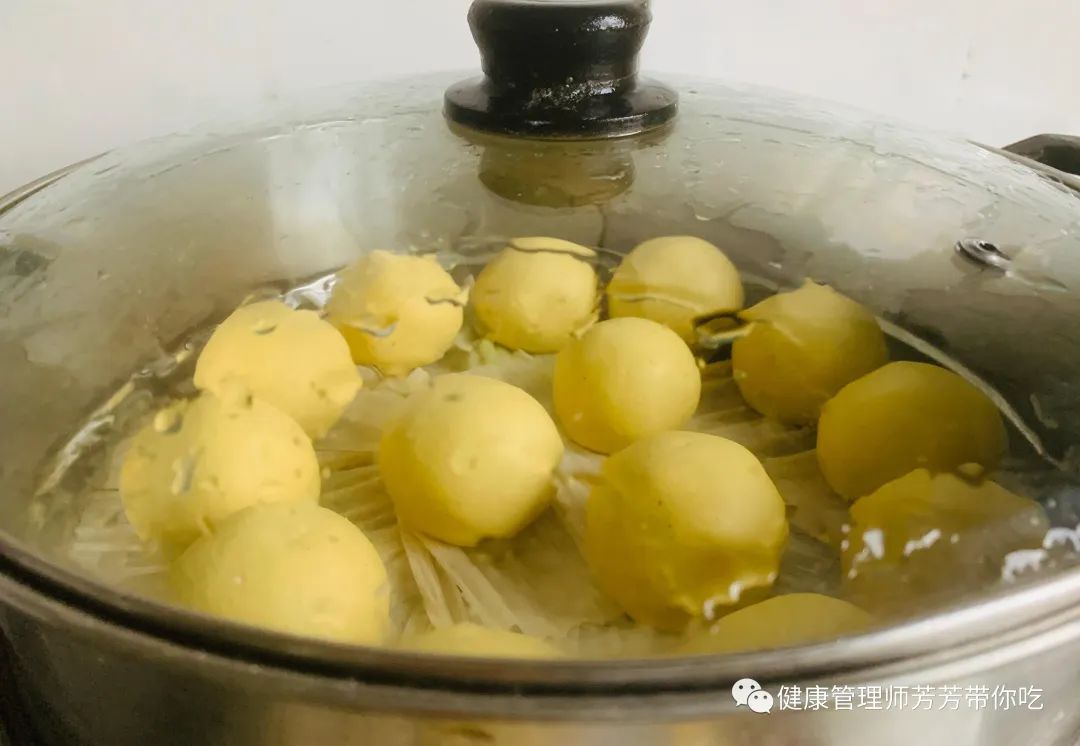
6. Place the raw sticky bean buns in a steamer (with corn husks laid out in advance to prevent sticking).
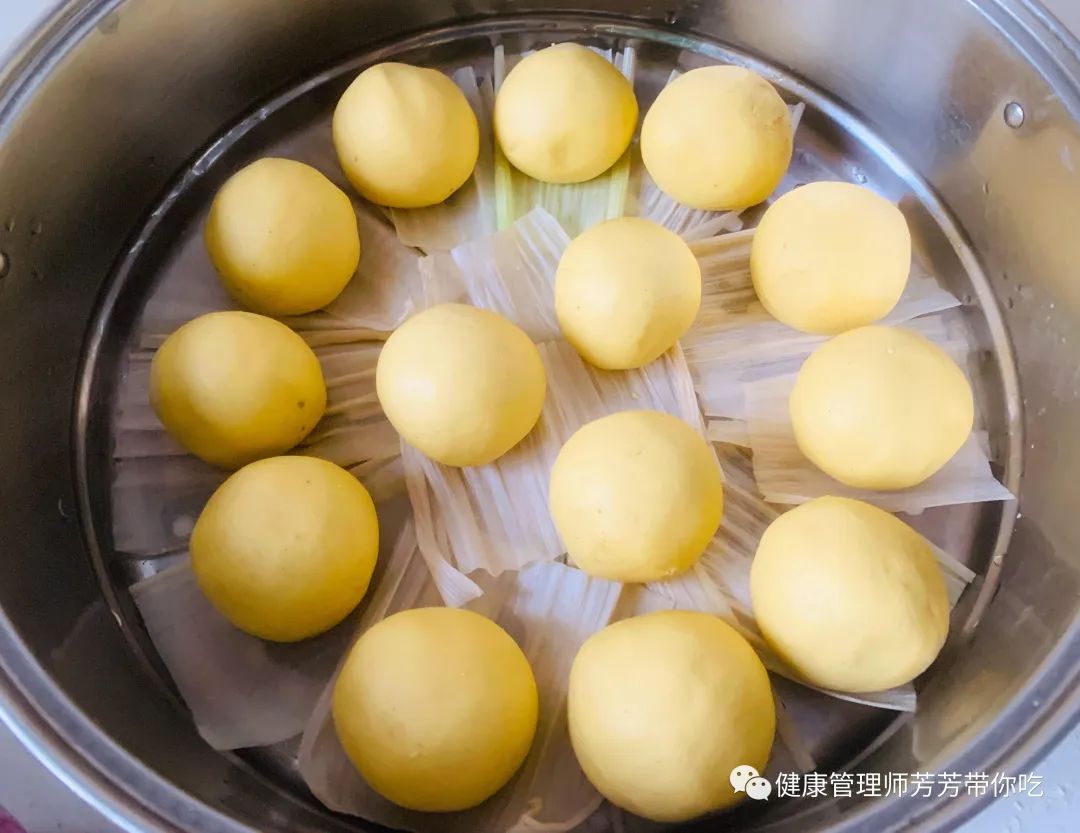
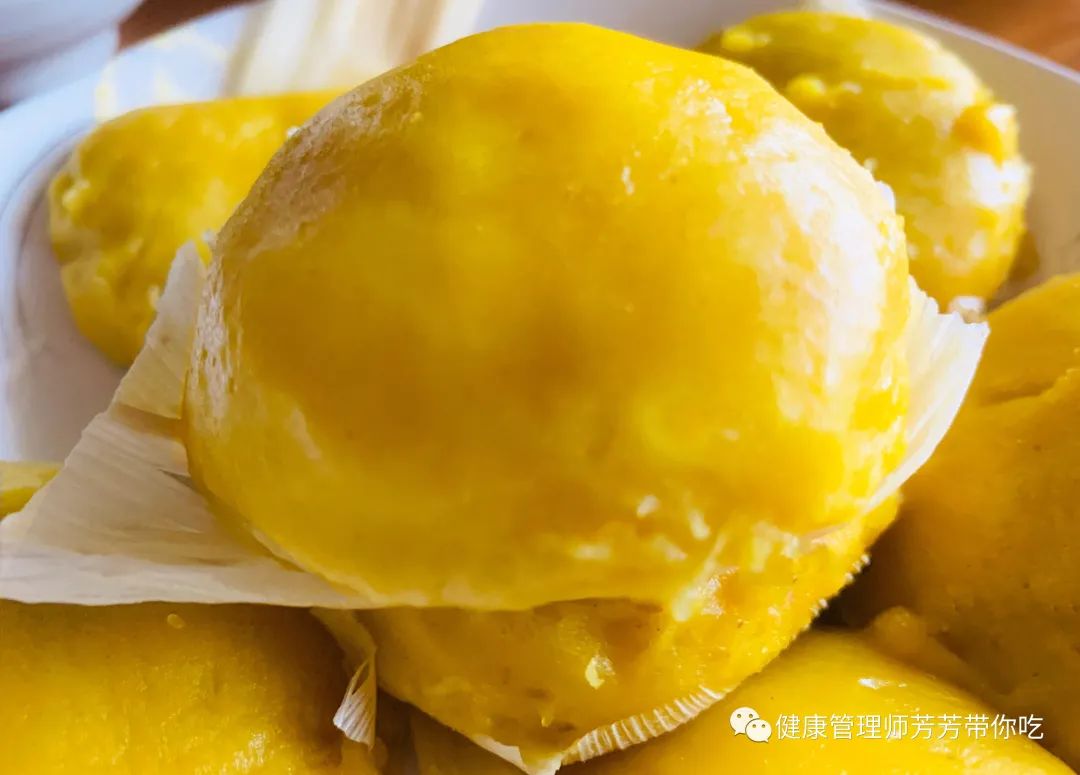
7. Add enough water to the steamer, place the steamer with the arranged sticky bean buns on top, and without needing a second rise, heat directly. Bring to a boil over high heat, then reduce to medium heat and steam for twenty minutes. Turn off the heat and let it sit for three minutes before opening the lid. The fragrant, sticky, and chewy Northeastern sticky bean buns are now ready.
Enjoy the steamed sticky bean buns while they are hot. Use chopsticks to separate any that are stuck together. The leftovers can be cooled at room temperature. Once they are no longer sticking to each other, place them in a sealed bag and store them in the refrigerator. They should be consumed within a week.
This sticky bean bun made with yellow millet flour is not only delicious but also filling, as it can prolong the feeling of fullness and delay gastric emptying, making it particularly satisfying. In the cold autumn and winter, making and enjoying this food can continuously provide energy to the body, preventing hunger before meal times, naturally enhancing the body’s ability to resist cold, so to speak, “a full stomach keeps the body warm.”
That’s all for today’s article. Thank you for reading! Don’t forget to like, follow, and share. See you next time!