This article will provide a hands-on tutorial for deploying the widely discussed stable-diffusion-webui project on the Qudong Cloud platform!
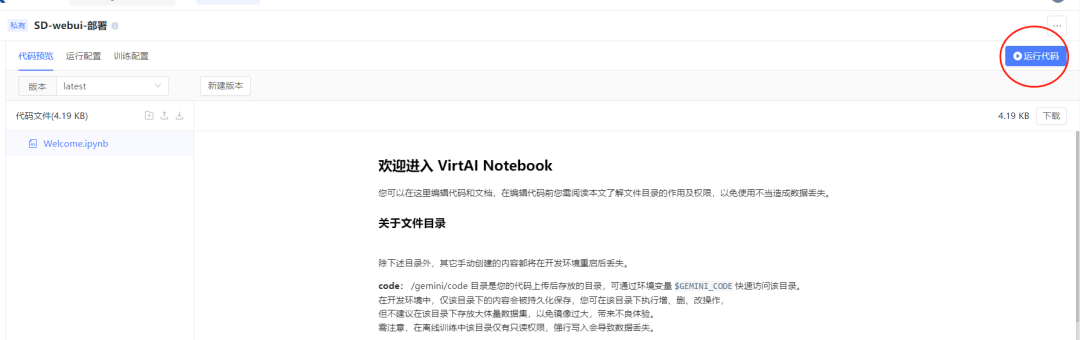
Create a Project
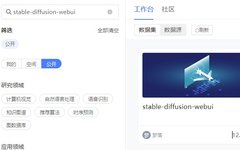
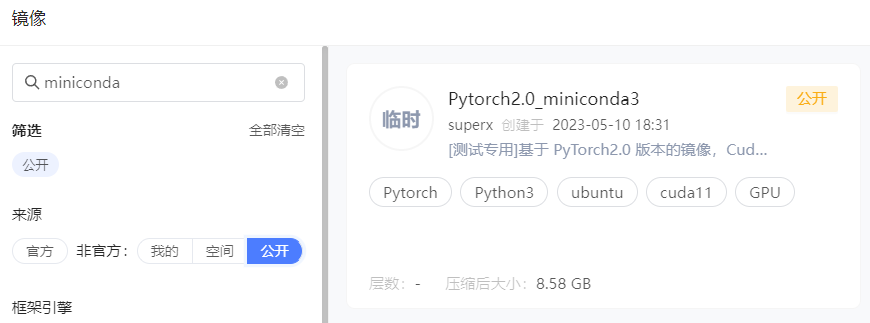
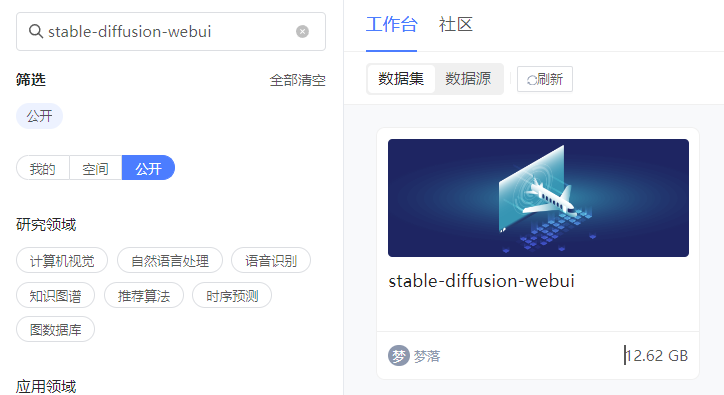
First, create a project named SD-webui-deployment (you can choose any name), select the appropriate image Pytorch2.0_miniconda3 (created by Qudong Cloud user superx, thanks for sharing!) and the dataset stable-diffusion-webui (created by Qudong Cloud user Mengluo, thanks for sharing!). You can search for them by keywords in the respective fields.
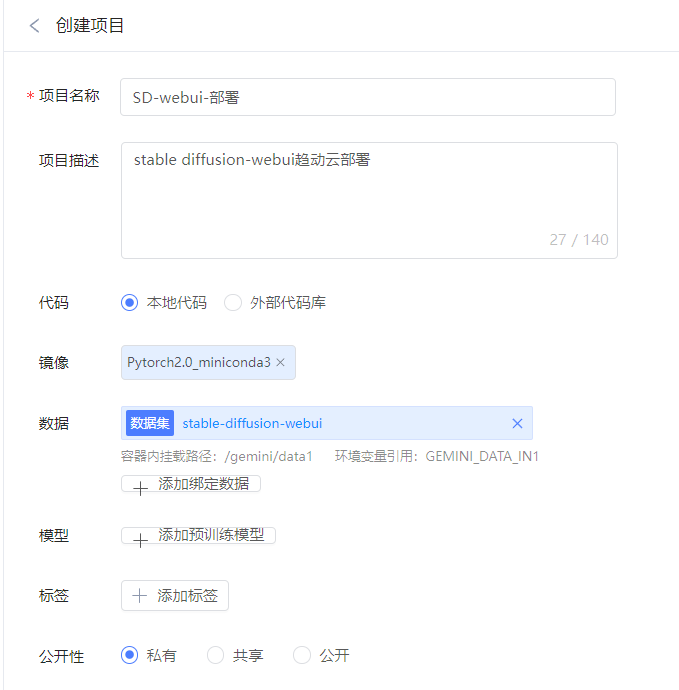
Please note that when creating the project, choose not to upload the code, as the code and resources are already included in the dataset.
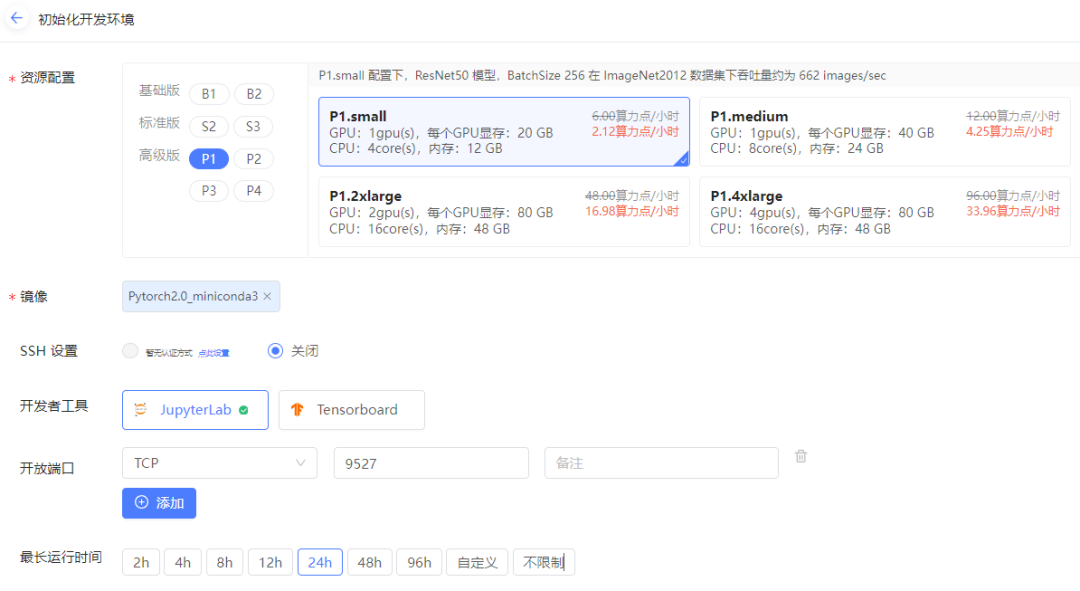
Initialize Development Environment
After creating the project, go to Run Code to configure the resources.
The computing resource selected is the P1.small model (which is affordable and sufficient), and we need to open a port. Here, I filled in 9527, and the maximum running time can be selected according to personal needs (according to this tutorial, the entire process should be completed within 10 minutes). Click confirm, as shown in the figure below.
After confirming your selections, the system will begin allocating resources. Within a minute, the hardware configuration, system environment, and data resources will be set up.
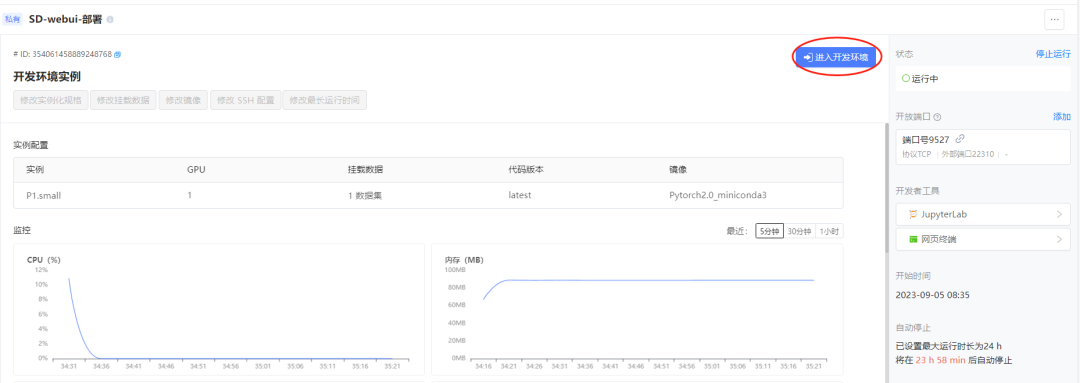
The screenshot above indicates that the configuration is complete. At this point, click Enter Development Environment to access a fully prepared machine for development.
Enter Development Environment
After clicking Enter Development Environment, we can view data and files, edit code in Jupyterlab, and execute command line operations through the Web Terminal.
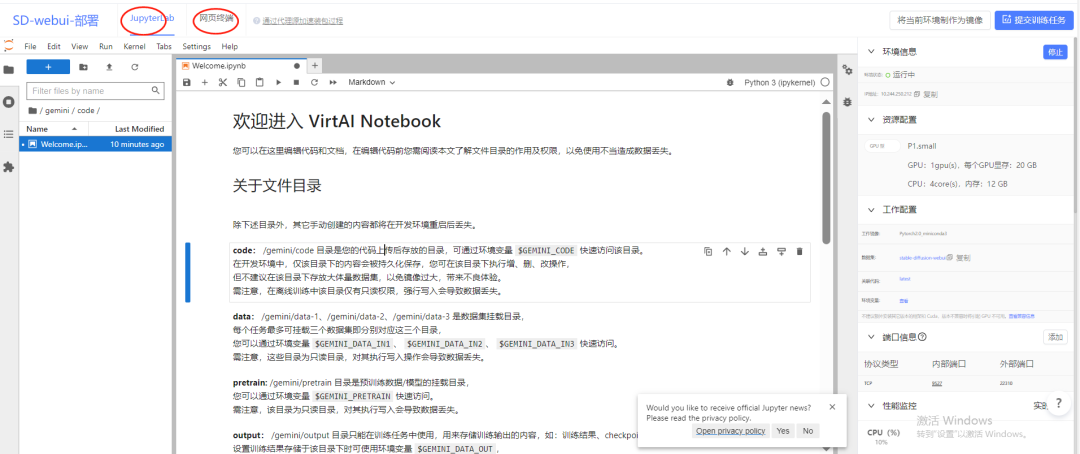
The subsequent processes for deploying Stable Diffusion can be completely operated through the web terminal.
The first step is to switch to the Qudong Cloud apt and pip sources.
In the Web Terminal input
cp /etc/apt/sources.list /etc/apt/sources.listBak &&
sed -i "s#http://archive.ubuntu.com/ubuntu/#https://mirrors.virtaicloud.com/repository/ubuntu/#g" /etc/apt/sources.list &&
sed -i "s#http://security.ubuntu.com/ubuntu/#https://mirrors.virtaicloud.com/repository/security/#g" /etc/apt/sources.list &&
apt update
pip config set global.index-url https://pypi.virtaicloud.com/repository/pypi/simple
This step can speed up the installation of Python packages and apt software tools, and it is recommended to change the source for every Qudong Cloud project.
The second step is to prepare model data and the software that needs to be installed.
Unzip the data:
unzip /gemini/data-1/stable-diffusion-webui.zip -d /gemini/code
Copy the software to be installed:
cp /gemini/data-1/install /gemini/code/ -r
Copy the stable diffusion model files:
cp /gemini/data-1/models /gemini/code/stable-diffusion-webui/ -r
The third step is to install the software and initiate the SD-webui project.
Install the software:
bash /gemini/data-1/install.sh
Configure the environment:
bash
conda activate sd-webui
Initiate the SD-webui project:
cd /gemini/code/stable-diffusion-webui
bash start.sh
Loading the model and running the SD project will take some time, and when a public link appears, it indicates that the run was successful:
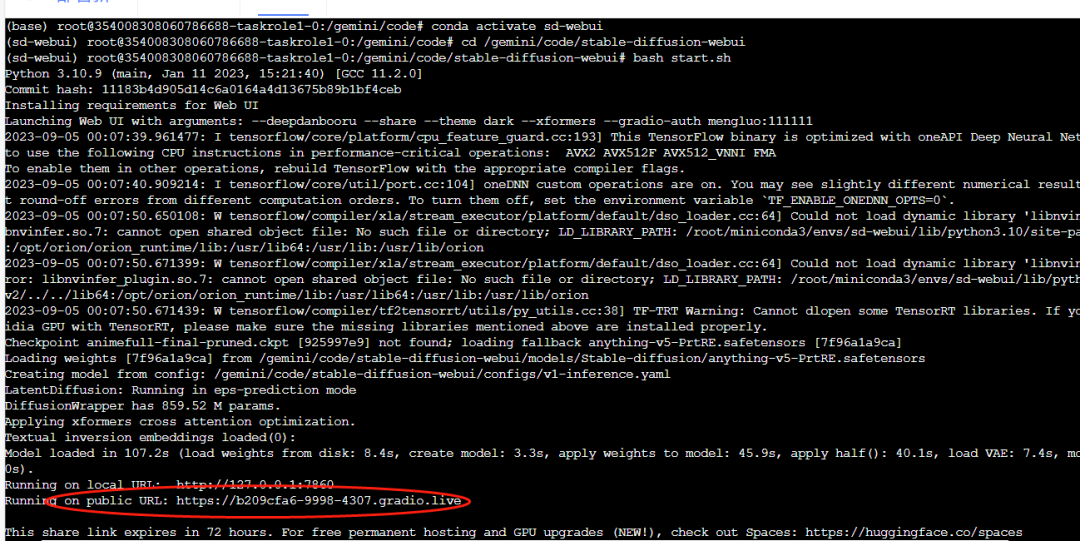
At this point, you can copy the public link above and open it in your local browser. This public link is valid for 72 hours.
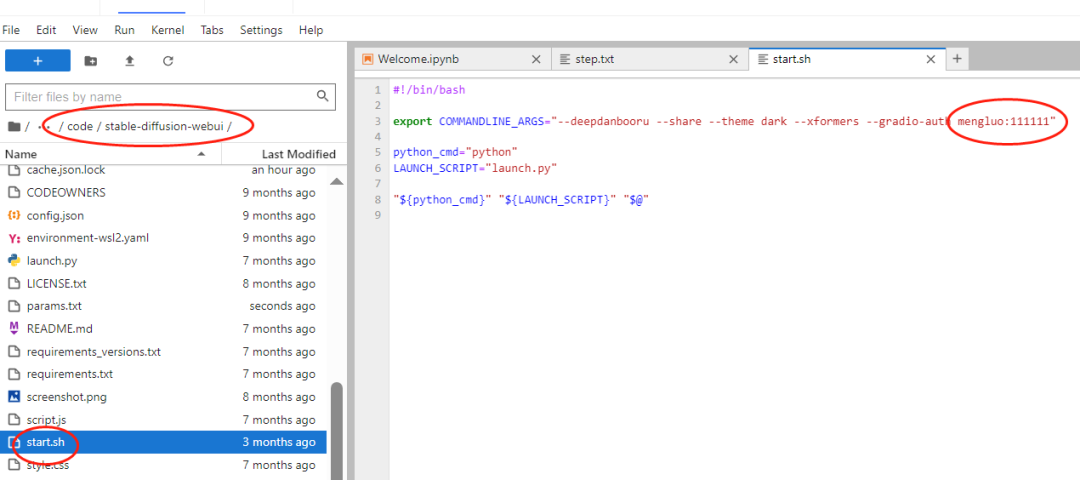
Please note that to access the above public address, you need to log in. The username and password are set by the dataset creator Mengluo as mengluo and 111111, respectively. If you want to change them, you can modify them in the /gemini/code/stable-diffusion-webui/start.sh file.
Try Out Stable Diffusion!
After logging in, enter the SD-webui project, as shown below:
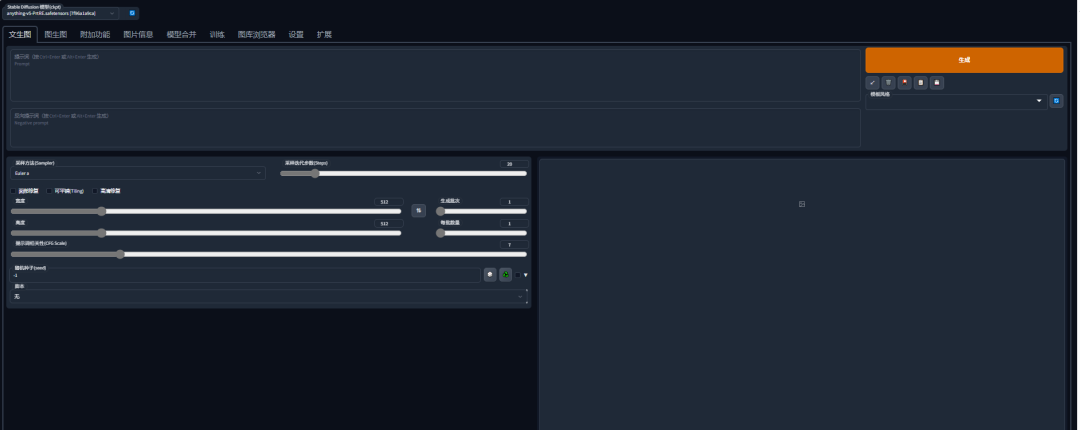
You can enter positive and negative prompts in the two input boxes in the upper left corner, and the generated results will appear in the lower right corner.
I first used a simple statement for testing.
Using only positive prompts:
two black ducks
The result obtained:
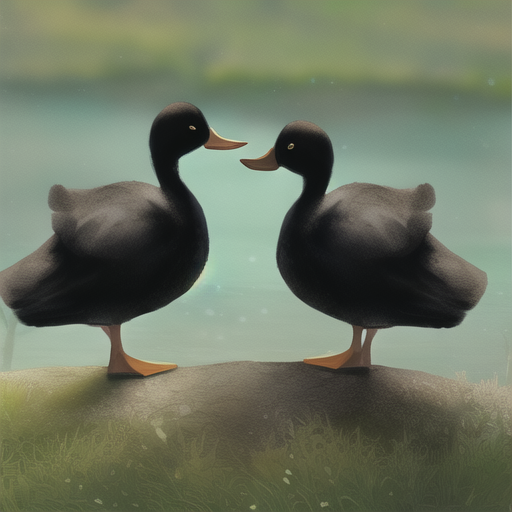
Both the quantity and color are correct.
Using only positive prompts:
Three guards, armed with spears
The result obtained:
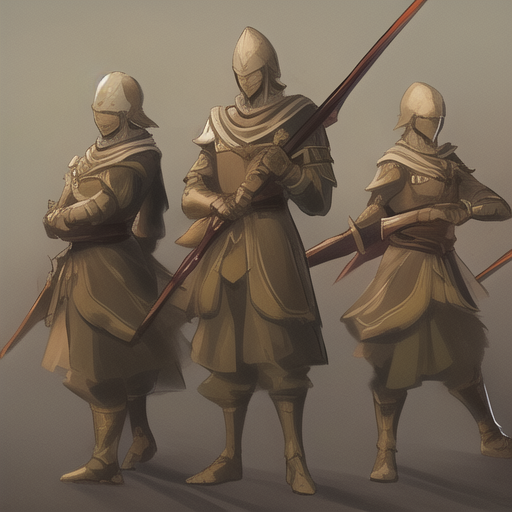
The quantity, scene, and characters are all correct. It feels so easy to draw with it!
I found some complex prompts online to test.
Positive prompts:
space girl, standing alone on hill, centered, detailed gorgeous face, anime style, key visual, intricate detail, highly detailed, breathtaking, vibrant, panoramic, cinematic, Carne Griffiths, Conrad Roset, ghibli
Negative prompts:
easynegative,,badhandv4,nfixer, nartfixer, nrealfixer, (jewelry),(big breasts, large breasts), CGI, 3d, doll, octane, render, cartoon, anime, illustration, drawing, digital art, digital painting, sketch, lowres, text, cropped, worst quality, low quality, jpeg artifacts, ugly, duplicate, poorly drawn hands, poorly drawn face, deformed, blurry, logo, big hands, ugly mouth, ugly eyes, missing teeth, crooked teeth, close up, out of frame, morbid, mutilated, extra fingers, mutation, dehydration, bad anatomy, bad proportions, extra limbs, cloned face, disfigured, gross proportions, malformed limbs, missing arms, missing legs, extra arms, extra legs, fused fingers, too many fingers, long neck, (more than two arms per body:1.5),(more than two legs per body:1.5),(more than five fingers on one hand:1.5)
The result obtained:

The effect is indeed stunning! The details are also very beautiful!
Welcome everyone to deploy your own diffusion model project on Qudong Cloud!
Connecting Computing Power • Connecting People
Register to receive a 168 yuan trial fund! https://growthdata.virtaicloud.com/t/Va

For more benefits, scan the code to add the assistant and invite you to join the group~
Scan the code to register for a Qudong Cloud account and follow the Qudong Cloud service account to receive an additional 10 yuan computing power credit

Please contact the assistant after registering to receive it immediately
▼HOT
Qudong Cloud is hotly registering! Click “Read the Original” to try it out~