

If you want to sell products or services online but can’t find suitable software or feel that customization costs are too high, then Scipio ERP might be just what you need.
Scipio ERP is an open-source e-commerce framework based on Java, with a comprehensive set of applications and features. This project forked from Apache OFBiz in 2014, focusing on better customization and a more modern appeal. This e-commerce component is very rich, capable of operating in a multi-store environment while supporting internationalization, with a dazzling array of product configurations, and it is compatible with modern HTML frameworks. The software also provides standard applications for many other business scenarios, such as accounting, warehouse management, or sales team automation. It is all highly standardized, making it easy to customize, which is fantastic if you want more than just a virtual shopping cart.
The system also makes it very easy to keep up with modern web standards. All interfaces are built using the system’s “template toolkit,” which is an easy-to-learn macro set that separates HTML from all applications. Because of this, each application has already been standardized to the core. Sound confusing? It really isn’t HTML—it looks a lot like HTML, but you write a lot less.
Initial Installation
Before you begin, make sure you have installed the Java 1.8 (or higher) SDK and a Git client. Done? Great! Next, switch to the master branch on GitHub:
git clone https://github.com/ilscipio/scipio-erp.git
cd scipio-erp
git checkout master
To install the system, simply run ./install.sh and choose any option from the command line. During development, it is best to always use the “installation for development” (option 1), which will also install a series of demo data. For a professional installation, you can modify the initial configuration data (“seed data”) to automatically set up your company and directory data. By default, the system will run using an internal database, but it can also be configured to use various relational databases such as PostgreSQL and MariaDB.
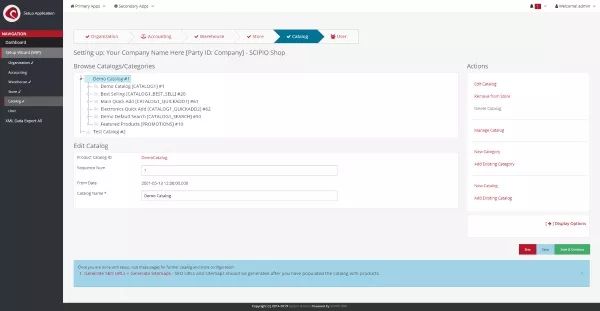
Complete the initial configuration through the installation wizard
Start the system with the command ./start.sh and then open the link https://localhost:8443/setup/ to complete the configuration. If you installed demo data, you can log in with the username admin and password scipio. In the installation wizard, you can set up company profiles, accounting, warehouses, product catalogs, online stores, and additional user configuration information. Temporarily skip the configuration of the website entity on the product store configuration interface. The system allows you to run multiple online stores using different underlying code; unless you want to do this, it’s easiest to always choose the default values.
Congratulations, you have just installed Scipio ERP! Spend a minute or two navigating the interface to get a feel for its capabilities.
Shortcuts
Before you dive into customization, here are some handy commands to help you:
./ant create-component-shop-override./ant create-component./ant create-theme./ant create-admin-user-login./ant -p./git-addons helpAdditionally, take note of the following locations:
/tools/scripts//runtime/logs<https://localhost:8443/admin/><https://localhost:8443/shop/>Finally, Scipio ERP builds all code within the following five main directories:
framework: Framework-related sources, application server, common interface, and configurationapplications: Core applicationsaddons: Third-party extensionsthemes: Modify interface appearancehot-deploy: Your own componentsApart from some configurations, you will be developing in the hot-deploy and themes directories.
Customizing the Online Store
To truly make the system your own, start thinking about using components. Components are a modular approach that can override, extend, and add to the system. You can think of components as independent web modules that can capture information about databases (entities), functionality (services), interfaces (views), events, operations, and web applications. With the functionality of components, you can add your own code while keeping compatibility with the original source.
Run the command ./ant create-component-shop-override and follow the steps to create your online store component. This action will create a new directory within the hot-deploy directory that will extend and override the original e-commerce application.
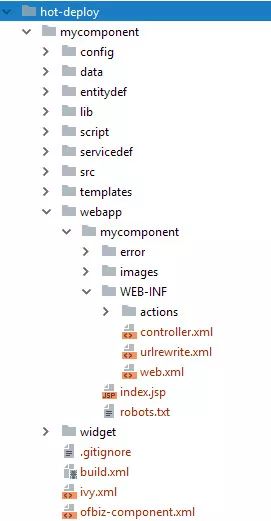
A typical component directory structure.
Your component will have the following directory structure:
config: Configurationdata: Seed dataentitydef: Database table definitionsscript: Location of Groovy scriptsservicedef: Service definitionssrc: Java classeswebapp: Your web applicationwidget: Interface definitionsAdditionally, the ivy.xml file allows you to add Maven libraries to the build process, and the ofbiz-component.xml file defines the entire component and web application structure. Apart from some visible in the current directory, you can also find the controller.xml file in the WEB-INF directory of the web application. This allows you to define request entities and connect them to events and interfaces. For interfaces, you can also use the built-in CMS functionality, but prioritize sticking to the core mechanisms. Familiarize yourself with /applications/shop/ before introducing changes.
Adding Custom Interfaces
Remember the template toolkit? You’ll find it used in every interface. You can think of it as a set of easy-to-learn macros used to build everything. Here’s an example:
<@section title="Title">
    <@heading id="slider">Slider</@heading>
    <@row>
        <@cell columns=6>
            <@slider id="" class="" controls=true indicator=true>
                <@slide link="#" image="https://placehold.it/800x300">Just some content…</@slide>
                <@slide title="This is a title" link="#" image="https://placehold.it/800x300"></@slide>
            </@slider>
        </@cell>
        <@cell columns=6>Second column</@cell>
    </@row>
</@section>
Not too difficult, right? Meanwhile, themes contain HTML definitions and styles. This empowers your front-end developers who can define the output of each macro and stick to their own build tools for development.
Let’s try it out quickly. First, define a request on your own online store. You will modify this code. A built-in CMS system can also be accessed via https://localhost:8443/cms/, which allows you to create new templates and interfaces more effectively. It is fully compatible with the template toolkit and comes with example templates that can be adopted to your liking. But since we are trying to understand the system here, let’s take a more complex approach first.
Open the controller.xml file in your store’s webapp directory. The controller tracks request events and acts accordingly. The following action will create a new request under /shop/test:
<!-- Request Mappings -->
<request-map uri="test">
     <security https="true" auth="false"/>
      <response name="success" type="view" value="test"/>
</request-map>
You can define multiple responses, and if necessary, use events or service calls in the request to determine which responses you might want to use. I chose a “view” type response. A view is a rendered response; other types are request redirects, forwards, etc. The system comes with various renderers that allow you to determine the output later; for this, please add the following:
<!-- View Mappings -->
<view-map name="test" type="screen" page="component://mycomponent/widget/CommonScreens.xml#test"/>
Replace my-component with your own component name. Then, you can define your first interface by adding the following content within the widget/CommonScreens.xml file:
<screen name="test">
        <section>
            <actions>
            </actions>
            <widgets>
                <decorator-screen name="CommonShopAppDecorator" location="component://shop/widget/CommonScreens.xml">
                    <decorator-section name="body">
                        <platform-specific><html><html-template location="component://mycomponent/webapp/mycomponent/test/test.ftl"/></html></platform-specific>
                    </decorator-section>
                </decorator-screen>
            </widgets>
        </section>
    </screen>
The store interface is actually very modular, consisting of multiple elements (widgets, actions, and decorators). For simplicity, just keep it as is for now and complete the new webpage by adding your first template toolkit file. To do this, create a new webapp/mycomponent/test/test.ftl file and add the following content:
<@alert type="info">Success!</@alert>
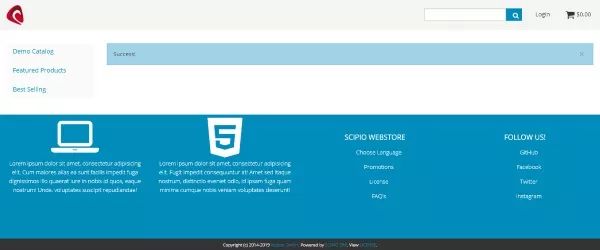
A custom interface.
Open https://localhost:8443/shop/control/test/ and marvel at your own achievement.
Customizing Themes
Modify the appearance of the store interface by creating your own theme. All themes can be found as components in the themes folder. Run the command ./ant create-theme to create your own theme.
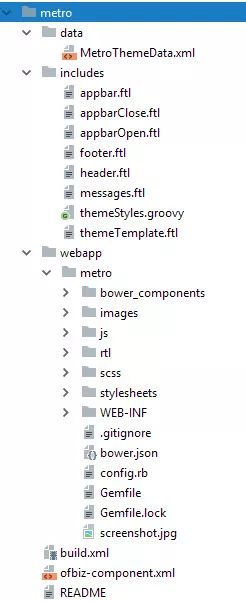
A typical theme component layout.
Here is the list of the most important directories and files:
data/*ThemeData.xmlincludes/*.ftlincludes/themeTemplate.ftlincludes/themeStyles.ftlwebapp/theme-title/Quickly browse the Metro theme in the toolkit; it uses the Foundation CSS framework and takes full advantage of it. Then, set up your own theme in the newly built webapp/theme-title directory and start developing. The Foundation-shop theme is a very simple store-specific theme implementation that you can use as a basis for your own work.
Look! You have built your own online store, ready for personalization!
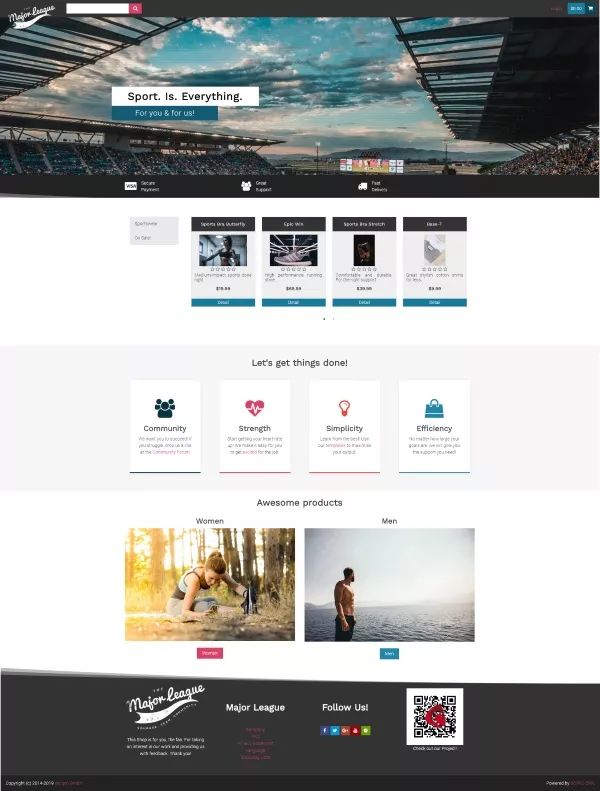
An online store built on Scipio ERP.
What’s Next?
Scipio ERP is a powerful framework that simplifies the development of complex e-commerce applications. For a more complete understanding, please check the project documentation, try the online demo, or join the community.
via: https://opensource.com/article/19/1/scipio-erp
Author: Paul Piper, Edited by: lujun9972, Translator: laingke, Proofreader: wxy
This article is originally compiled by LCTT and proudly presented by Linux China.