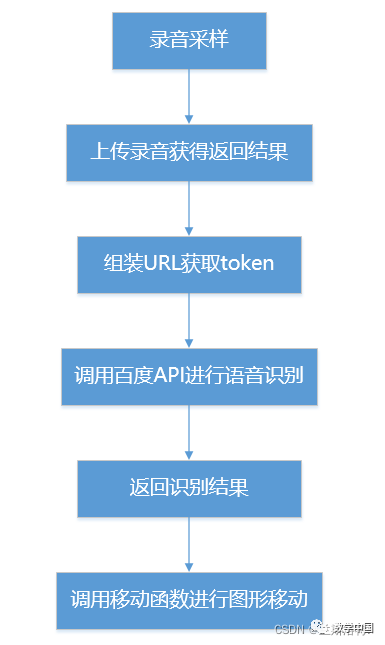
The topic is simple: using voice recognition to identify spoken words and control the movement of graphics based on the content of those words. For example, if you say ‘up’, the graphic on the canvas will move upwards. This article uses the Baidu recognition API (because it’s free). Here’s a flowchart I created:
Without further ado, let’s start with the program design. First, log into Baidu Cloud and create an application.
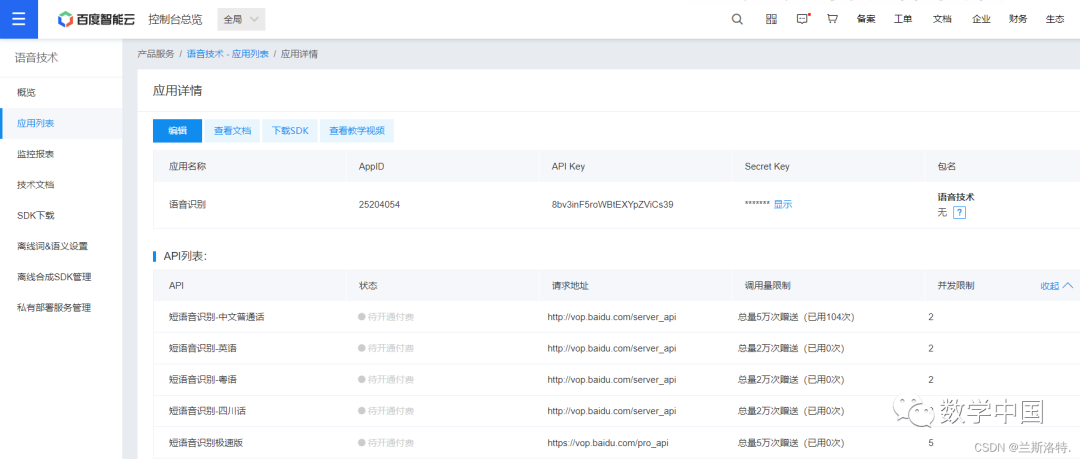
Note the API Key and Secret Key here; you must use your own for them to be effective.
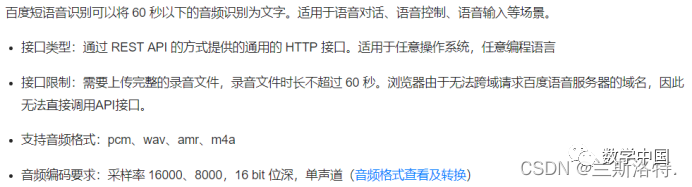
Baidu’s voice recognition has corresponding documentation that clearly explains how to call the API. If you want to learn more, you can check the REST API documentation.
The documentation is very detailed, and this article only explains the methods used. The voice recognition method involves assembling a URL to get a token, then processing the local audio and sending it to the Baidu voice recognition server in JSON format to obtain the return result.
Baidu voice recognition supports multiple formats such as pcm and wav; the Baidu server will convert non-pcm formats to pcm format. Therefore, using wav or amr formats will incur extra conversion time. Saving in pcm format can be recognized, but the built-in Windows player cannot recognize pcm format, so we use wav format instead and reference the wave library, which allows reading and writing wav type audio files. The sampling rate uses a fixed value of 16000 for pcm sampling, and the encoding is 16-bit mono.
The recording function uses the PyAudio library, which is an audio processing module for Python, used to stream audio to the computer’s sound card. It opens a new audio file in the current folder for recording and stores the recording data. Local recording:
def save_wave_file(filepath, data): wf = wave.open(filepath, 'wb') wf.setnchannels(channels) wf.setsampwidth(sampwidth) wf.setframerate(framerate) wf.writeframes(b''.join(data)) wf.close() # Recordingdef my_record(): pa = PyAudio() # Open a new audio stream stream = pa.open(format=paInt16, channels=channels, rate=framerate, input=True, frames_per_buffer=num_samples) my_buf = [] # Store recording data t = time.time() print('Recording...') while time.time() < t + 5: # Set recording time (seconds) # Loop read, each read 2000 frames string_audio_data = stream.read(num_samples) my_buf.append(string_audio_data) print('Recording ended.') save_wave_file(FILEPATH, my_buf) stream.close()Next is obtaining the token. Use the APIKey and SecretKey obtained from creating the application to assemble the URL for getting the token. In the voice recognition function, call the obtained token and the recorded audio data, writing it into the JSON parameters for audio upload as required.
Baidu voice requires base64 encoding of local voice binary data, using the base64 library for encoding. The recognition request is submitted using the POST method, and the recognition function writes the short voice recognition request address provided by Baidu. The recognition result will be returned immediately, packaged in JSON format, with the recognition result placed in the “result” field of the JSON, uniformly encoded in utf-8.
# Assemble URL to get tokenbase_url = "https://openapi.baidu.com/oauth/2.0/token?grant_type=client_credentials&client_id=%s&client_secret=%s"APIKey = "*****************"SecretKey = "********************"HOST = base_url % (APIKey, SecretKey) def getToken(host): res = requests.post(host) r = res.json()['access_token'] return r # Pass voice binary data, token# dev_pid is one of the language options provided by Baidu voice recognition, default 1537 is Mandarin with punctuationdef speech2text(speech_data, token, dev_pid=1537): FORMAT = 'wav' RATE = '16000' CHANNEL = 1 CUID = '*******' SPEECH = base64.b64encode(speech_data).decode('utf-8') data = { 'format': FORMAT, 'rate': RATE, 'channel': CHANNEL, 'cuid': CUID, 'len': len(speech_data), 'speech': SPEECH, 'token': token, 'dev_pid': dev_pid } url = 'https://vop.baidu.com/server_api' # Short voice recognition request address headers = {'Content-Type': 'application/json'} print('Recognizing...') r = requests.post(url, json=data, headers=headers) Result = r.json() if 'result' in Result: return Result['result'][0] else: return ResultFinally, we write the control movement function. First, we need to know how to control the movement of the graphic to present it. In this project, we use the tkinter module. Tkinter is a Python module that is an interface to Tcl/Tk, a cross-platform script graphic interface. It is a popular Python graphic programming interface. The biggest feature is cross-platform, while its downside is that performance is not very good and execution speed is slow.
We use the canvas in tkinter to set up a drawing board and create a rectangle with event ID 1, displaying it on the canvas. We add a Button to the canvas, where the callback writes the corresponding function, triggering audio recording and voice recognition upon click. To make the code cleaner, we place the movement function in the voice recognition function, and after getting the recognition result, we make a judgment based on the result to move the graphic accordingly.
def move(result): print(result) if "up" in result: canvas.move(1, 0, -30) # Move the object with ID 1【move(2,0,-5) moves the object with ID 2】, increasing x by 0 and decreasing y by 30 elif "down" in result: canvas.move(1, 0, 30) elif "left" in result: canvas.move(1, -30, 0) elif "right" in result: canvas.move(1, 30, 0) tk = Tk()tk.title("Voice Recognition Control Graphic Movement")Button(tk, text="Start Recording", command=AI.my_record).pack()Button(tk, text="Start Recognition", command=speech2text).pack()canvas = Canvas(tk, width=500, height=500) # Set up canvascanvas.pack() # Display canvasr = canvas.create_rectangle(180, 180, 220, 220, fill="red") # Event ID 1mainloop()As a personal habit, I wrote the voice recognition and graphic control in two separate files, which led to the inability to use the return values from the functions in the AI.py file in the main.py file because the tkinter module runs in a continuous loop through mainloop(). This continuous loop prevents the return values from being called. The method I used is to rebuild the functions in main.py to call the functions in AI.py and declare global variables, placing the return values from AI.py into global variables in main.py, thus obtaining the return values, and then writing the functions into Button callbacks to achieve the corresponding functionality.
Actually, the code is quite complicated; having it all in one file would be simpler. I drew the call relationship between the two files:

The complete demo is as follows:
AI.py
import wave # Read and write wav type audio files.import requests # HTTP library based on urllib, licensed under Apache2 open-source protocol. Used in this project to pass headers and POST requestsimport timeimport base64 # Baidu voice requires base64 encoding of local voice binary datafrom pyaudio import PyAudio, paInt16 # Audio processing module for streaming audio to the computer's sound card framerate = 16000 # Sampling ratenum_samples = 2000 # Sampling pointschannels = 1 # Channelsampwidth = 2 # Sampling width 2 bytesFILEPATH = 'speech.wav' # Assemble URL to get tokenbase_url = "https://openapi.baidu.com/oauth/2.0/token?grant_type=client_credentials&client_id=%s&client_secret=%s"APIKey = "8bv3inF5roWBtEXYpZViCs39"SecretKey = "HLXYiLGCpeOD6ddF1m6BvwcDZVOYtwwD"HOST = base_url % (APIKey, SecretKey) def getToken(host): res = requests.post(host) r = res.json()['access_token'] return r def save_wave_file(filepath, data): wf = wave.open(filepath, 'wb') wf.setnchannels(channels) wf.setsampwidth(sampwidth) wf.setframerate(framerate) wf.writeframes(b''.join(data)) wf.close() # Recordingdef my_record(): pa = PyAudio() # Open a new audio stream stream = pa.open(format=paInt16, channels=channels, rate=framerate, input=True, frames_per_buffer=num_samples) my_buf = [] # Store recording data t = time.time() print('Recording...') while time.time() < t + 5: # Set recording time (seconds) # Loop read, each read 2000 frames string_audio_data = stream.read(num_samples) my_buf.append(string_audio_data) print('Recording ended.') save_wave_file(FILEPATH, my_buf) stream.close() def get_audio(file): with open(file, 'rb') as f: data = f.read() return data # Pass voice binary data, token# dev_pid is one of the language options provided by Baidu voice recognition, default 1537 is Mandarin with punctuationdef speech2text(speech_data, token, dev_pid=1537): FORMAT = 'wav' RATE = '16000' CHANNEL = 1 CUID = '*******' SPEECH = base64.b64encode(speech_data).decode('utf-8') data = { 'format': FORMAT, 'rate': RATE, 'channel': CHANNEL, 'cuid': CUID, 'len': len(speech_data), 'speech': SPEECH, 'token': token, 'dev_pid': dev_pid } url = 'https://vop.baidu.com/server_api' # Short voice recognition request address headers = {'Content-Type': 'application/json'} print('Recognizing...') r = requests.post(url, json=data, headers=headers) Result = r.json() if 'result' in Result: return Result['result'][0] else: return Resultmain.py
import AIfrom tkinter import * # Import all content from the tkinter module token = Nonespeech = Noneresult = None def getToken(): temptoken = AI.getToken(AI.HOST) return temptoken def speech2text(): global token if token is None: token = getToken() speech = AI.get_audio(AI.FILEPATH) result = AI.speech2text(speech, token, dev_pid=1537) print(result) move(result) def move(result): print(result) if "up" in result: canvas.move(1, 0, -30) # Move the object with ID 1【move(2,0,-5) moves the object with ID 2】, increasing x by 0 and decreasing y by 30 elif "down" in result: canvas.move(1, 0, 30) elif "left" in result: canvas.move(1, -30, 0) elif "right" in result: canvas.move(1, 30, 0) tk = Tk()tk.title("Voice Recognition Control Graphic Movement")Button(tk, text="Start Recording", command=AI.my_record).pack()Button(tk, text="Start Recognition", command=speech2text).pack()canvas = Canvas(tk, width=500, height=500) # Set up canvascanvas.pack() # Display canvasr = canvas.create_rectangle(180, 180, 220, 220, fill="red") # Event ID 1mainloop()File relationships
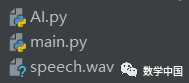
The recorded audio will be automatically saved in the current folder as ‘speech.wav’
Testing results, running
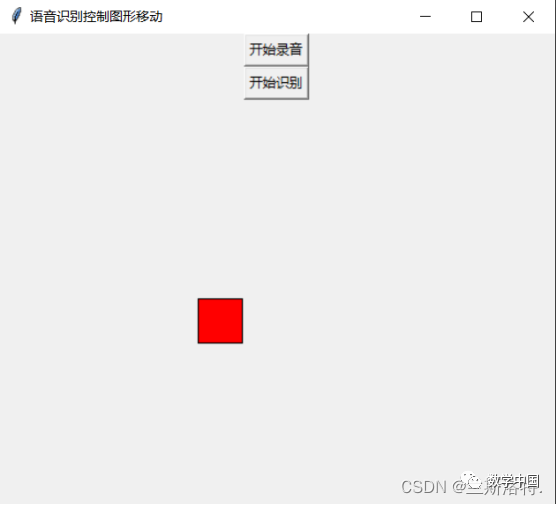
Click to start recording

Click to start recognition

Then you can see the graphic moving to the right
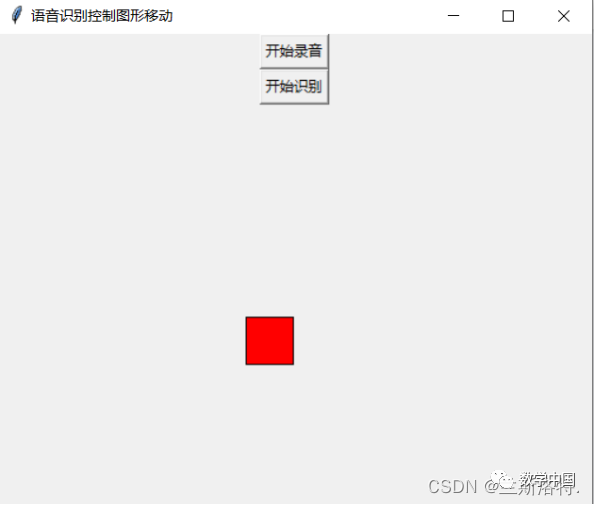
Testing showed that shouting works better.
This article is sourced from the internet; if there is any infringement, please delete it immediately.
Original link: https://blog.csdn.net/weixin_45973679/article/details/121709190