Introduction
The main difference between the CPU version and the GPU version is the running speed; the GPU version runs faster. Therefore, if your computer’s graphics card supports CUDA, it is recommended to install the GPU version.
The CPU version requires no additional preparation and can generally be installed on any computer without needing a dedicated graphics card (if you want to install the CPU version, please refer to another tutorial on installing TensorFlow CPU published today by this account!).
The GPU version requires downloading CUDA and cuDNN in advance (this article is a tutorial for installing the GPU version).
Preparation for Installing TensorFlow GPU Version
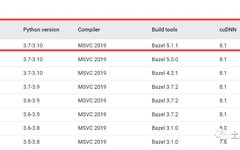
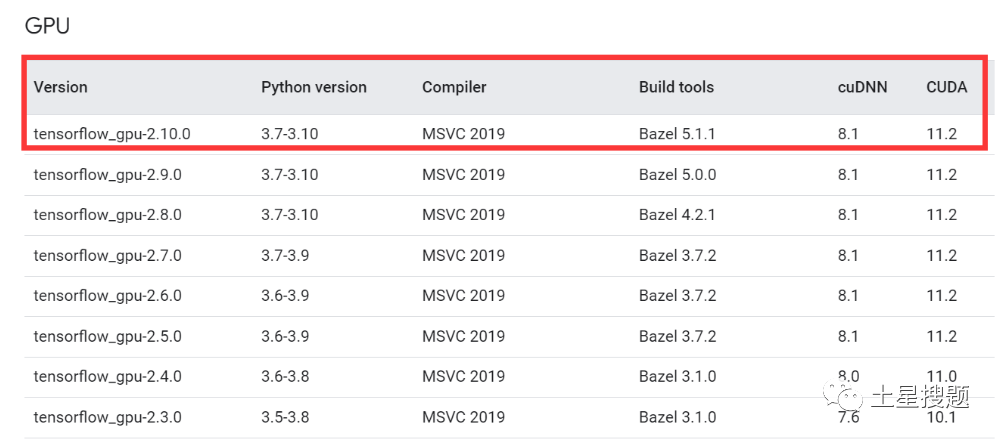
Before installation, be sure to check your computer’s environment configuration and then check the compatibility of TensorFlow GPU, Python, CUDA, and cuDNN versions, which must match one-to-one!
Official website for checking compatibility between TensorFlow GPU and Python, CUDA, cuDNN versions:
https://tensorflow.google.cn/install/source_windows?hl=en
My installation environment is:

My TensorFlow GPU installation version is:

This compatibility information is based on successful installation cases found online; do not randomly combine versions, as this can easily lead to installation failures. Alternatively, you can follow the combinations suggested on the official website, as the installation process is the same!
1. Check your computer’s graphics card:
1. Right-click on This PC → Manage → Device Manager → Display Adapters
Look for the dedicated graphics card: GeForce RTX 2050
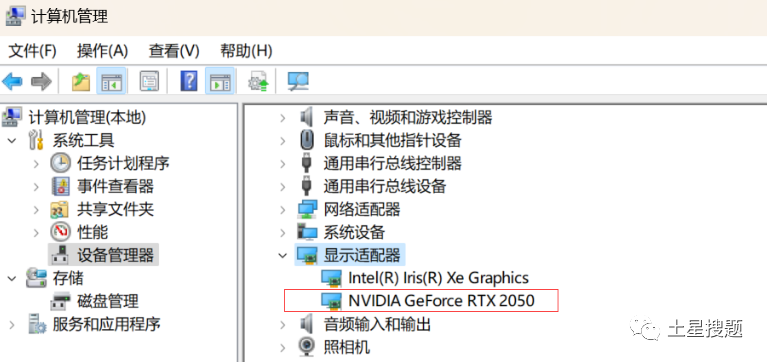
You can see the model of your graphics card by clicking on NVIDIA GeForce …
If it appears, it means you can use the TensorFlow GPU version; if not, you can only install the CPU version.
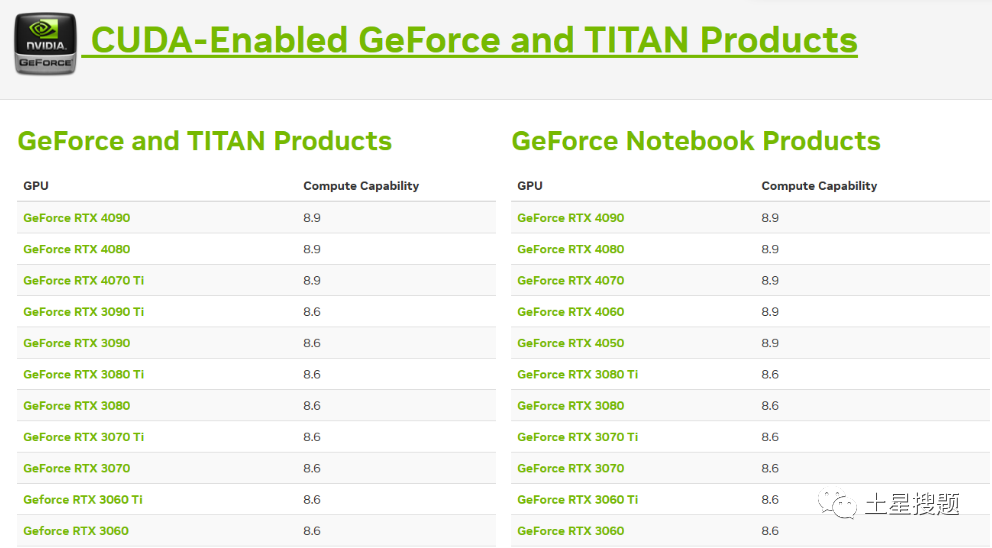
Then you can check your graphics card’s computing power on the NVIDIA official website: https://developer.nvidia.com/cuda-gpus, it is recommended to have a computing power >= 3.5 for installation.
2. Check the GPU driver version, which is our “CUDA Version”. In Windows 11, it is generally version 12.0. Press Win + R simultaneously, type cmd, and open the command window. In the command window, type: nvidia-smi

2. Installing Anaconda
Before installing TensorFlow, you must first install Anaconda.
Anaconda is a powerful open-source data science platform that integrates many great tools, greatly simplifying the workflow for users and helping them solve a series of data science problems.
People often struggle with whether to install Python or Anaconda first; it is recommended to install Anaconda first, as it comes with Python, and after installing Anaconda, the default Python version will be the one that comes with Anaconda.
There are two scenarios for installing Anaconda:
Scenario 1: If Python is not currently installed on the computer or can be uninstalled (uninstall Python before installing Anaconda).
Scenario 2: If Python is currently installed but you want to keep it (this is more complex; please refer to other tutorials online!).
This section introduces Scenario 1.
Completely uninstall Python.
First, use the built-in uninstaller of the computer management tool to uninstall Python and manually delete the files in the installation directory (this part is very simple and will not be detailed here). Next, delete the environment variables:
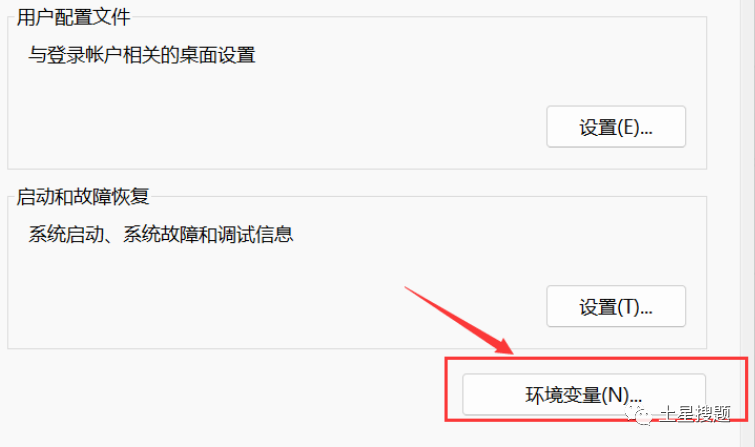
Step 1: Right-click on Computer → Properties → Advanced System Settings → (click) Environment Variables
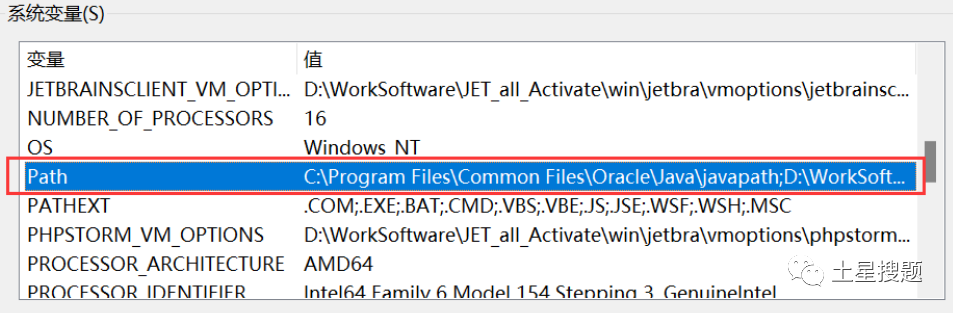
Step 2: Check the user-defined environment variables in the upper section, find path, double-click the value next to path to view your custom environment variables.
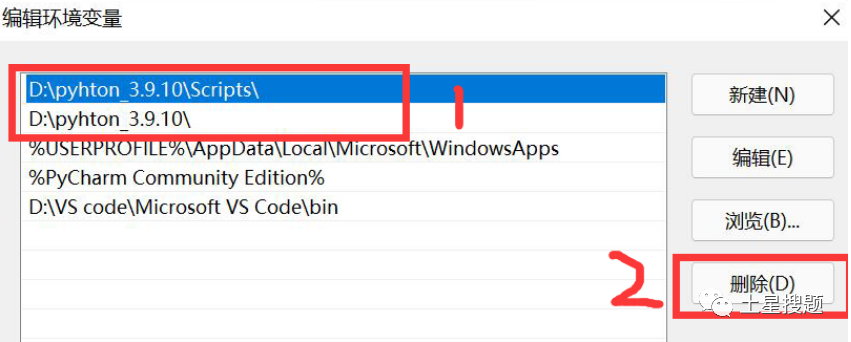
Step 3: Delete all variables related to the installed Python, as shown in the image, select both values, click delete, and confirm. (If the environment variables were automatically deleted after uninstalling Python, you can ignore this step!)
At this point, Python has been completely uninstalled!
Download link for Anaconda:
Note: During the Anaconda installation process, a common error occurs when configuring environment variables, so be careful while configuring them.
Method 1: Log in to the Anaconda official website.

Just click “Download”.
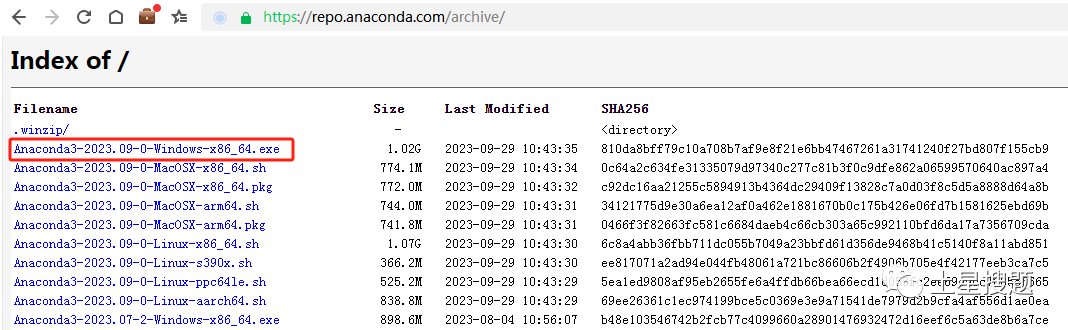
Method 2: If the official website download is too slow, it is recommended to download from the Tsinghua mirror site.
https://repo.anaconda.com/archive/
Detailed installation steps:
1. Double-click the downloaded installation package – click Next – click I Agree – select All Users – choose the installation path, be sure not to select the system disk!!
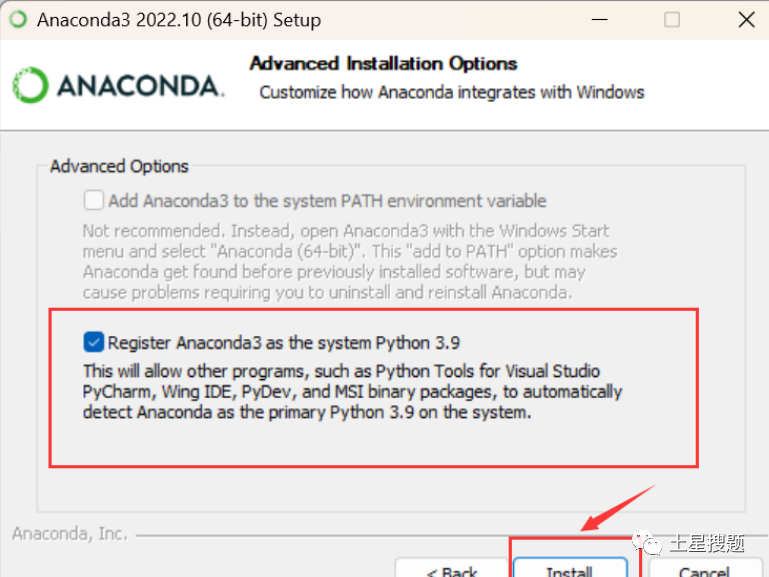
2. Only select the second option, which says to use the default Python version, and manually add the environment variables later.
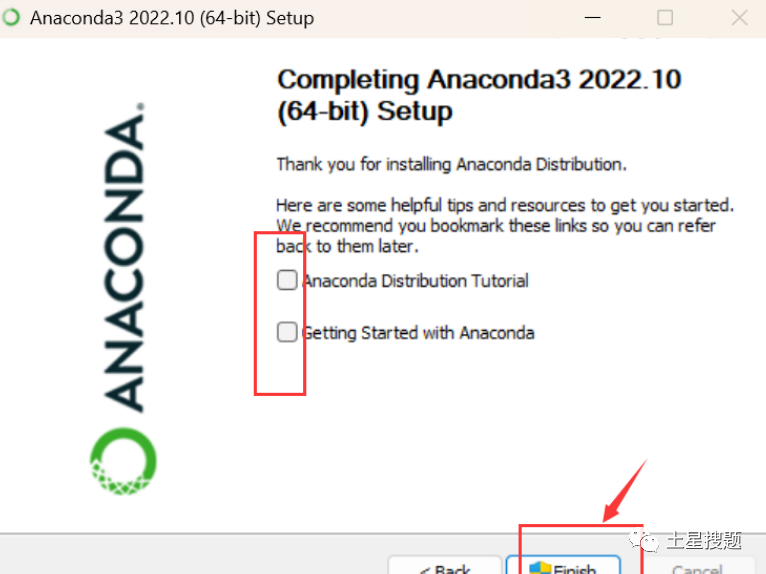
3. Click Install – click Next – uncheck both “learn” options.
4. Then wait for it to finish installing, after which manually configure the environment variables.
Right-click on Computer → Properties → Advanced System Settings → (click) Environment Variables.
In the System Variables section, find and click Path.
In the edit environment variable window, click New.
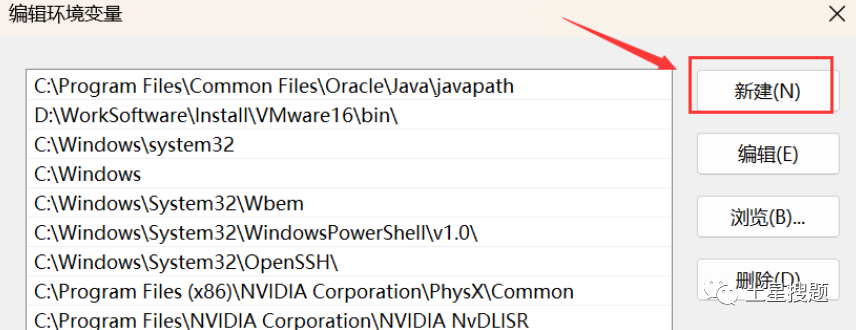
Input the following five environment variables. (You need to modify the “D:\WorkSoftware\Install\Anaconda3” in the following five environment variables to your Anaconda installation path.)
D:\WorkSoftware\Install\Anaconda3
D:\WorkSoftware\Install\Anaconda3\Scripts
D:\WorkSoftware\Install\Anaconda3\Library\bin
D:\WorkSoftware\Install\Anaconda3\Library\mingw-w64\bin
D:\WorkSoftware\Install\Anaconda3\Library\usr\bin
Among these five environment variables, 1 is needed for Python, 2 is for conda scripts, 3 is for Jupyter Notebook dynamic libraries, and 4 is for using C with Python.
Check if the installation was successful:
Press Win + R, type cmd, and in the command line check the conda version by typing:
conda --version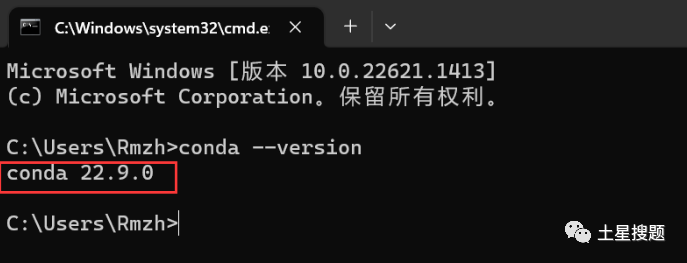
Type python:

If the version number appears, it indicates that the configuration was successful!
In the lower left corner of the computer screen, click the green circle Anaconda Navigator to open it.
If this interface appears, it means the installation was successful:
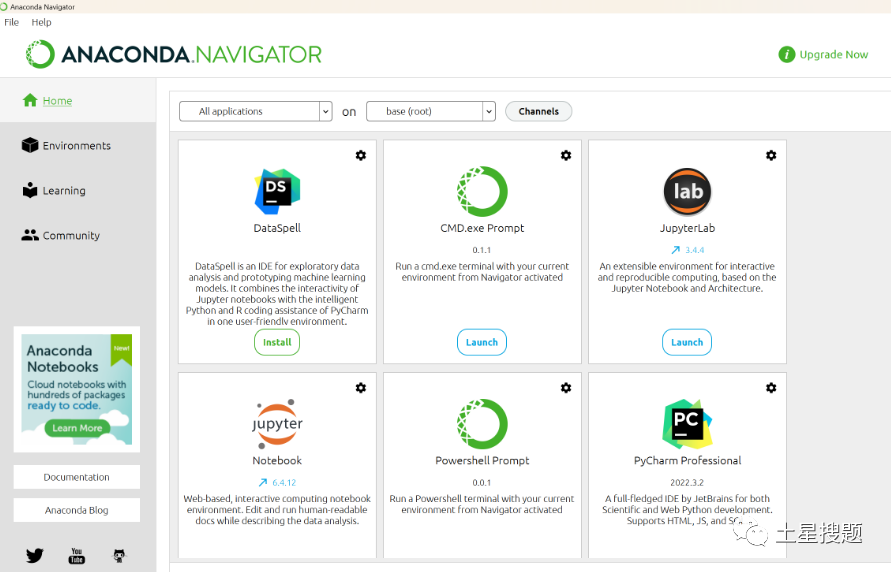
At this point, the basic installation and settings are done!
Change Conda Source
The purpose is to speed up the installation of third-party libraries later. Since the official server is abroad and the download speed is slow, Tsinghua University provides a mirror repository for Anaconda. We will change the source to the Tsinghua University mirror.
Operation in Anaconda prompt:
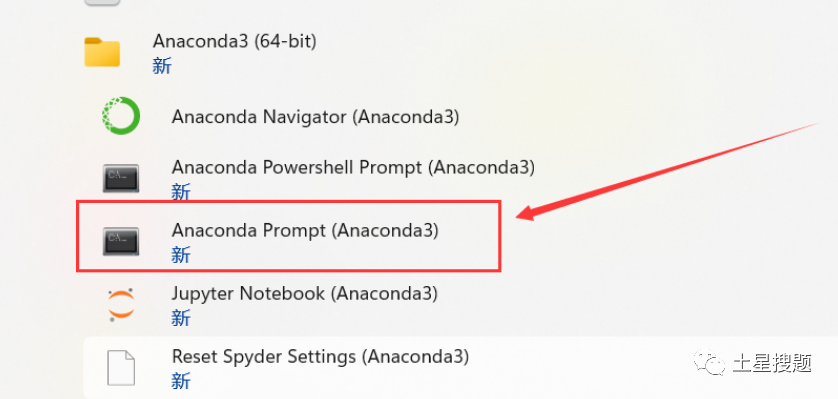
Type the following commands in the command line:
conda config --add channels https://mirrors.tuna.tsinghua.edu.cn/anaconda/pkgs/free/
conda config --add channels https://mirrors.tuna.tsinghua.edu.cn/anaconda/cloud/conda-forge
conda config --add channels https://mirrors.tuna.tsinghua.edu.cn/anaconda/cloud/msys2/  // Set to show channel addresses when searching
conda config --set show_channel_urls yes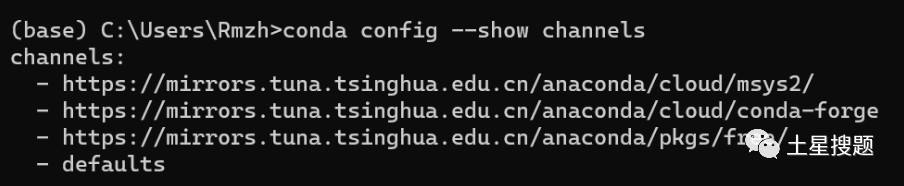
Check if the channels have been modified:
conda config --show channels
Restore default source:
conda config --remove-key channelsDelete old mirror source:
conda config --remove channels https://mirrors.tuna.tsinghua.edu.cn/tensorflow/linux/cpu/Add new mirror source:
conda config --add channels https://mirrors.tuna.tsinghua.edu.cn/tensorflow/linux/cpu/3. Download and Install CUDA
Download CUDA and cuDNN. Download the corresponding CUDA and cuDNN from the official website. The version can be lower than the CUDA version checked above but must not exceed the version supported by your computer.
CUDA download link: CUDA Toolkit Archive | NVIDIA Developer
https://developer.nvidia.com/cuda-toolkit-archive
cuDNN download link: cuDNN Archive | NVIDIA Developer
https://developer.nvidia.com/rdp/cudnn-archive
1. Download:
Here we download CUDA Toolkit 11.5.2, click on CUDA Toolkit 11.5.2.
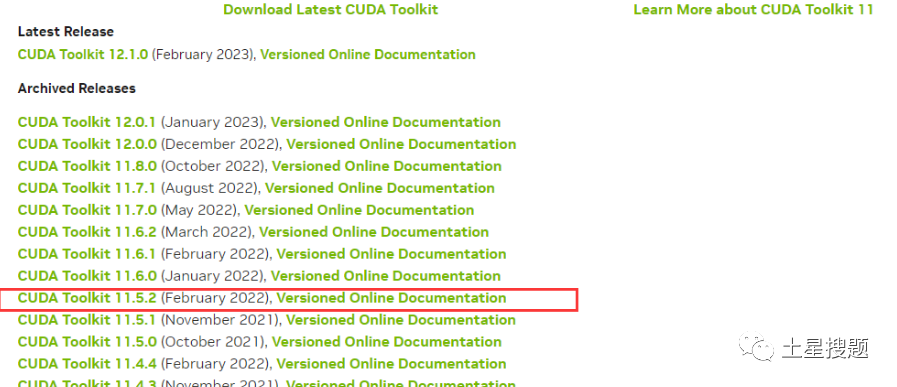
Select the appropriate system, version, etc., then click Download:

2. Installation:
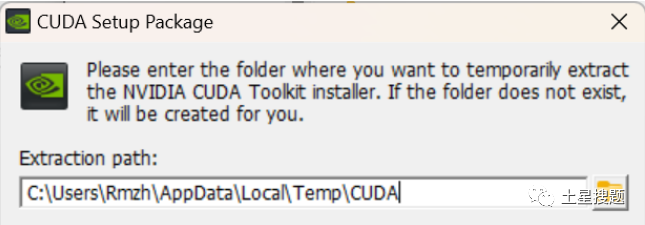
a. Double-click the installation package, and a prompt will appear asking you to choose a temporary extraction location (the content at this location will be automatically deleted after you install CUDA), you can click OK.
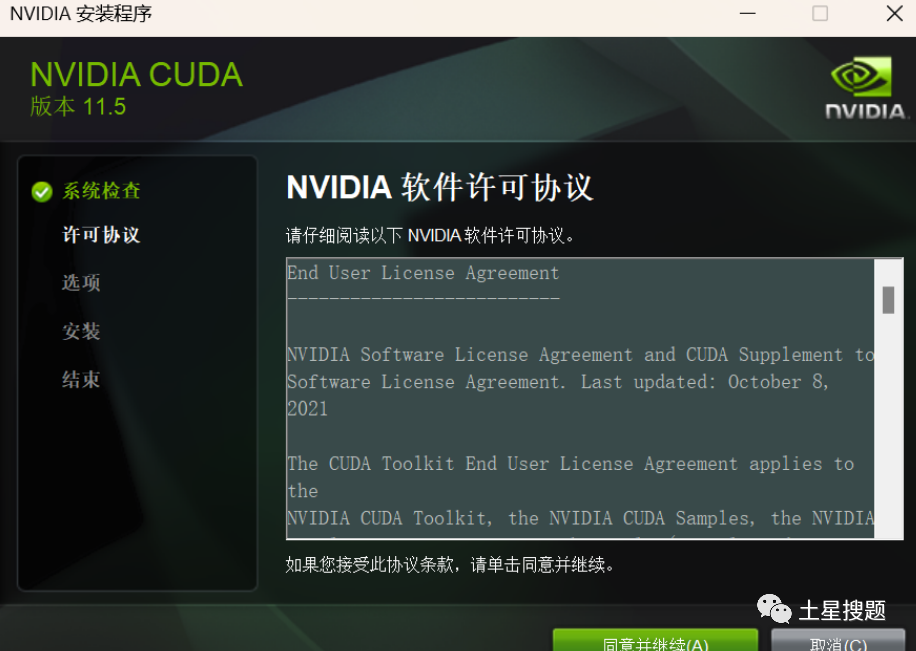
b. Click agree and continue:
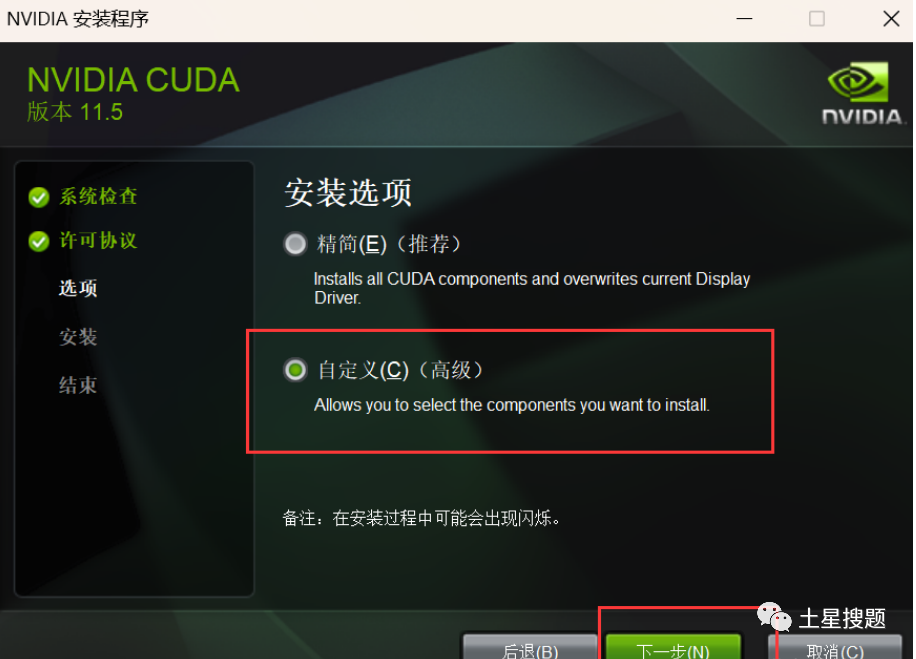
c. After completing the previous step, select Custom, then click Next:
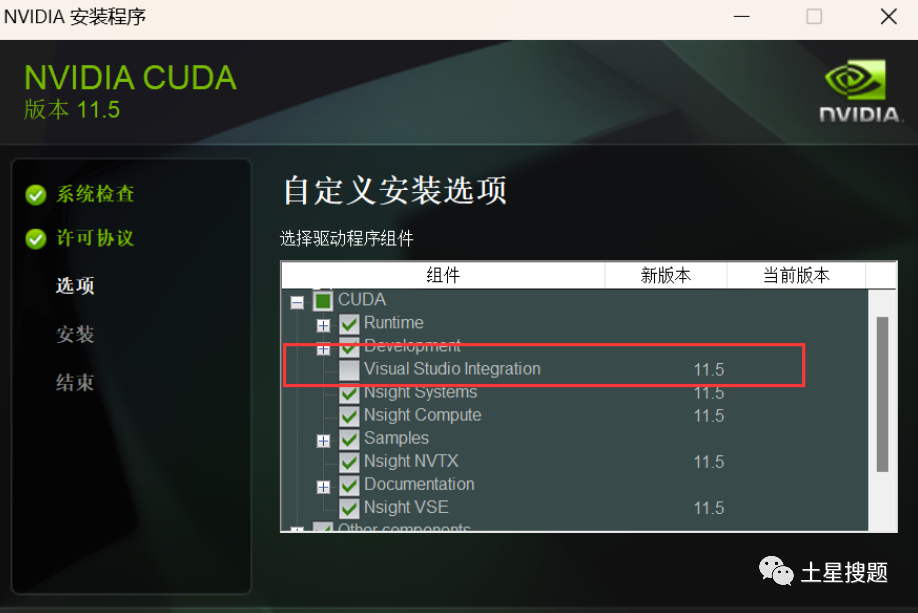
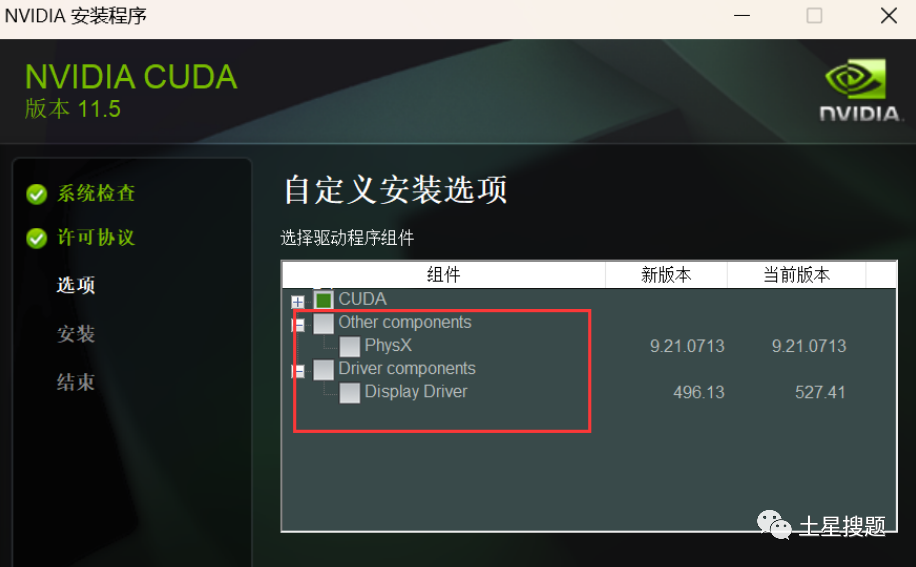
d. After completing the previous step, make sure to check CUDA, the optional components can be unchecked, as they do not affect the subsequent installation.
In the CUDA components section, uncheck Visual Studio Integration (since we are not using the Visual Studio environment, even if checked, the installation will fail).
In the Driver components section, compare the new version of the Display Driver with the current version information.
If the current version is higher than the new version, uncheck Display Driver;
If the current version is lower than the new version, keep the default installation information, otherwise, the computer may freeze or crash, and may even blue screen.
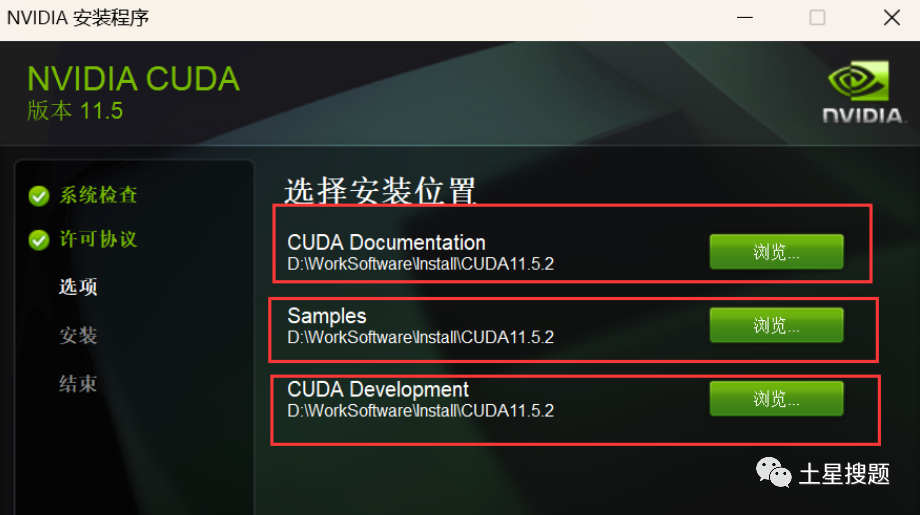
e. You can change the installation location. Remember to take a screenshot to record where you installed it, as you will need it later! I chose the default installation location.
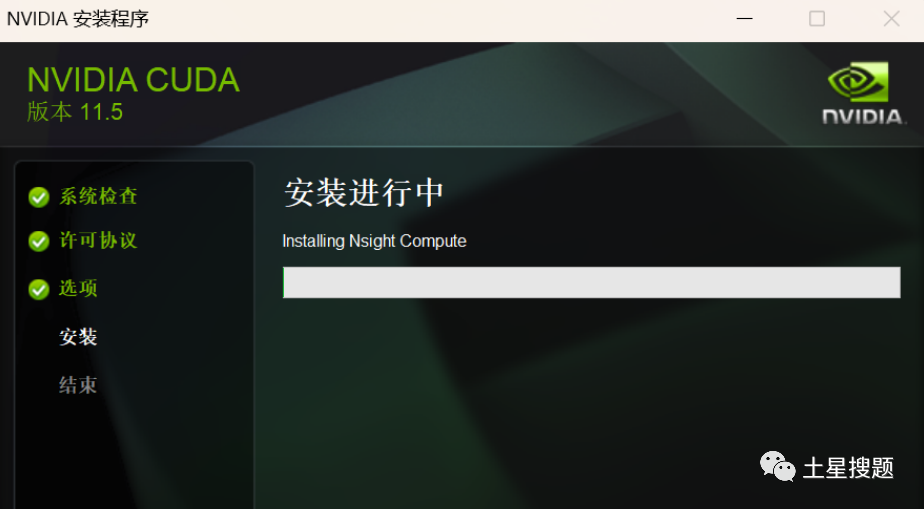
f. Installing…
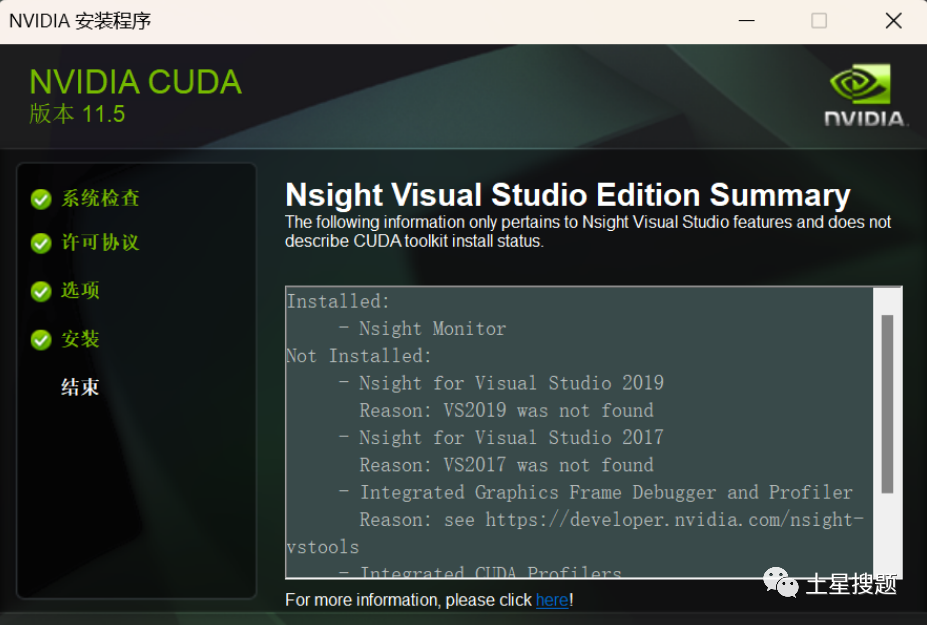
g. Installation successful!
Check the environment variables:
After installation, check if the environment variables exist. Generally, they will be automatically configured after installation; if not, you need to configure them manually. The specific process is as follows.
1. Open Computer Properties, find Advanced System Settings, and select Environment Variables.
2. Check if the following system variables exist; if not, you need to add them yourself, corresponding to the names and values in the image, configuring your computer’s CUDA installation path.
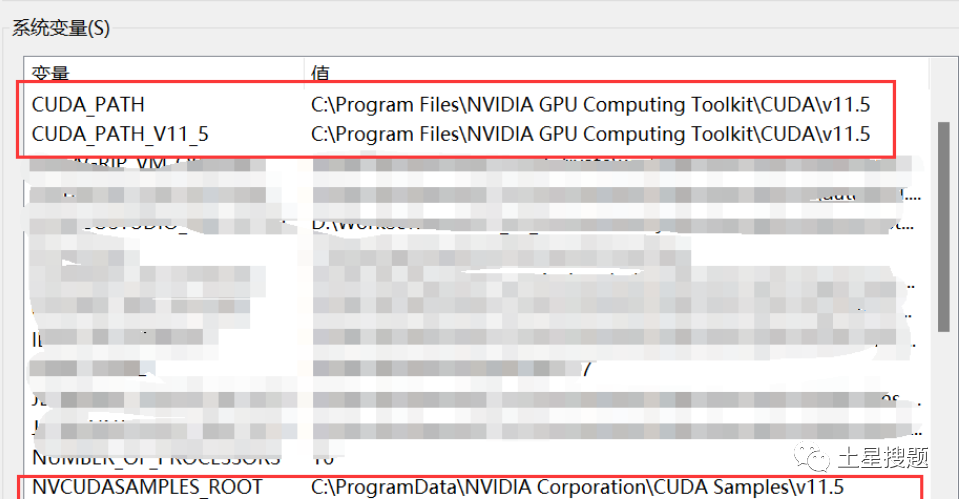
3. Open the Path in the system variables and check if the following two contents exist; if not, you need to add them yourself, ensuring to configure them to the installation path.

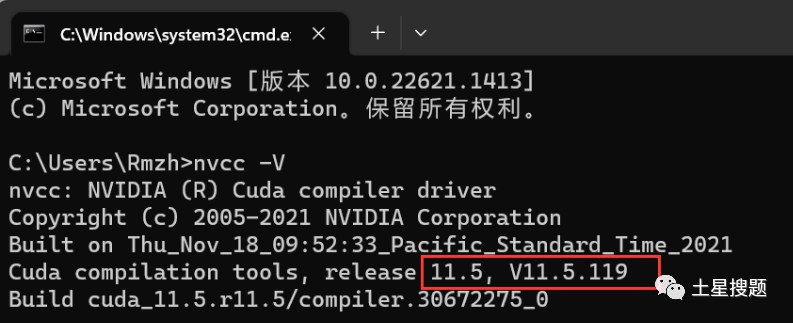
4. After configuring the environment variables, we check if CUDA was installed successfully.
Open cmd and type nvcc -V to check if CUDA was installed successfully (choose one of the two).
If the following information cannot be displayed, it indicates that the installation failed.
Type set cuda to check the CUDA environment variable settings.

4. Download and Install cuDNN
CUDA is not the neural network acceleration library for GPU implementation. If you want to accelerate neural networks, you also need to install the cuDNN neural network acceleration library.
cuDNN is not an application but a package of several files. After downloading, copy it to the CUDA directory.
cuDNN Archive | NVIDIA Developer Download link:
https://developer.nvidia.com/rdp/cudnn-archive
When you first click to download, it will ask you to register and log in first, then proceed to download. Fill out the registration form carefully, and you should have no issues. This step is skipped, and we will proceed to the download section.
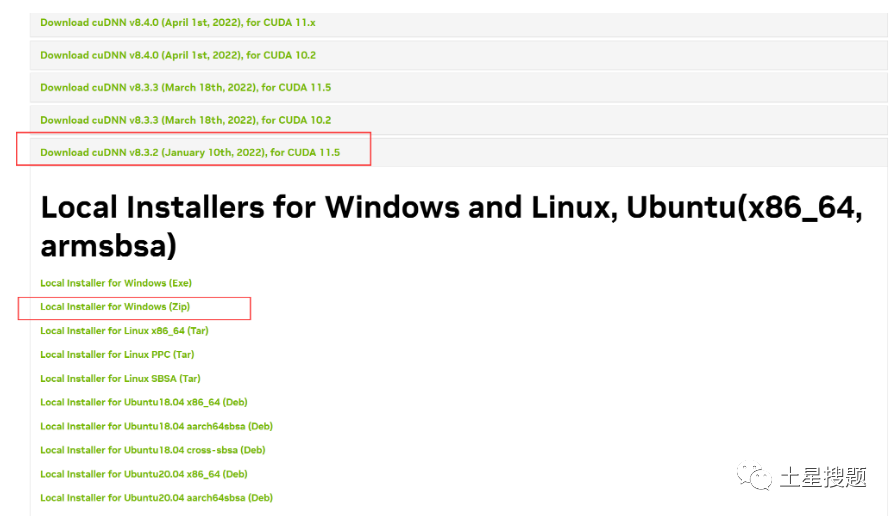
1. Download:
Download the corresponding version of cuDNN. Here we choose cuDNN v8.3.2 for CUDA 11.5.
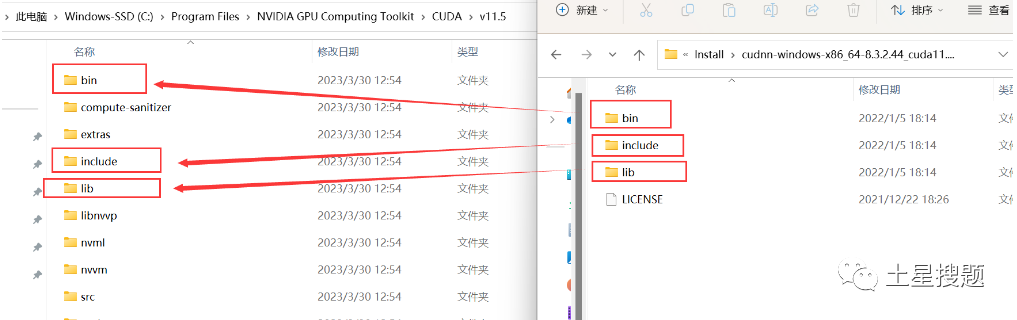
2. After downloading and unzipping the installation package, we can see four files:
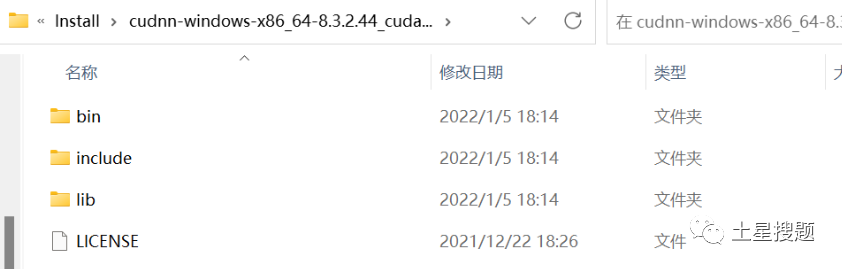
3. Copy all files from the corresponding folders in the cuDNN folder to the corresponding installation directory, not copying the folders from the cuDNN folder. For example, copy all files from the bin folder, not the bin folder itself. (It is normal to have duplicate files; just overwrite them!) (This point is particularly important).
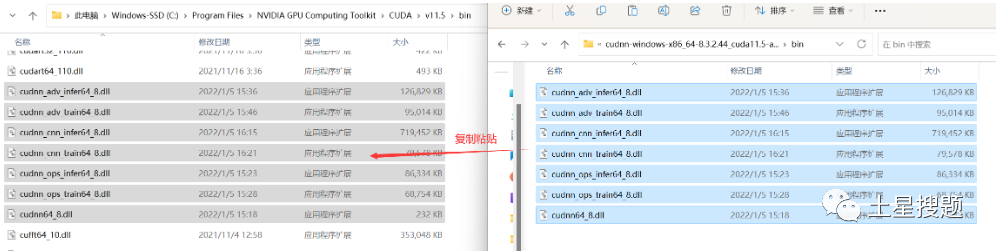
4. Open the bin folder in the cuDNN folder and copy all files from that folder to the CUDA\v11.5\bin folder:
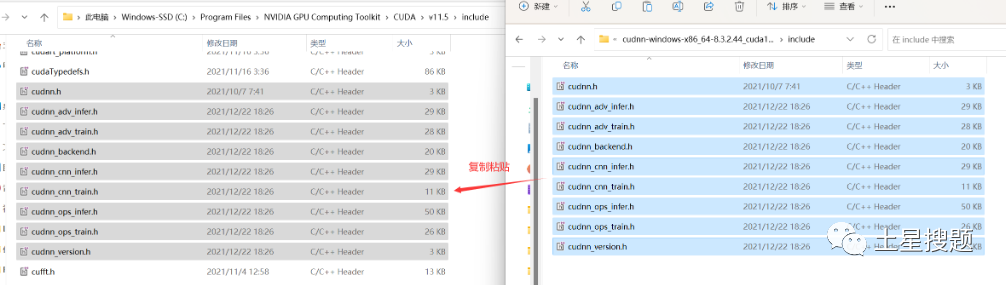
5. Open the include folder in the cuDNN folder and copy all files from that folder to the CUDA\v11.5\include folder:
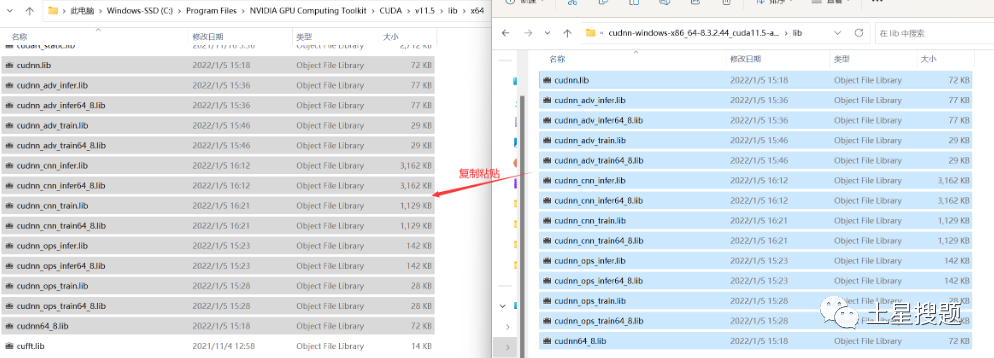
6. Open the lib folder in the cuDNN folder and copy all files from that folder to the CUDA\v11.5\lib\x64 folder:
7. Open the remaining files in the cuDNN folder and copy them to the CUDA\v11.5 folder:
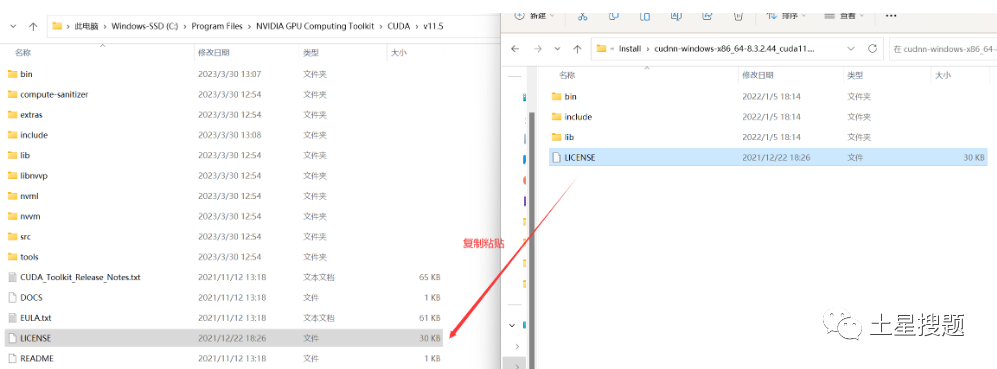
cuDNN is essentially a patch for CUDA, optimized for deep learning operations, and then we add the environment variables!
5. Configure Environment Variables
1. In the Path of the system variables, add the following paths (specific adjustments should be made according to your installation path):
C:\Program Files\NVIDIA GPU Computing Toolkit\CUDA\v11.5\bin
C:\Program Files\NVIDIA GPU Computing Toolkit\CUDA\v11.5\libnvvp
C:\Program Files\NVIDIA GPU Computing Toolkit\CUDA\v11.5
C:\Program Files\NVIDIA GPU Computing Toolkit\CUDA\v11.5\lib\x64
2. After configuring the environment, we need to verify whether the environment variable configuration was successful:
Open cmd, navigate to your CUDA installation path…
\CUDA\v11.5\extras\demo_suite: I am using the default path:
cd \Program Files\NVIDIA GPU Computing Toolkit\CUDA\v11.5\extras\demo_suiteThen execute the following two commands:
.andwidthTest.exe
.\