
Introduction
Do you want to run large language models locally and create your own AI assistant? The latest Ollama 0.5.7 version makes this easier than ever. By following the steps below, you will easily complete the deployment and embark on an intelligent journey!💡
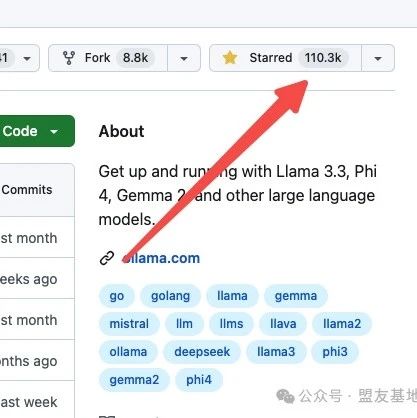
🎯 What is Ollama?
Ollama is a tool designed to help users run large language models in a local environment. Whether you are a developer or an AI enthusiast, you can easily deploy and use various models through it.
Main features:
-
Simple and Easy to Use: Provides an intuitive command-line interface that is easy to operate.
-
Multi-Platform Support: Compatible with macOS, Linux, and Windows systems.
-
Rich Model Selection: Supports various pre-trained models to meet different needs.
🛠️ Steps to Deploy Ollama
Step 1: Environment Preparation
Ensure your system meets the following requirements:
-
Operating System: macOS, Linux, or Windows.
-
Memory: At least 8GB RAM (for running the 7B model), 16GB RAM (for running the 13B model), 32GB RAM (for running the 33B model).
-
Network Connection: Needed to download necessary dependencies and model files.
Note: Currently, Windows systems only provide preview support.
Step 2: Install Ollama
Choose the appropriate installation method based on your operating system:
-
macOS and Windows:
-
Visit the Ollama official website to download the installation package for your system and follow the prompts to complete the installation.
-
Linux:
-
Open the terminal and run the following command:
-
<span class="language-plaintext">curl -fsSL https://ollama.com/install.sh | sh</span>
Tip: If manual installation is needed, please refer to the manual installation instructions.
-
Docker:
-
If you prefer to use Docker, you can run the following command to start the Ollama container:
-
<span class="language-plaintext">docker run -d -v ollama:/root/.ollama -p 11434:11434 --name ollama ollama/ollama</span>
Note: The above command maps the Ollama service to port 11434 on your localhost. Please ensure that this port is not occupied.
Step 3: Download and Run Models
After installation, you can use the pre-trained models provided by Ollama. Here are some example models and how to download and run them:
|
|
|
|
|
|
|
|
|
|
|
|
|
|
|
|
|
|
|
|
|
|
|
|
|
|
|
|
|
|
|
|
|
|
|
|
|
|
|
|
|
|
|
|
|
|
|
|
|
|
|
|
|
|
|
|
|
|
|
|
|
|
|
|
|
|
|
|
|
|
|
|
|
|
|
|
|
|
|
|
|
|
|
|
|
|
|
|
|
|
|
|
|
|
|
|
|
|
|
|
|
|
|
|
|
Tip: For more available models and their details, please visit the Ollama Model Library.
Step 4: Test the Model
After running the above command, you can interact with the model in the terminal. For example:
<span class="language-plaintext">ollama run llama3. Enter your question, and the model will return the corresponding answer.</span>
🌟 Advanced Features
-
Custom Models
You can import models from local files or customize existing models. For example:
-
Import from GGUF File:
-
Create a file named
<span class="language-plaintext">Modelfile</span>with the following content: -
<span class="language-plaintext">FROM ./your-model-file.gguf</span> -
Then run:
-
<span class="language-plaintext">ollama create your_model_name -f Modelfile</span> -
Custom Prompts:
-
<span class="language-plaintext">FROM llama3.2</span><span class="language-plaintext">PARAMETER temperature 1</span><span class="language-plaintext">SYSTEM """</span><span class="language-plaintext">You are an expert AI assistant and a senior software developer. You have extensive knowledge covering various programming languages, frameworks, and best practices. Your goal is to help users solve various technical problems and provide efficient, concise solutions.</span><span class="language-plaintext">"""</span> -
Create a
<span class="language-plaintext">Modelfile</span>with the following content: -
Then run:
-
<span class="language-plaintext">ollama create custom_llama -f Modelfile</span><span class="language-plaintext">ollama run custom_llama</span>
-
Use REST API Calls
Ollama provides a REST API for developers to integrate easily. After starting the Ollama service, you can use the following command to generate a response:
<span class="language-plaintext">curl http://localhost:11434/api/generate -d '{</span><span class="language-plaintext"> "model": "llama3.2",</span><span class="language-plaintext"> "prompt": "Why is the sky blue?"</span><span class="language-plaintext">}'</span>
Note: Ensure your Ollama service is running and listening on the correct port.
📝 Conclusion
By following the steps above, you can successfully deploy and run Ollama 0.5.7 locally. Whether for research or application development, this is a powerful tool. Start exploring and create your own AI assistant!
Project Address
https://github.com/ollama/ollamaOfficial Documentation
https://ollama.readthedocs.io/quickstart/