
Setting Up a Minecraft (MC) Bedrock Edition (BE) Server on Windows
Minecraft Bedrock Edition, also known as 我的世界基岩版, is another version of Minecraft. Minecraft Bedrock Edition can run on Win10, Android, iOS, Xbox, and Switch. Bedrock Edition cannot use Java Edition servers, and Java Edition cannot use Bedrock Edition servers. However, the Bedrock Edition versions on Win10, Android, iOS, Xbox, and Switch can all connect to the same server, meaning that a Bedrock Edition server can allow both Win10 and mobile devices to connect together.
Video tutorial: https://www.bilibili.com/video/BV1PU4y197jK/
-
Other versions of Minecraft server setup tutorials:https://blog.zeruns.tech/tag/mc/
-
Various Minecraft server introductions and downloads:https://blog.zeruns.tech/archives/626.html
-
Recommended cost-effective and cheap VPS/cloud servers: https://blog.zeruns.tech/archives/383.html
Minecraft server communication QQ group 2: 746189110
MC server communication QQ channel: https://url.zeruns.tech/mc_qq
Preparation
First, you need to have a server (if you already have one, you can skip this). Here are some recommendations:
-
Huawei Cloud: https://url.zeruns.tech/hwy2021
-
UCloud:https://www.ucloud.cn/site/active/kuaijie.html?invitation_code=C1x5E3EE29AA7B9
-
Tianyi Cloud:https://www.ctyun.cn/agent/#/invitation/10366809
-
Tencent Cloud 618:https://curl.qcloud.com/XJxLJI22
-
Point Cloud 5800X: https://www.awsl9527.cn/archives/967.html
Other high cost-performance server recommendations:https://blog.zeruns.tech/archives/383.html
Performance comparison of cloud servers from major vendors, including Alibaba Cloud, Tencent Cloud, Huawei Cloud, Ucloud, and Tianyi Cloud: https://blog.zeruns.tech/archives/670.html
If you are a new user, there are discounts available. It is recommended to purchase for as long as possible because the renewal price for discounted servers can be very high after expiration, and new user discounts can only be used once, so try to buy for a longer period for better value.
Recommended configuration: 2 cores, 4GB RAM, 5Mbps bandwidth. This configuration can support about 10-20 players. A configuration of 4 cores, 8GB RAM, and 10Mbps can support about 20-40 players.
Do not buy 1Mbps bandwidth!!! 1Mbps bandwidth can only support one or two players at most; it is recommended to start from 5Mbps!!!
After purchasing the server, choose to install the Windows Server 2019 operating system, and then connect using the built-in Remote Desktop Protocol (RDP) software.
The default account is usually: administrator, and the password is what you set during purchase. If you did not set a password during purchase, you can reset the password in the console after purchase.
Connecting to the Server
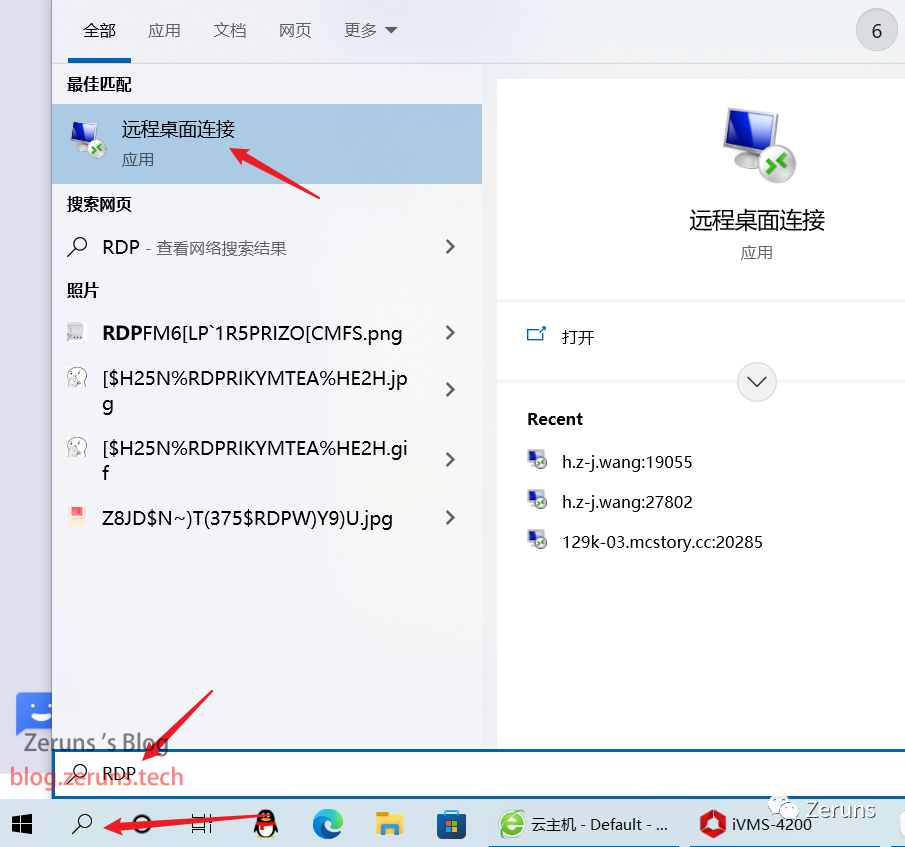
Find the built-in Remote Desktop software and open it.
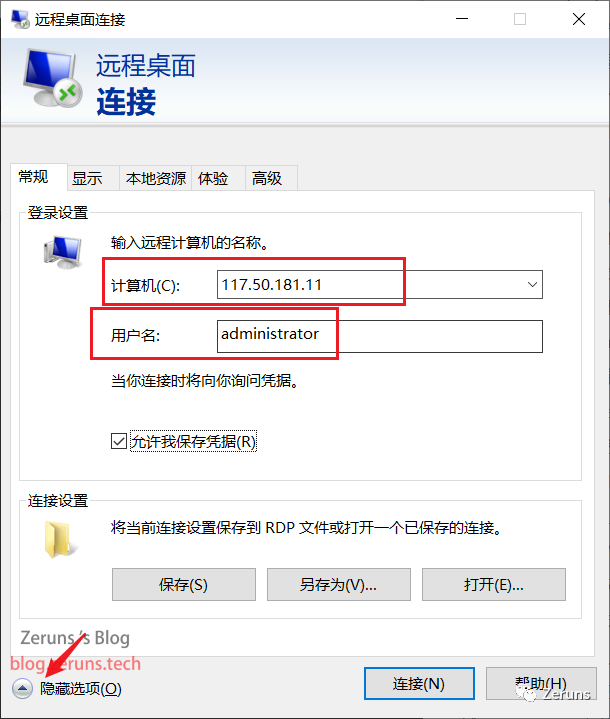
Enter the public IP of the server you bought and the username.
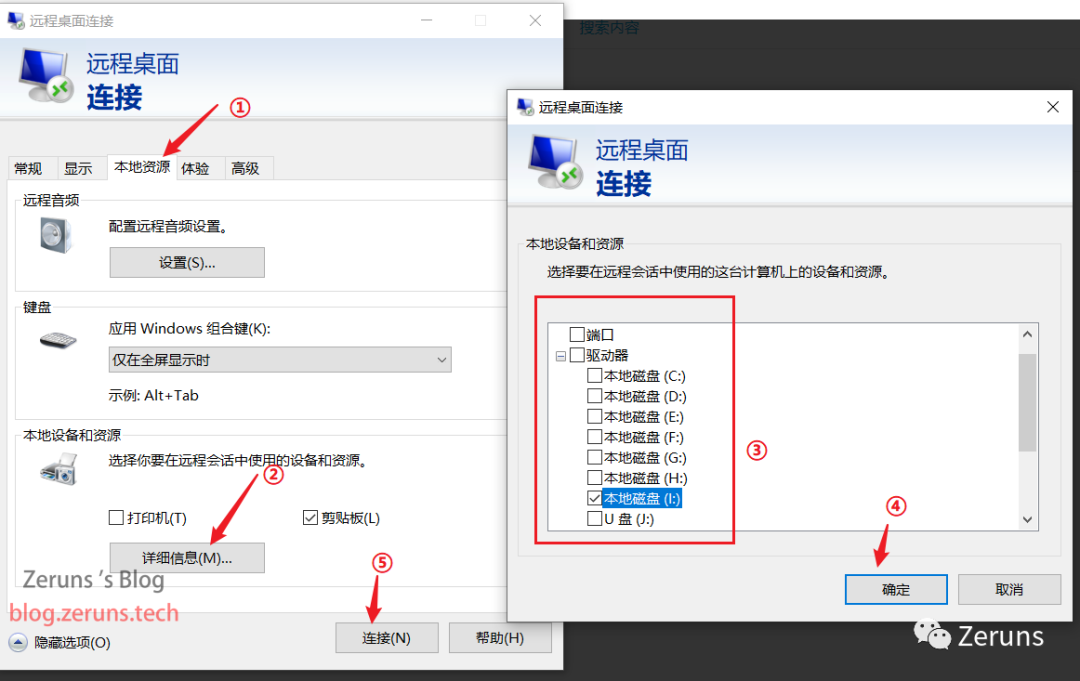
Click on Local Resources → More, then select one of your computer’s hard drive partitions. This function allows you to share a drive from your computer to the server during the remote desktop connection, making it convenient for file transfer. This way, you can directly access and download files from this drive on the server, and you can also place files from the server onto this drive. Finally, click OK and connect, then enter the password to connect to the server.
Open Ports
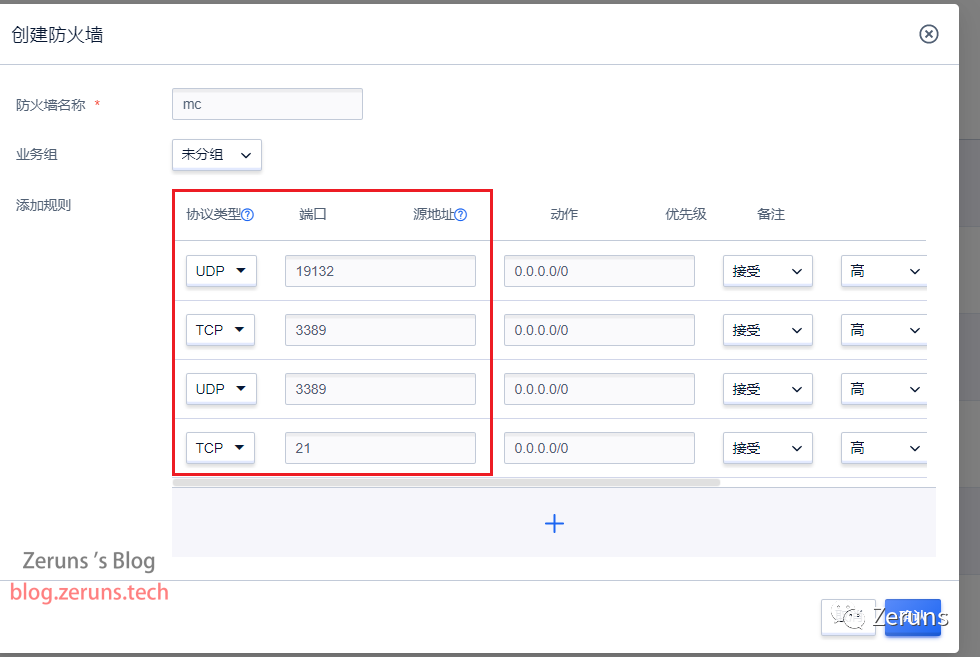
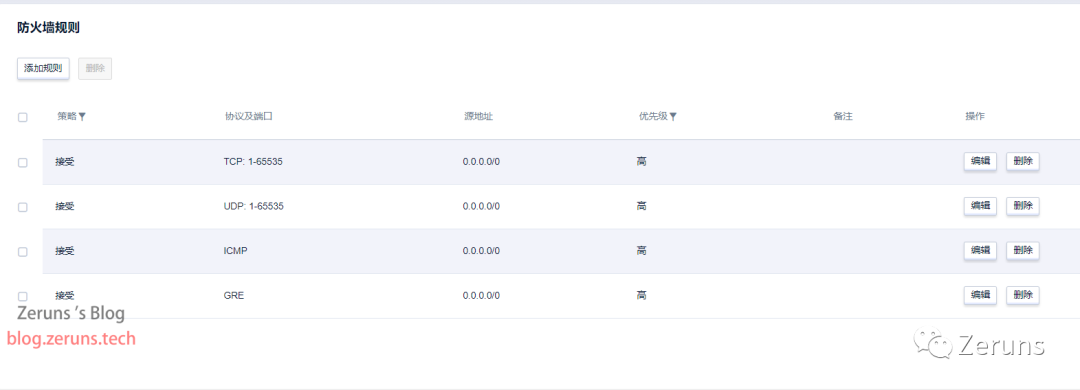
The default port for the Bedrock Edition server is 19132, using the UDP protocol; you also need to open port 3389 for remote desktop; if you need to install FTP, you will also need to open port 21.
If you are using Alibaba Cloud, Tencent Cloud, or other cloud service providers, please go to the console to the Firewall/Security Group policy and allow the above ports.
Alternatively, you can allow all ports, both inbound and outbound.
The following images show examples of opening some ports and opening all ports.
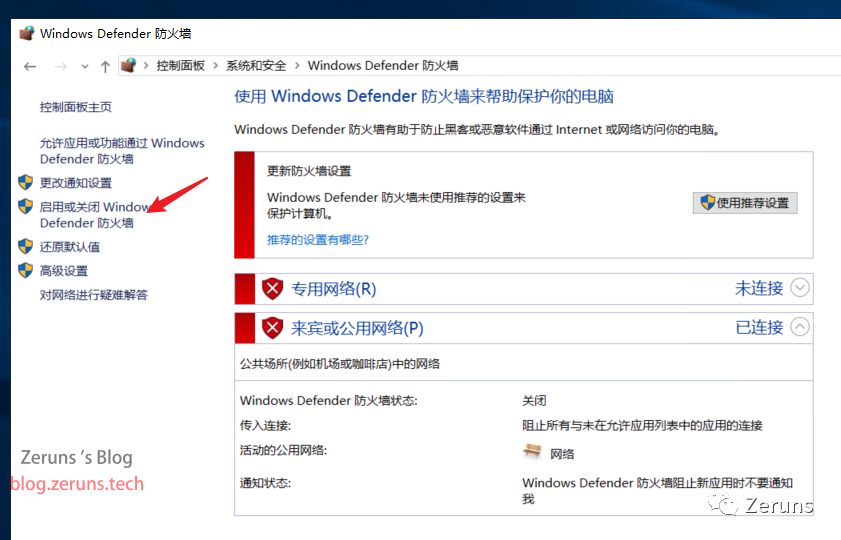
You also need to disable the built-in firewall. The Windows system’s built-in firewall usually blocks all ports except for 3389 by default, so you need to either disable the system firewall or configure it to open the necessary ports.
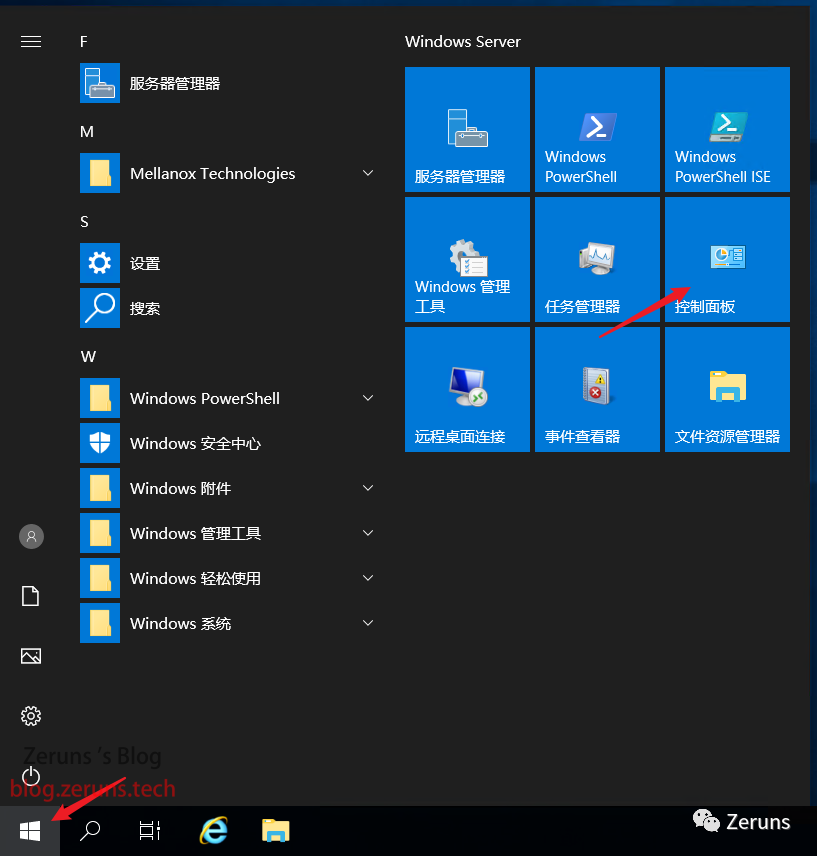
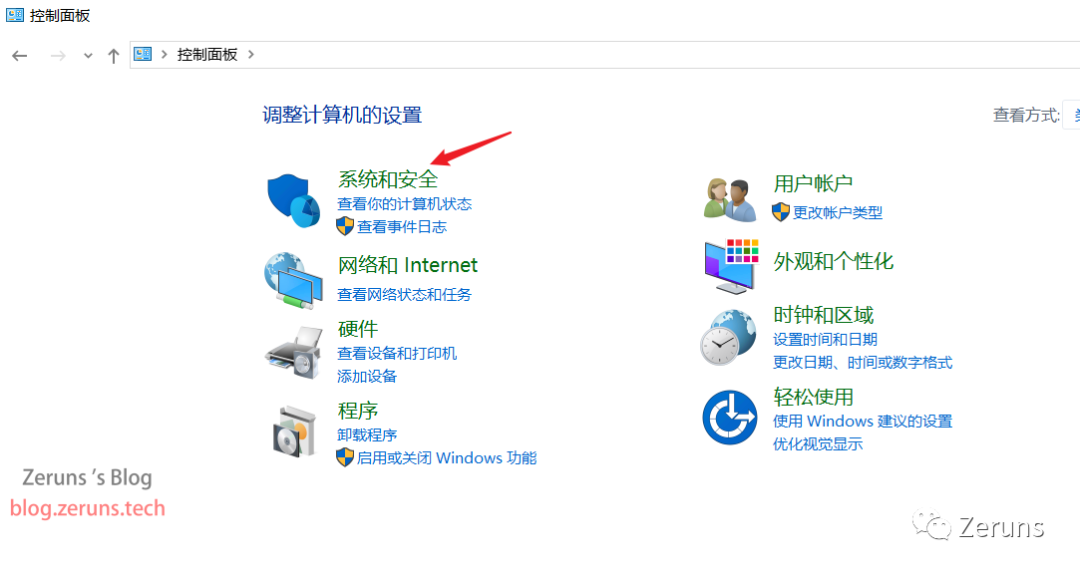
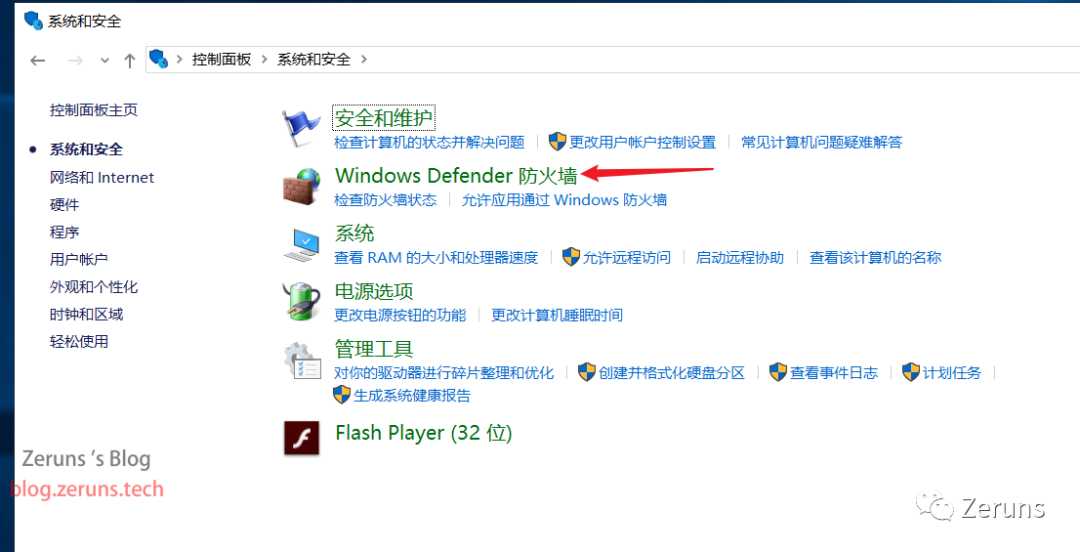
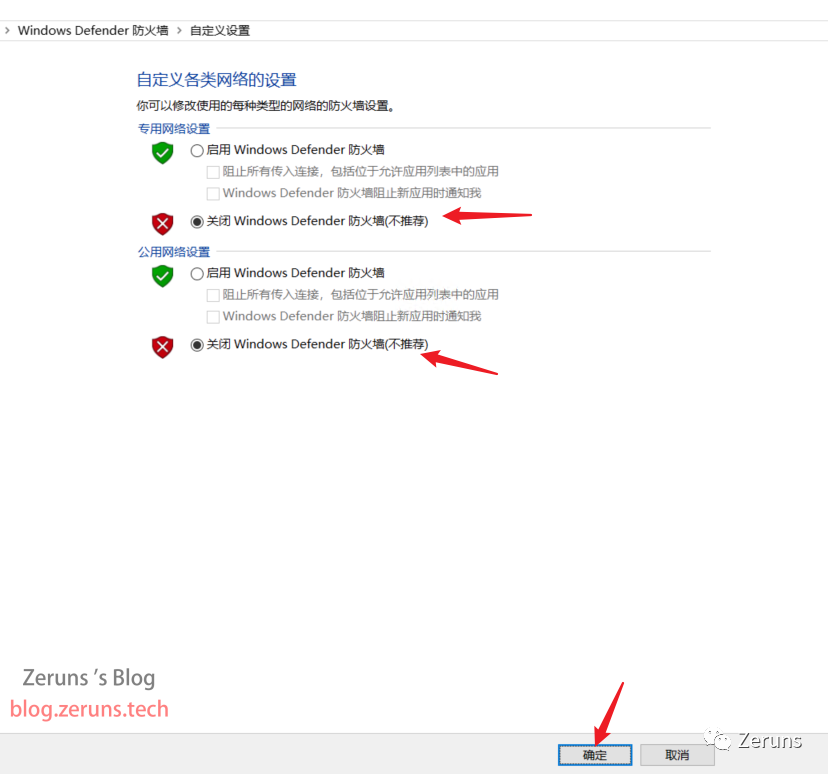
Go to Control Panel → System and Security → Windows Defender Firewall → Turn Windows Defender Firewall on or off, then check both options to turn them off, and finally click OK.
Running the Server
First, download the Windows version of the BDS server from the official website. You can either open the browser on the server to download it or download it to your computer and then transfer it to the server. The official website usually only provides the latest version of the server.
BDS official download link: https://url.zeruns.tech/MC_BDS
Version 1.19.1.01 Baidu Cloud download link: https://url.zeruns.tech/LYE9Y
It is best to keep the client version consistent with the server version; it can be slightly higher than the server version but not too much higher.
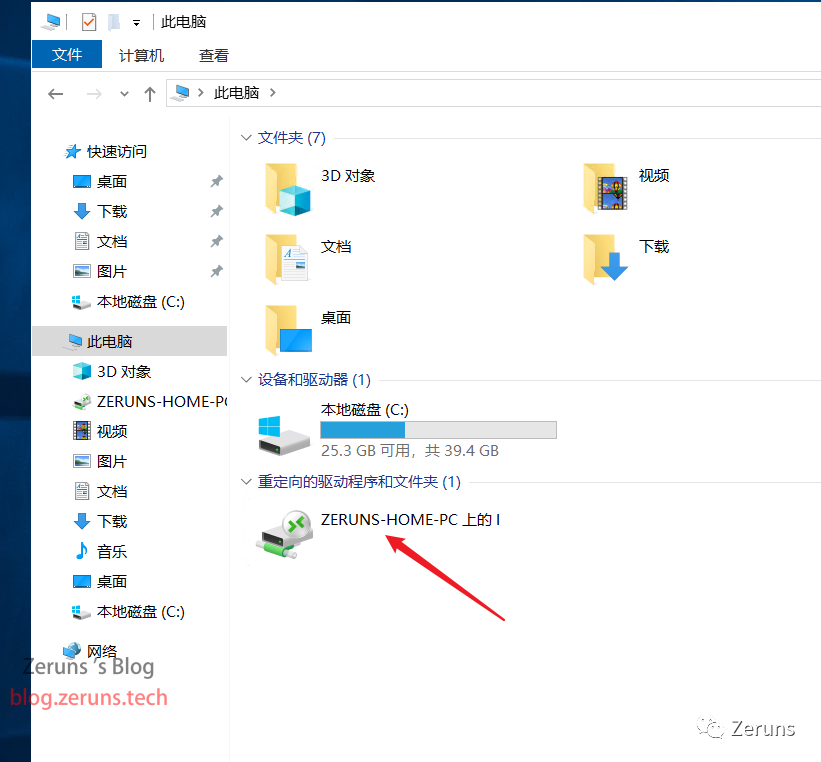
The shared drive set up earlier can be accessed in File Explorer.
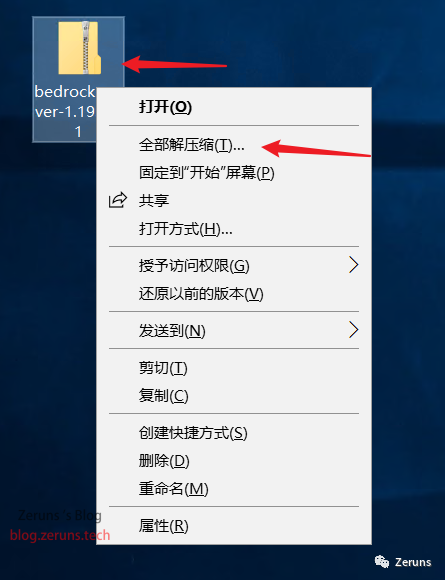
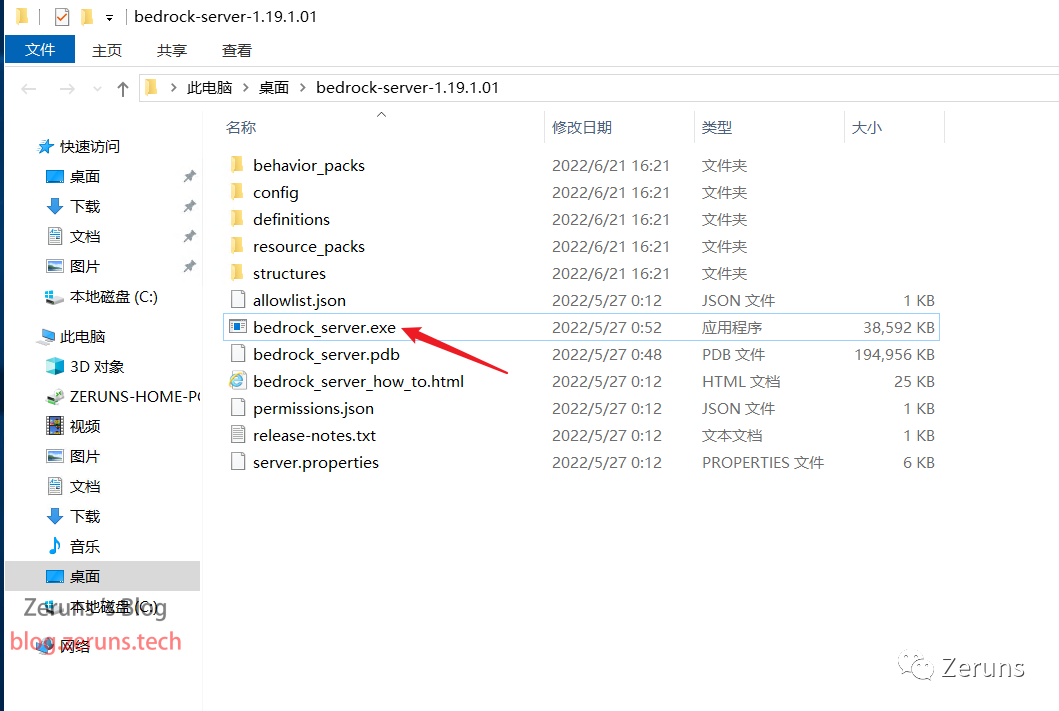
Then drag the downloaded server package to the server and extract the files inside.
Then double-click to run bedrock_server.exe
Wait a moment until the information shown in the image below appears, and the server is ready to go.

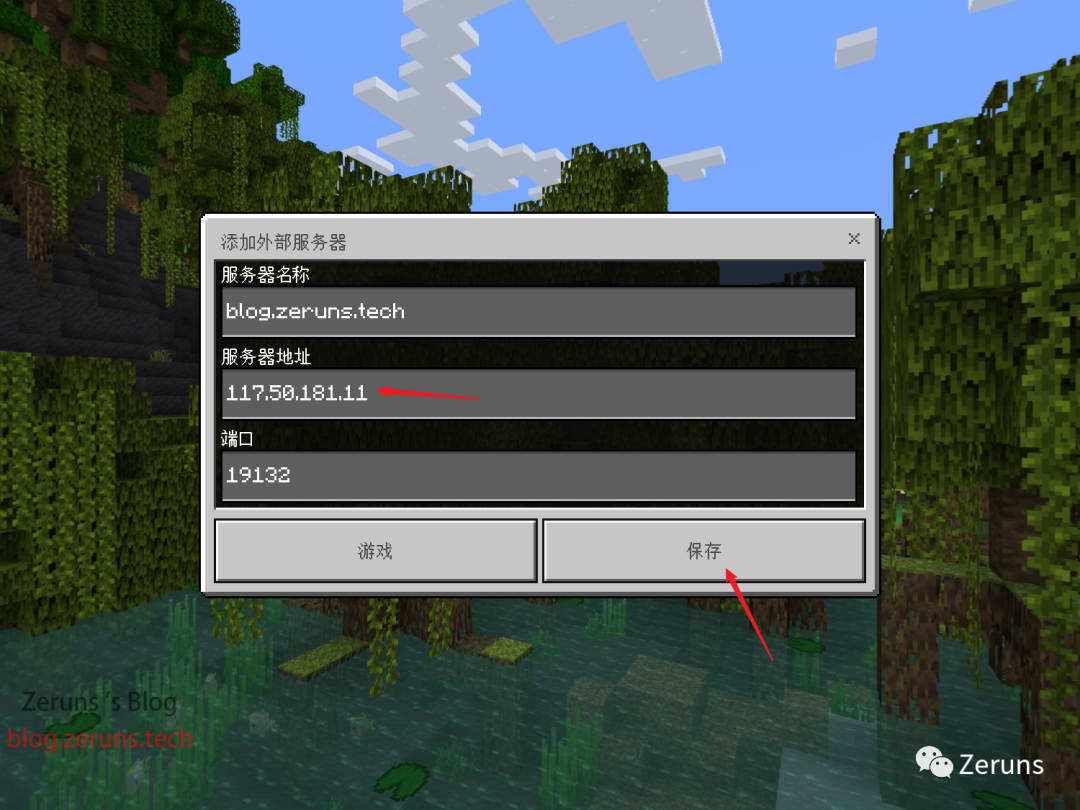
Entering the Game
In the game, click to add a server and enter your server’s public IP.

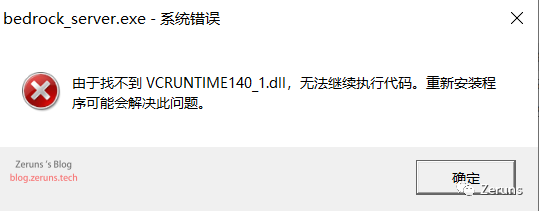
Common Issues
If you see the following error message VCRUNTIME140_1.dll not found, cannot continue executing code., it means you are missing the VC++ runtime library. Download and install it here: https://url.zeruns.tech/iq90K
Configuration
After extracting the server, you will find a configuration file named server.properties, where the server-related configurations are located.
You can use the nano editor to open and edit the configuration file.
Lines starting with # are comments and can be ignored; you mainly need to modify the content after the =.
Below are some explanations of configuration items:
-
gamemode: Default game mode,survivalfor survival,creativefor creative,adventurefor adventure. -
difficulty: Default difficulty,peacefulfor peaceful,easyfor easy,normalfor normal,hardfor hard. -
max-players: Player limit, default is10. -
server-port: Server port, default is19132. -
server-portv6: IPv6 port, default is19133. -
online-mode: Authenticity verification. If your server can connect to Xbox Live normally, set it totrue; otherwise, set it tofalse. Even if authenticity verification is not enabled, the client still needs to log into Xbox Live to connect. -
white-list: Whitelist. Only players on the whitelist can enter the server, default isfalse. -
allow-cheats: Allow cheats, default isfalse. -
player-idle-timeout: Automatically kick idle players, default is 30 minutes. -
default-player-permission-level: Default player level,visitorfor visitors,memberfor regular players,operatorfor admins.
For more detailed configuration instructions, you can refer to the help documentation.
Whitelist Configuration
After extracting the server, you will find a whitelist.json file, which is the file that stores the whitelist. The format is as follows:
[ { "name": "name1", "ignoresPlayerLimit": "true" }, { "name": "name2" }]In this, name is the player’s Xbox username, and ignoresPlayerLimit is to ignore the server’s player limit; ignoresPlayerLimit is optional.
Only when white-list in the server.properties configuration file is set to true will the whitelist in whitelist.json take effect.
If you modify the whitelist while the server is running, you need to enter the following command in the server command line:
whitelist reloadto reload the whitelist for it to take effect.
After setting the whitelist, only players listed in the whitelist.json can enter the server.
Recommended Reading
-
Recommended cost-effective and cheap VPS/cloud servers: https://blog.zeruns.tech/archives/383.html
-
Using NPS to build a self-hosted intranet penetration server tutorial with WEB management: https://blog.zeruns.tech/archives/660.html
-
How to set up a personal blog: https://blog.zeruns.tech/archives/218.html
-
How to build a confession wall website (LoveWall): https://blog.zeruns.tech/archives/634.html
-
Performance comparison of cloud servers from major vendors: https://blog.zeruns.tech/archives/670.html
-
Minecraft server setup tutorial: https://blog.zeruns.tech/tag/mc/