Many interior designers want to use the popular AI drawing tool—Stable Diffusion—to enhance design efficiency and creativity, but they don’t know how to use it.
Today, I have prepared a valuable sharing for everyone.From the local deployment of Stable Diffusion, operation interface, and plugin usage, to practical case studies, I will teach you step by step how to use Stable Diffusion!
Don’t forget to like and bookmark~
1. Local Deployment of Stable Diffusion
The configuration requirements for Stable Diffusion are not very high; a graphics memory of 4G or more is sufficient, but the hard drive needs at least 50G (100G is recommended), and it is suitable for Win10-11 versions.
If your computer meets the above requirements, you can proceed with the local deployment of Stable Diffusion.
(1) Download the integration package. Unzip the files in a path with all English characters to reduce the likelihood of errors later.
(2) Click “Run Dependencies” on the launcher to complete the setup of the startup environment.

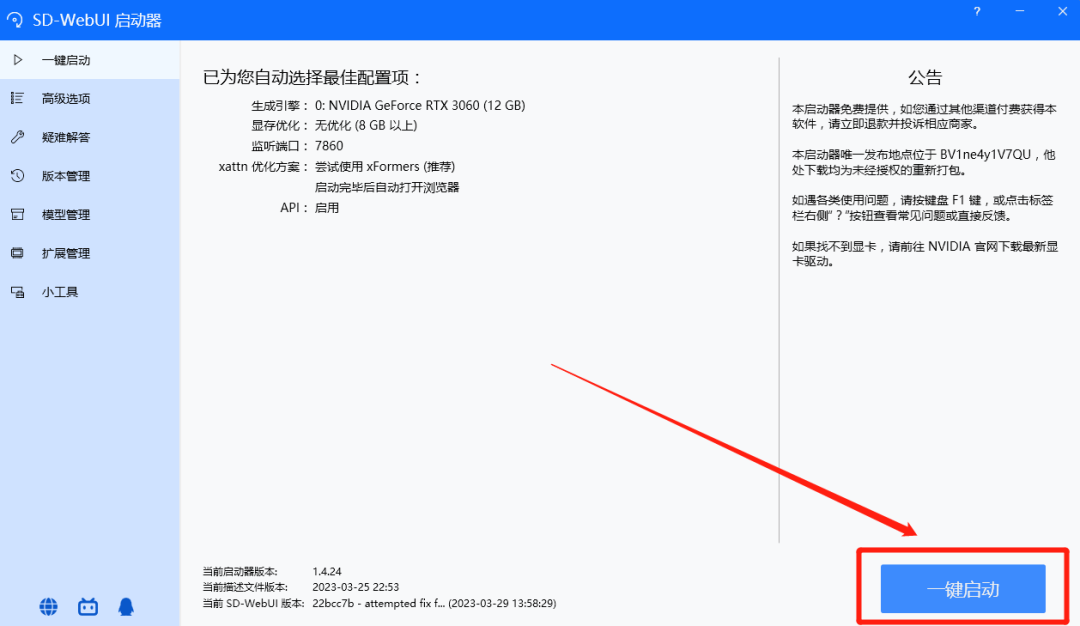
(3) Click the launcher application to start Stable Diffusion with one click.

(4) When the launcher page pops up, click “Start”.
(5) The first startup of Stable Diffusion may take a long time, please be patient:
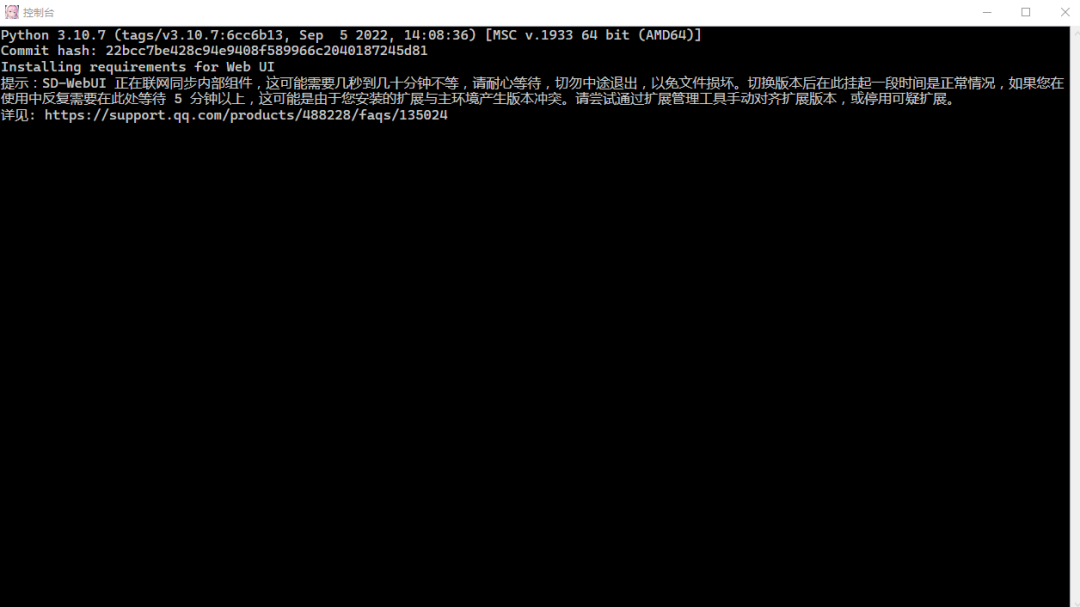
(6) When the Stable Diffusion interface pops up automatically, it means you have completed its local deployment.

2. Familiarize Yourself with the Stable Diffusion Interface
(1) In the upper left corner of the interface, you can select the base model for creation.
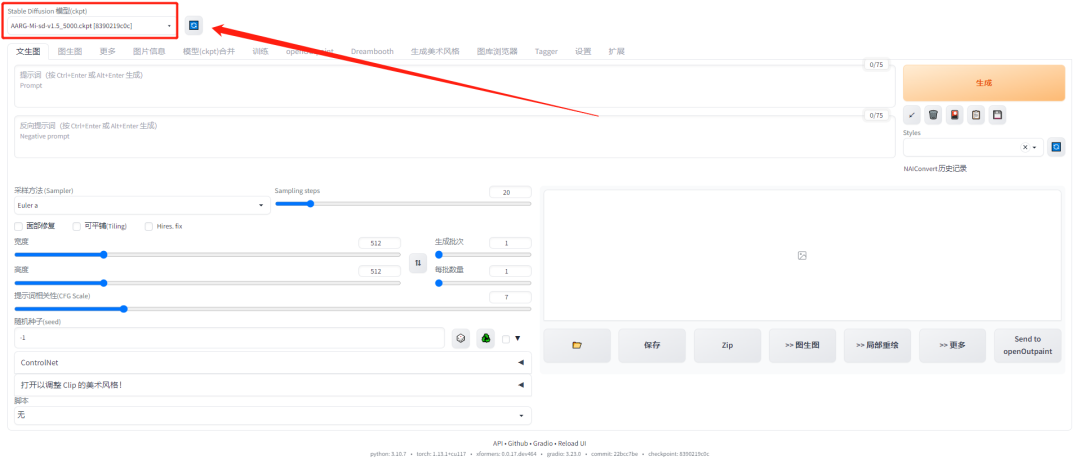
(2) Below the model selection is the text input field for prompts.
Unlike Midjourney, Stable Diffusion also has a line for negative prompt text, where you can input elements you don’t want to appear in the image to fit your creative needs.

(3) Below the prompt text field aresampling methods and iteration steps.
Simply put, the iteration steps affect the richness of the details in the created image. The more iteration steps, the more details produced.
More iteration steps are not always better; this needs to be adjusted based on the creative project.

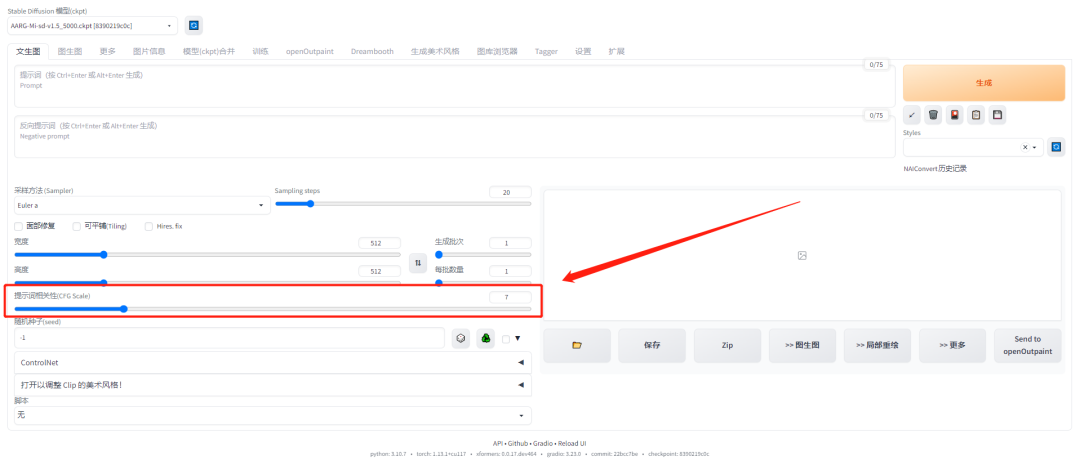
(4) Below are the image width, height, generation batch, and quantity per batch.
It is worth noting the prompt relevance below them.It controls the degree to which the output image is influenced by the input prompts.The typical range is between 7-15.
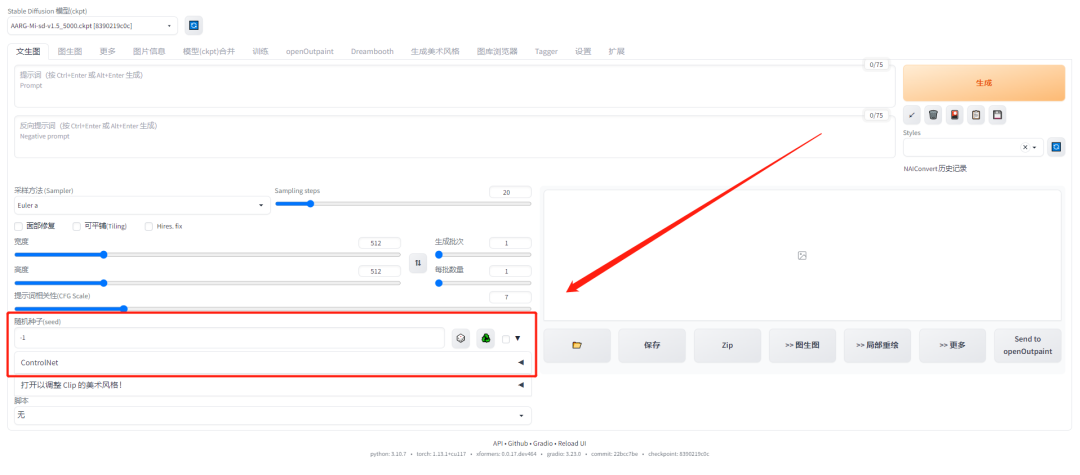
(5) Below the prompt relevance is the very important random seed parameter and ControlNet plugin.
It can be said that it is precisely because of the ControlNet plugin that Stable Diffusion distinguishes itself from other “blind box” AI generation tools like Midjourney, making it more applicable to real projects in architecture and interior design.
3. Introduction to ControlNet Plugin
How to install the ControlNet plugin for Stable Diffusion:
A. Click “Extensions” on the page.
B. Click “Available” in the extension interface.
C. Click “Load from” in the available interface.
D. Hold down the control key on the keyboard and press the F key to bring up the search text box.
E. Type “controlnet” in the search text box.
F. Find “Diffusion Control Network (controlnet)” and click the install button behind it.
G. Click “Apply and Restart UI” and wait for the installation to complete.
After ensuring that the ControlNet plugin is installed, you need to change the root path of ControlNet, the specific process is as follows:
A. Click “Settings” and find the ControlNet option.
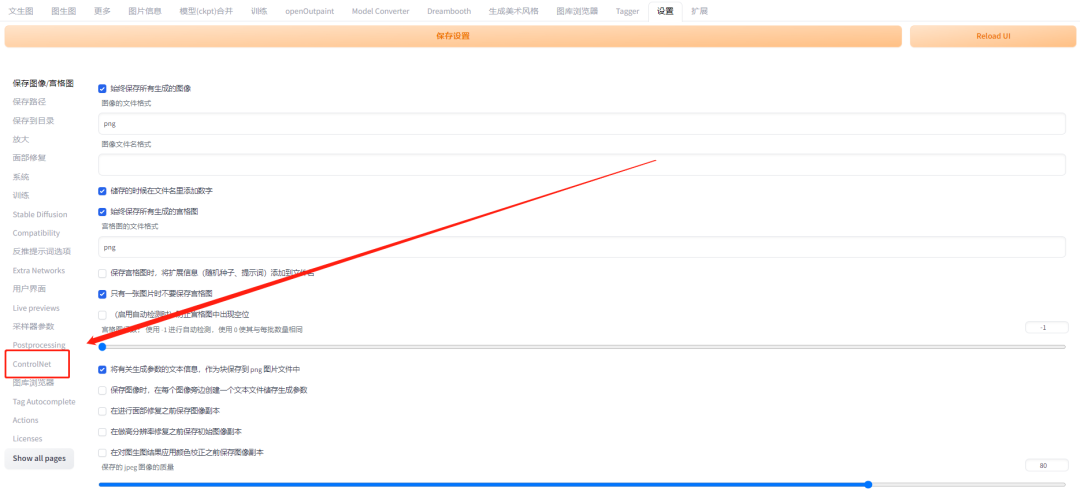
B. Copy the root path of ControlNet.
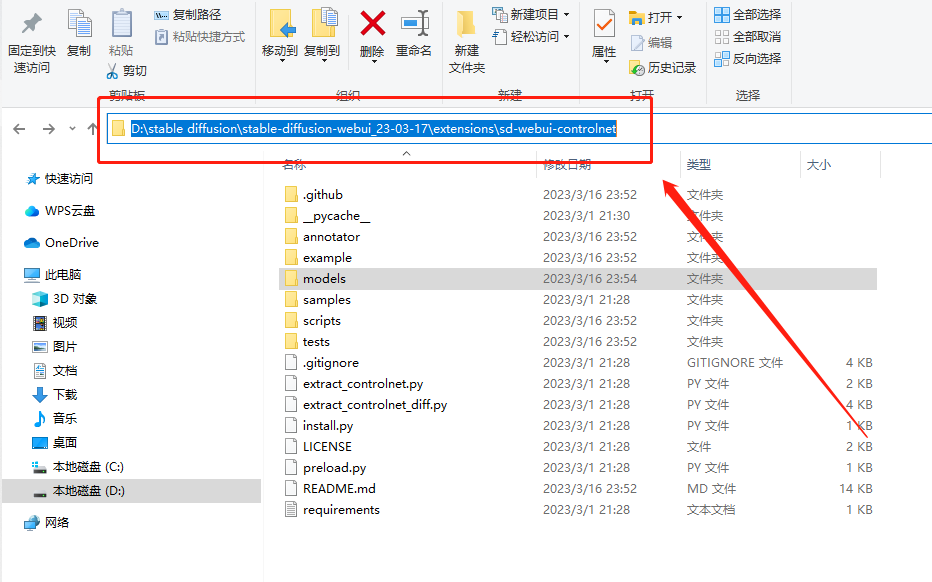
C. Paste the ControlNet root path into the save path.
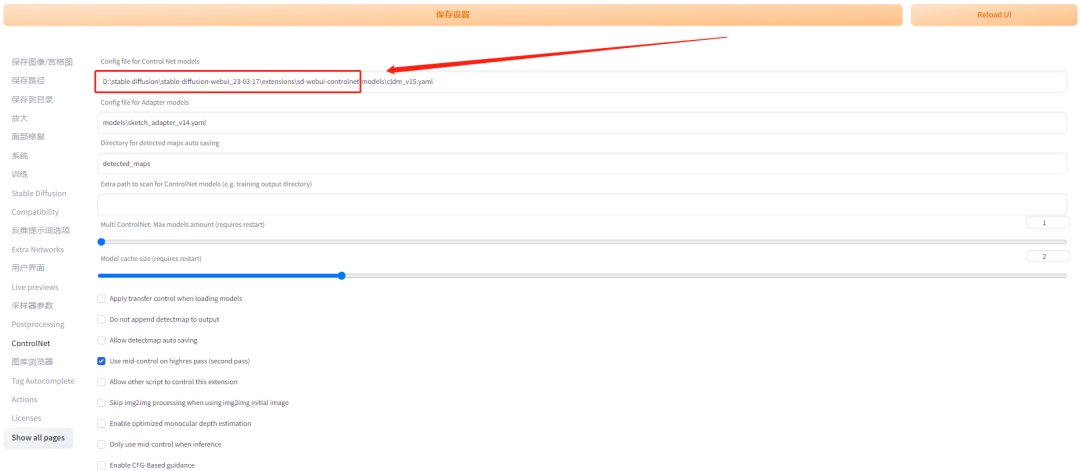
It is important to note that this operation must be performed under the premise of “scientific internet access”.
4. Practical Case Sharing
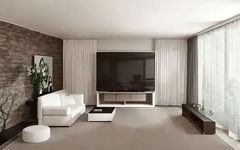
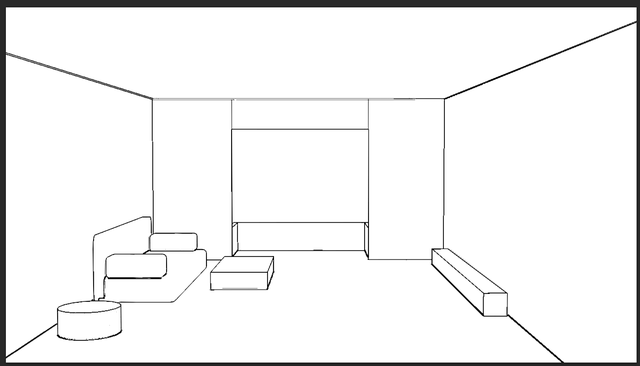
(1) Obtaining Indoor Line Drawing
First, open 3ds max, simply stack a room scene using boxes, you can also use other 3D software, and then render a line drawing of this scene.
(2) Setting Prompts
Select text-to-image, the positive keywords and negative keywords are as follows, the initial iteration steps can be set lower, make sure the aspect ratio matches the line drawing.
Positive keywords:
The interior design of a beautiful living room with a big glass windows with heavy curtains,bay window,tv wallNegative keywords:
ugly,poorly designed,amateur,bad bad proportions, bed lighting,direct sunlight,people,person,cartoonish
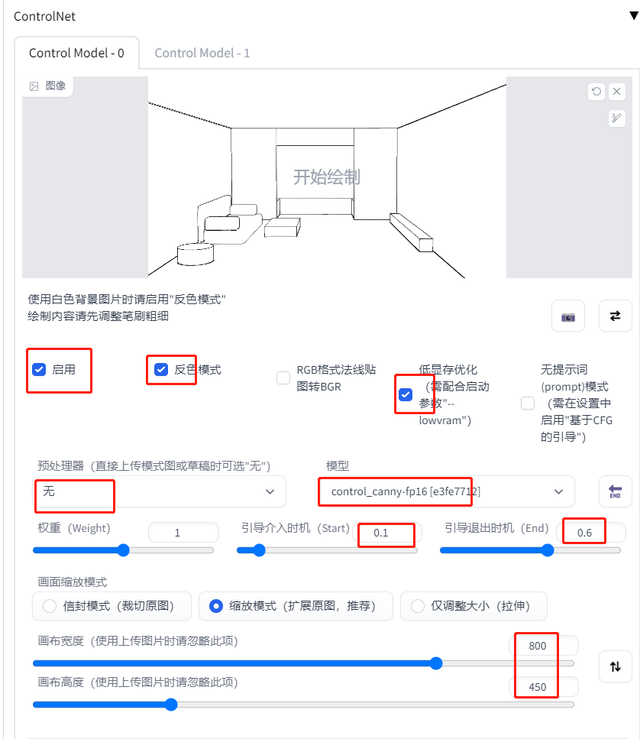
(3) Setting ControlNet
Open ControlNet, drag the previously rendered line drawing into the reference image of ControlNet,check Enable, since it is a white background image, you need tocheck Inverse Mode.
If the graphics card memory is low, checkLow Memory Optimization.Since the reference image is a line drawing, there is no need to select a preprocessor; in the model,select canny.
Set the guidance intervention timing to around 0.1, and the guidance exit timing to around 0.6.
Finally, don’t forget the size; set it to match the original image ratio.
The output result is as follows. If you are not satisfied with this image, you can generate several more until you find one you like.
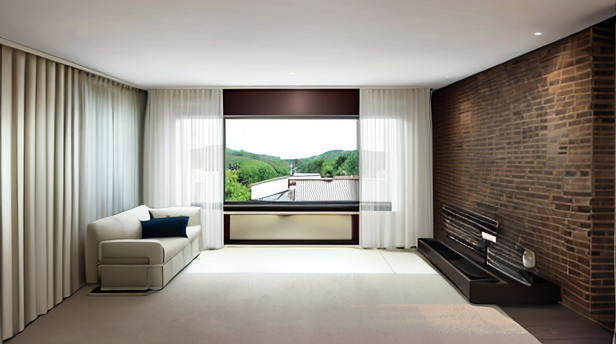

It is important to note: After opening ControlNet, the image generation speed will become very slow, so initially it is recommended that everyone set the iteration steps and size smaller, generate more images in batches, and once
you find an image you like, keep the seed number, and then generate a larger image.
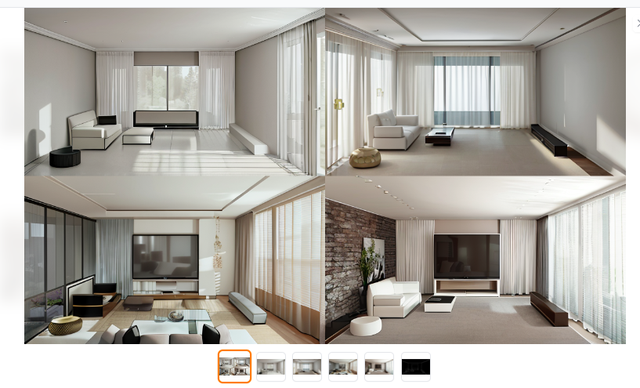
After selecting a satisfactory image, keep the seed number, and then generate a larger image.
How to keep the seed number? Click on the image whose seed number you want to keep, and on the left side, there is a green button; clicking it will show a series of numbers, which is the seed number.
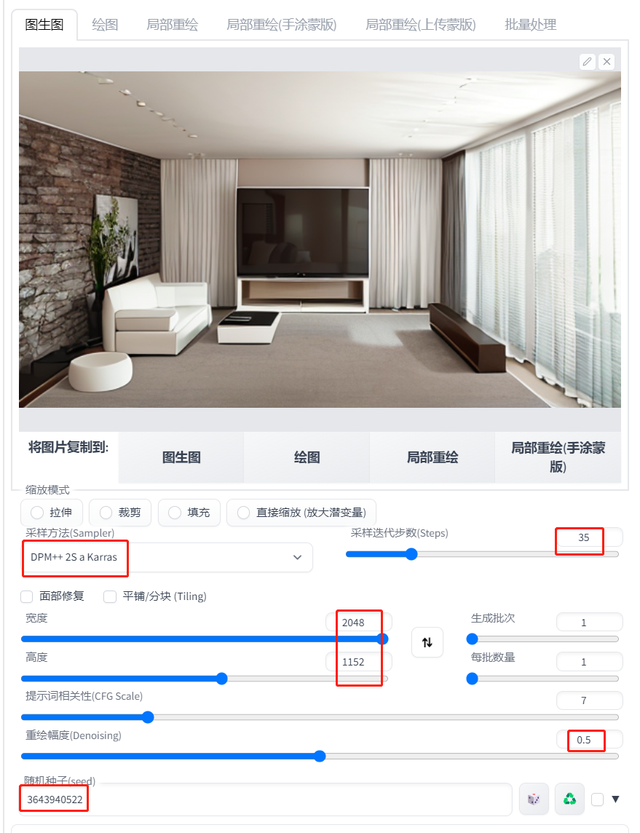
(4) Obtaining a 4K Image
Next, we will enlarge the image. Click on the image generation interface below the image, and you will find that the prompts and seed number we used in text-to-image have all been copied over.
Next, set the sampler, increase the iteration steps, proportionally increase the image size, and finally be careful not to make the redraw amplitude too large, otherwise the output image will undergo significant changes.
Finally, go to the additional features and enlarge the image obtained from the image generation interface by another 2 times to get a 4K high-definition image.


Summary
If you have spent some time reading the above content carefully and followed the steps, then I believe you have successfully entered the world of Stable Diffusion, this AI image generation tool.
The future is here, and what will be more needed in the future are interior designers who can use AI! Hurry up and learn now~
PS: If you need the Stable Diffusion installation package, please reply with “AI installation package”.