1. Installing TensorFlow
1. Install from Binary using pip
Note:
-
The link to the latest version of the binary files can be obtained from the TensorFlow official website here.
-
Please install the latest version of pip, or use
pip install --upgrade pipto update. -
If installing the GPU version, please ensure that CUDA is installed and configured beforehand.
Python 2.7
// CPU version
pip install https://storage.googleapis.com/tensorflow/linux/cpu/tensorflow-1.4.0-cp27-none-linux_x86_64.whl

// GPU version
pip install https://storage.googleapis.com/tensorflow/linux/gpu/tensorflow_gpu-1.4.0-cp27-none-linux_x86_64.whl-
1
-
2
-
3
-
4
-
5
Python 3.4
// CPU version
pip install https://storage.googleapis.com/tensorflow/linux/cpu/tensorflow-1.4.0-cp34-cp34m-linux_x86_64.whl

// GPU version
pip install https://storage.googleapis.com/tensorflow/linux/gpu/tensorflow_gpu-1.4.0-cp34-cp34m-linux_x86_64.whl-
1
-
2
-
3
-
4
-
5
Python 3.5
// CPU version
pip install https://storage.googleapis.com/tensorflow/linux/cpu/tensorflow-1.4.0-cp35-cp35m-linux_x86_64.whl

// GPU version
pip install https://storage.googleapis.com/tensorflow/linux/gpu/tensorflow_gpu-1.4.0-cp35-cp35m-linux_x86_64.whl-
1
-
2
-
3
-
4
-
5
Python 3.6
// CPU version
pip install https://storage.googleapis.com/tensorflow/linux/cpu/tensorflow-1.4.0-cp36-cp36m-linux_x86_64.whl

// GPU version
pip install https://storage.googleapis.com/tensorflow/linux/gpu/tensorflow_gpu-1.4.0-cp36-cp36m-linux_x86_64.whl-
1
-
2
-
3
-
4
-
5
2. Install from Source
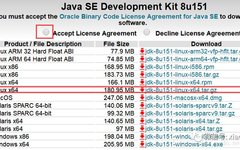
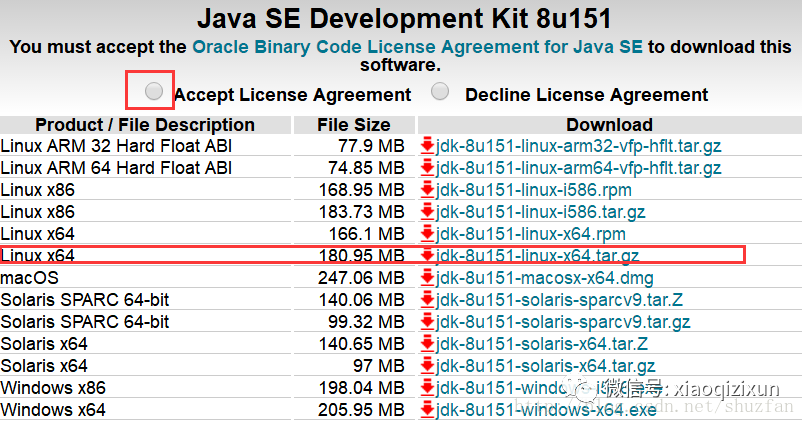
2.1 Install JDK8
Download the corresponding version from the official website here.
Use the tar command to extract the files:
tar zxvf jdk-8u151-linux-x64.tar.gz-
1
Use the vi editor to set environment variables:
# Current user (this file is hidden, you can use the ll command to view)
vi /$HOME/.bashrc-
1
-
2
Add the following content to the end of the opened file and save it, where JAVA_HOME is the extraction path:
export JAVA_HOME=/usr/jdk1.8.0_151
export CLASSPATH=.:$JAVA_HOME/lib/dt.jar:$JAVA_HOME/lib/tools.jar
export PATH=$PATH:$JAVA_HOME/bin-
1
-
2
-
3
Use the following command to make the environment variables take effect immediately:
# Current user (this file is hidden, you can use the ll command to view)
source /$HOME/.bashrc-
1
-
2
2.2 Install Bazel
First, go to the Release page here to download Bazel. Or use the following command:
wget https://github.com/bazelbuild/bazel/releases/download/0.7.0/bazel-0.7.0-dist.zip-
1
After downloading, extract and enter the directory to compile:
unzip /home/zhaofan/bazel -d bazel

cd bazel

./compile.sh-
1
-
2
-
3
-
4
-
5
After installation, an “/output” folder will be generated in the folder. Add this path to .bashrc and use source to take effect immediately. For example, my path is:
export PATH=$PATH:/home/****/3rdparty/bazel/output-
1
2.3 Install CUDA and cuDNN
It is recommended to install CUDA 8.0 (it seems that 9.0 is also supported). CUDA must be installed with administrator privileges; otherwise, even if it compiles successfully, it will not function properly on the GPU. Therefore, if CUDA is not installed, contact your administrator for installation.
For installing CUDA, you can refer to this article.
It is recommended to install cuDNN version 6 or higher, and the cuDNN files should be in the same directory as CUDA, that is:
cudnn.h should be located in cuda/include, and libcudnn.* files should be located in cuda/lib64.
If you need to upgrade or replace a lower version of cuDNN, you can refer to the article on upgrading cuDNN version on Ubuntu 14.04.
2.4 Install TensorFlow on Anaconda
To avoid non-administrators from being unable to upgrade to the latest version of Python packages, it is recommended to use Anaconda. You can refer to the article on installing Anaconda on Linux.
Download the latest TensorFlow source code:
git clone --recurse-submodules https://github.com/tensorflow/tensorflow-
1
Enter the root directory of TensorFlow and execute:
./configure-
1
Follow the prompts to enter y/n or paths and other information. Pay attention to: Python path, enabling GPU support, CUDA path, cuDNN path, etc. The specifics are as follows:
WARNING: Running Bazel server needs to be killed, because the startup options are different.
You have bazel 0.7.0- (@non-git) installed.
Please specify the location of python. [Default is /home/zhaofan/anaconda3/bin/python]:
Found possible Python library paths:
/home/zhaofan/anaconda3/lib/python3.6/site-packages
Please input the desired Python library path to use. Default is [/home/zhaofan/anaconda3/lib/python3.6/site-packages]Do you wish to build TensorFlow with jemalloc as malloc support? [Y/n]: nNo jemalloc as malloc support will be enabled for TensorFlow.Do you wish to build TensorFlow with Google Cloud Platform support? [Y/n]: nNo Google Cloud Platform support will be enabled for TensorFlow.Do you wish to build TensorFlow with Hadoop File System support? [Y/n]: nNo Hadoop File System support will be enabled for TensorFlow.Do you wish to build TensorFlow with Amazon S3 File System support? [Y/n]: nNo Amazon S3 File System support will be enabled for TensorFlow.Do you wish to build TensorFlow with XLA JIT support? [y/N]: nNo XLA JIT support will be enabled for TensorFlow.Do you wish to build TensorFlow with GDR support? [y/N]: nNo GDR support will be enabled for TensorFlow.Do you wish to build TensorFlow with VERBS support? [y/N]: nNo VERBS support will be enabled for TensorFlow.Do you wish to build TensorFlow with OpenCL SYCL support? [y/N]: nNo OpenCL SYCL support will be enabled for TensorFlow.Do you wish to build TensorFlow with CUDA support? [y/N]: y
CUDA support will be enabled for TensorFlow.
Please specify the CUDA SDK version you want to use, e.g. 7.0. [Leave empty to default to CUDA 8.0]:
Please specify the location where CUDA 8.0 toolkit is installed. Refer to README.md for more details. [Default is /usr/local/cuda]:
Please specify the cuDNN version you want to use. [Leave empty to default to cuDNN 6.0]: 6Please specify the location where cuDNN 6 library is installed. Refer to README.md for more details. [Default is /usr/local/cuda]:
Please specify a list of comma-separated Cuda compute capabilities you want to build with.
You can find the compute capability of your device at: https://developer.nvidia.com/cuda-gpus.
Please note that each additional compute capability significantly increases your build time and binary size. [Default is: 6.1,6.1,6.1,6.1]Do you want to use clang as CUDA compiler? [y/N]: n
nvcc will be used as CUDA compiler.
Please specify which gcc should be used by nvcc as the host compiler. [Default is /usr/bin/gcc]:
Do you wish to build TensorFlow with MPI support? [y/N]: nNo MPI support will be enabled for TensorFlow.
Please specify optimization flags to use during compilation when bazel option “–config=opt” is specified [Default is -march=native]:
Add “–config=mkl” to your bazel command to build with MKL support.
Please note that MKL on MacOS or windows is still not supported.If you would like to use a local MKL instead of downloading, please set the environment variable “TF_MKL_ROOT” every time before build.
Configuration finished
After configuration, execute:
bazel build --config=opt --config=cuda --config=monolithic //tensorflow/tools/pip_package:build_pip_package-
1
The above process takes a lot of time, after it ends, continue executing:
bazel-bin/tensorflow/tools/pip_package/build_pip_package /tmp/tensorflow_pkg-
1
Finally, install the generated .whl file:
pip install /tmp/tensorflow_pkg/tensorflow-1.4.0-cp36-cp36m-linux_x86_64.whl-
1
After installation, exit the TensorFlow directory, open Python, and execute:
import tensorflow as tf
hello = tf.constant('Hello, TensorFlow!')
sess = tf.Session()
print(sess.run(hello))-
1
-
2
-
3
-
4
If it prints successfully, it indicates that the installation was successful.
3. Some Issues Encountered
3.1 About Enabling MKL Support
Add the mkl flag during compilation to automatically download the required mkl: Unfortunately, the network speed in China may cause this step to fail.
bazel build --config=opt --config=cuda --config=monolithic --config=mkl//tensorflow/tools/pip_package:build_pip_package-
1
Alternatively, download and install mkl yourself, then set the TF_MKL_ROOT variable. Unfortunately, I also did not succeed with this method.
3.2 Cannot Find Dynamic Library
For example, the following error:
ImportError: libcusolver.so.8.0: cannot open shared object file: No such file or directory-
1
-
2
The solution is to add the library path to the environment variable.
Edit the .bashrc file:
export LD_LIBRARY_PATH=$LD_LIBRARY_PATH:/usr/local/cuda/lib64