
1. Install Python
1. Download the installation package
You can download the Windows version installation package from the Python official website at: https://www.python.org/downloads/windows/
2. After downloading, double-click the installation package to install it. During the installation process, you can choose whether to add Python to the system environment variables.
2. Download AutoGPT Code
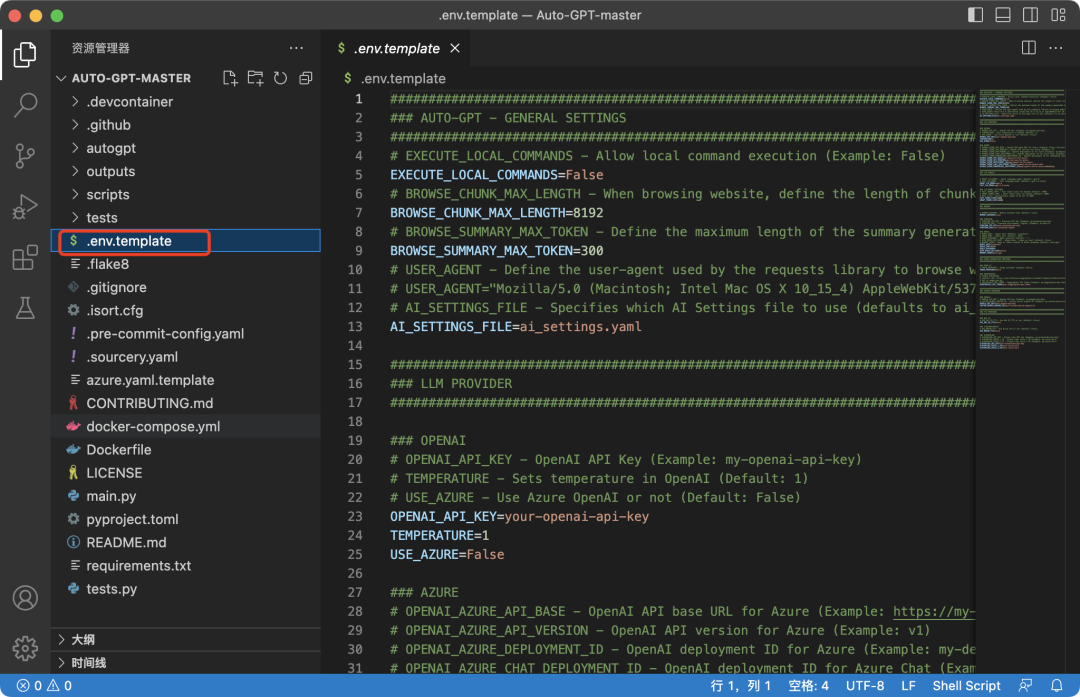
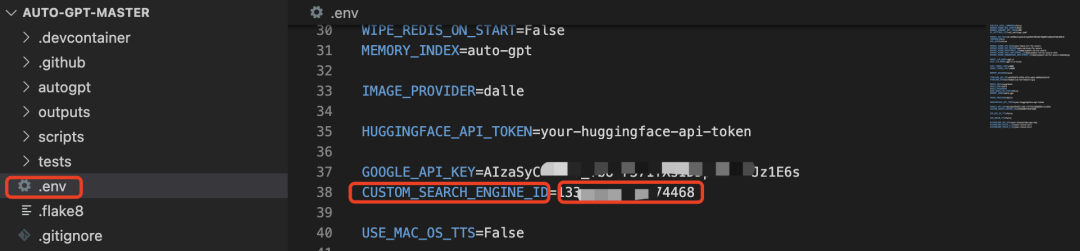
1. If you haven’t installed git, click the link to download https://github.com/Torantulino/Auto-GPT/archive/refs/heads/master.zip, unzip it. Open the file with a code editor, I used VS Code here, find the env.template file, delete the suffix and rename it to “.env”
3. API Configuration
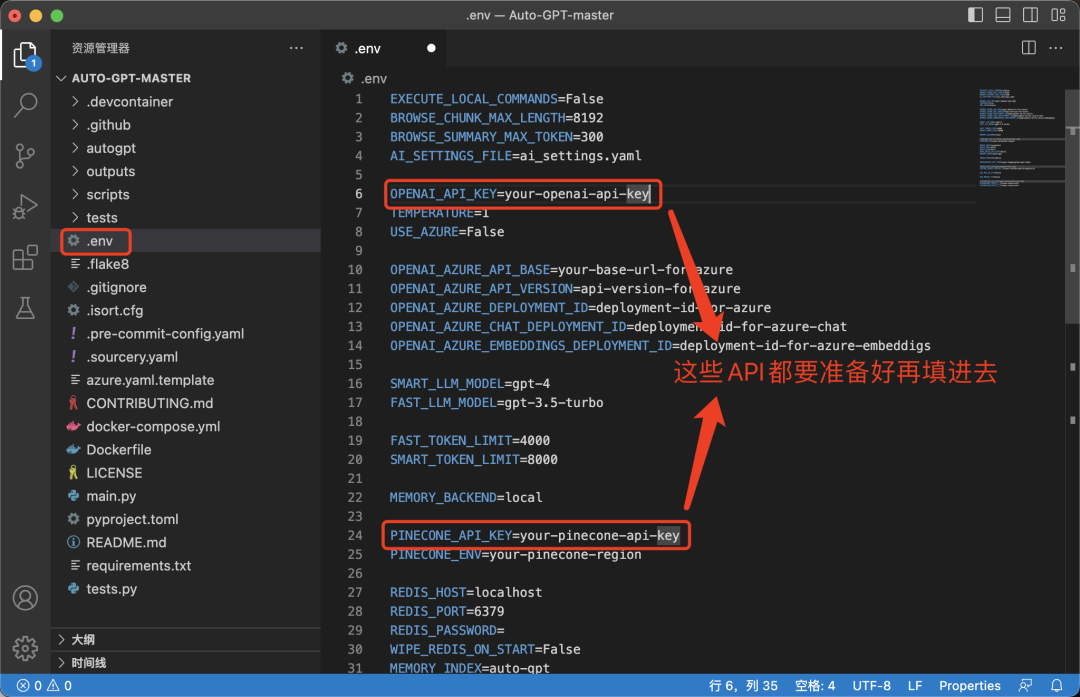
AutoGPT requires the following APIs:
1. ChatGPT
2. Google API and Google Search Engine ID
3. Pinecone
1/ Get ChatGPT API
Visit https://platform.openai.com to get it, and paste it into the corresponding position in the .env file.

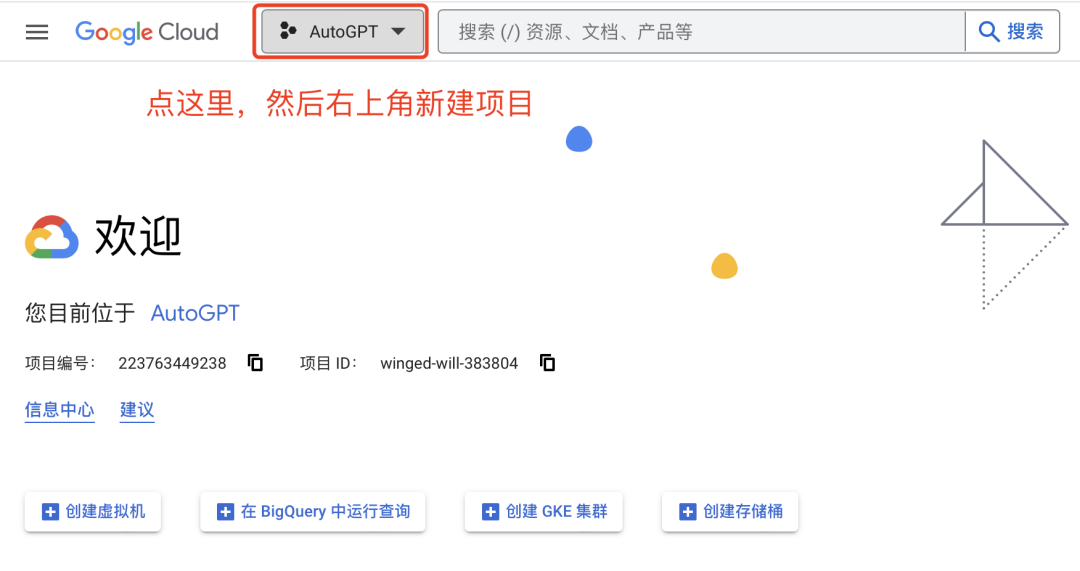
2/ Get Google API and Google Search Engine ID
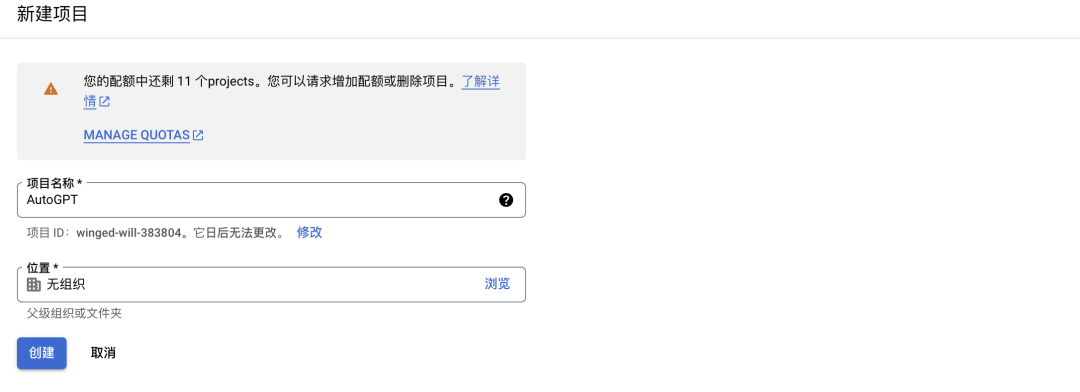
Go to https://console.cloud.google.com, create an unorganized project:
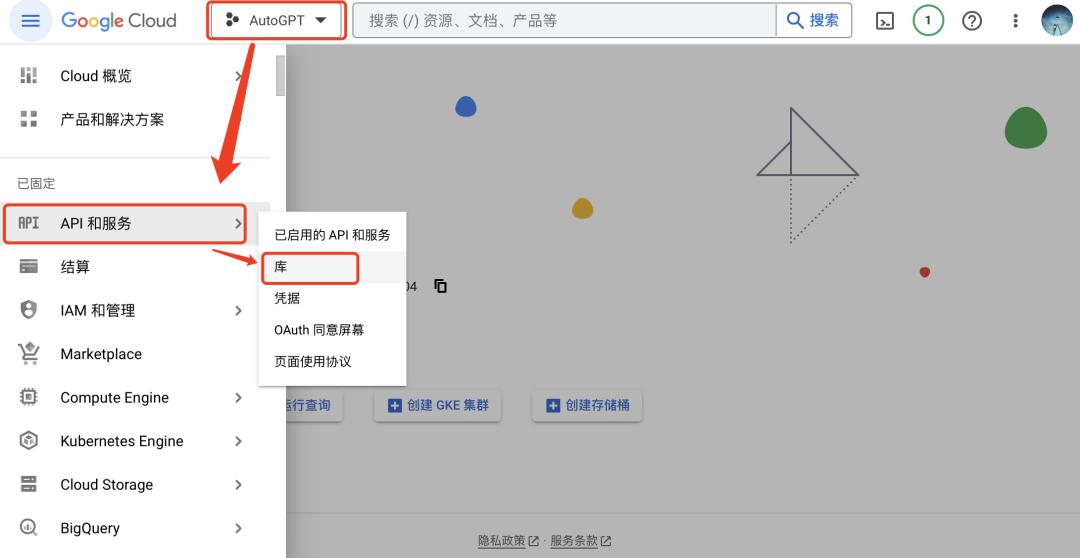
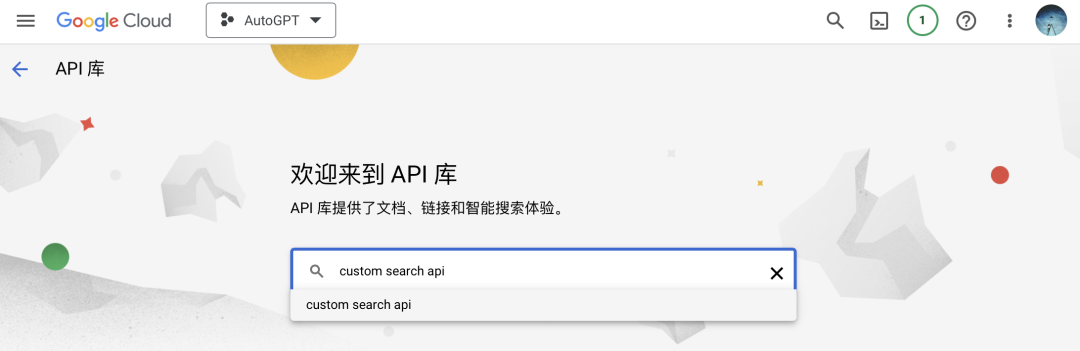
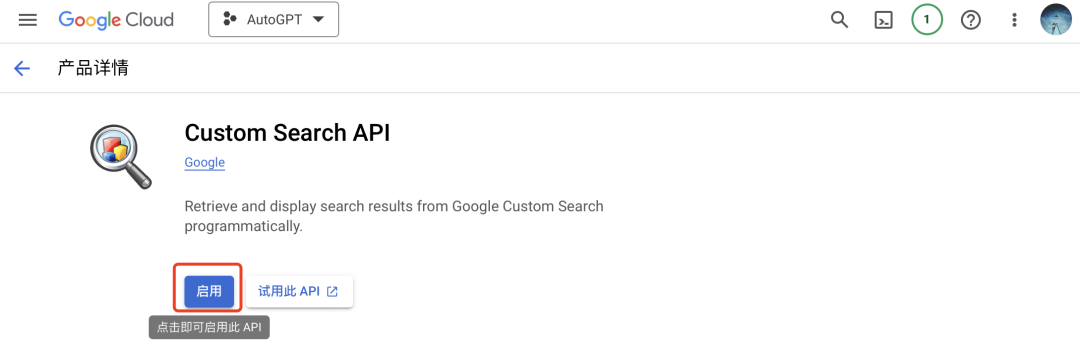
After creating the project, go to your created project – API & Services – Library, search for Custom Search API, and enable it.
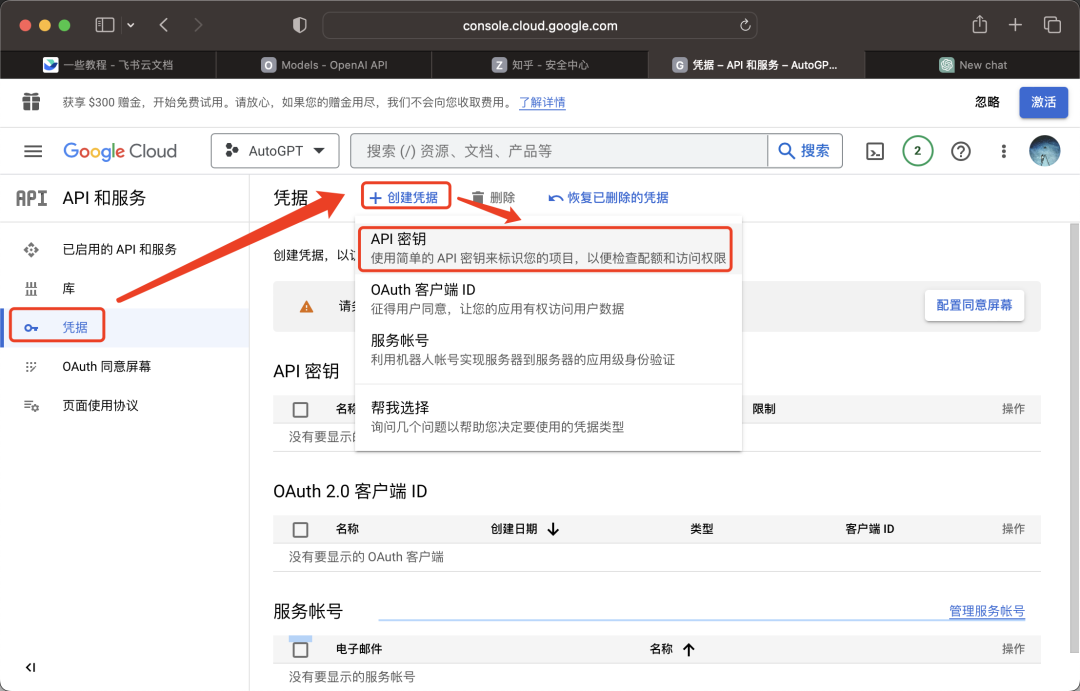
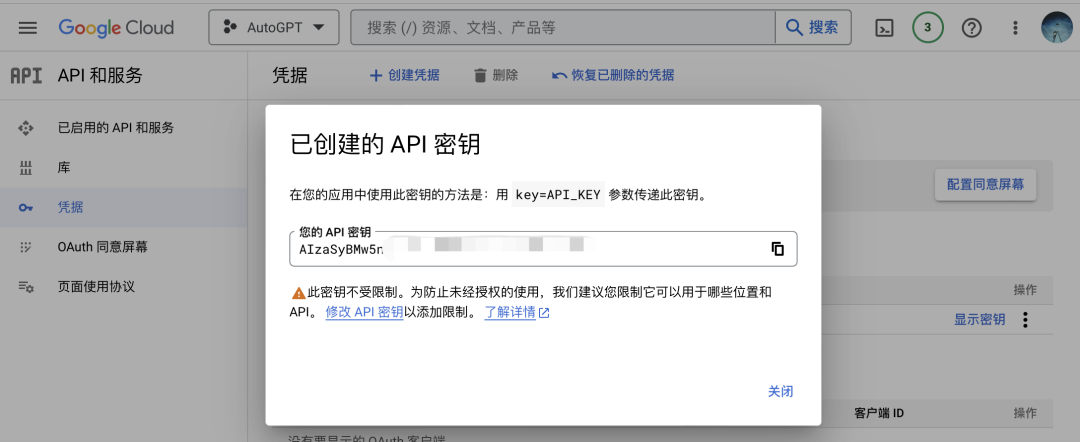
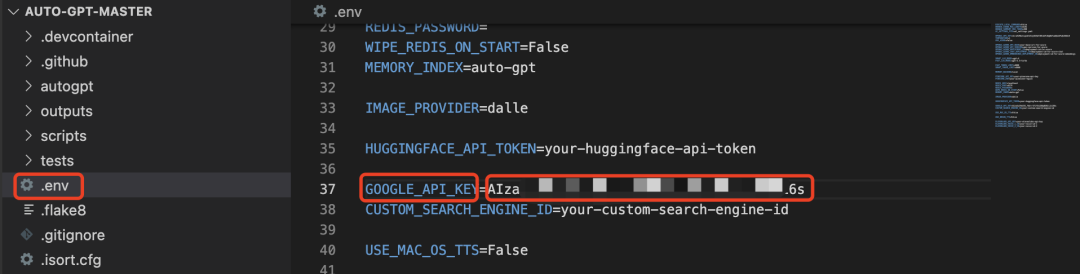
Click Credentials – Create Credentials – API Key – Copy the key – Paste it after “GOOGLE_API_KEY=” in the .env file:
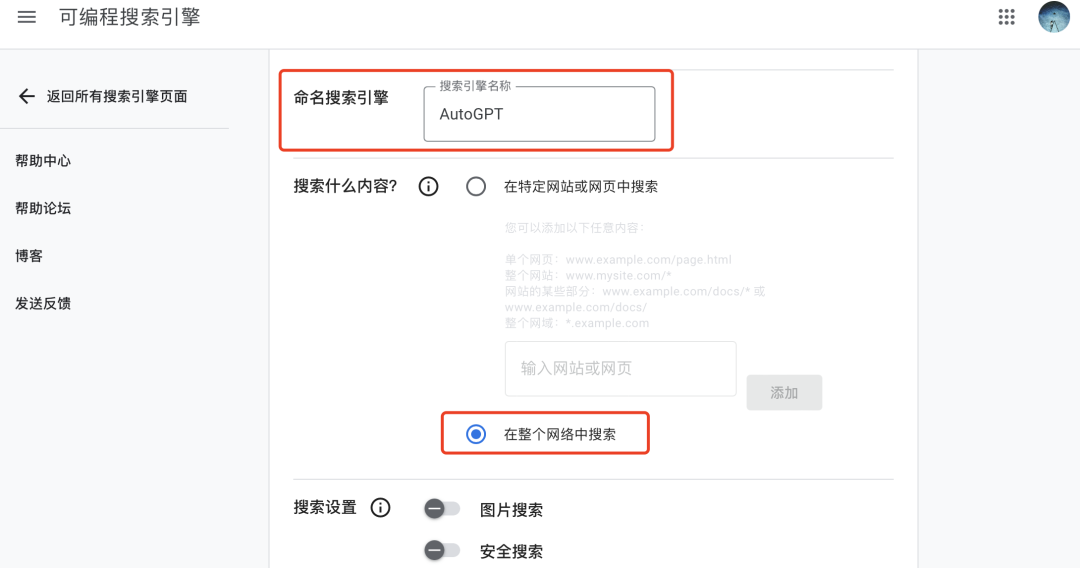
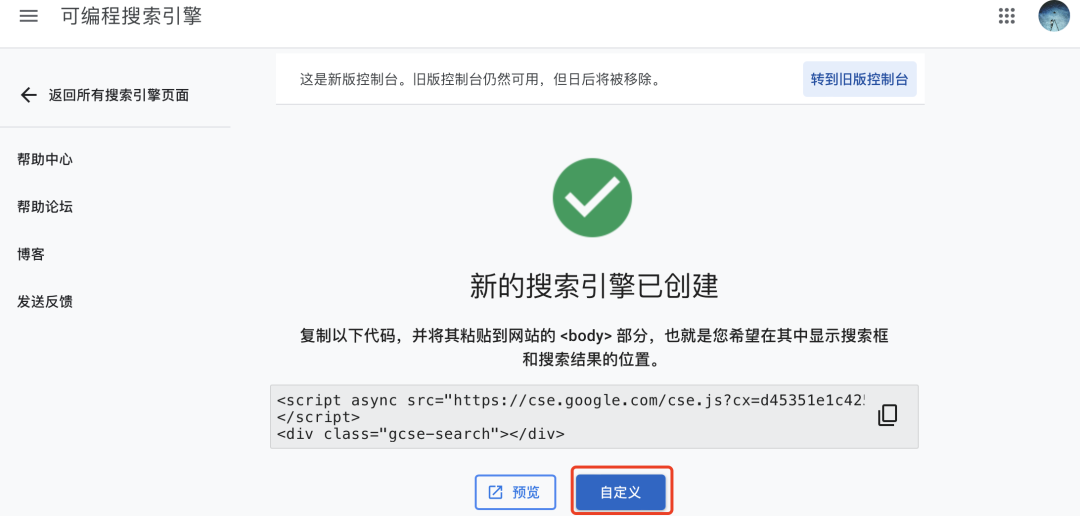
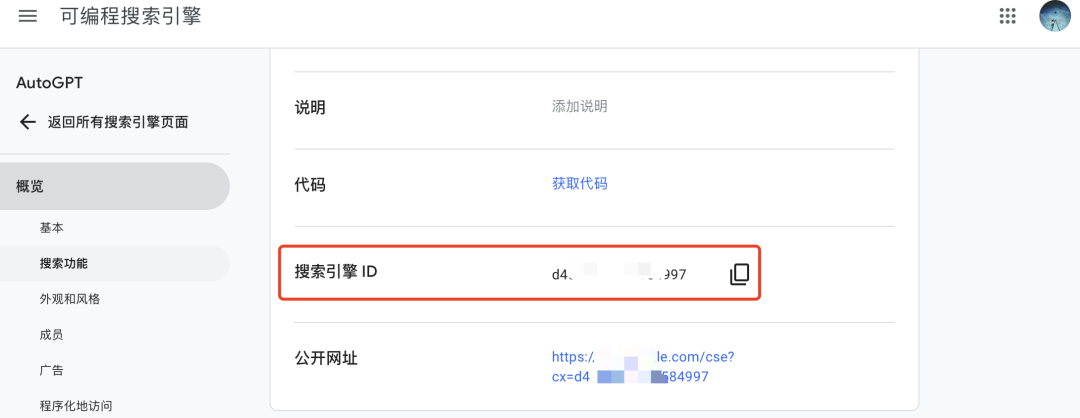
3/ Then similarly add the CUSTOM_SEARCH_ENGINE_ID, visit https://programmablesearchengine.google.com/about/
Create a search engine, set it to search the entire web:
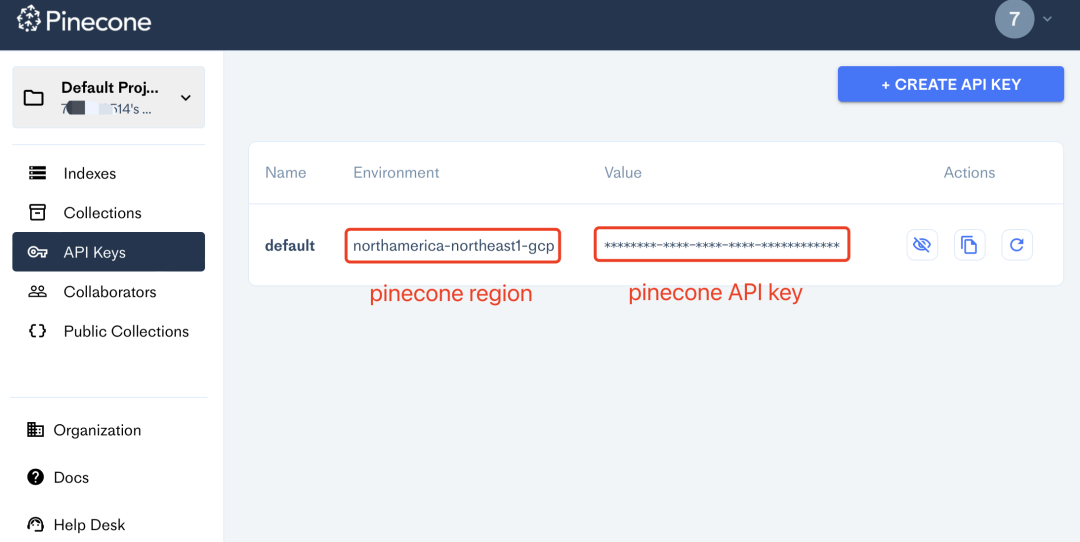
4/ Get Pinecone API
Visit https://www.pinecone.io, register an account, get the API and Pinecone region, and fill in the corresponding position in the .env file:

4. Run AutoGPT
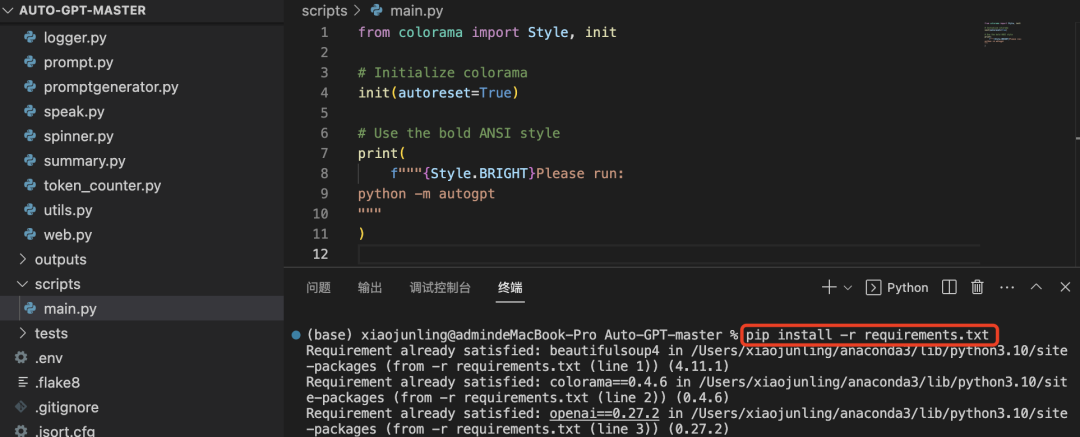
1. Install the required libraries
Install the required libraries with pip install -r requirements.txt:
2. Done
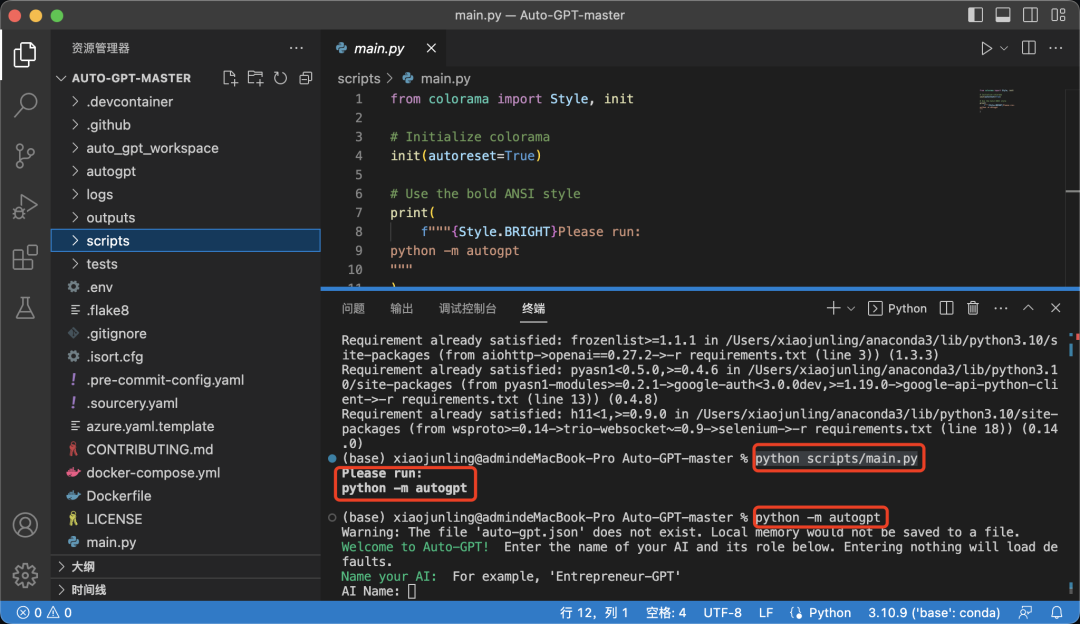
Run python scripts/main.py and follow the prompts to enter python -m autogpt — continuous –gpt3only (where the — continuous parameter means automatic confirmation of commands, no manual confirmation is required).