How to Create a Custom Agent Using Copilot Studio

Follow our public account to learn more about the hybrid office ecosystem and Microsoft infrastructure.

How to Create a Custom Agent Using Copilot Studio

This article is approximately 2000 words and takes about 10 minutes to read.

Agents are the direction for AI implementation

How to Create a Custom Agent Using Copilot Studio
In previous articles, I mentioned the importance of data for AI and its application in enterprises. There is a vast amount of data within the organization, including payroll, personnel evaluations, sales data, R&D designs, financial data, after-sales knowledge bases, etc. Different business departments have different usage scenarios and needs. For example:
Payroll, personnel evaluations, and IT knowledge bases are data that everyone needs to access, while sales data and financial data cannot be opened to other departments. However, these departments also need AI for data analysis and reasoning. Therefore, internal enterprises need Digital HR (IT) to onboard AI for various departments.
Agents are definitely the direction for future AI applications. In Microsoft AI applications, you do not need to make complex configurations, as Microsoft has already set up the entire framework for you through Copilot Studio. You just need to make simple configurations to get started. In this article, we will use Microsoft 365 Copilot as an example to demonstrate how to create a custom Copilot Agent using Copilot Studio.
Just like onboarding a real employee:
First, the business department needs to propose requirements and provide data to the IT department;
Then, the IT department starts building the data sources based on these requirements and data;
Next, the IT department needs to create the digital agents, including connecting the data sources with AI and helping AI understand the data structures, what results the business department needs from these data, and running processes together with the business department for optimization. This is the onboarding training and probation period for digital agents.
Finally, the IT department needs to distribute this type of specific AI Agent for departmental users to use, and the digital agents officially start working for the enterprise.
In this process, data sources and prompt engineering are the two most important links. Prompt engineering can be accomplished with any AI; you just need to tell AI your requirements and let it generate prompts for you. AI will automatically generate the prompt engineering in markdown format, and of course, you can modify and improve it based on that. There are some limitations regarding data sources, but they are not many:
1. Currently, each Agent supports only 20 data sources, which can be Office documents, SharePoint sites, Web, or Graph connectors. If a single file is used as a data source, there are further limitations:
File Type
File Size Limit
.docx
512MB
.doc
150MB
.pdf
512MB
.txt
150MB
.pptx
512MB
.ppt
150MB
.html
150MB
2. The currently supported languages include: Danish, Dutch, English, French, German, Italian, Japanese, Portuguese, Spanish, and Simplified Chinese.
3. Currently, AI Agents can only be shared with security groups. If SharePoint files and folders are used as data sources, these SharePoint files and folders will be automatically shared with the target users when sharing the Agent.
4. Agents created in Copilot Studio cannot be used in Teams.
5. If the Copilot search for web content is disabled in tenant configuration, the web search function cannot be enabled when creating the Agent. However, in actual use, switching the UI interface to the web will not be disabled, which is a UI limitation.
Some small suggestions regarding Copilot Agents: Although you can create Agents directly from SharePoint Online sites, these Agents will not appear in Copilot Chat or in My Agents. This may be updated in the future. It is recommended to create Agents from Studio, as it allows you to easily add multiple data sources and conveniently update and share the Agent with other users in the organization.

Creating a Copilot Agent

How to Create a Custom Agent Using Copilot Studio
Next, let’s create your first Agent together. To use SharePoint sites as data sources, you need to create a dedicated site or use an existing dedicated site. However, as the creator of the Copilot Agent, you need to be the owner of this SharePoint site. Newly created SharePoint sites may not appear in Studio immediately; it usually takes 8-24 hours for the new site to be selectable through the data source option. Of course, you can manually enter the site URL to add the data source in a timely manner. The site URL format is: https://[tenantdefaultdomain].sharepoint.com/site/[name] Just replace the content within the brackets with the actual content.
How to Create a Custom Agent Using Copilot Studio

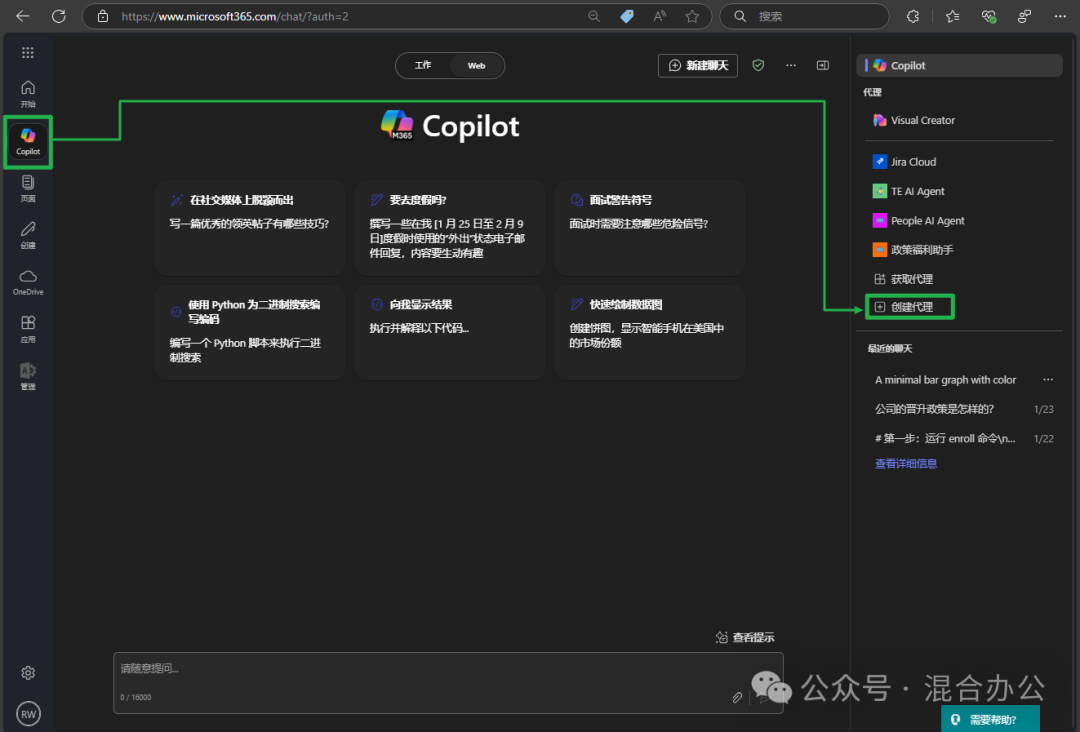
I recommend creating the agent from the image above. You can tell AI what you need to do through a conversation, including response tone and recommended agent names, etc. It is very convenient to use:

How to Create a Custom Agent Using Copilot Studio

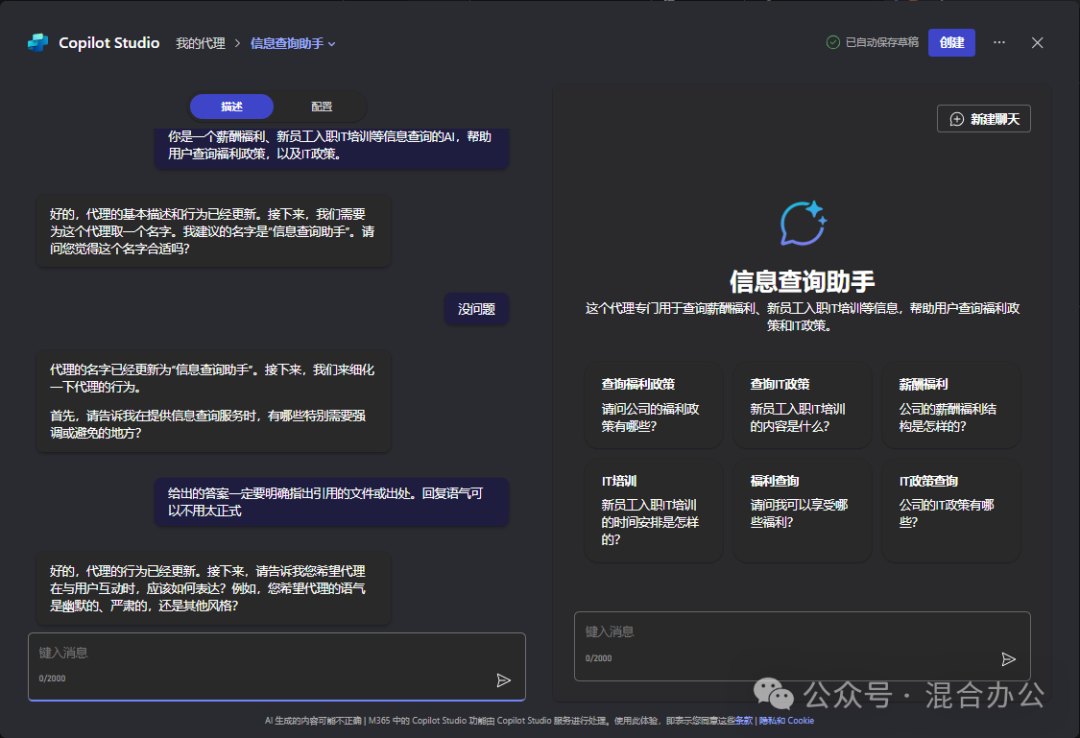
After completing the conversation withStudio, click on the “Configure” button on the right side, and you will see that all your requirements are presented in theAgent‘s description. Of course, you can also manually supplement the content in the description. In thelogo section, you can upload a customlogo and modify the background color to distinguish differentAgents.

How to Create a Custom Agent Using Copilot Studio

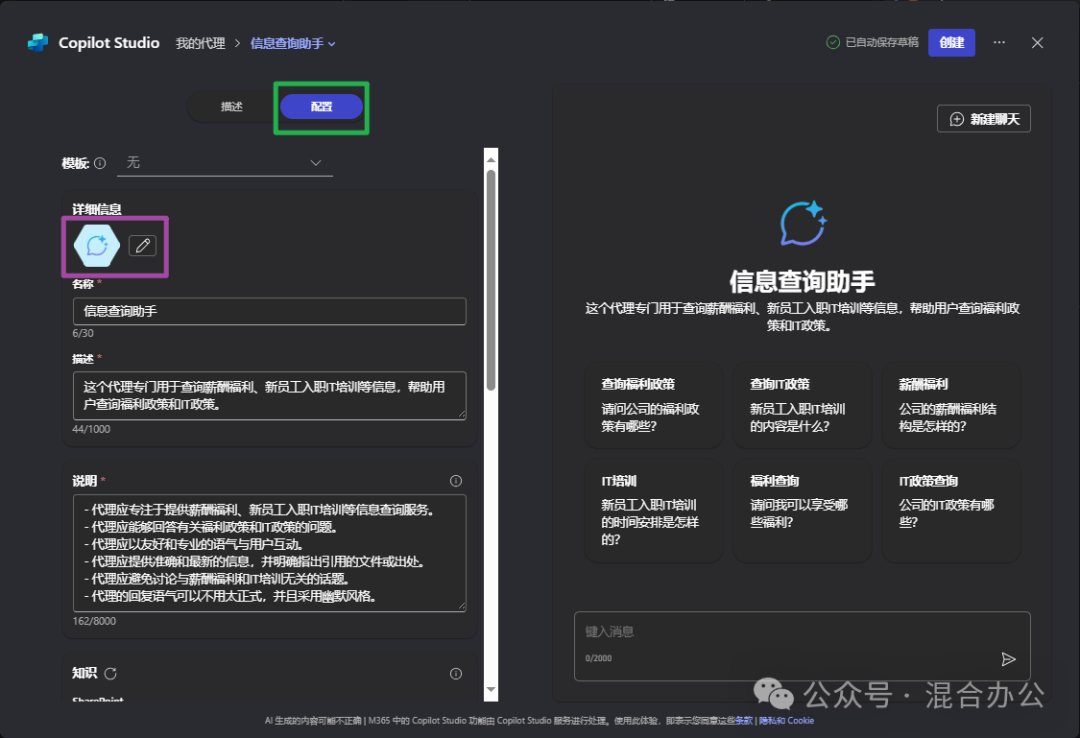
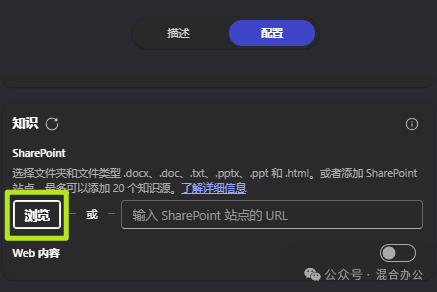
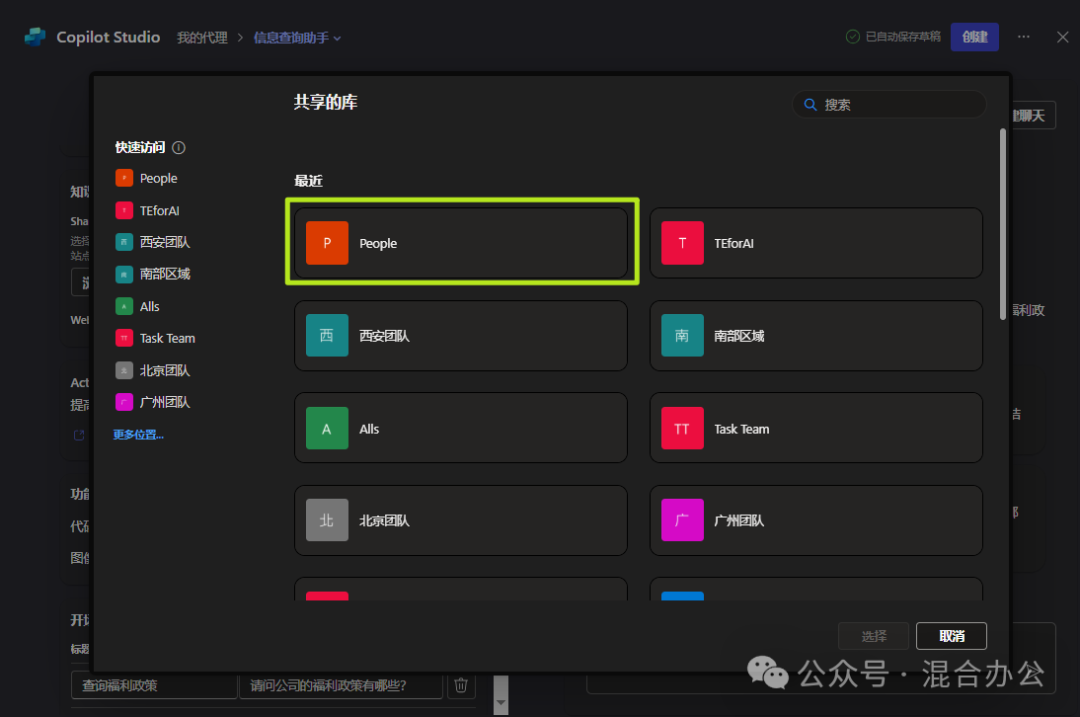
Next, add the knowledge base of theAgent. Click “Browse” to select theSharePoint site.

How to Create a Custom Agent Using Copilot Studio

Click on the createdSharePoint site, for example, I have previously created aPeople site, click on “People“.

How to Create a Custom Agent Using Copilot Studio

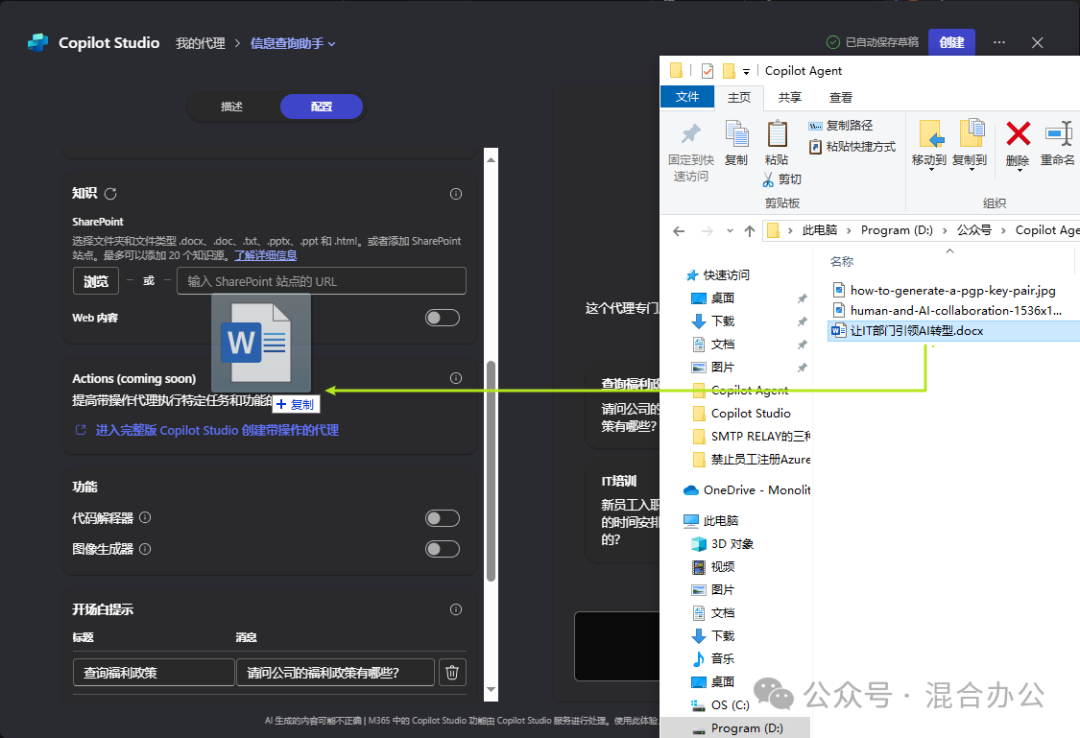
Next, select theKB folder in the document library (which should be created in advance and the documents uploaded into it).

How to Create a Custom Agent Using Copilot Studio
If you want to upload a single file, simply drag the file into the browser window.
How to Create a Custom Agent Using Copilot Studio

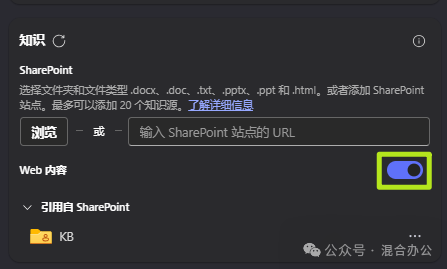
If you want thisAgent to search for internet content and answer, please enableWeb content. However, since we are performing precise queries for internal enterprise data, my suggestion is not to enable it.

How to Create a Custom Agent Using Copilot Studio

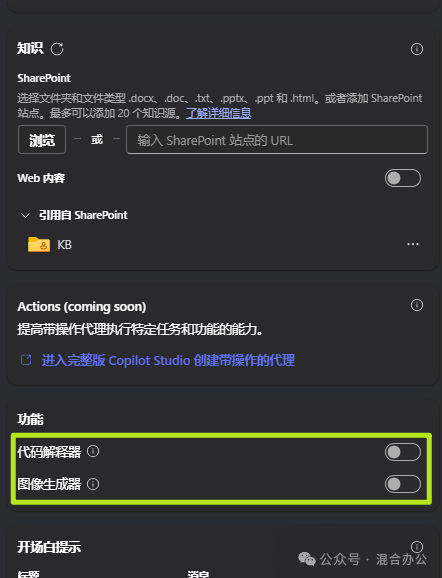
Additionally, if theAgent is for business or R&D departments, it is recommended to enable the following two features:

Code Interpreter – Use Python code to solve complex mathematical problems, analyze data, and generate visualizations.

Image Generator – Generate images based on user prompts.

How to Create a Custom Agent Using Copilot Studio

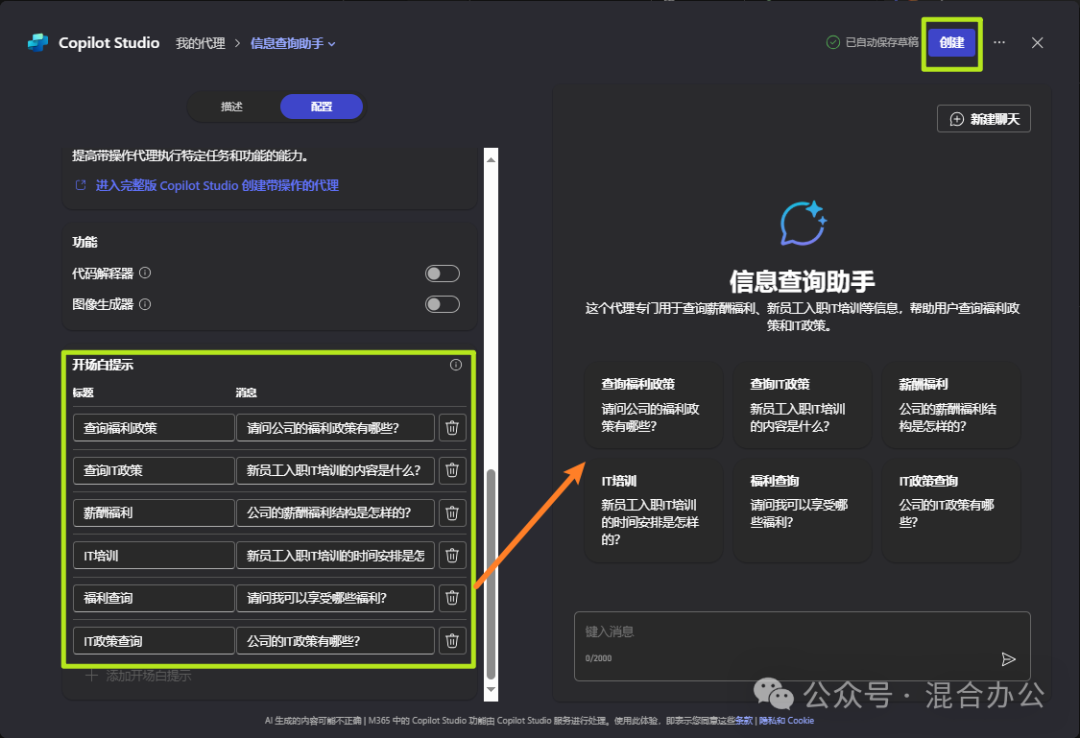
Next is the opening prompt, which can be adjusted as needed. Since we previously defined the functions of thisAgent through the conversation withStudio, these opening prompts are automatically generated. You can click these buttons in the chat window to quickly initiate a conversation. Once all configurations are complete, click create to finish the creation.

How to Create a Custom Agent Using Copilot Studio

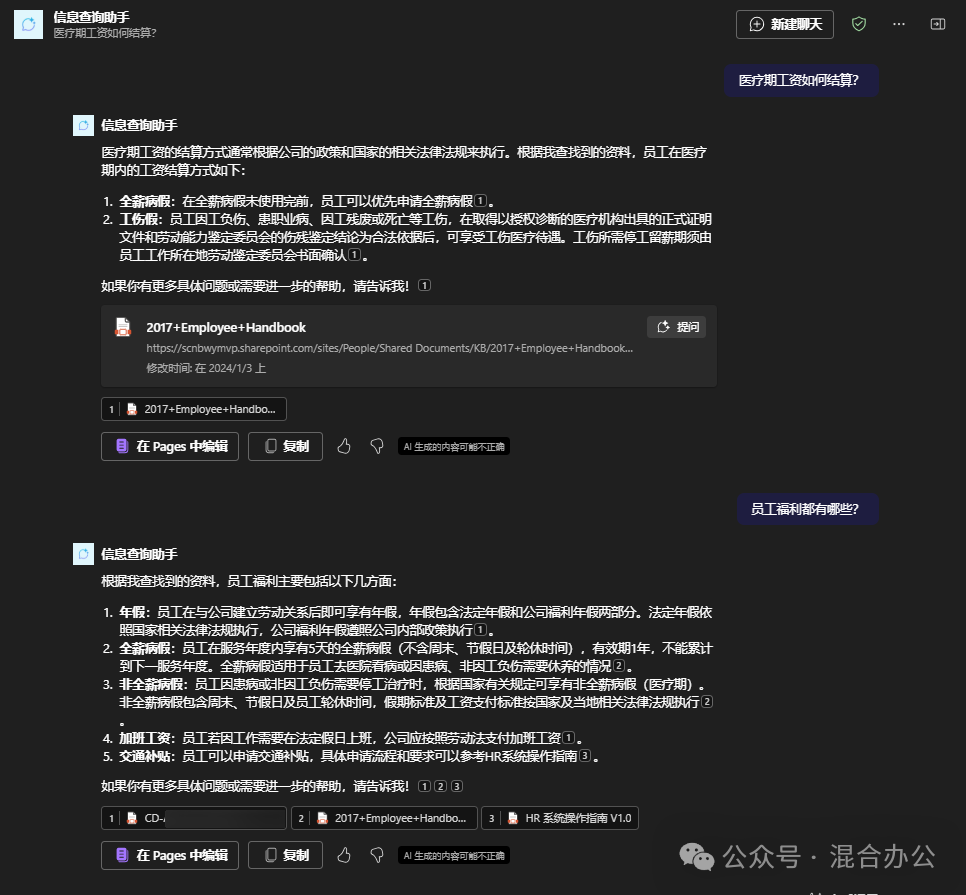
After creation, thisAgent will only be available for you. Click the sharing settings to share theAgent now, and you can also change the sharing objects later. Next, let’s go to theAgent to ask questions and see the effect.

How to Create a Custom Agent Using Copilot Studio

How to updateAgent and re-shareAgent?

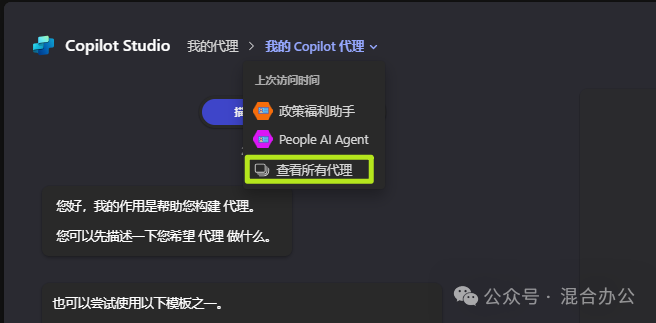
Go back to theAgent creation page, click on myCopilot agents, and select “View All Agents”.

How to Create a Custom Agent Using Copilot Studio

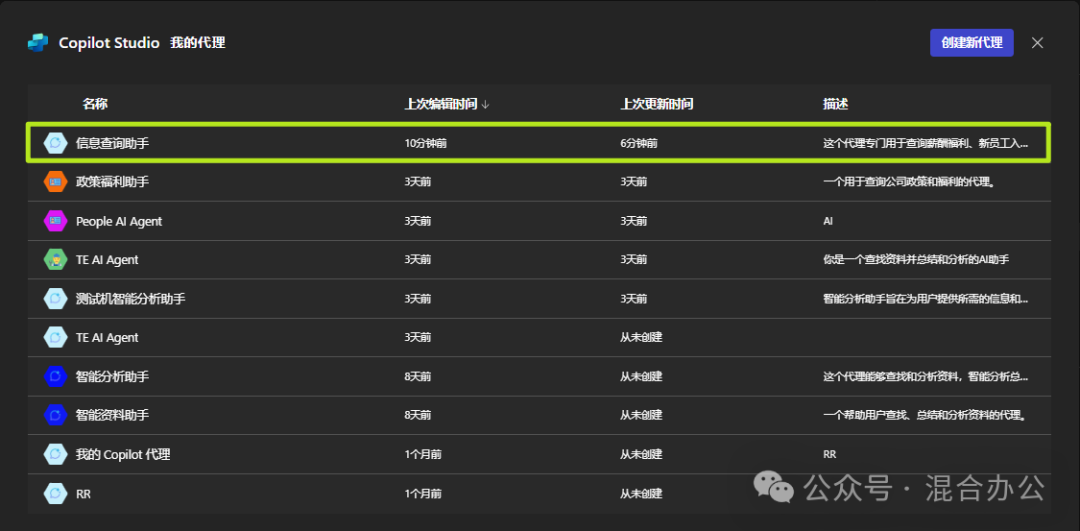
Here you will see all the digital agents (Copilot Agents) I have recruited. Click on the Agent you just created.

How to Create a Custom Agent Using Copilot Studio

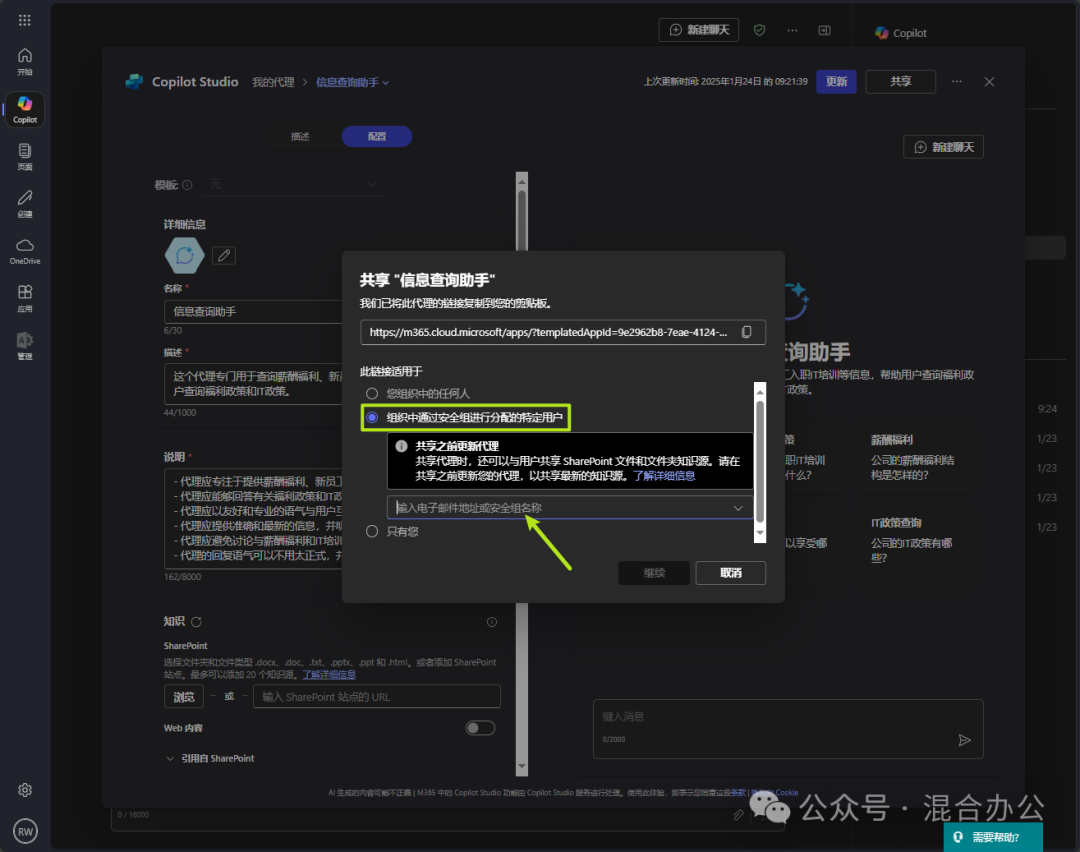
You will find yourself back in the configuration interface. Here you can also update data sources, modify thelogo, change prompts, and modify functions. Then click the update button in the upper right corner to update the technical capabilities of this digital agent. At the same time, a new button will appear in the upper right corner: “Share”. Click this button to share theAgent with users in the organization, with two options:

1. Available to all (manual sharing ofSharePoint document library required)

2. Available to specific security group users (automatically sharesSharePoint document library)

How to Create a Custom Agent Using Copilot Studio

This is the complete creation process. Go ahead and onboard your first digital agent!

Final Introduction

Microsoft MVP Program

How to Create a Custom Agent Using Copilot Studio

Finally, the Microsoft Most Valuable Professional (MVP) is a global award given by Microsoft to third-party technical professionals. For 34 years, technology community leaders around the world have been awarded this title for sharing their expertise and experience in both online and offline technical communities. Currently, about 3000 professionals worldwide have received this award.

MVPs are a team of experts carefully selected by Microsoft, representing the most skilled and knowledgeable individuals in technology. They are passionate about contributing to the community and are always willing to help. MVPs strive to assist others through speaking, forum Q&A, creating websites, writing blogs, sharing videos, open-source projects, organizing meetings, and more, maximizing support for users of Microsoft technology. For more details, please visit the official Microsoft website: https://mvp.microsoft.com/zh-cn

Leave a Comment