
Jishi Guide
This article uses the C++ inference framework ncnn as an example to introduce the general deployment process. The approach is similar for other C++ inference frameworks, with the only learning cost being the API of the inference framework itself. >> Join the Jishi CV Technology Exchange Group to stay at the forefront of computer vision
There are many methods, a relatively simple path is:
PyTorch Model –> ONNX Format –> C++ Inference Framework
This article introduces the general process using the C++ inference framework ncnn as an example. The approach is similar for other C++ inference frameworks, with the only learning cost being the API of the inference framework itself.
1. Convert PyTorch Model to ONNX
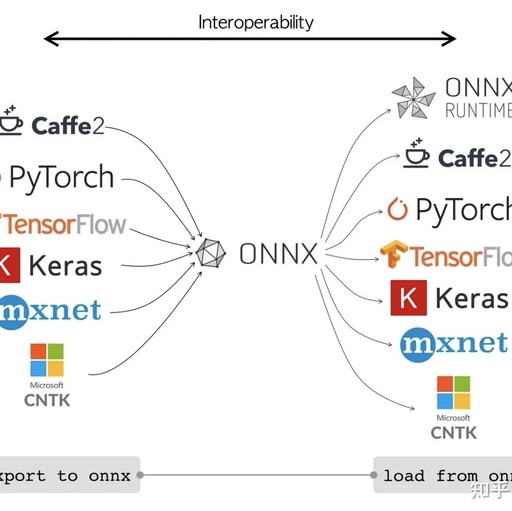
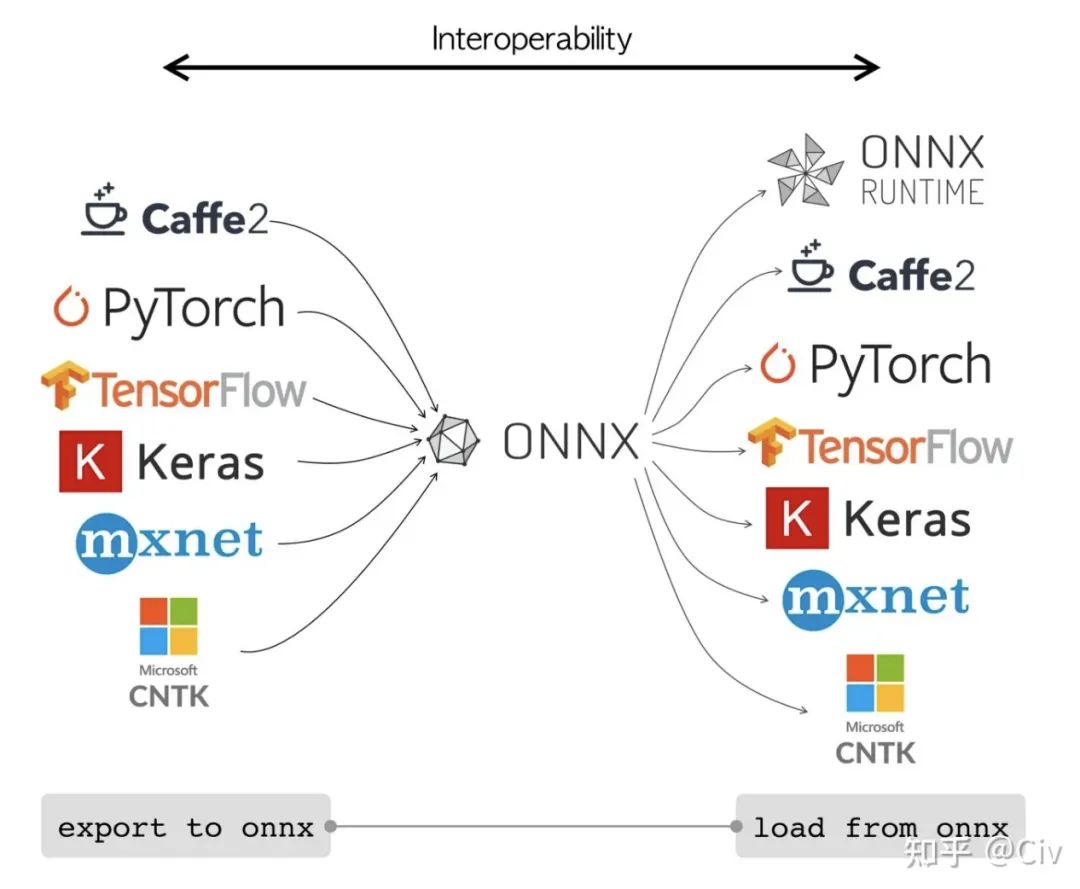
ONNX is an open format built to represent machine learning models. ONNX defines a common set of operators – the building blocks of machine learning and deep learning models – and a common file format to enable AI developers to use models with a variety of frameworks, tools, runtimes, and compilers.
In simple terms, ONNX can be considered as an intermediate format. Most machine learning/deep learning frameworks can convert their models to ONNX, and similarly, can convert ONNX back to their own framework’s format, as shown in the figure below.
ONNX official website: https://onnx.ai/
In PyTorch, you can easily store a PyTorch model in ONNX format using the following method:
import torch

# Specify input size, ONNX needs this information to determine input size
# Parameters correspond to (batch_size, channels, H, W)
dummy_input = torch.randn(1, 3, 224, 224, device="cuda")

# model is the model itself
# dummy_input should be adjusted according to your needs
# "model.onnx" is the output file, change it to your desired path
torch.onnx.export(model, dummy_input, "model.onnx")
The torch.onnx.export also has some additional parameters that allow for more flexible usage; see here for details. The example in this article is sufficient for you to successfully deploy your own model.
It is important to note that ONNX’s goal is “universality,” so there may inevitably be situations where operators are incompatible. Specifically, when you convert a model from a certain framework (e.g., PyTorch) to ONNX and then convert ONNX to another framework’s model (e.g., ncnn), errors may occur (e.g., xxx operator not supported). There are various types of incompatibility, and specific cases need to be analyzed individually.
Some effective solutions include:
-
Use ONNXSIM to simplify the ONNX model. This is very effective. I personally recommend that whenever you use ONNX, you should process the ONNX model with ONNXSIM once. GitHub address: https://github.com/daquexian/onnx-simplifier. It is very easy to use; install using
pip install onnxsim, and then use the commandonnxsim input_onnx_model_path output_onnx_model_path. -
Avoid relying on the size of intermediate variables for calculations. For example, in some Image to Image tasks, you may resize other tensors based on the size of an intermediate tensor. In this case, we first obtain the sizes H and W of the intermediate tensor, and then pass them as parameters to other methods. When encountering such operations, ONNX seems to create two variables related to H and W, but their values will be bound to the sizes H and W obtained when using
dummy_inputfor forward propagation. Once bound, these values do not change. Therefore, when using different input sizes later, it is highly likely to result in errors (this point has not been thoroughly verified, but the intermediate results seem to suggest this).
Additionally, I strongly recommend using some network visualization tools. When encountering model conversion errors, they can help easily locate the source of the error. I personally prefer Netron, available at: https://github.com/lutzroeder/netron
Here is an image from the repository showing the effect:

2. Convert ONNX to ncnn
ncnn is a lightweight inference framework open-sourced by Tencent. Its biggest feature is ease of use. However, when power consumption and time consumption are the main considerations, it is necessary to try other frameworks, such as TensorFlow Lite.
ncnn address: https://github.com/Tencent/ncnn
ncnn provides tools to convert ONNX to ncnn format. You can find them here: https://github.com/Tencent/ncnn/releases. For example, on Windows, you can download this. After extracting, you can find onnx2ncnn.exe in the bin folder for x64 or x86. Use the following command in the command line to convert ONNX to ncnn format:
onnx2ncnn.exe onnx_model_path [ncnn.param] [ncnn.bin]
Replace onnx_model_path with your ONNX model path. The last two parameters are optional. If not provided, the converted ncnn model files will be generated in the same directory as onnx2ncnn.exe: one .param file and one .bin file. You can also specify the output path by providing the last two parameters.
3. Perform Model Inference in ncnn
Inference in any framework requires only two steps: load the model and convert the data to the framework format.
The method to load the model in ncnn is (there are other methods):
ncnn::Net model;  // Define a model
model.load_param("model.param");   // Load the model's param file
model.load_model("model.bin");        // Load the model's bin file
After loading the model, you only need to convert the data to the ncnn format. The input format for ncnn models is ncnn::Mat.
The method to convert OpenCV’s Mat to ncnn::Mat is listed here:
https://github.com/Tencent/ncnn/wiki/use-ncnn-with-opencv
For example:
// cv::Mat a(h, w, CV_8UC3);
ncnn::Mat in = ncnn::Mat::from_pixels(a.data, ncnn::Mat::PIXEL_BGR2RGB, a.cols, a.rows);
In JNI, to convert an Android bitmap to ncnn::Mat, you can refer to the official example: https://github.com/nihui/ncnn-android-squeezenet/blob/master/app/src/main/jni/squeezencnn_jni.cpp
The code is as follows:
// ncnn from bitmap
ncnn::Mat in = ncnn::Mat::from_android_bitmap(env, bitmap, ncnn::Mat::PIXEL_BGR);
With the model and input ready, simply forward once and retrieve the result:
ncnn::Extractor ex = model.create_extractor();

// input_name can be viewed using netron for .param or .bin files
// Replace input_name with the name of the first input position of the model
 ex.input(input_name, in);

ncnn::Mat out;  // Used to store the output result

// output_name can be viewed using netron for .param or .bin files
// Replace output_name with the name of the output position of the model
ex.extract(output_name, out);
Conclusion
As long as you are converting models, most paths are like this, and the learning cost is not high. The main cost is learning the inference framework. The inference frameworks provided by chip manufacturers are relatively complex, with various peculiar rules.

Reply “Dataset” in the public account backend to get 100+ resources sorted across various deep learning directions
Jishi Insights

Click to read the original text to enter the CV community
Gain more technical insights