Introduction
Previously, I introduced how to install CUPS on Armbian as a print server, allowing devices like the N1 box, WanKeYun, and even portable WiFi to print via CUPS. However, some friends do not want to dedicate a device solely for the printer. If you happen to have a router with a USB port, you might want to try the method below.
Configuring a network printer on the router is actually much simpler than on Armbian. You can complete the configuration by simply enabling the USB printer in the settings page. However, due to different router firmware and printer models, there may be issues such as missing drivers, making it less compatible and universal than installing CUPS on Armbian.
OpenWRT
Router Setup
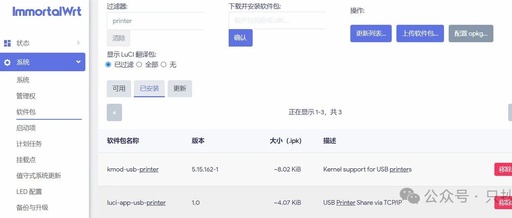
There are various methods to configure a network printer on OpenWRT. The CUPS used on Armbian can also be used here. You can refer to the previous article “Installing CUPS on WanKeYun Armbian as a Print Server for Network Shared Printers”. Today, I will introduce how to achieve this using the luci-app-usb-printer plugin. First, enter the package management, click to update the list, and then search to install kmod-usb-printer and luci-app-usb-printer.
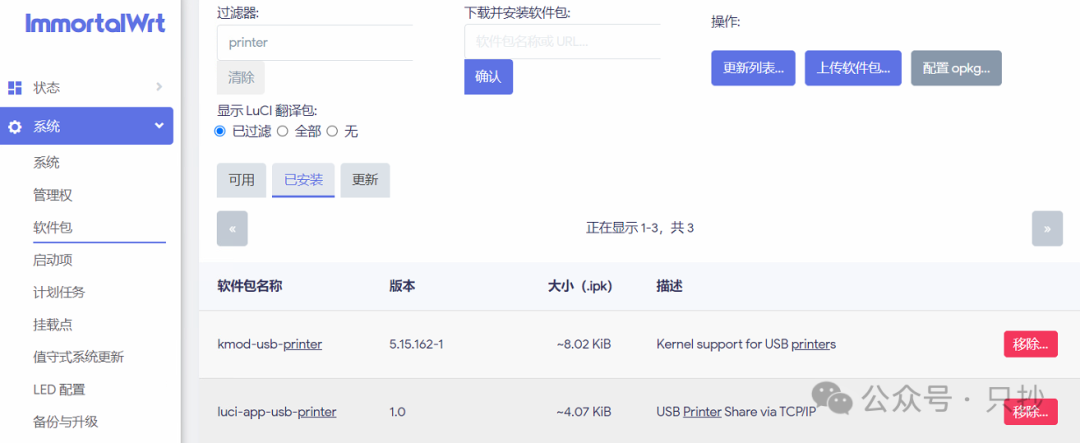
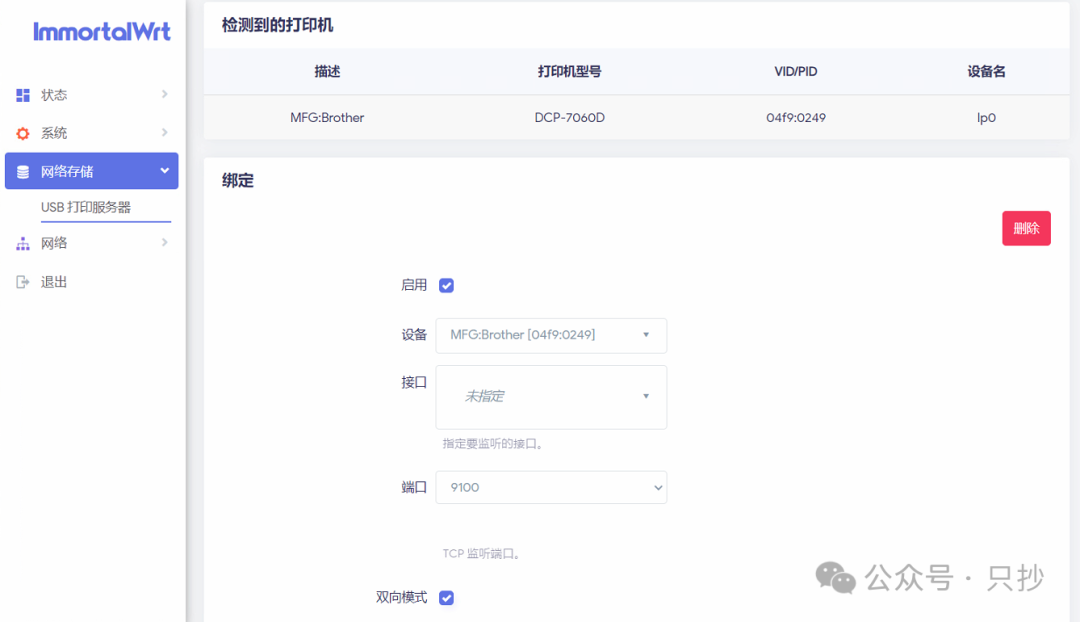
After installation, refresh the page, and in the left navigation bar under “Network Storage”, you will see USB Print Server. At this point, you can connect the printer to the router’s USB port using a USB cable. Refresh the page again, and you will see the detected printer. Check “Enable”, select the detected printer, and the interface and port can be left as default. Whether to check “Bidirectional Mode” depends on the printer model; you can try both options.
Windows Setup
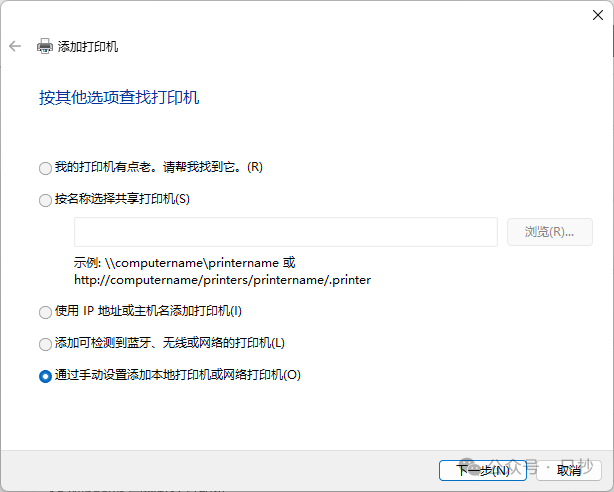
Open Windows Settings -> Bluetooth & Other Devices -> Printers & Scanners -> Add Device -> My printer isn’t listed, and choose “Add a local printer or network printer manually”.
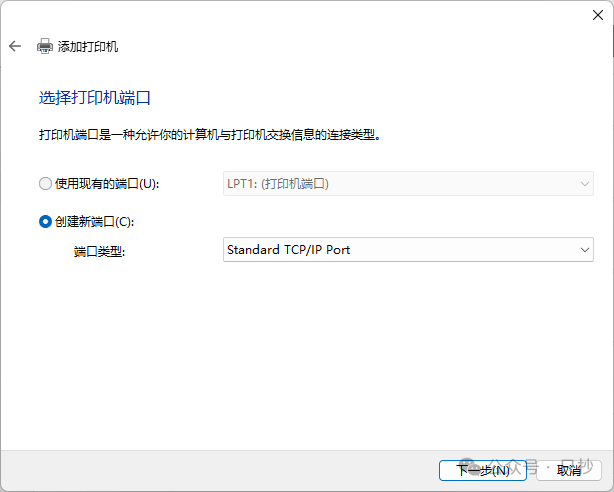
Select “Create a new port”, and choose “Standard TCP/IP Port” as the port type, then click Next.
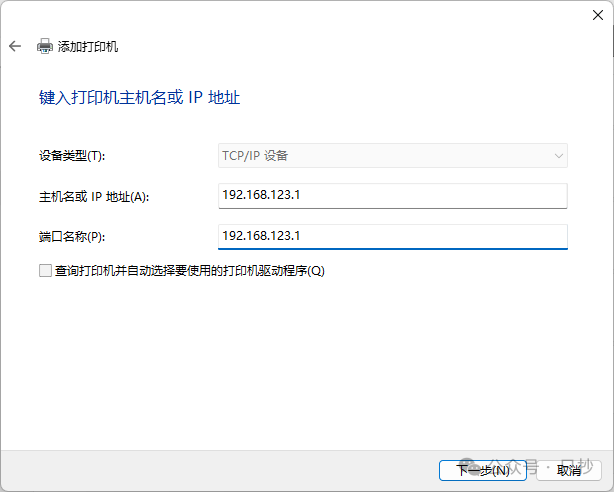
Fill in the router’s IP address in the “Host name or IP address” field. If using a bypass router, fill in the bypass router’s IP address. It is recommended not to check “Query the printer and automatically select the driver to use” below to save time.
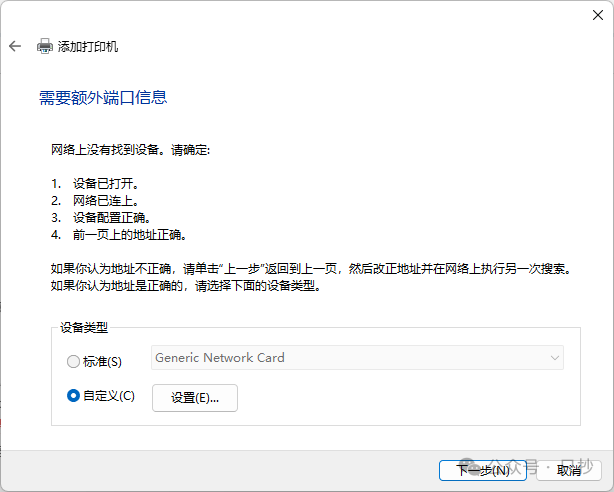
After a moment, you will be prompted that additional port information is needed. Select Custom below and click “Settings”.
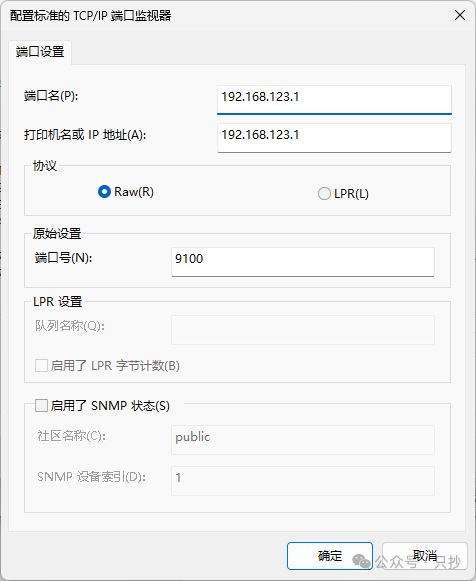
The next step is crucial; select the protocol as “RAW”, and the port number must match what was set in OpenWRT, which is “9100” by default. Afterward, select your printer’s driver (which needs to be installed beforehand), and you will be able to use it.
Padavan
Router Setup
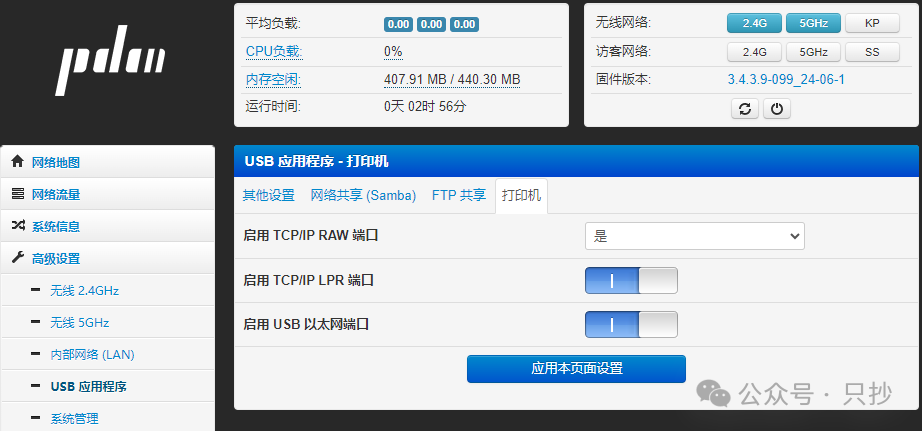
Setting up Padavan is even simpler; you just need to enable everything in the USB application printer settings.
Windows Setup
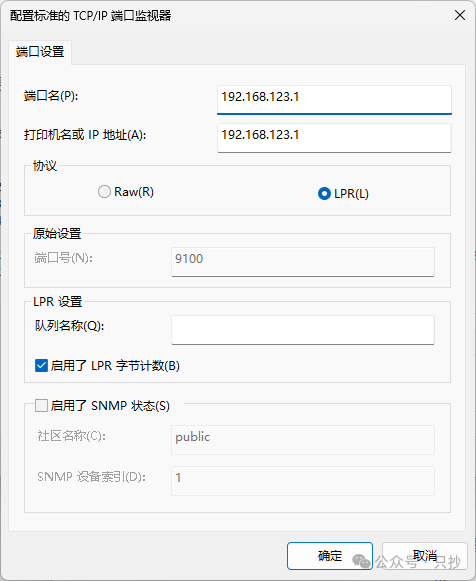
The steps to add a printer in Windows can refer to the above OpenWRT steps. In the last step, you can choose Raw like in OpenWRT, or you can choose LPR, where the queue name should be filled in as LPRServer, and check “Enable LPR Byte Counting”.
Conclusion
Using OpenWRT and Padavan as network printers is quite simple, provided the printer supports it. It is advisable to place only a few sheets of paper in the printer’s tray during testing to avoid repeated printing issues. If you have an old router with a 7621 chipset, you might try flashing it; many routers from that era have USB ports, allowing you to extend your signal while also serving as a network printer.