Skip to content
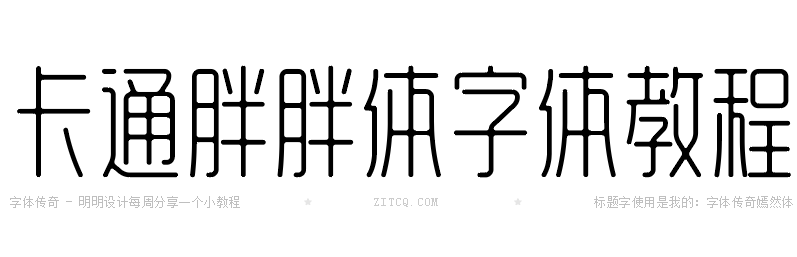
AI Font Design Tutorial – Cartoon Fat Font Design
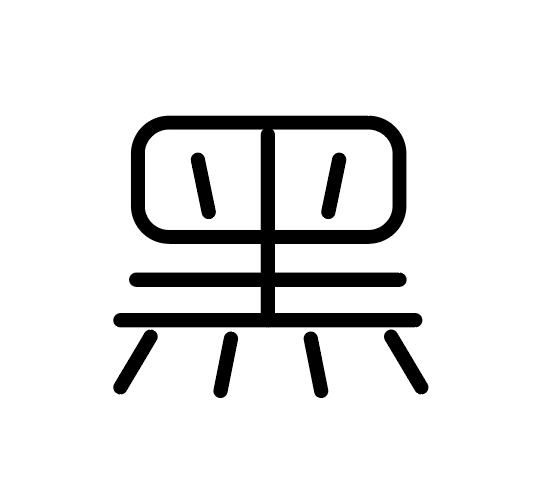
Thicken the outline of the text, ensuring there are no gaps between strokes
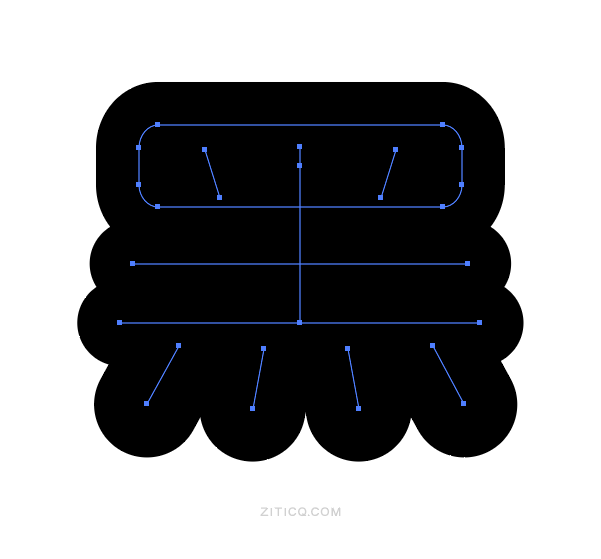
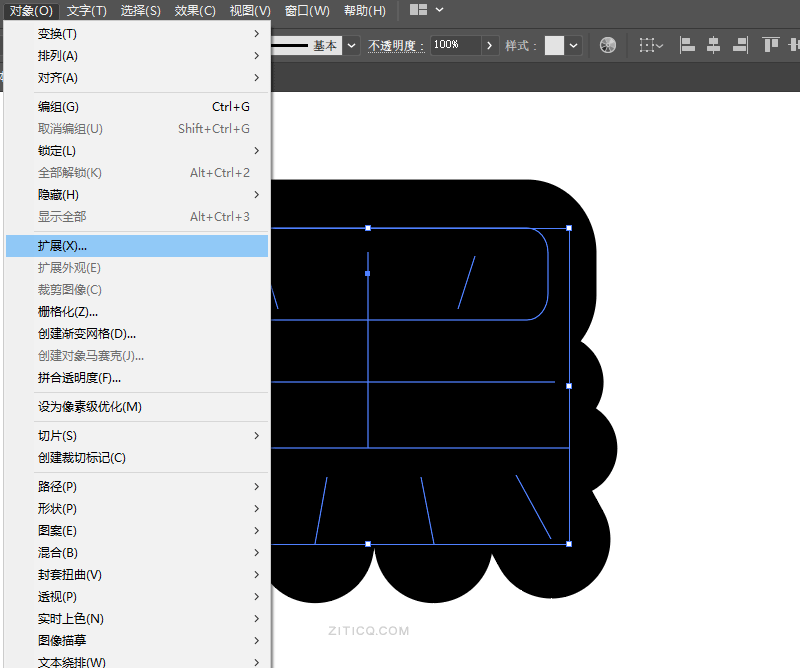
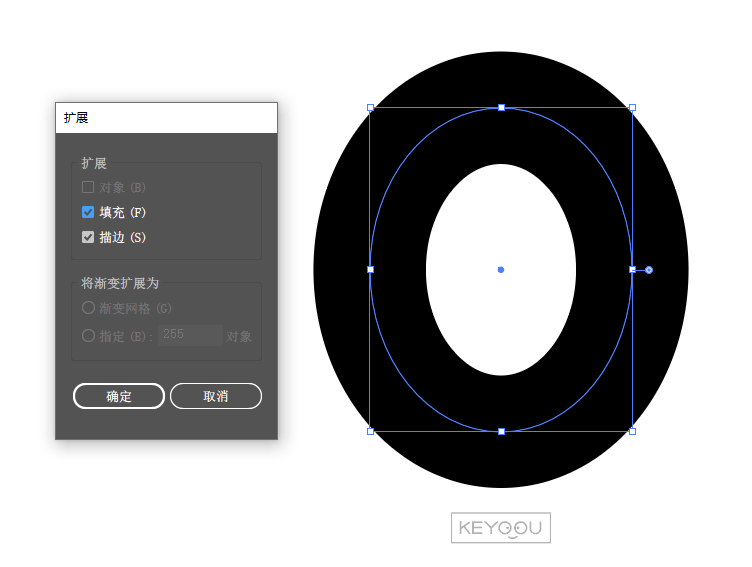
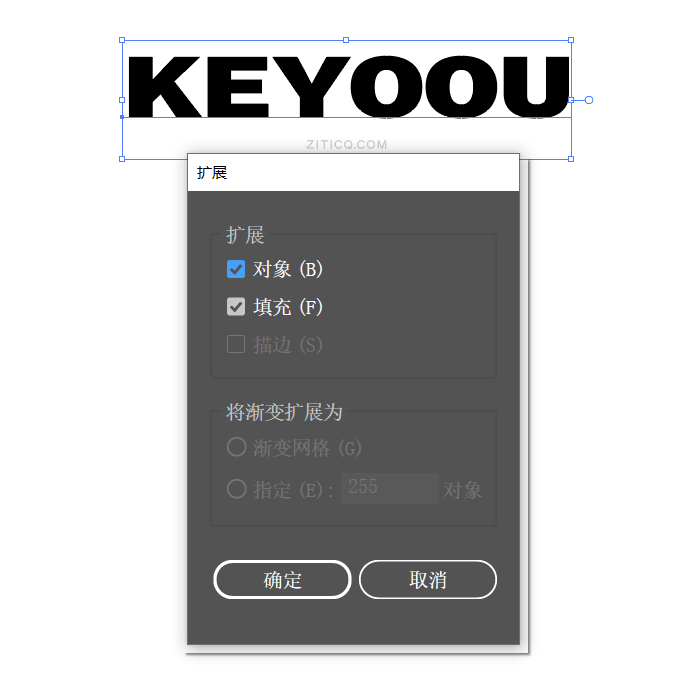
Object – Expand, turning the outline into a fill.
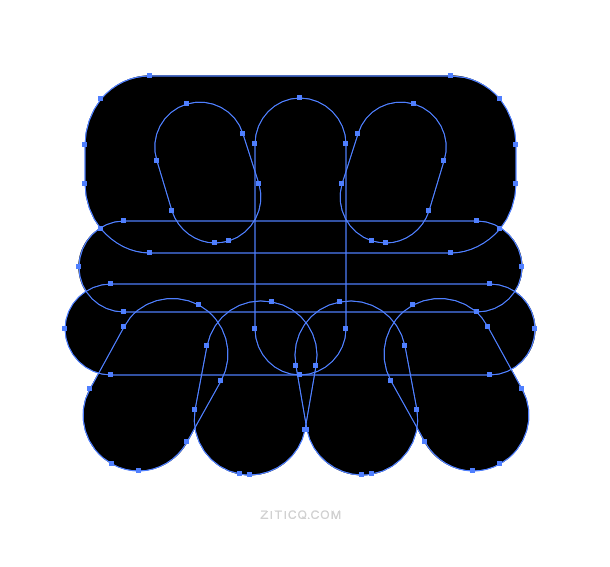
Add an overlay stroke effect to the text
Add some fun elements to the text

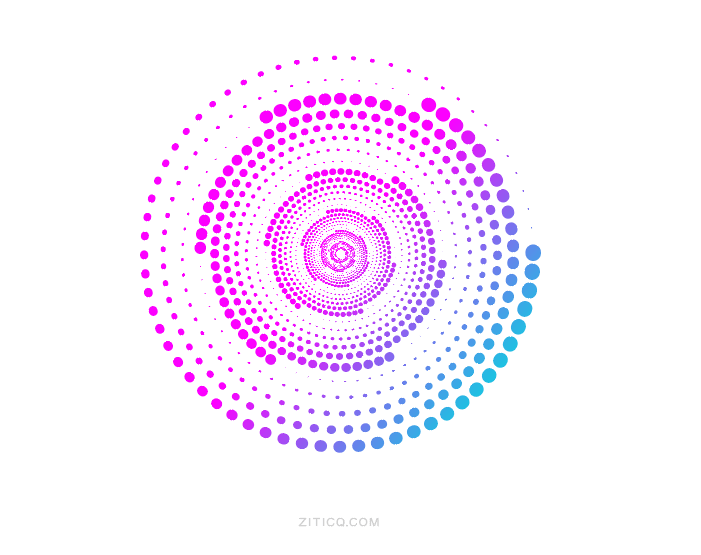
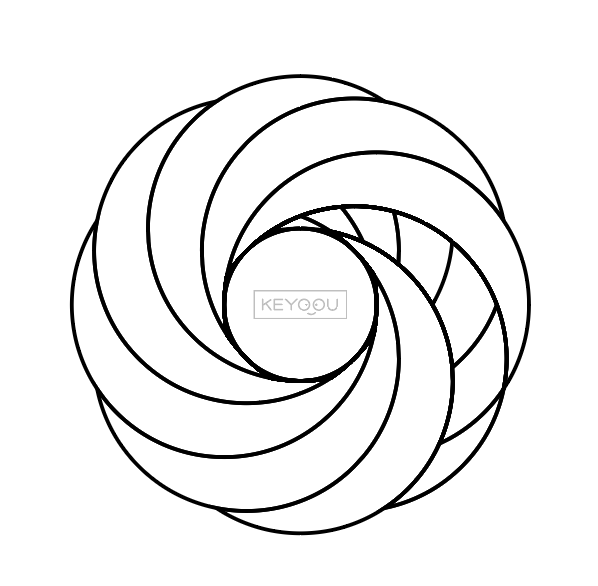
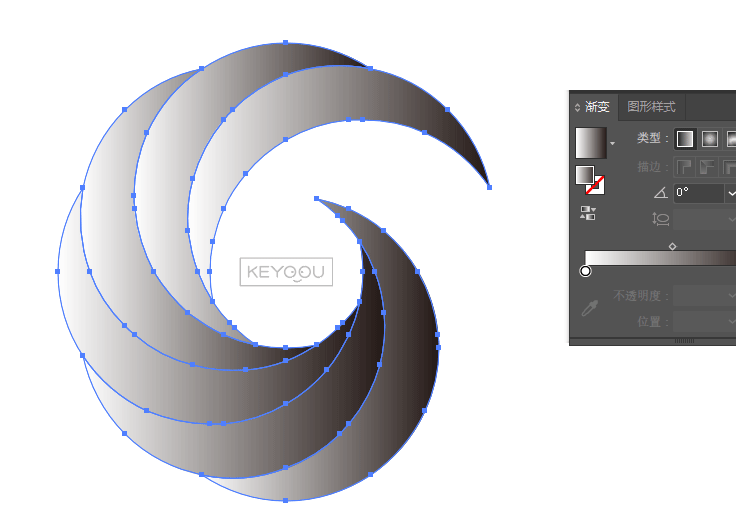
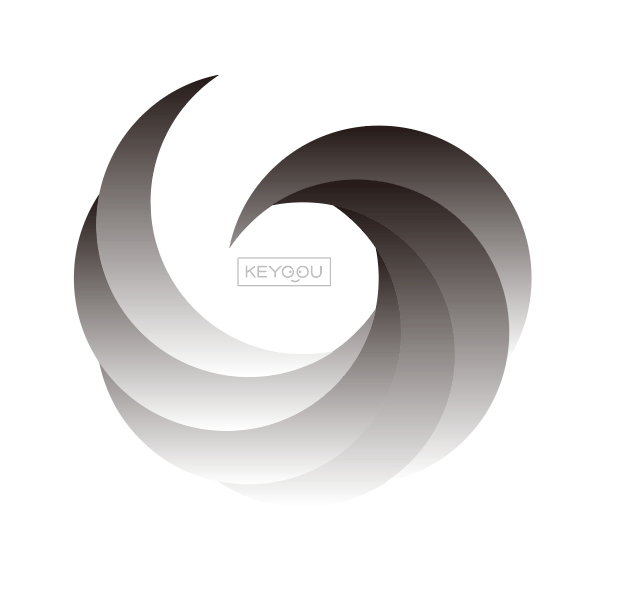
AI Tips – How to Create a Cool Swirl Effect from a Circle in AI
Stroke ctrl+F10 to bring up the stroke panel, thicken the stroke value, change the endpoints to round, check dashed lines, set gap to 18.

Select the Isometric Triangle from the menu bar
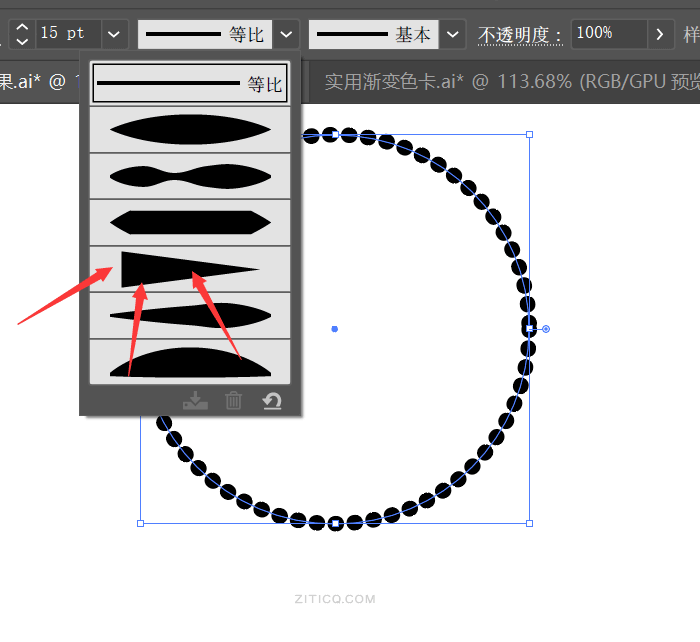
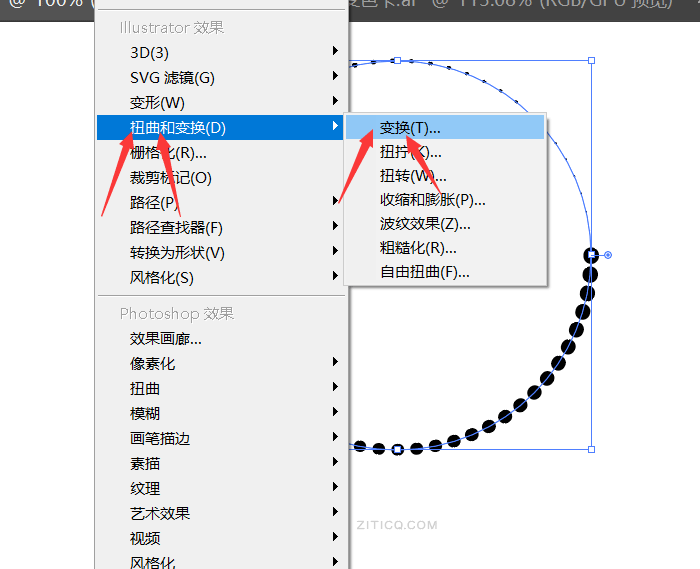
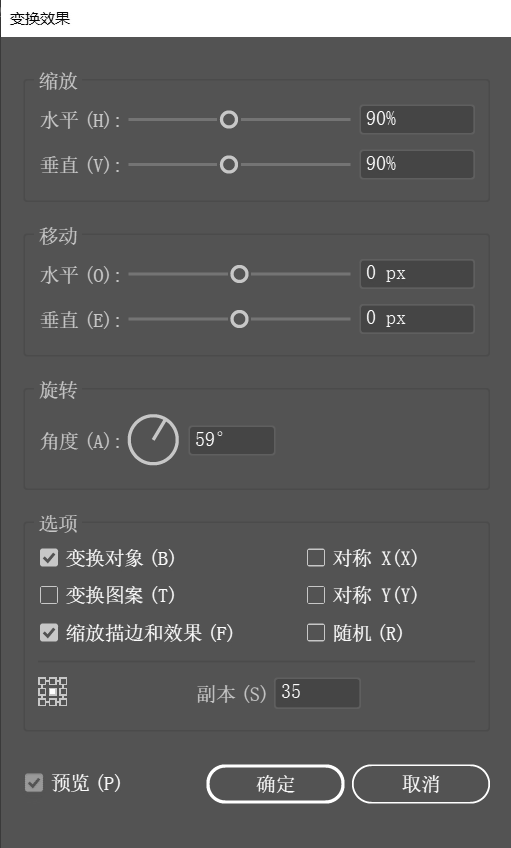
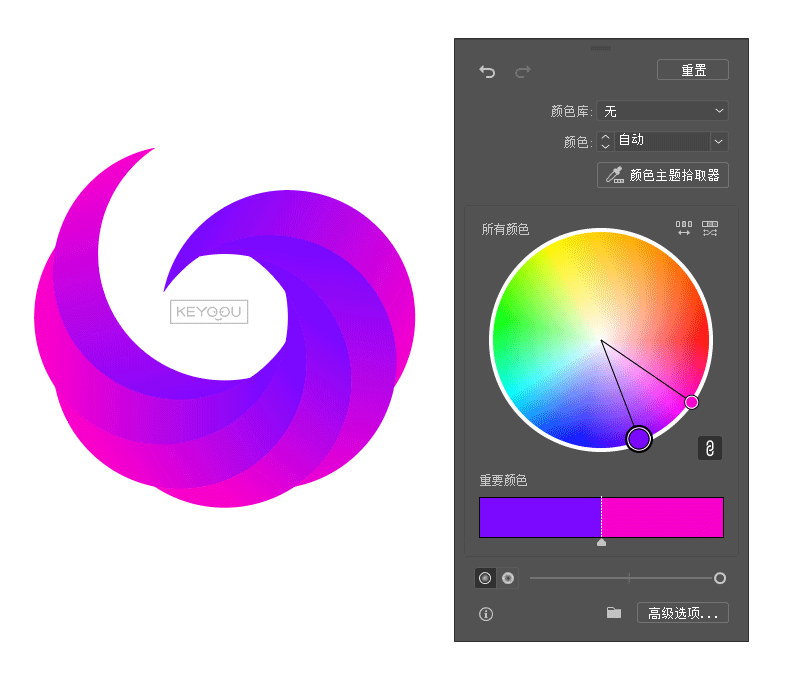
Execute Effect – Distort & Transform – Transform

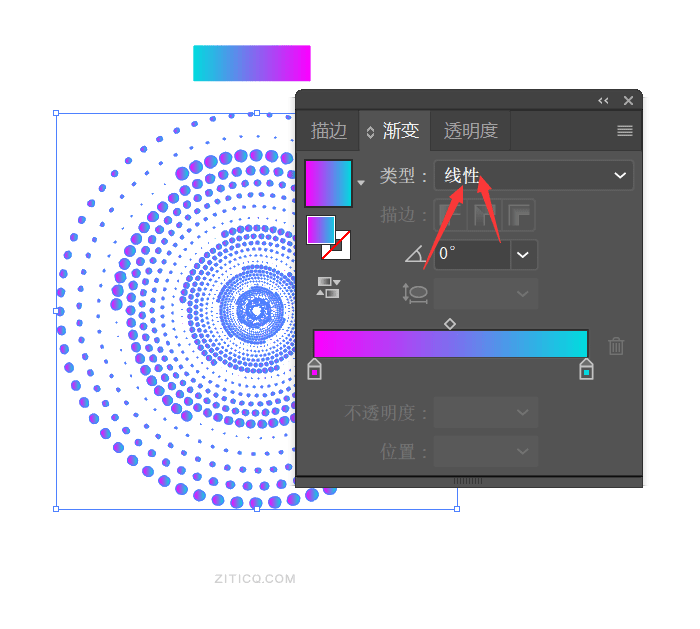
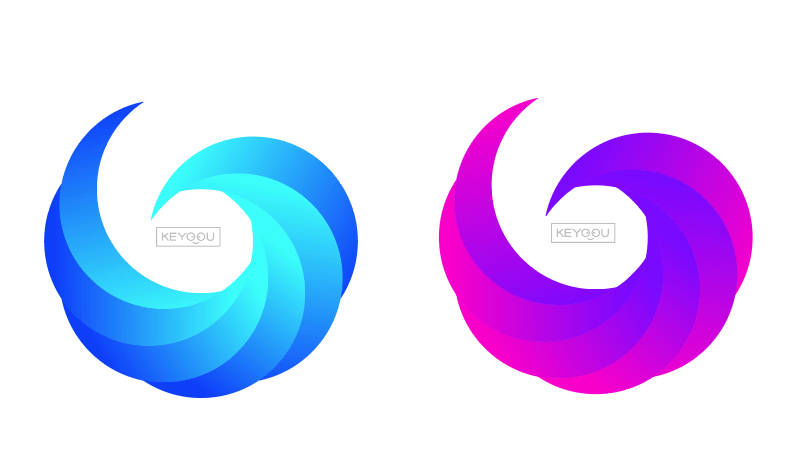
Object – Expand, use the eyedropper to sample the gradient color, double-click the gradient tool, and drag to create a linear gradient; the swirl effect is complete!
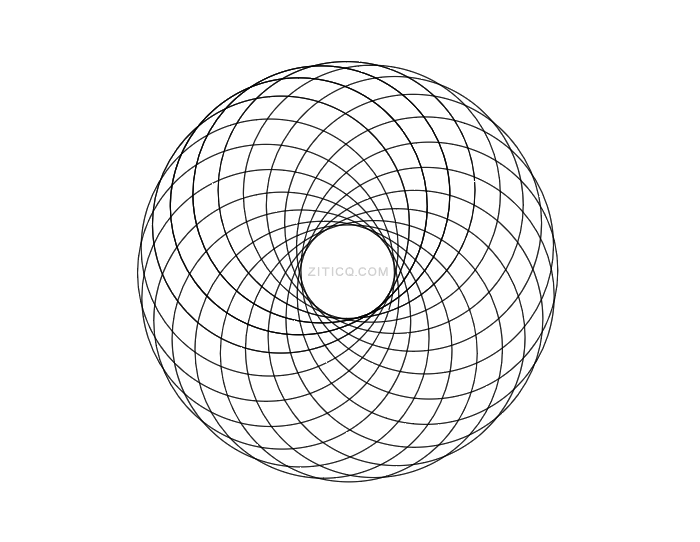
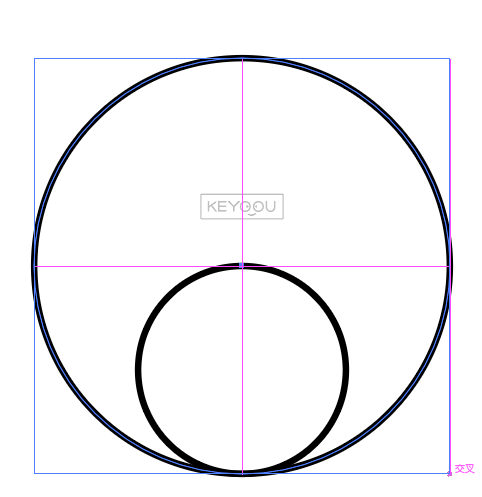
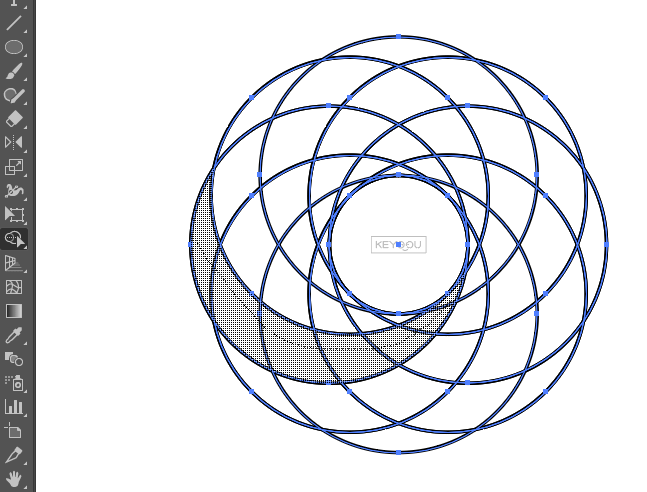
How to Create Cool Shapes Using the Circle Rotation Tool in AI

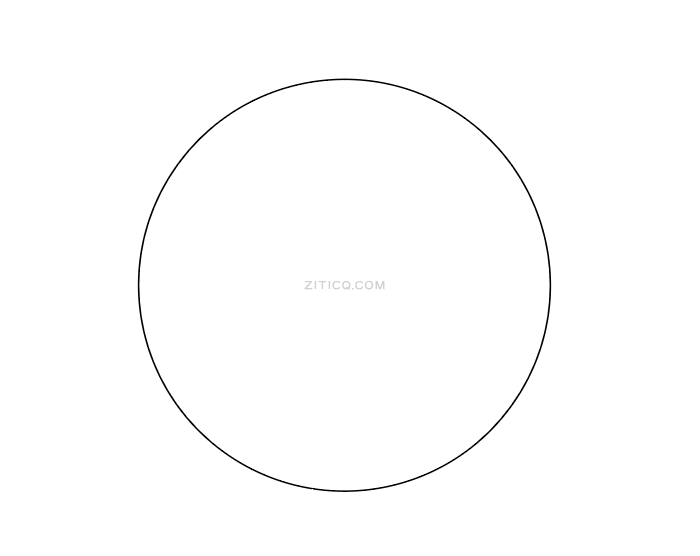
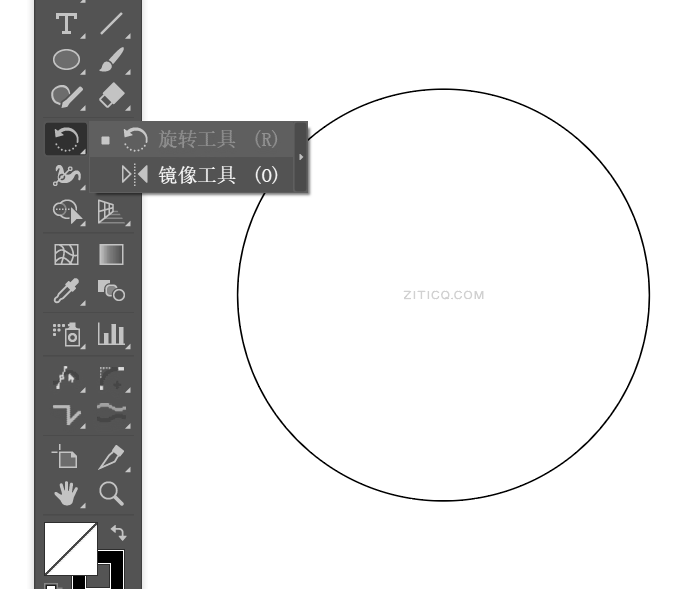
Hold down the Alt key, drag down the circle’s center point, set parameters, and click copy.
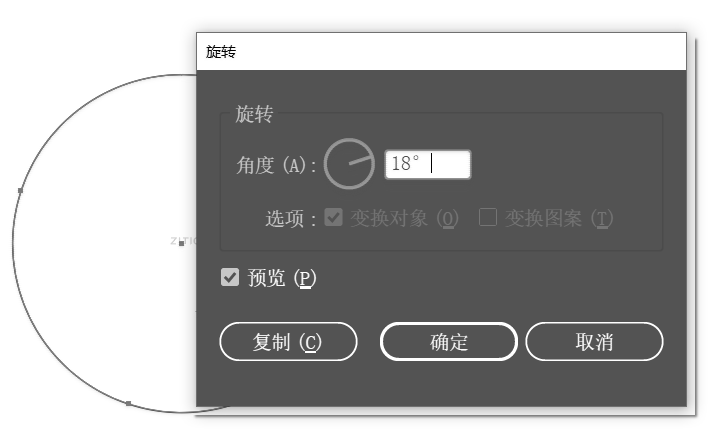
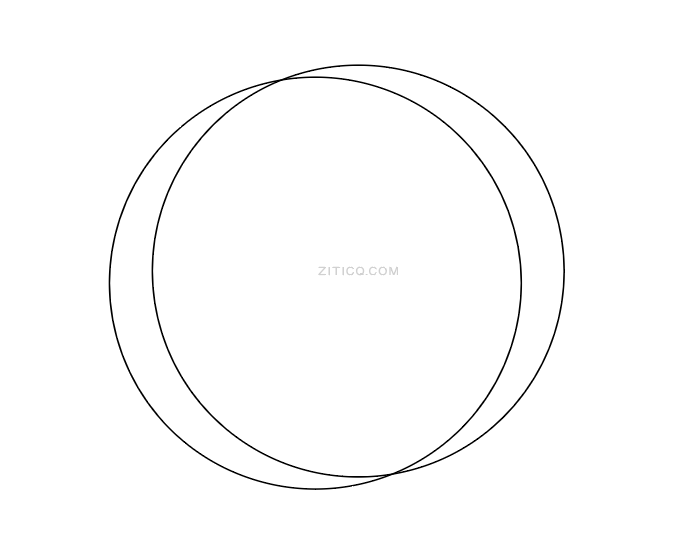
Select both circles, then execute Ctrl+D to copy, repeating until a full circle is created.
AI Tutorial – Water Ripple Wave Pattern Tutorial
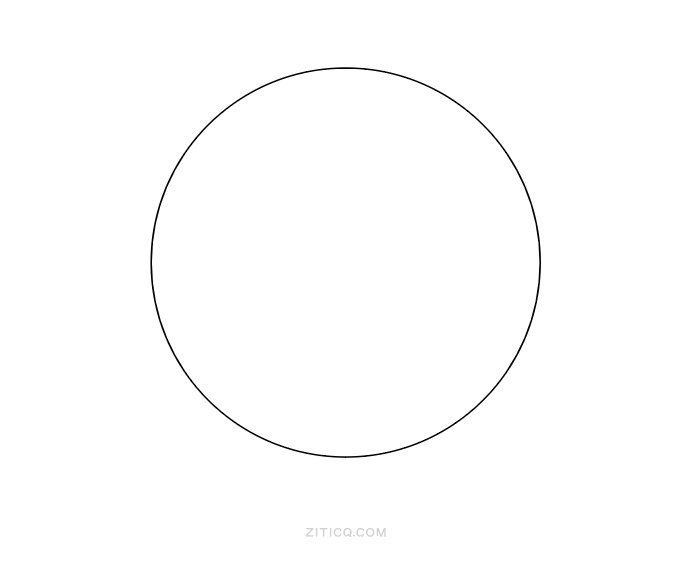
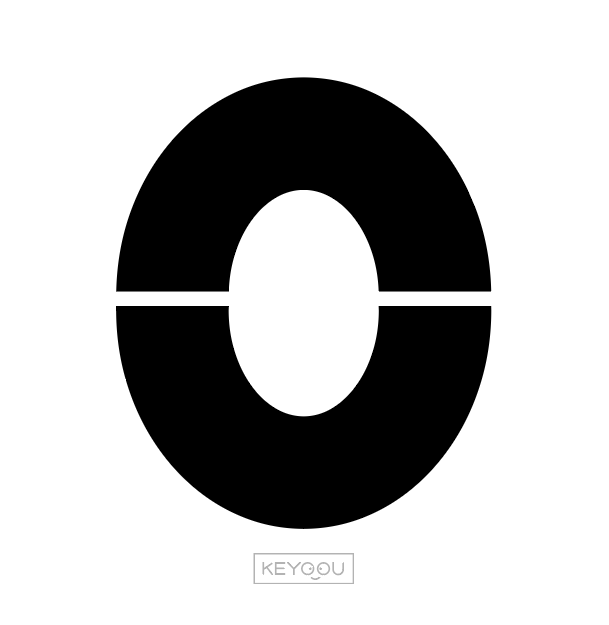
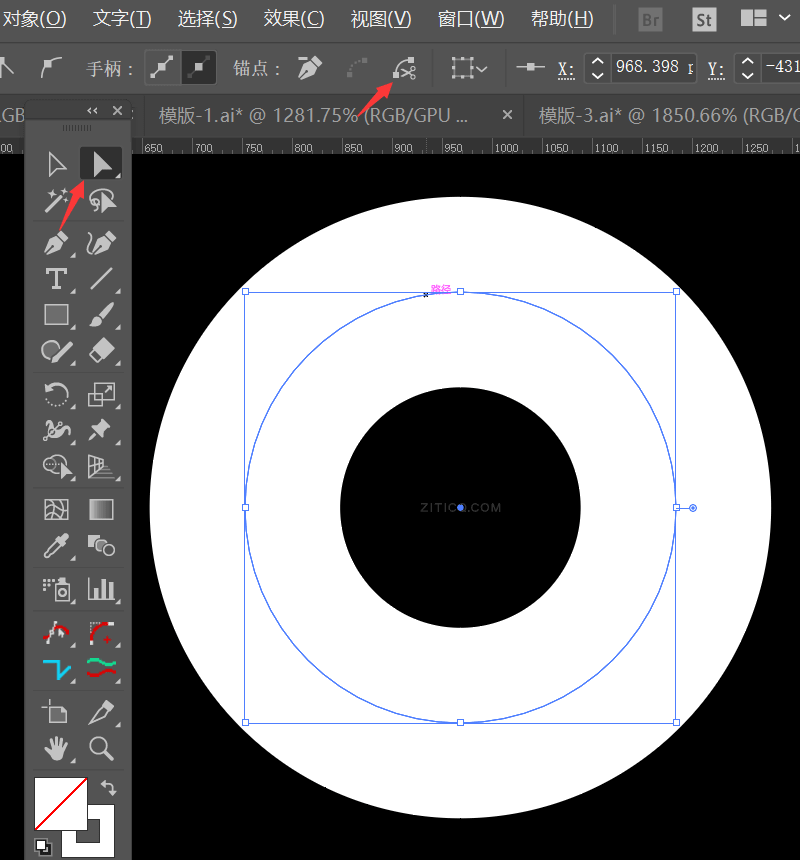
Draw a stroked circular path
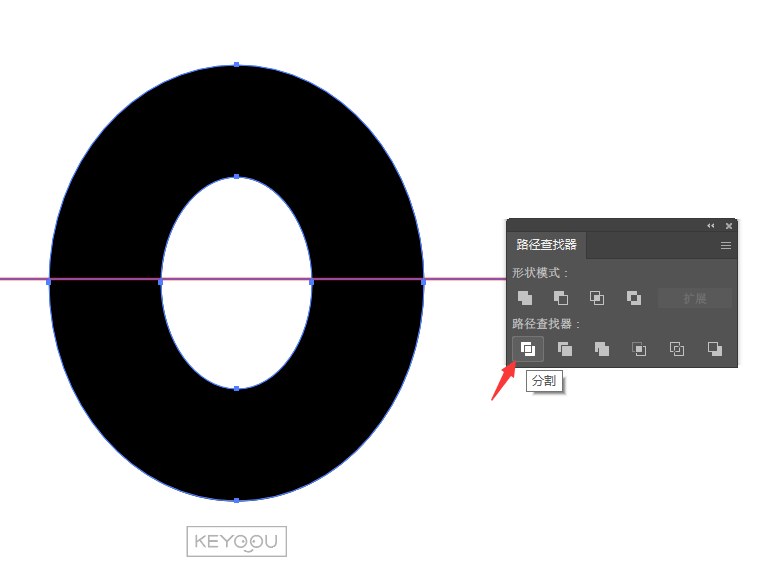
Draw a line in the center, then use the pathfinder to divide it below.
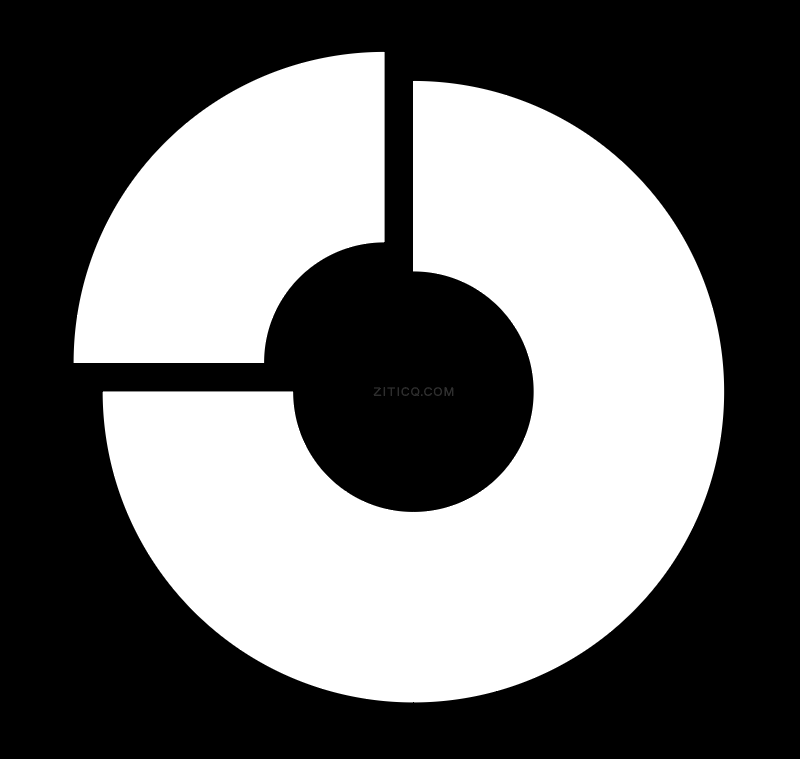
Ungroup, and move some space in the middle.
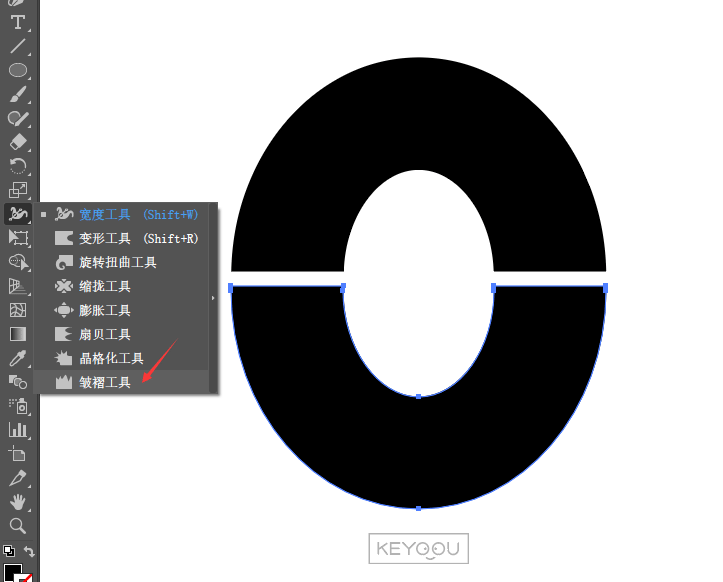
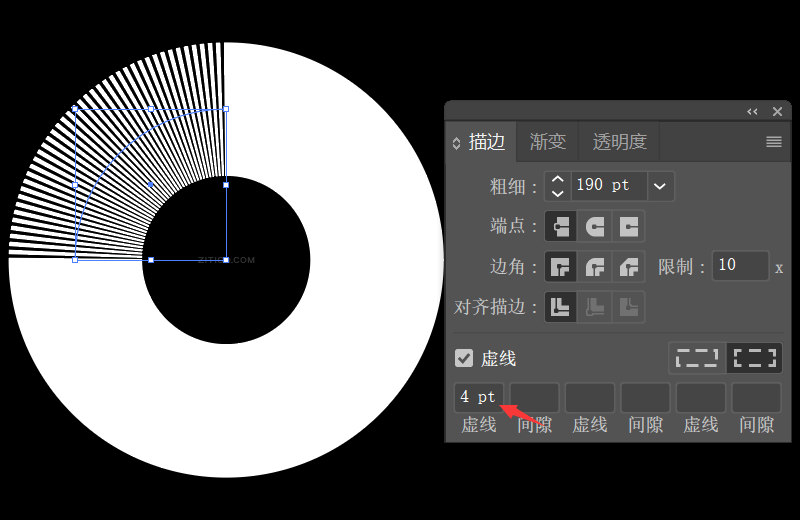
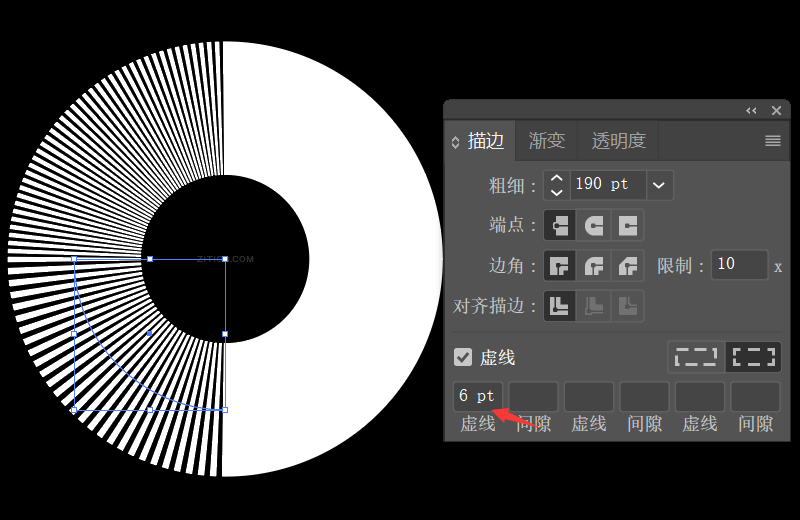
On the left tool, find the Wrinkle Tool and double-click
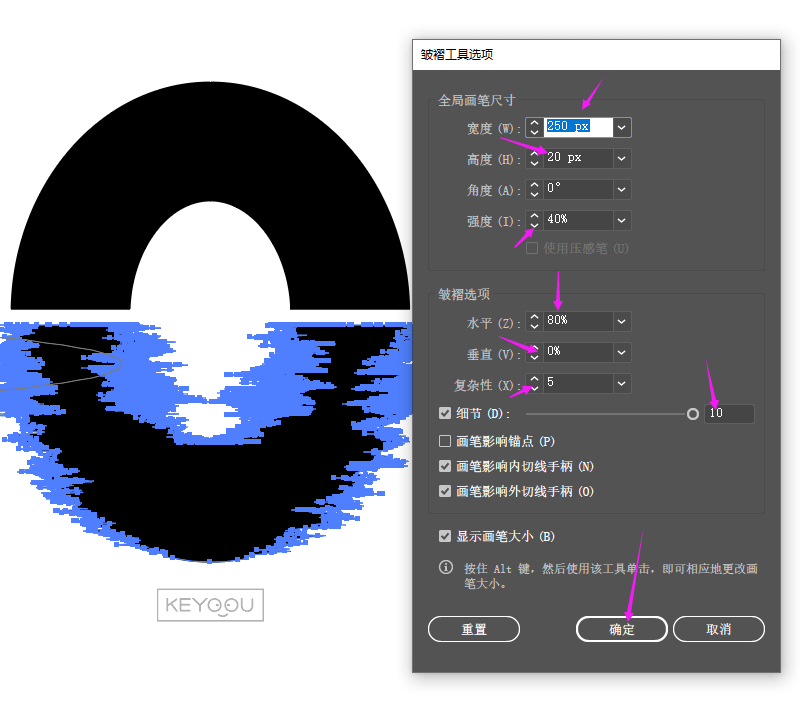
The parameters here need to be set patiently; if using PX, you can directly operate this.
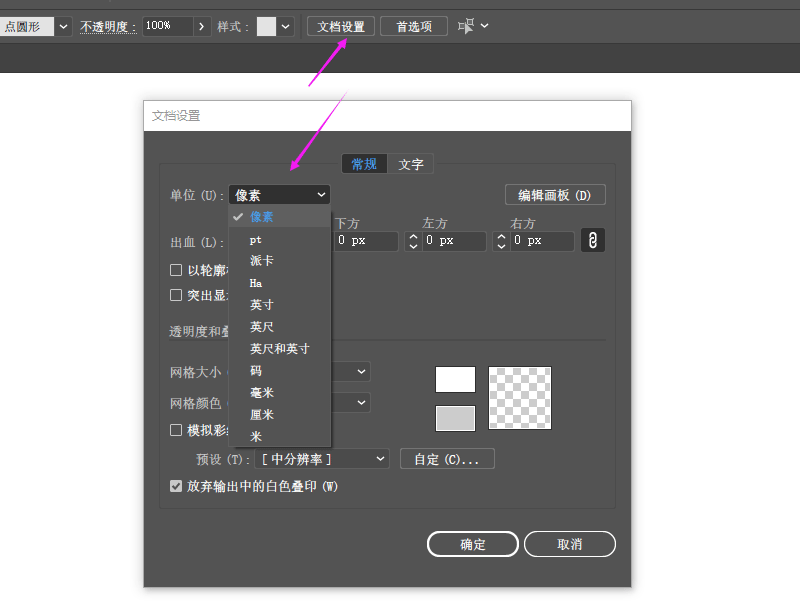
Warm Tip: Set the document to PX format here.
After setting the parameters, just click with the mouse, and the shape you need will be automatically generated; you can click multiple times for better results.


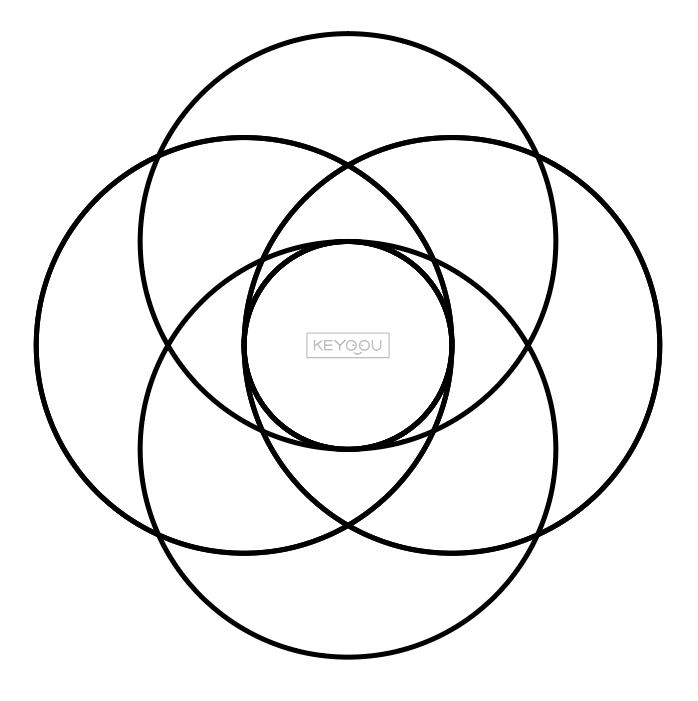
Draw a large circle, then copy a smaller circle and reduce it by half.
Copy a large circle downwards

Copy everything, then rotate.
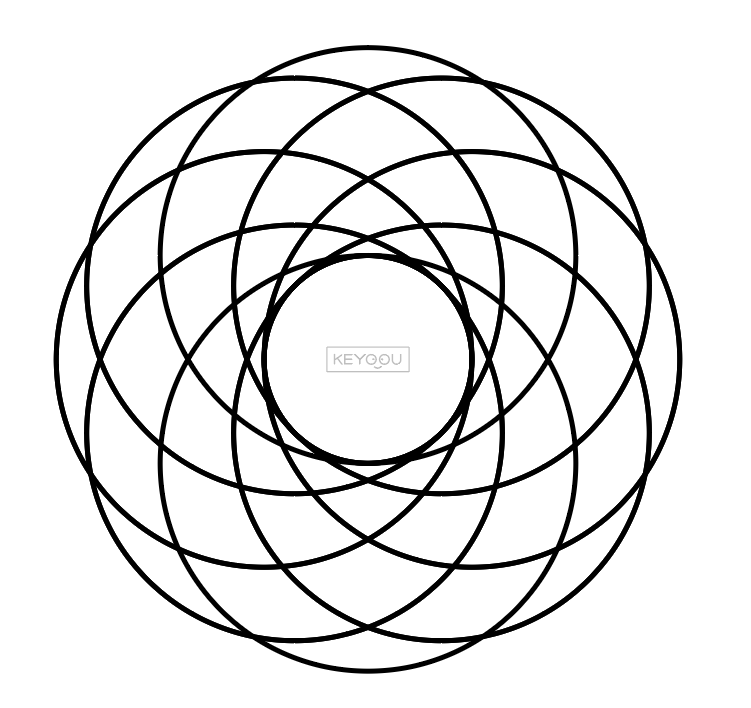
If more details are needed, copy several rotations.
In the toolbar, find the Shape Builder Tool, select the shape to generate. Recommended Shape Builder Tool Tutorial
Then generate the parts you need
Change the color to your liking

Finally, you can also use the color adjustment tool to change colors,Recommended Color Adjustment Tool Tutorial.
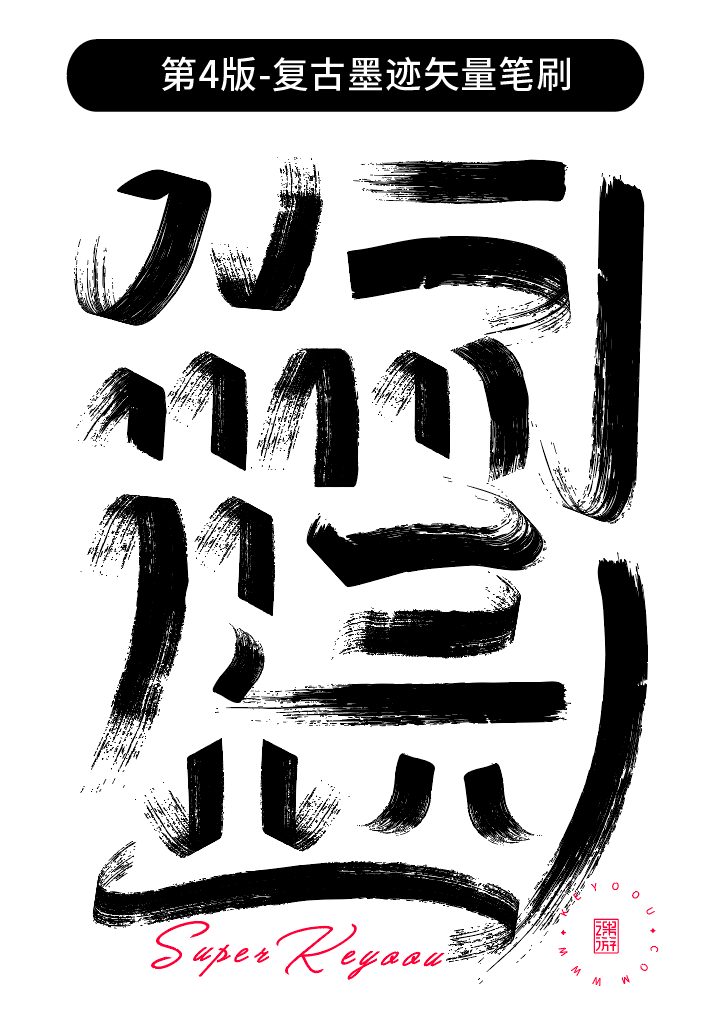
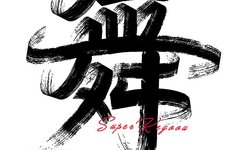
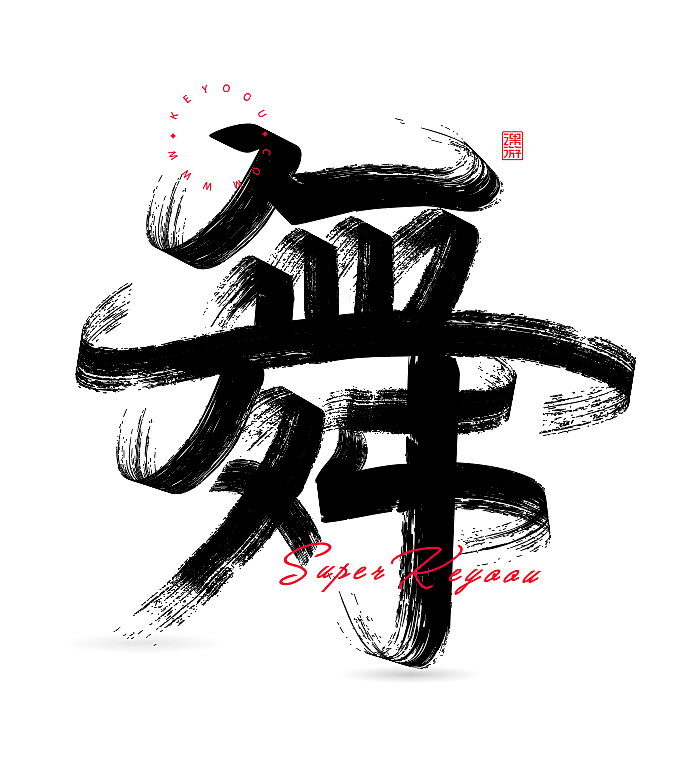
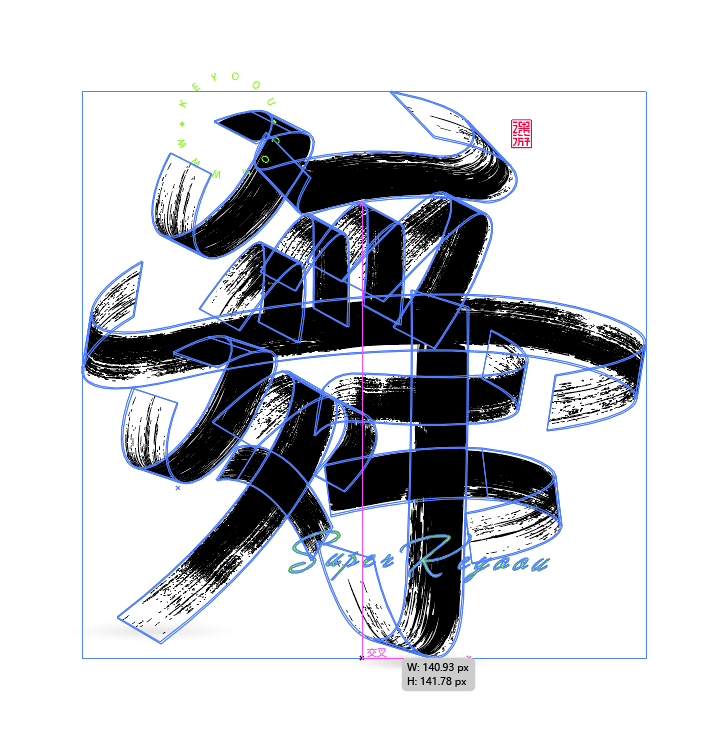
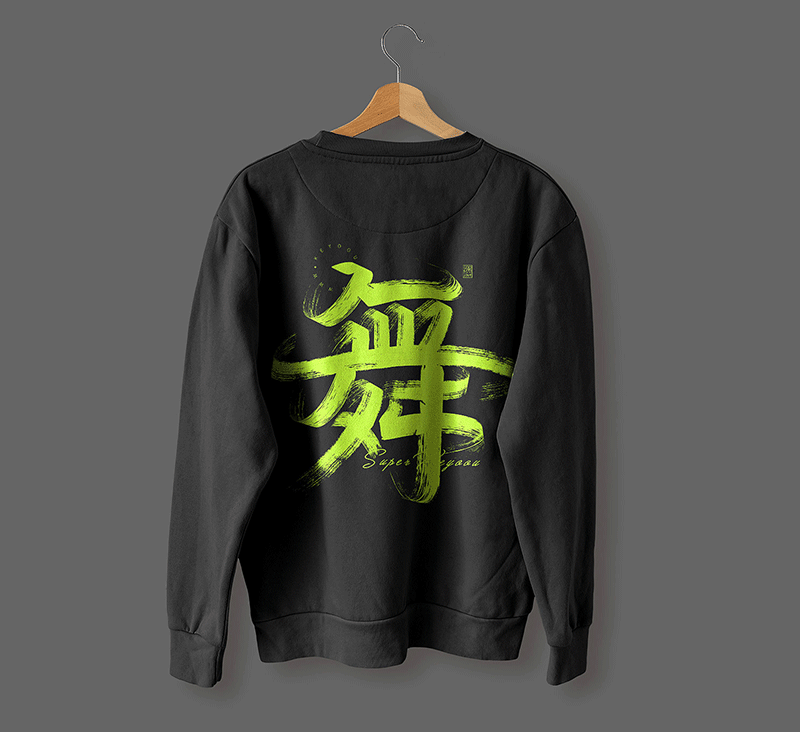
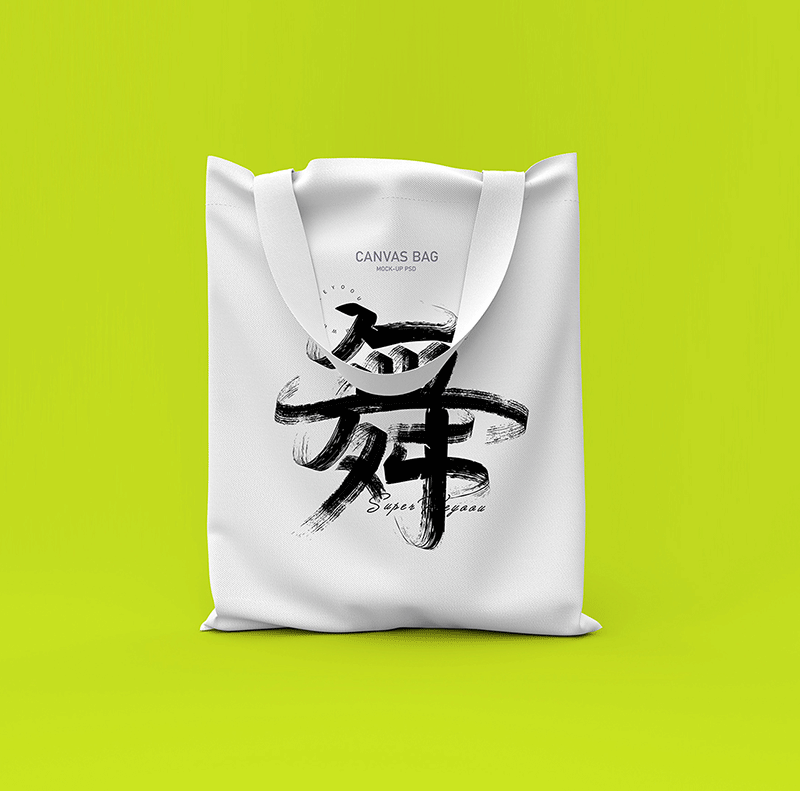
This dance character stroke synthesis design, is performed using stroke replacement deformation, this time in an ink wash style. Provided
AI Vector Stroke Material Download http://www.ziticq.com/Material/6054


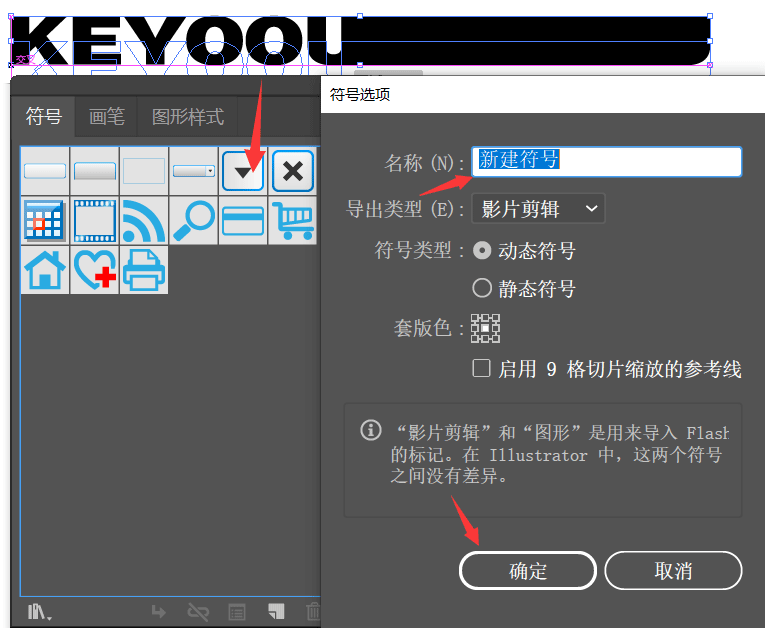
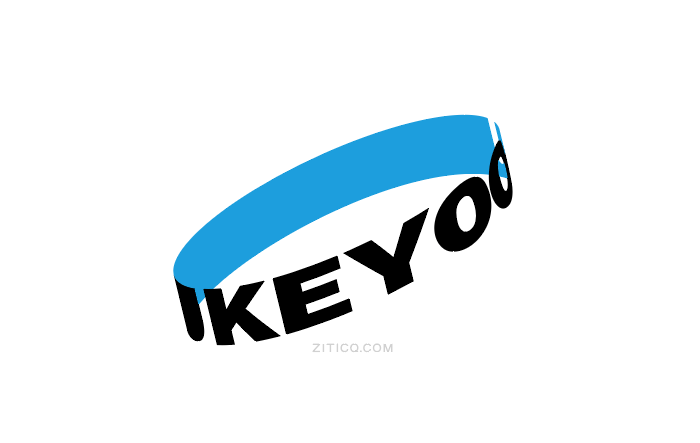
Lengthen one side of the letter U

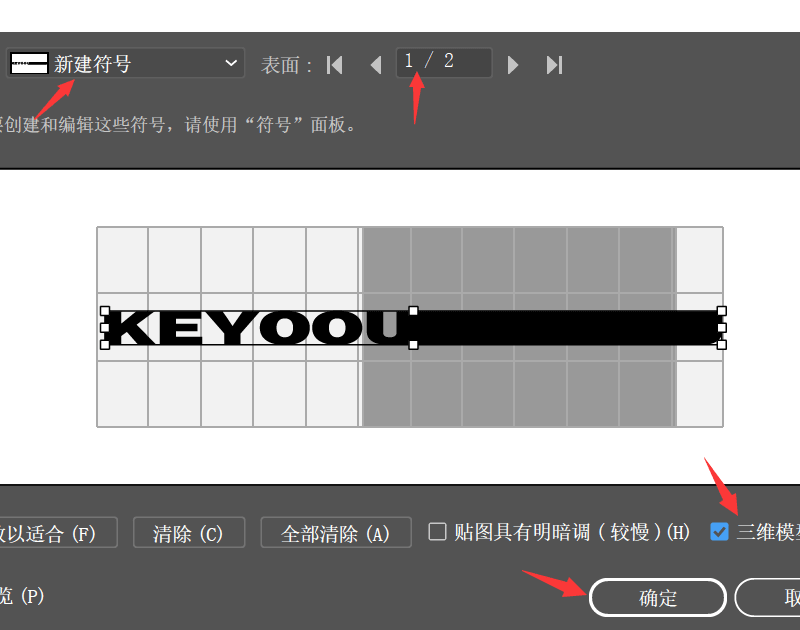
Shortcut key Shift+Ctrl+F11 to pop up the symbol panel, drag the letter into the symbol box to create a new symbol, as shown
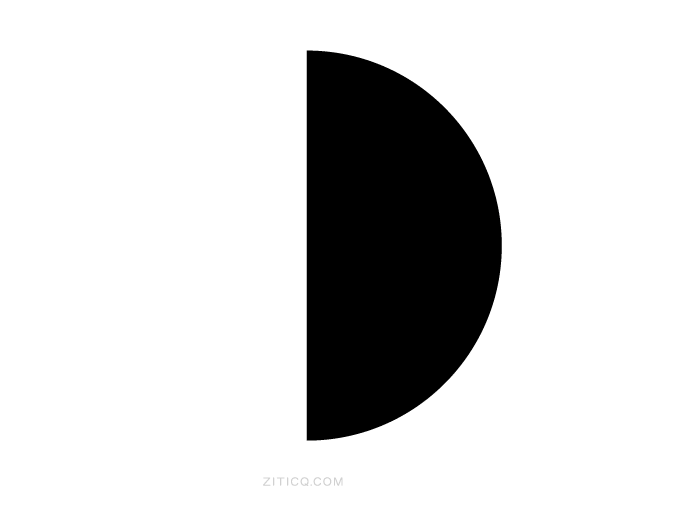
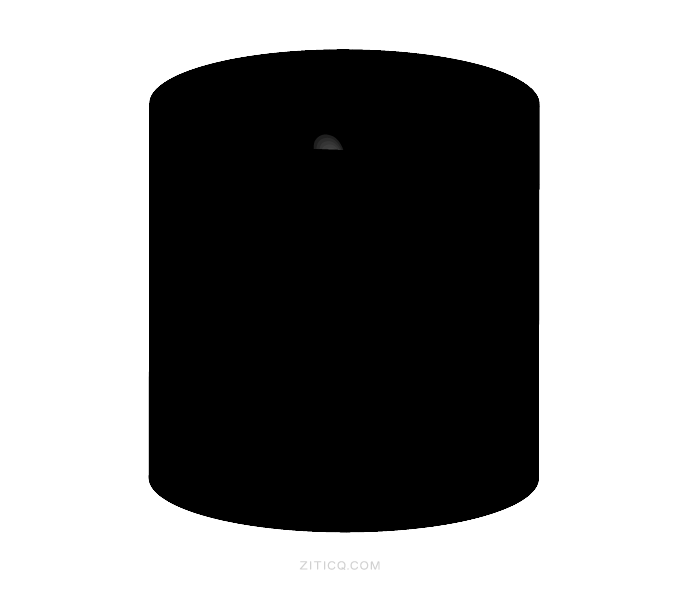
Draw a circle, use the A tool to delete one side’s node to get a semicircle
Execute Effect – 3D – Revolve Command
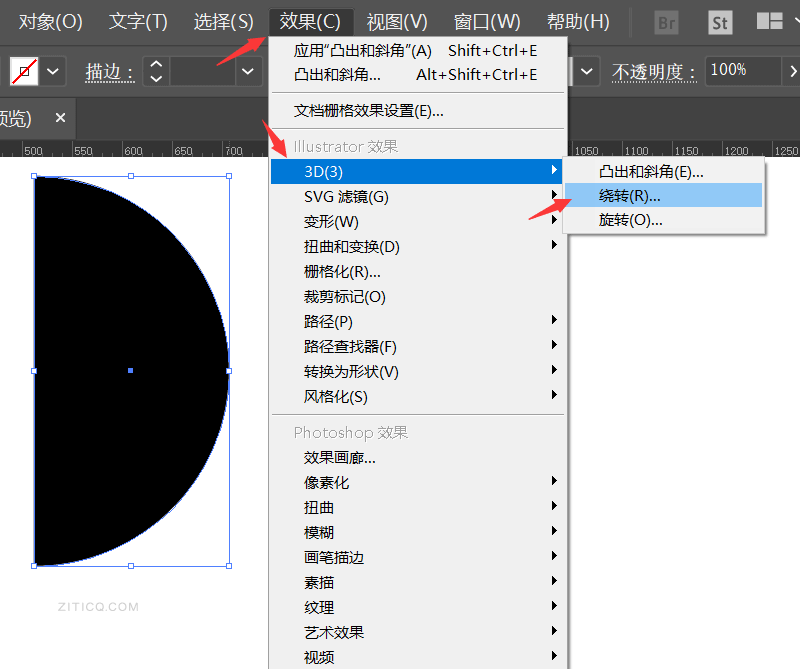
Parameters can be adjusted to your preferred direction
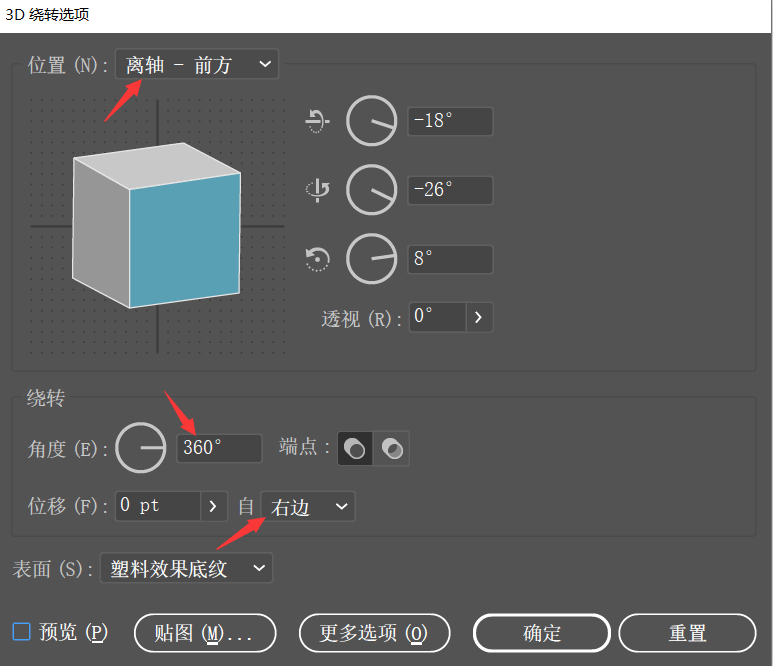
Click the texture option in the image above to place the new symbol in, and confirm
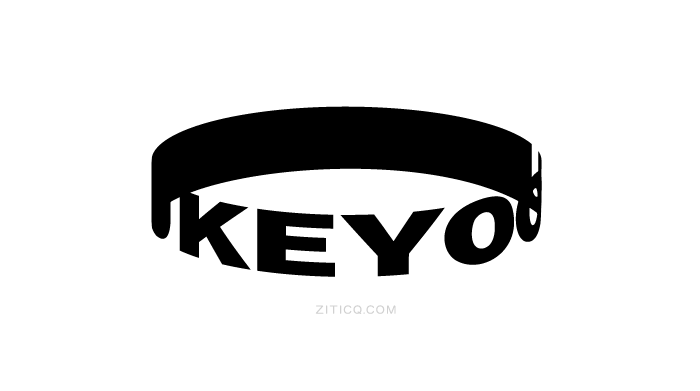
Execute Effect – 3D – Extrude and Bevel
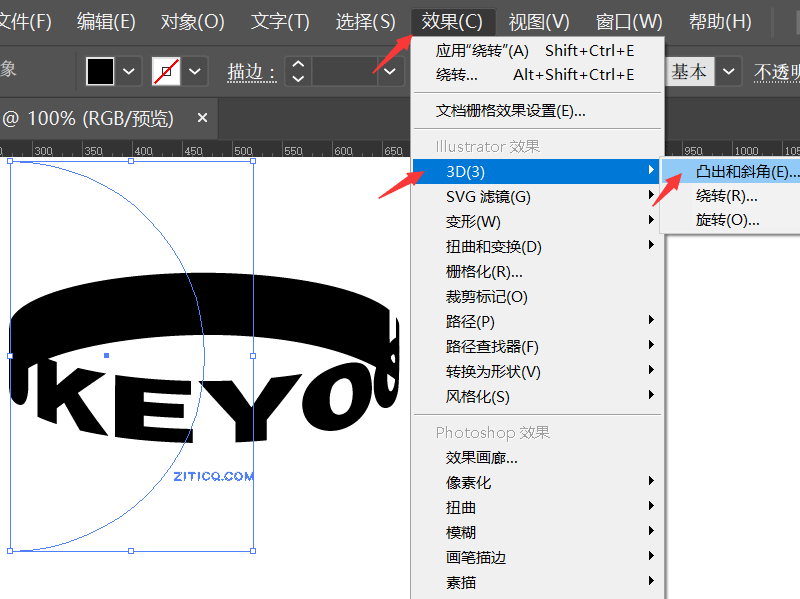
Set parameters to adjust to a suitable angle
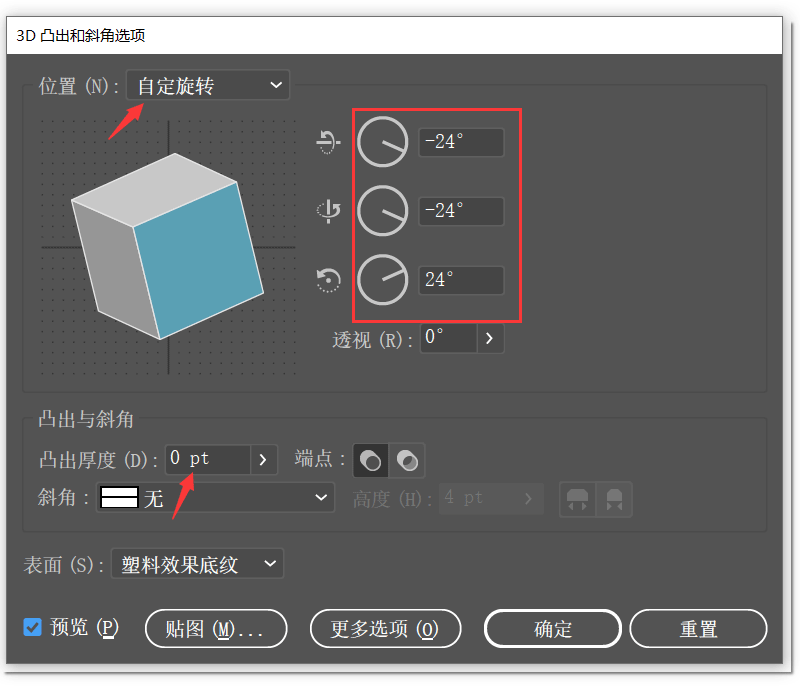
Execute Object – Expand, ungroup twice, and select the letters inside the inner circle to freely edit their colors
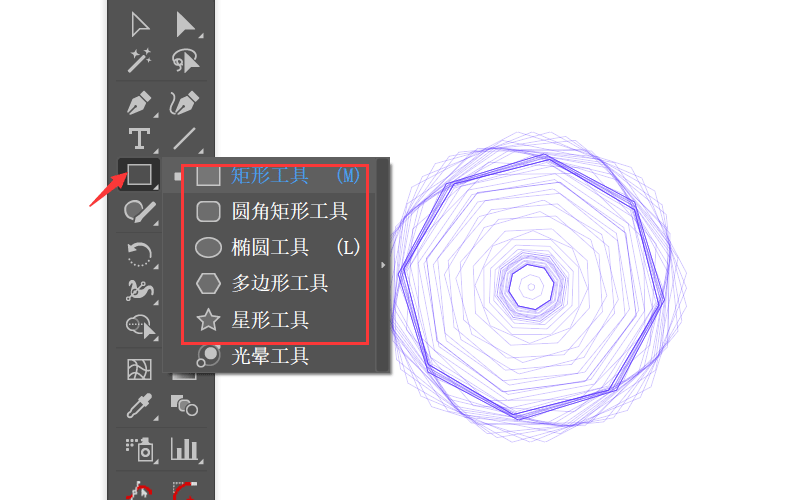
Hold down the wave key on the keyboard, click the polygon tool (you can also use other shape tools) to operate on the artboard.
Finally, add your favorite colors
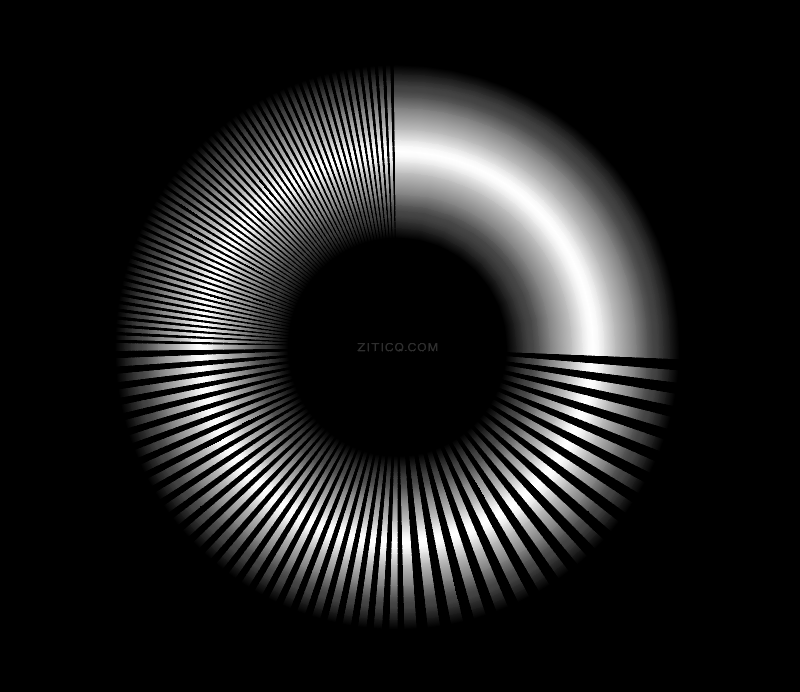
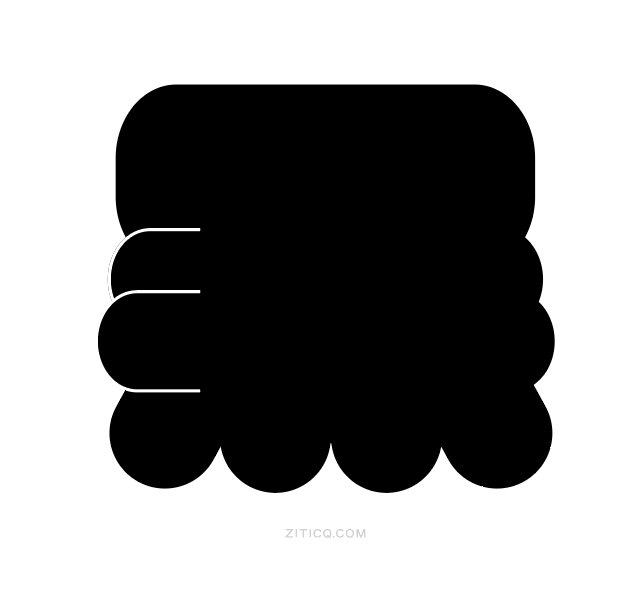
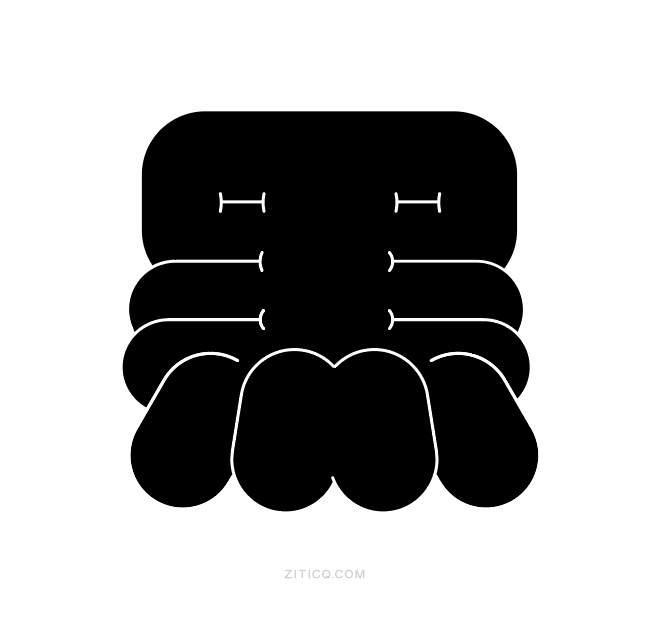
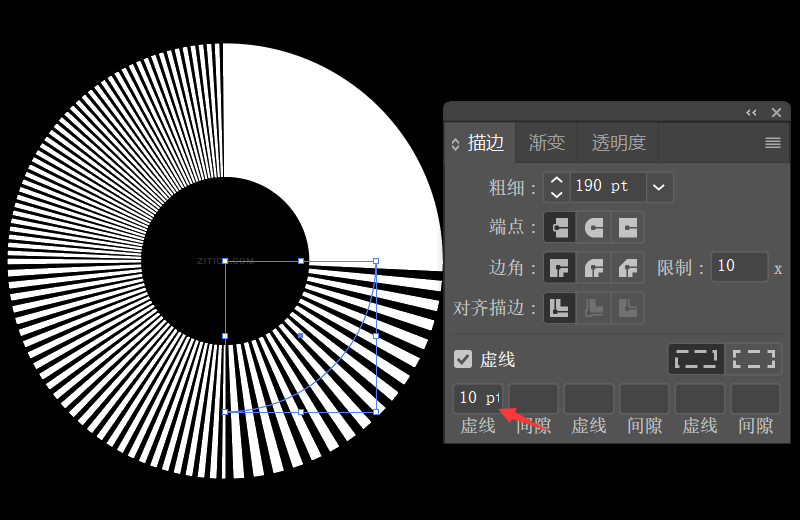
Draw a circle, set the stroke width
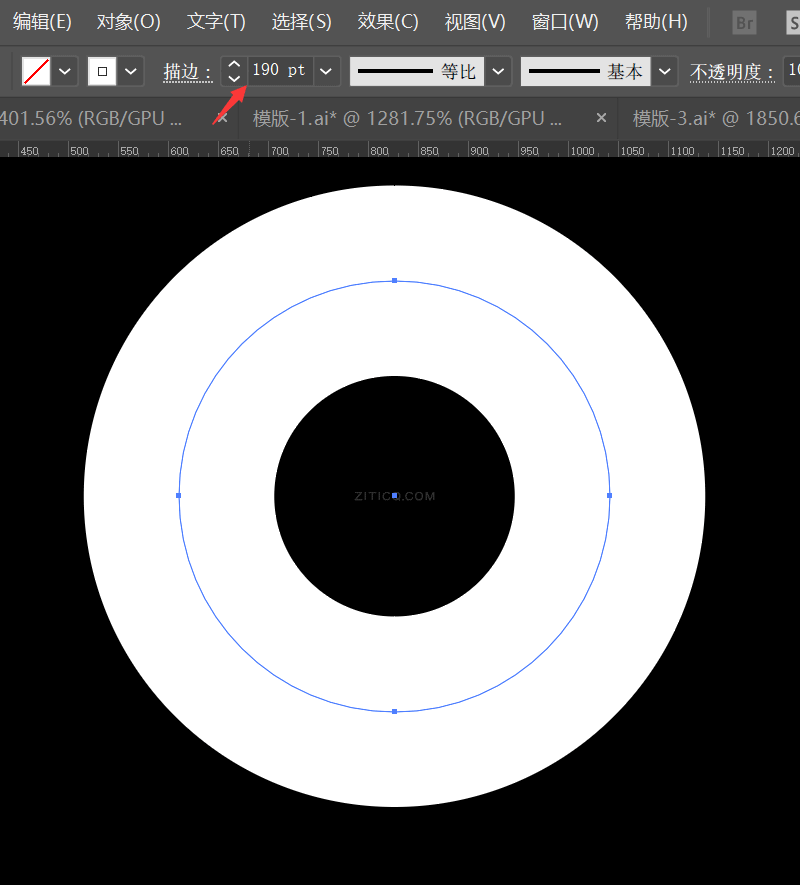
Select the tool, break the nodes, and remember to remove the internal fill
Select this segment, press the shortcut key ctrl+F10 to pop up the stroke panel, select dashed lines, and set your preferred parameters.
Then select these two segments, following the same steps as above.
Then select the third segment, following the same steps as above.
Select all paths, choose to fill the stroke with gradient color, here select radial gradient, change to apply gradient across the stroke.
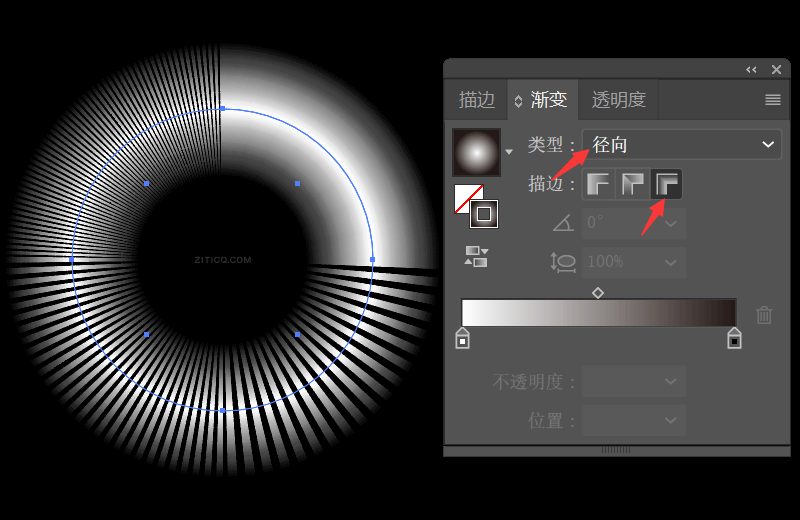
Finally, the three-dimensional gradient spring effect is complete.

Last issue review: 8 Practical AI Design Tips
26 AI Vector Beautiful Stroke Material Downloads
Handwritten Calligraphy Ink Style Font Synthesis + Stroke Material Download