

Using data augmentation techniques can increase the diversity of images in the dataset, thereby improving the performance and generalization ability of the model. The main image augmentation techniques include:
-
Resize -
Grayscale Transformation -
Normalization -
Random Rotation -
Center Crop -
Random Crop -
Gaussian Blur -
Brightness and Contrast Adjustment -
Horizontal Flip -
Vertical Flip -
Gaussian Noise -
Random Blocks -
Center Region
1
『Resize』
1
『Resize』
Before starting to resize the image, we need to import the data (taking fundus images as an example).
from PIL import Image
from pathlib import Path
import matplotlib.pyplot as plt
import numpy as np
import sys
import torch
import numpy as np
import torchvision.transforms as T

plt.rcParams["savefig.bbox"] = 'tight'
orig_img = Image.open(Path('image/000001.tif'))
torch.manual_seed(0) # Set the seed for random number generation in CPU for reproducibility
print(np.asarray(orig_img).shape) #(800, 800, 3)

# Resizing the image
resized_imgs = [T.Resize(size=size)(orig_img) for size in [128,256]]
# plt.figure('resize:128*128')
ax1 = plt.subplot(131)
ax1.set_title('original')
ax1.imshow(orig_img)

ax2 = plt.subplot(132)
ax2.set_title('resize:128*128')
ax2.imshow(resized_imgs[0])

ax3 = plt.subplot(133)
ax3.set_title('resize:256*256')
ax3.imshow(resized_imgs[1])

plt.show()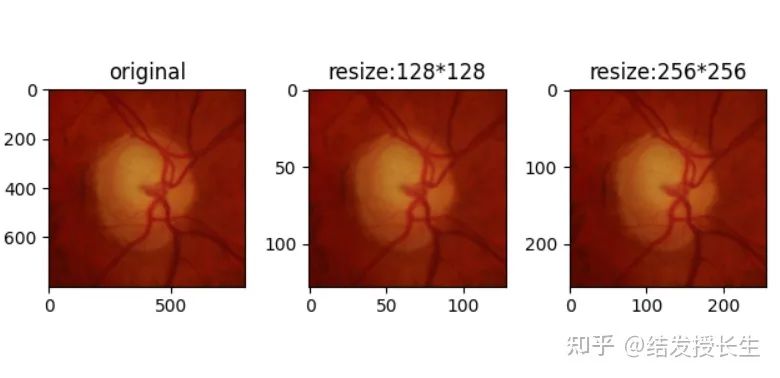
2
『Grayscale Transformation』
2
『Grayscale Transformation』
This operation converts an RGB image to a grayscale image.
gray_img = T.Grayscale()(orig_img)
# plt.figure('resize:128*128')
ax1 = plt.subplot(121)
ax1.set_title('original')
ax1.imshow(orig_img)

ax2 = plt.subplot(122)
ax2.set_title('gray')
ax2.imshow(gray_img,cmap='gray')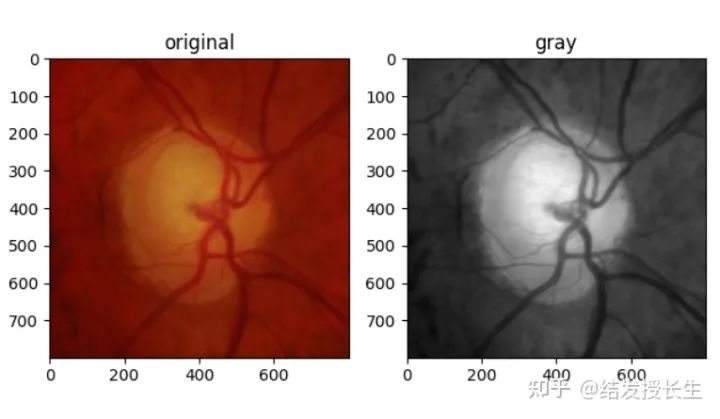
3
『Normalization』
3
『Normalization』
Normalization can accelerate the computation speed of models based on neural network structures and speed up learning.
-
Subtract the channel mean from each input channel -
Divide by the channel standard deviation.
normalized_img = T.Normalize(mean=(0.5, 0.5, 0.5), std=(0.5, 0.5, 0.5))(T.ToTensor()(orig_img))
normalized_img = [T.ToPILImage()(normalized_img)]
# plt.figure('resize:128*128')
ax1 = plt.subplot(121)
ax1.set_title('original')
ax1.imshow(orig_img)

ax2 = plt.subplot(122)
ax2.set_title('normalize')
ax2.imshow(normalized_img[0])

plt.show()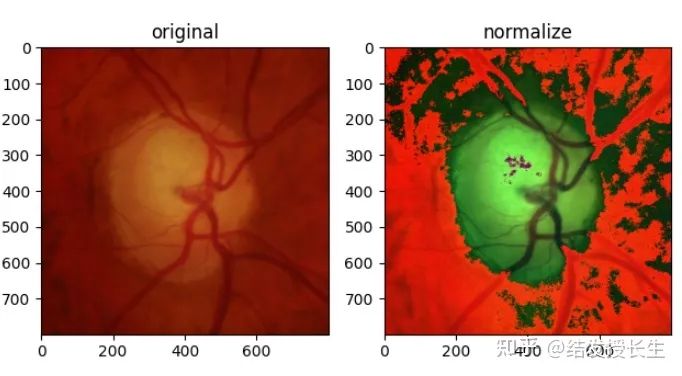
4
『Random Rotation』
4
『Random Rotation』
Rotate the image from a design perspective.
from PIL import Image
from pathlib import Path
import matplotlib.pyplot as plt
import numpy as np
import sys
import torch
import numpy as np
import torchvision.transforms as T

plt.rcParams["savefig.bbox"] = 'tight'
orig_img = Image.open(Path('image/2.png'))

rotated_imgs = [T.RandomRotation(degrees=90)(orig_img)]
print(rotated_imgs)
plt.figure('resize:128*128')
ax1 = plt.subplot(121)
ax1.set_title('original')
ax1.imshow(orig_img)

ax2 = plt.subplot(122)
ax2.set_title('90°')
ax2.imshow(np.array(rotated_imgs[0]))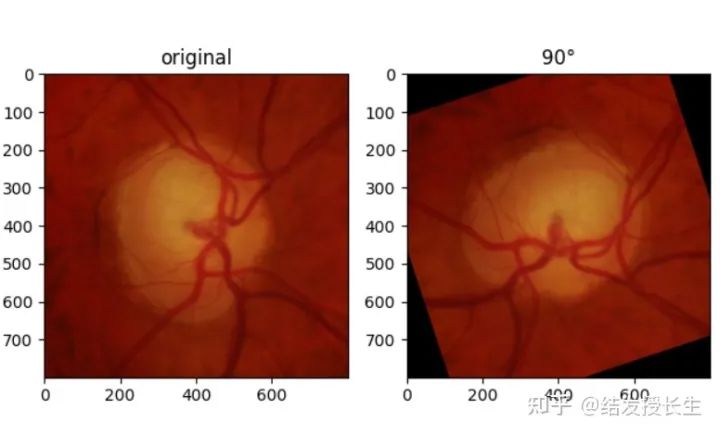
5
『Center Crop』
5
『Center Crop』
Crop the center region of the image.
from PIL import Image
from pathlib import Path
import matplotlib.pyplot as plt
import numpy as np
import sys
import torch
import numpy as np
import torchvision.transforms as T

plt.rcParams["savefig.bbox"] = 'tight'
orig_img = Image.open(Path('image/2.png'))

center_crops = [T.CenterCrop(size=size)(orig_img) for size in (128,64)]

plt.figure('resize:128*128')
ax1 = plt.subplot(131)
ax1.set_title('original')
ax1.imshow(orig_img)

ax2 = plt.subplot(132)
ax2.set_title('128*128°')
ax2.imshow(np.array(center_crops[0]))

ax3 = plt.subplot(133)
ax3.set_title('64*64')
ax3.imshow(np.array(center_crops[1]))

plt.show()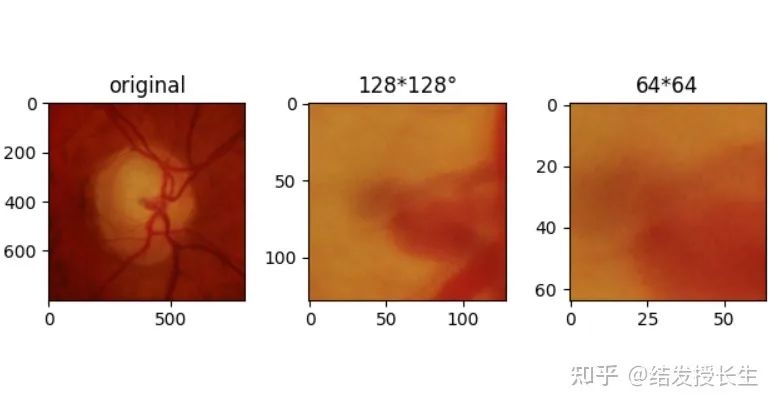
6
『Random Crop』
6
『Random Crop』
Randomly crop a portion of the image.
from PIL import Image
from pathlib import Path
import matplotlib.pyplot as plt
import numpy as np
import sys
import torch
import numpy as np
import torchvision.transforms as T

plt.rcParams["savefig.bbox"] = 'tight'
orig_img = Image.open(Path('image/2.png'))

random_crops = [T.RandomCrop(size=size)(orig_img) for size in (400,300)]

plt.figure('resize:128*128')
ax1 = plt.subplot(131)
ax1.set_title('original')
ax1.imshow(orig_img)

ax2 = plt.subplot(132)
ax2.set_title('400*400')
ax2.imshow(np.array(random_crops[0]))

ax3 = plt.subplot(133)
ax3.set_title('300*300')
ax3.imshow(np.array(random_crops[1]))

plt.show()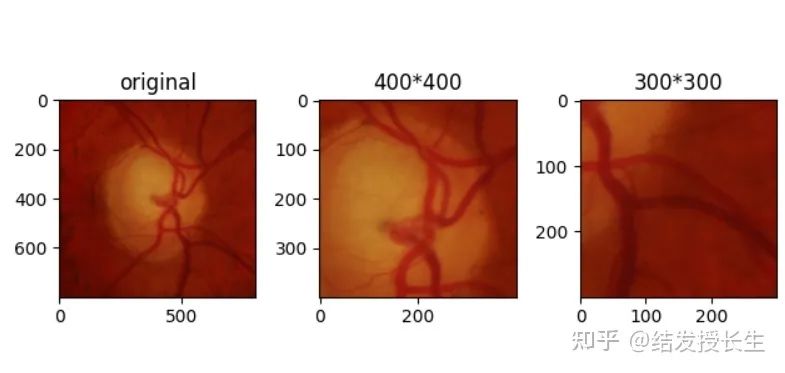
7
『Gaussian Blur』
7
『Gaussian Blur』
Apply Gaussian blur transformation to the image using a Gaussian kernel.
from PIL import Image
from pathlib import Path
import matplotlib.pyplot as plt
import numpy as np
import sys
import torch
import numpy as np
import torchvision.transforms as T

plt.rcParams["savefig.bbox"] = 'tight'
orig_img = Image.open(Path('image/2.png'))

blurred_imgs = [T.GaussianBlur(kernel_size=(3, 3), sigma=sigma)(orig_img) for sigma in (3,7)]

plt.figure('resize:128*128')
ax1 = plt.subplot(131)
ax1.set_title('original')
ax1.imshow(orig_img)

ax2 = plt.subplot(132)
ax2.set_title('sigma=3')
ax2.imshow(np.array(blurred_imgs[0]))

ax3 = plt.subplot(133)
ax3.set_title('sigma=7')
ax3.imshow(np.array(blurred_imgs[1]))

plt.show()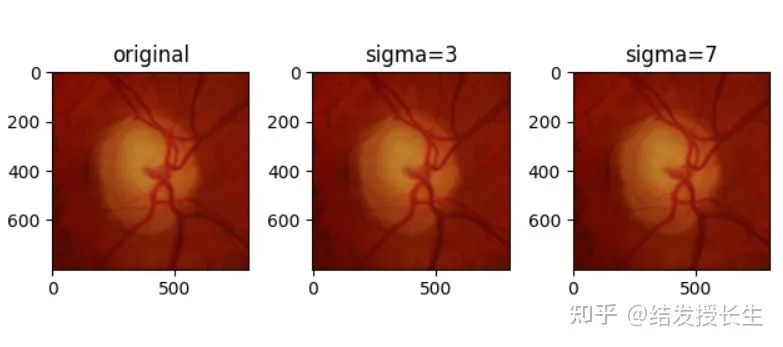
8
『Brightness, Contrast, and Saturation Adjustment』
8
『Brightness, Contrast, and Saturation Adjustment』
from PIL import Image
from pathlib import Path
import matplotlib.pyplot as plt
import numpy as np
import sys
import torch
import numpy as np
import torchvision.transforms as T

plt.rcParams["savefig.bbox"] = 'tight'
orig_img = Image.open(Path('image/2.png'))
# random_crops = [T.RandomCrop(size=size)(orig_img) for size in (832,704, 256)]
colorjitter_img = [T.ColorJitter(brightness=(2,2), contrast=(0.5,0.5), saturation=(0.5,0.5))(orig_img)]

plt.figure('resize:128*128')
ax1 = plt.subplot(121)
ax1.set_title('original')
ax1.imshow(orig_img)
ax2 = plt.subplot(122)
ax2.set_title('colorjitter_img')
ax2.imshow(np.array(colorjitter_img[0]))
plt.show()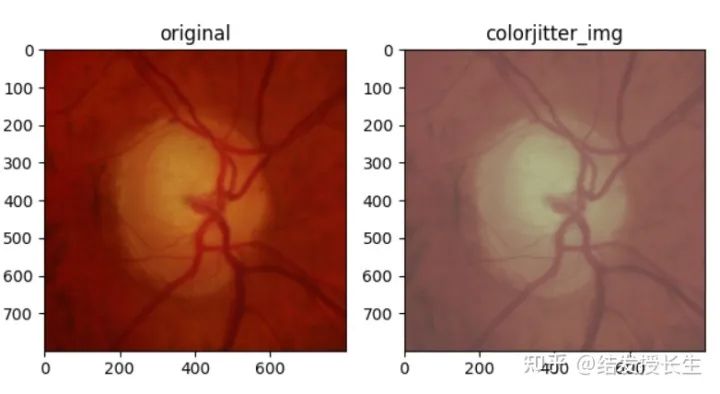
9
『Horizontal Flip』
9
『Horizontal Flip』
from PIL import Image
from pathlib import Path
import matplotlib.pyplot as plt
import numpy as np
import sys
import torch
import numpy as np
import torchvision.transforms as T

plt.rcParams["savefig.bbox"] = 'tight'
orig_img = Image.open(Path('image/2.png'))

HorizontalFlip_img = [T.RandomHorizontalFlip(p=1)(orig_img)]

plt.figure('resize:128*128')
ax1 = plt.subplot(121)
ax1.set_title('original')
ax1.imshow(orig_img)

ax2 = plt.subplot(122)
ax2.set_title('colorjitter_img')
ax2.imshow(np.array(HorizontalFlip_img[0]))

plt.show()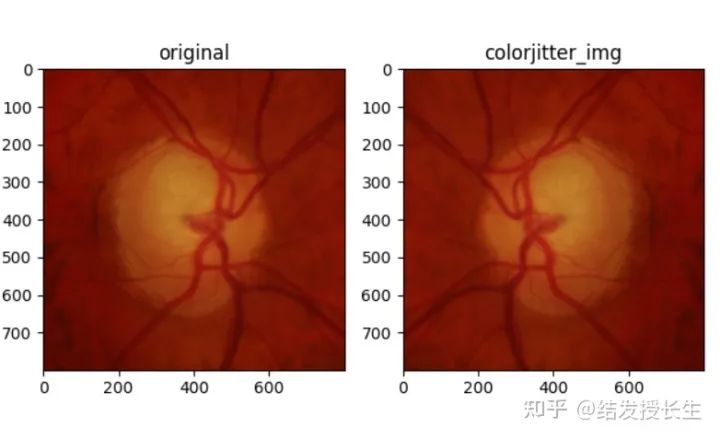
10
『Vertical Flip』
10
『Vertical Flip』
from PIL import Image
from pathlib import Path
import matplotlib.pyplot as plt
import numpy as np
import sys
import torch
import numpy as np
import torchvision.transforms as T

plt.rcParams["savefig.bbox"] = 'tight'
orig_img = Image.open(Path('image/2.png'))

VerticalFlip_img = [T.RandomVerticalFlip(p=1)(orig_img)]

plt.figure('resize:128*128')
ax1 = plt.subplot(121)
ax1.set_title('original')
ax1.imshow(orig_img)

ax2 = plt.subplot(122)
ax2.set_title('VerticalFlip')
ax2.imshow(np.array(VerticalFlip_img[0]))

# ax3 = plt.subplot(133)
# ax3.set_title('sigma=7')
# ax3.imshow(np.array(blurred_imgs[1]))

plt.show()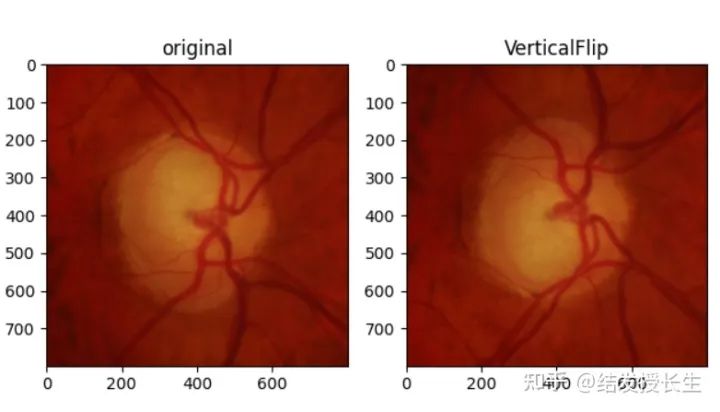
11
『Gaussian Noise』
11
『Gaussian Noise』
Add Gaussian noise to the image. The higher the noise factor, the greater the noise in the image.
from PIL import Image
from pathlib import Path
import matplotlib.pyplot as plt
import numpy as np
import sys
import torch
import numpy as np
import torchvision.transforms as T

plt.rcParams["savefig.bbox"] = 'tight'
orig_img = Image.open(Path('image/2.png'))

def add_noise(inputs, noise_factor=0.3):
    noisy = inputs + torch.randn_like(inputs) * noise_factor
    noisy = torch.clip(noisy, 0., 1.)
    return noisy

noise_imgs = [add_noise(T.ToTensor()(orig_img), noise_factor) for noise_factor in (0.3, 0.6)]
noise_imgs = [T.ToPILImage()(noise_img) for noise_img in noise_imgs]

plt.figure('resize:128*128')
ax1 = plt.subplot(131)
ax1.set_title('original')
ax1.imshow(orig_img)

ax2 = plt.subplot(132)
ax2.set_title('noise_factor=0.3')
ax2.imshow(np.array(noise_imgs[0]))

ax3 = plt.subplot(133)
ax3.set_title('noise_factor=0.6')
ax3.imshow(np.array(noise_imgs[1]))

plt.show()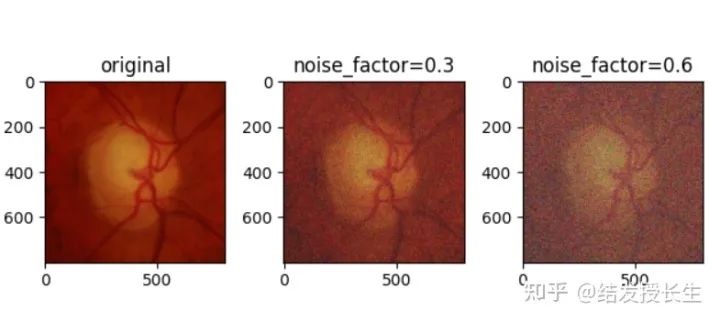
12
『Random Blocks』
12
『Random Blocks』
Randomly apply square patches to the image. The more patches there are, the harder it is for the neural network to solve the problem.
from PIL import Image
from pathlib import Path
import matplotlib.pyplot as plt
import numpy as np
import sys
import torch
import numpy as np
import torchvision.transforms as T

plt.rcParams["savefig.bbox"] = 'tight'
orig_img = Image.open(Path('image/2.png'))

def add_random_boxes(img,n_k,size=64):
    h,w = size,size
    img = np.asarray(img).copy()
    img_size = img.shape[1]
    boxes = []
    for k in range(n_k):
        y,x = np.random.randint(0,img_size-w,(2,))
        img[y:y+h,x:x+w] = 0
        boxes.append((x,y,h,w))
    img = Image.fromarray(img.astype('uint8'), 'RGB')
    return img

blocks_imgs = [add_random_boxes(orig_img,n_k=10)]

plt.figure('resize:128*128')
ax1 = plt.subplot(131)
ax1.set_title('original')
ax1.imshow(orig_img)

ax2 = plt.subplot(132)
ax2.set_title('10 black boxes')
ax2.imshow(np.array(blocks_imgs[0]))

plt.show()
13
『Center Region』
13
『Center Region』
Similar to random blocks, but patches are added to the center of the image.
from PIL import Image
from pathlib import Path
import matplotlib.pyplot as plt
import numpy as np
import sys
import torch
import numpy as np
import torchvision.transforms as T

plt.rcParams["savefig.bbox"] = 'tight'
orig_img = Image.open(Path('image/2.png'))

def add_central_region(img, size=32):
    h, w = size, size
    img = np.asarray(img).copy()
    img_size = img.shape[1]
    img[int(img_size / 2 - h):int(img_size / 2 + h), int(img_size / 2 - w):int(img_size / 2 + w)] = 0
    img = Image.fromarray(img.astype('uint8'), 'RGB')
    return img

central_imgs = [add_central_region(orig_img, size=128)]

plt.figure('resize:128*128')
ax1 = plt.subplot(131)
ax1.set_title('original')
ax1.imshow(orig_img)

ax2 = plt.subplot(132)
ax2.set_title('')
ax2.imshow(np.array(central_imgs[0]))
#
# ax3 = plt.subplot(133)
# ax3.set_title('20 black boxes')
# ax3.imshow(np.array(blocks_imgs[1]))

plt.show()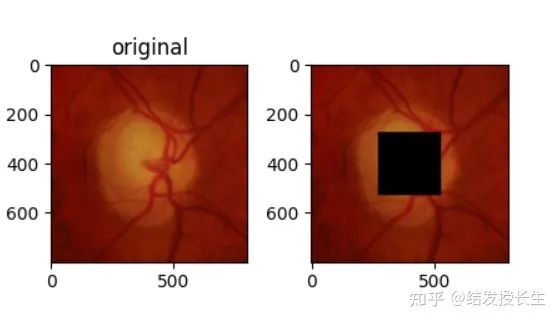

Scan the QR code to add the assistant WeChat
About Us