
Click the "Xiaobai Learns Vision" above, select to add "Star" or "Top"
Heavy content delivered at the first time
1. Introduction
What is Object Detection? Given an image, we humans can identify objects within it. For example, we can detect if there are cars, trees, people, etc., in the image. If we can analyze the image and detect objects, can we teach machines to do the same? The answer is yes. With the rise of deep learning and computer vision, we can automate object detection. We can build deep learning and computer vision models that can detect and locate objects, calculate distances between them, predict their future positions, and more. Object detection has a wide range of applications in computer vision and machine learning. Technologies such as object tracking, CCTV monitoring, human activity recognition, and even autonomous vehicles utilize this technology. To better understand it, consider the image below.
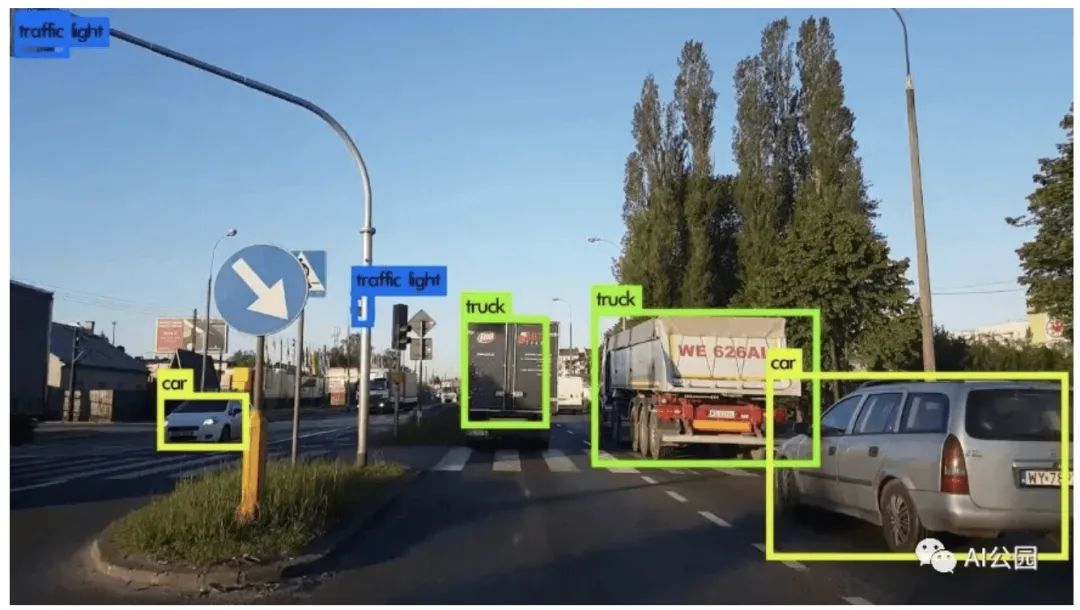
Figure 1, Object Detection in Road Traffic
The image shows an object detection of road traffic from a vehicle’s perspective. Here we can see it detecting other vehicles, traffic signals, etc. If the vehicle is an autonomous car, it should be able to detect the driving path, other vehicles, pedestrians, traffic signals, etc., for smooth and safe driving. Now that we understand object detection, let’s move on to a slightly advanced technique called image segmentation. By analyzing the image below, we can easily understand the difference between object detection and image segmentation.

Figure 2, Object Detection and Image Segmentation
Both methods attempt to identify and locate objects in an image. In object detection, this is achieved through bounding boxes. The algorithm or model locates the object by drawing a rectangular bounding box around it. In image segmentation, every pixel in the image is labeled. This means that given an image, the segmentation model tries to classify all the pixels into meaningful object categories for pixel-level classification. This is also known as dense prediction, as it predicts the meaning of each pixel by identifying and understanding what object each pixel belongs to. “The output format of image segmentation is called a mask: an image of the same size as the original, but for each pixel, it only has a boolean value indicating whether the object exists or not.” We will use this technique in our case study. Now that we have the concepts of object detection and image segmentation, let’s further understand the problem statement.
2. Problem Statement
We have obtained images of some products. Some products have defects, while others do not. Given the images of the products, we need to detect whether they have defects. We also need to locate these defects.
3. Formulation of Machine Learning
This problem can be framed as an image segmentation task. Given an image of a product, we need to draw a segmentation mask for it. If the product has a defect, the segmentation map should be able to locate that defect.
4. Performance Metrics
One of the most commonly used metrics in segmentation problems is the Intersection over Union (IoU) score. Refer to the image below, which clearly shows how the IoU score is calculated.
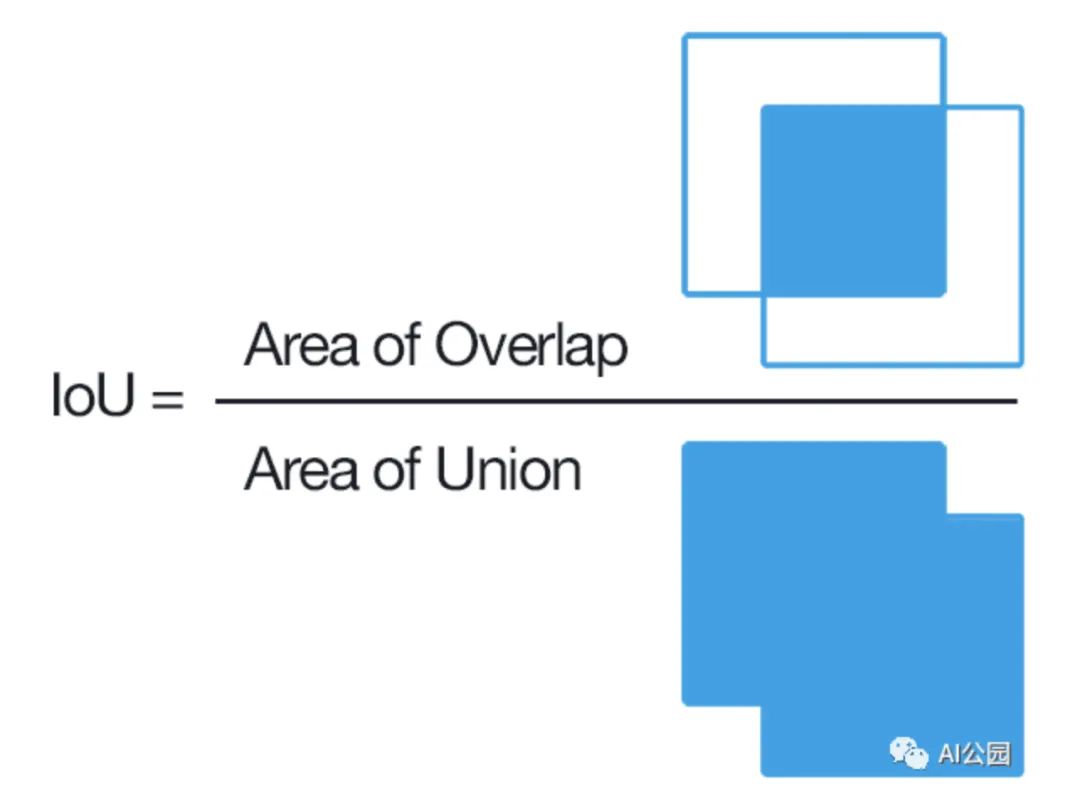
IoU is the area of overlap between the predicted segmentation and the ground truth segmentation divided by the area of the union between the predicted and the ground truth segmentation.
We can also express the IoU score as TP/(TP+FN+FP). The range of this metric is from 0 to 1. An IoU score of 1 indicates complete overlap, while an IoU score of 0 indicates no overlap at all. The loss function used in this case study is the Dice loss. The Dice loss can be thought of as 1 minus the Dice coefficient, where the Dice coefficient is defined as follows: Dice coefficient = 2 * area of overlap.
5. Understanding the Data
The dataset contains two folders – train and test. The training set consists of six categories of images. Each category of images is divided into two folders, one containing 1000 defect-free images and the other containing 130 defective images. The image below shows the folders within the train folder.

Figure 3, Training Dataset
The folder names ending with “def” contain the defective images of the corresponding class, while those without “def” indicate defect-free images. The test folder contains a set of 120 defective images, for which the segmentation maps will be predicted.
6. Data Preprocessing
6.1 Preparing Image Data and Segmentation Masks
Now we need to prepare the image data and corresponding segmentation masks for each image. We divide the images into twelve folders. Let’s take a look at some images.

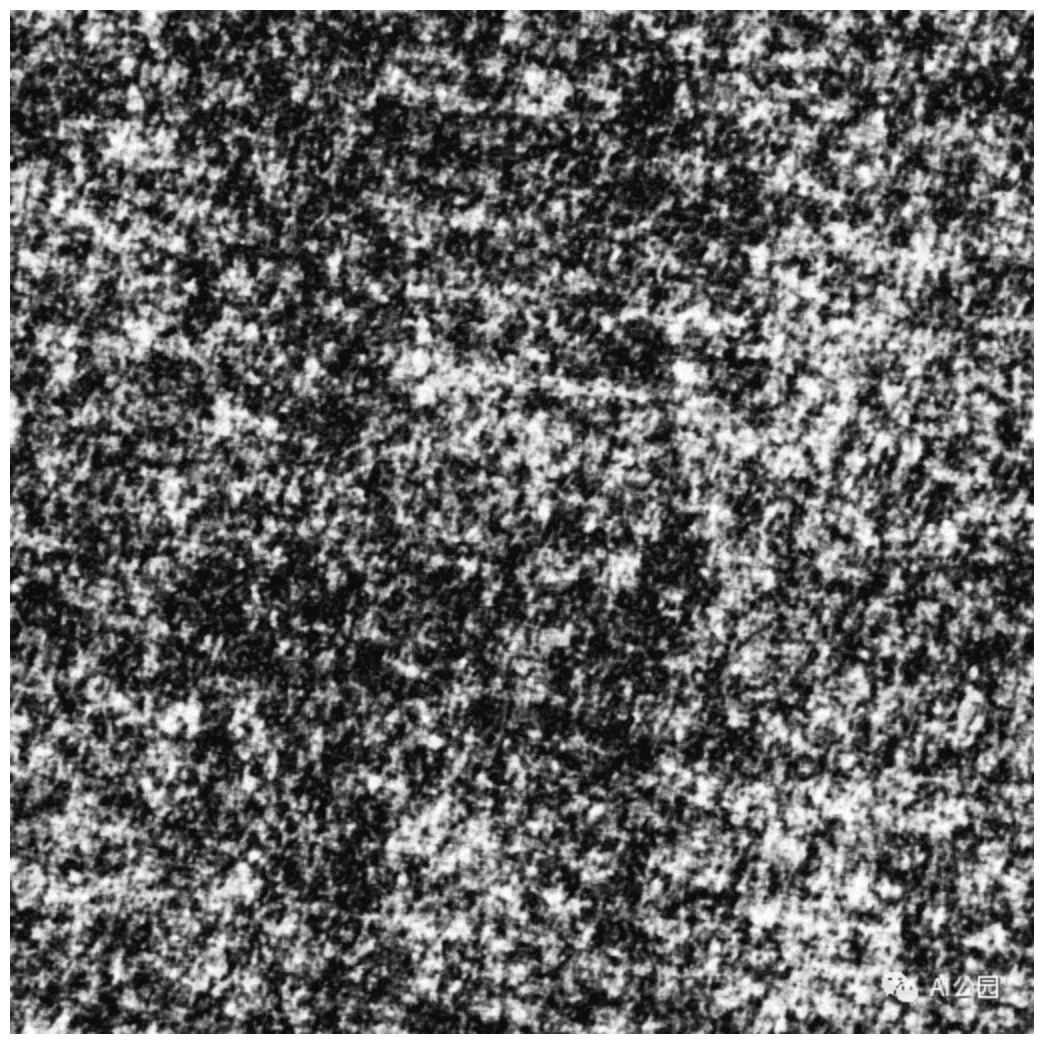
Figure 4, Images of Products
The first image represents a defective product, while the second image represents a defect-free image. Now we need to prepare the segmentation maps for these images. The segmentation map can detect the defective parts of the image. For the images above, the expected segmentation maps are as follows.

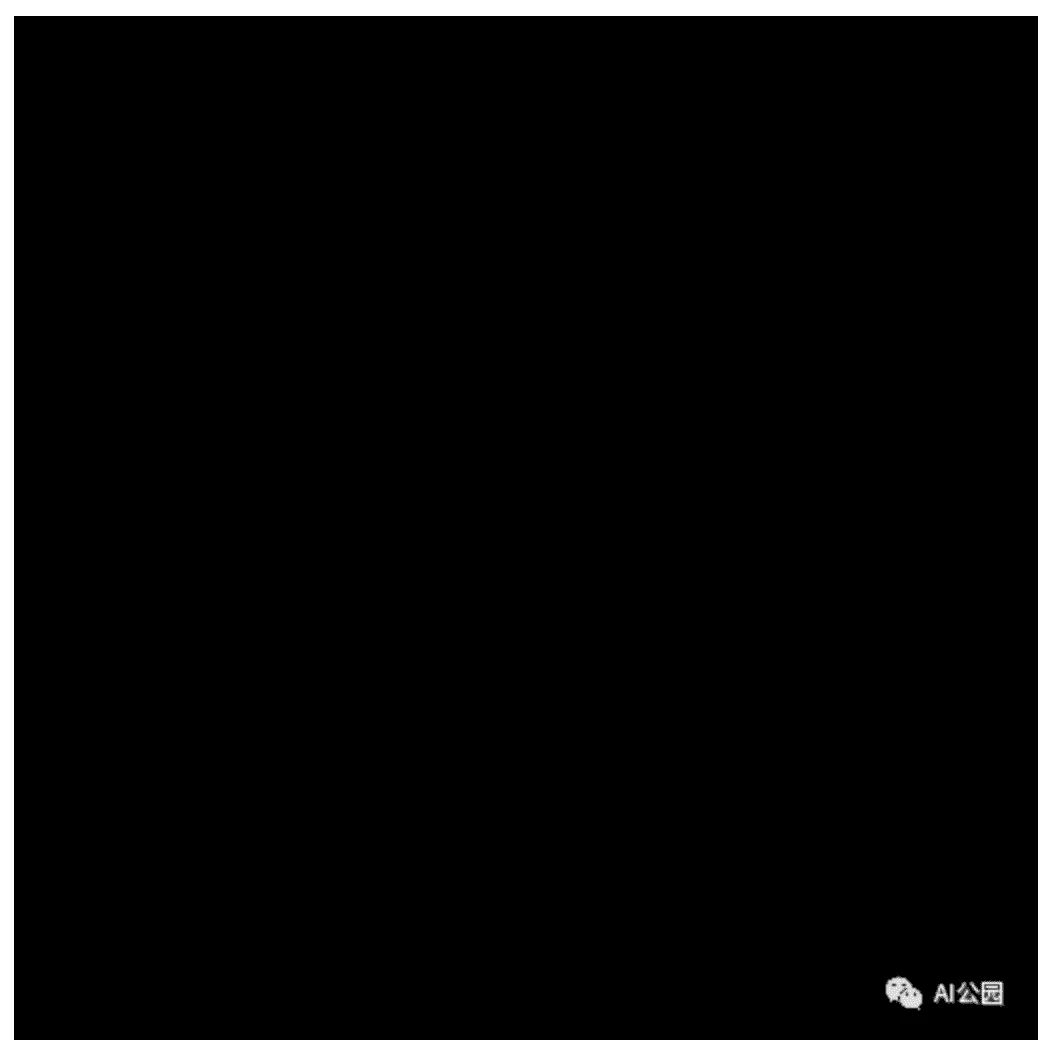
Figure 5, Segmentation Masks for Figure 4
We can see that in the first image, the elliptical area represents the detected part. The second image is blank because it has no defects. Let’s analyze some more defective images.
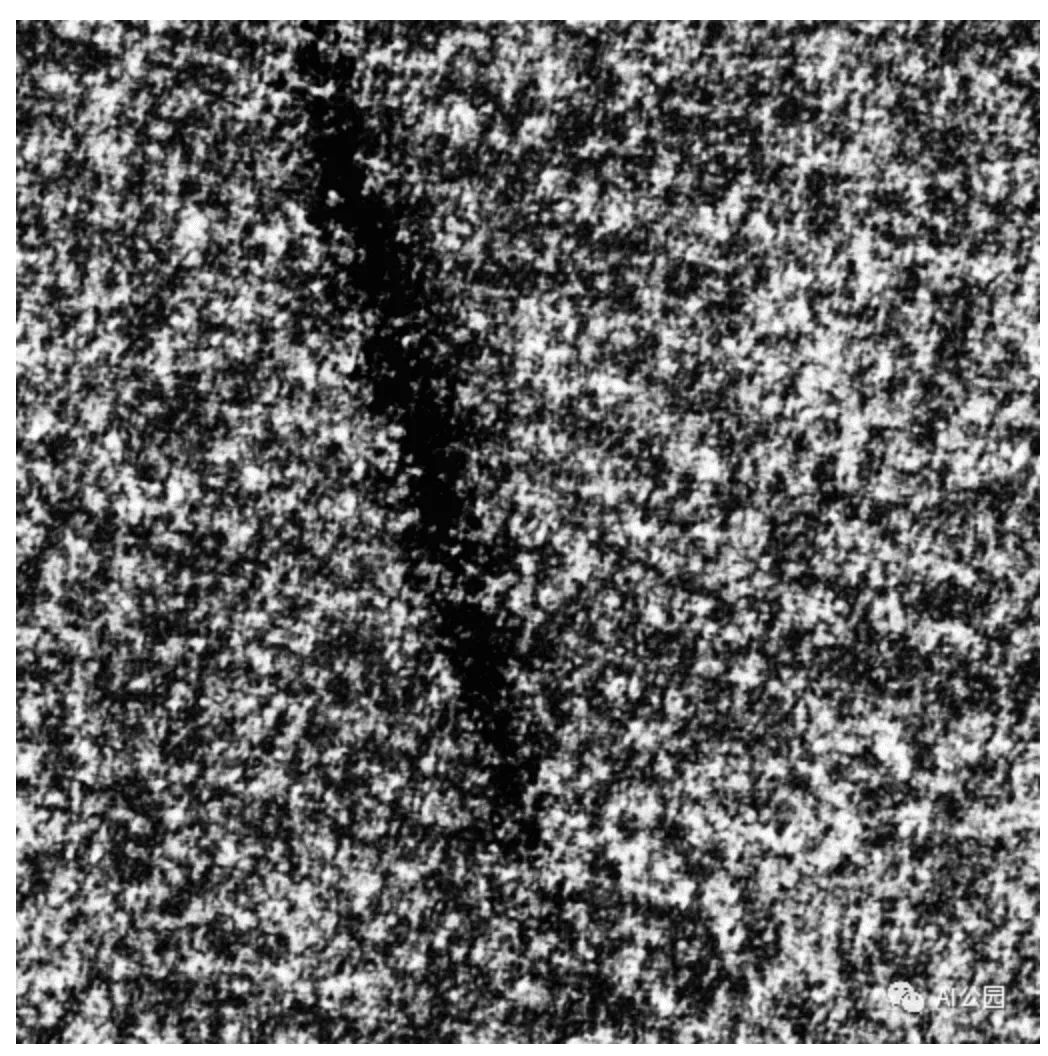
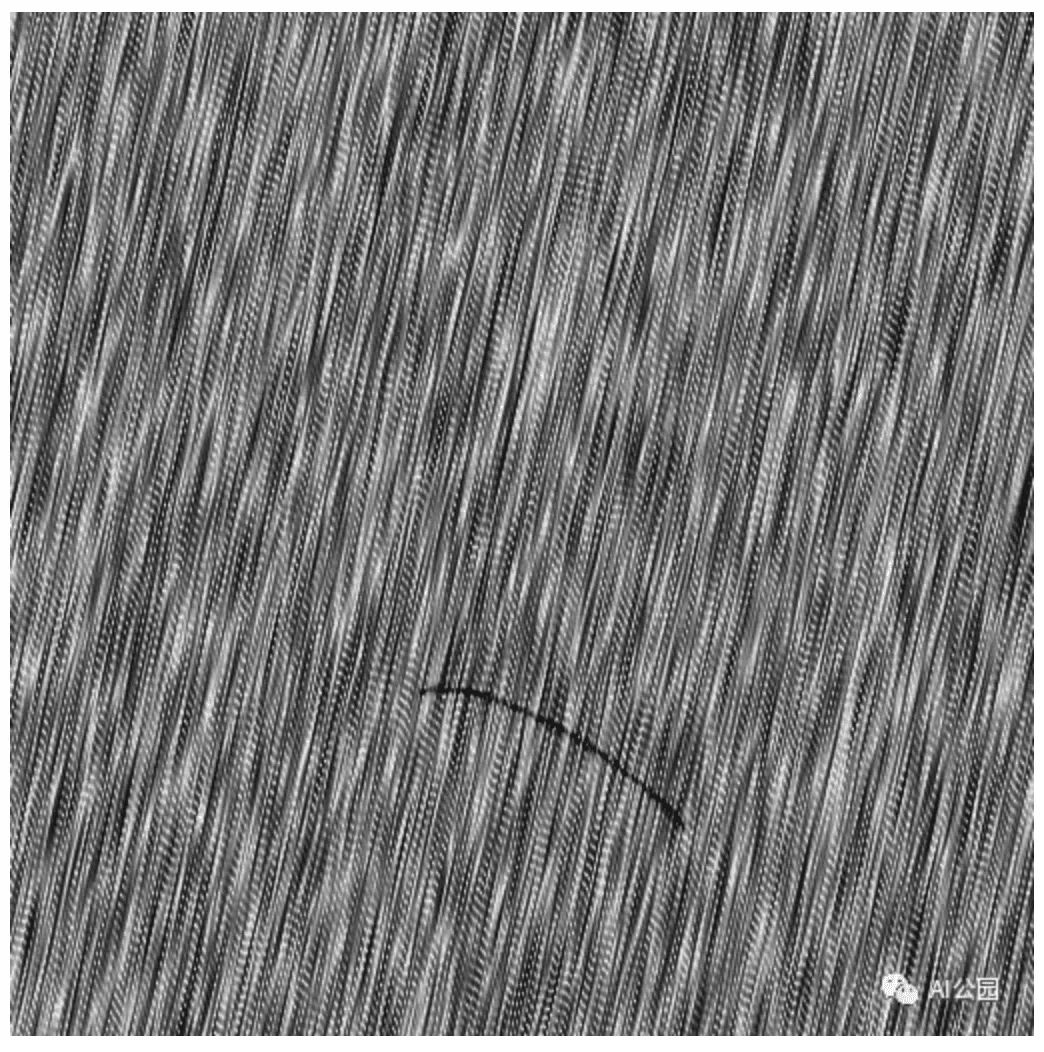
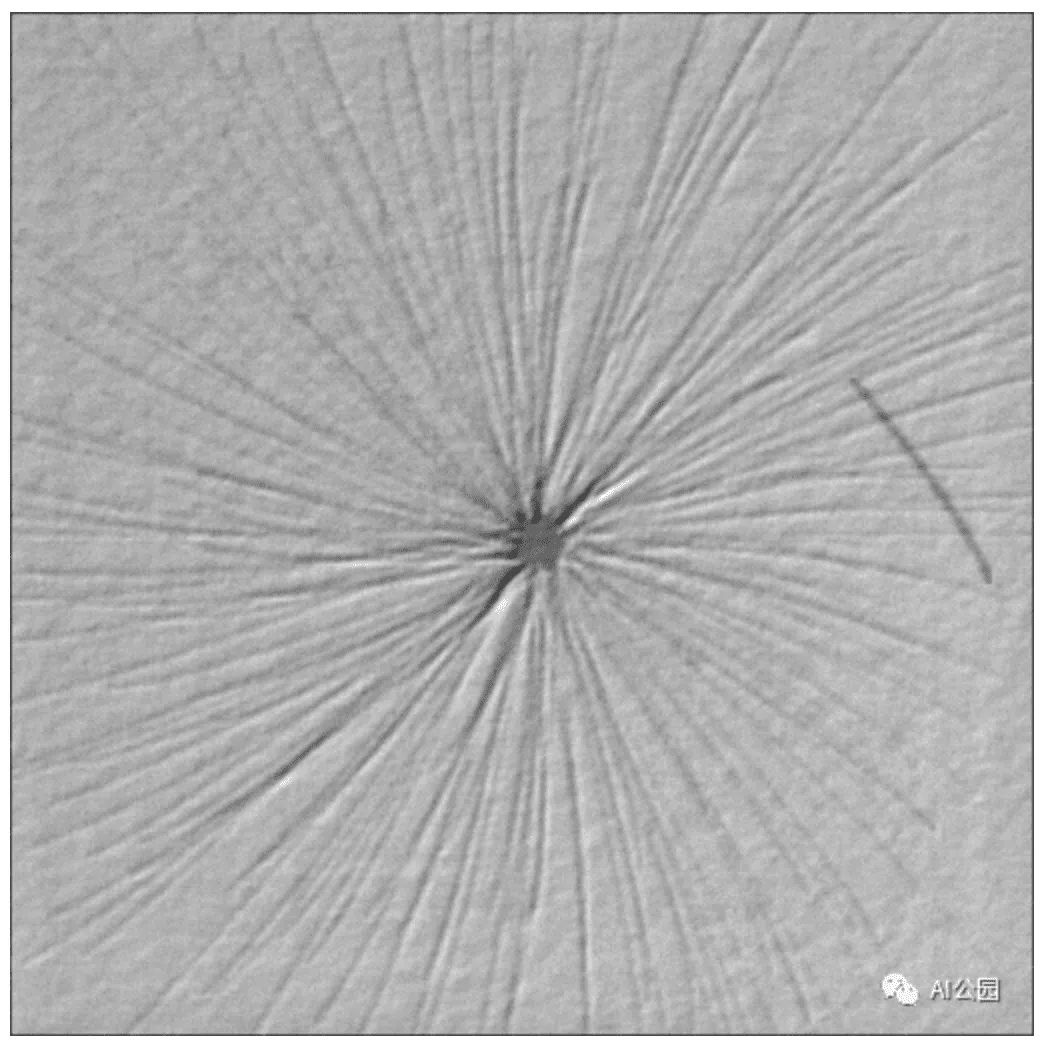
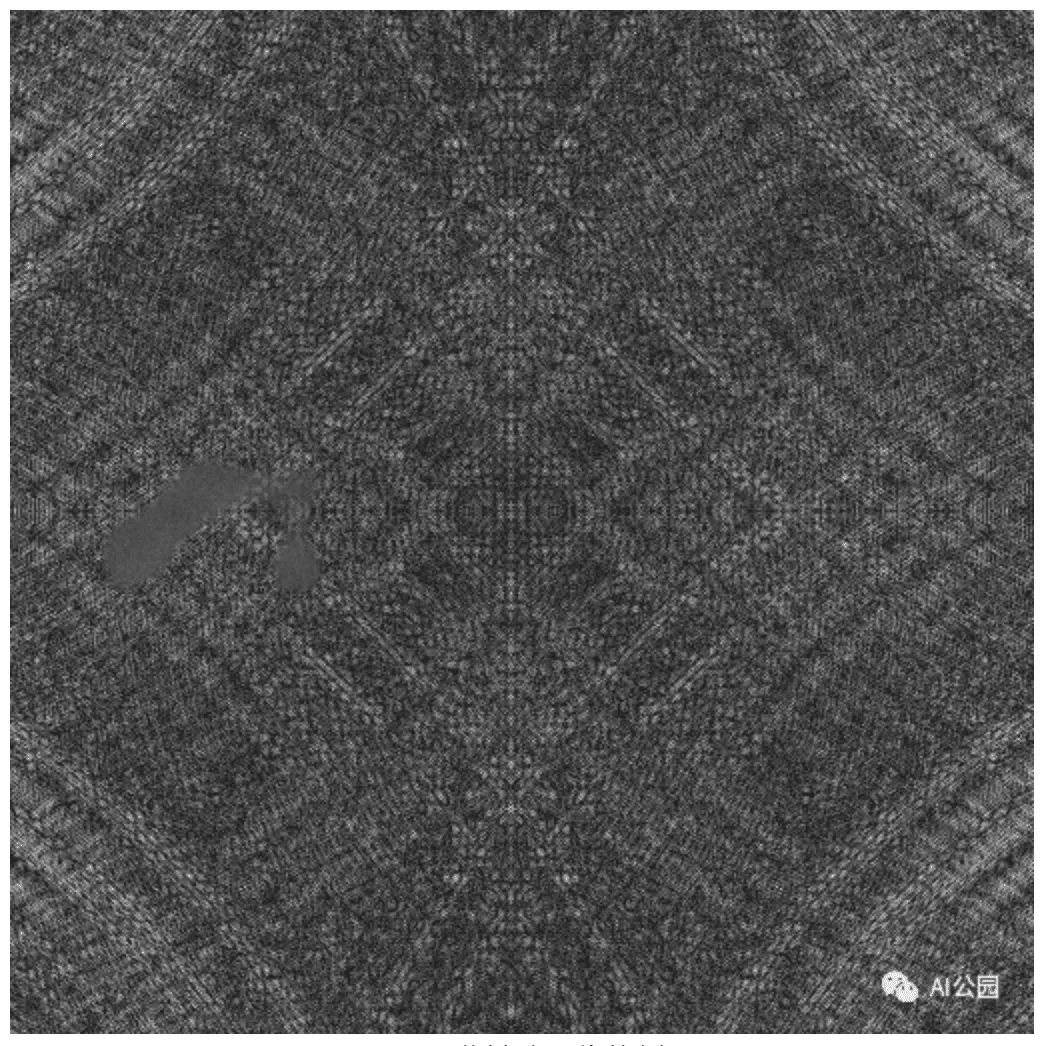
Figure 6, Examples of Some Defective Images
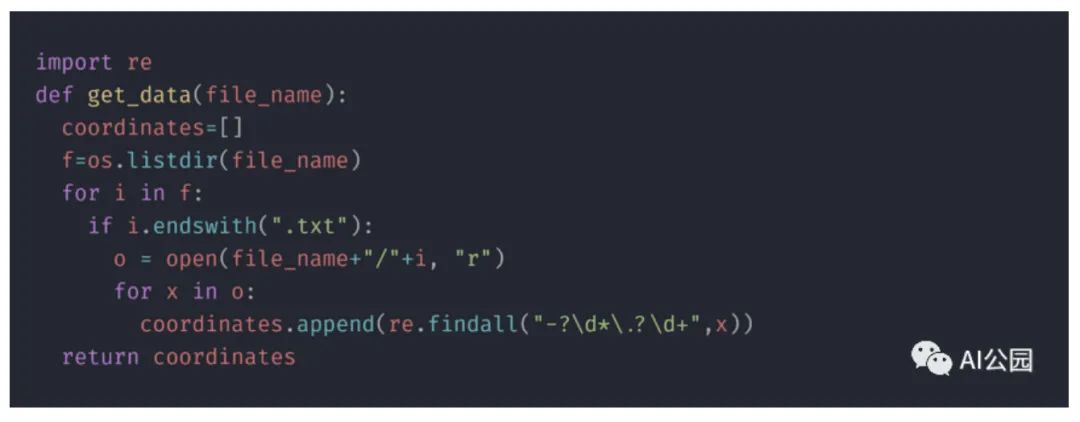
We can see that defects appear in the images in the form of curves or straight lines. Therefore, we can use ellipses to mark these areas as defects. But how do we prepare the segmentation masks? Do we need to annotate them manually? We have another file containing information about the segmentation masks.

Each row contains information about the mask area of the image. Each column represents the filename of the image, the semi-major axis of the ellipse, the semi-minor axis of the ellipse, the rotation angle of the ellipse, and the x and y positions of the center of the ellipse.
The data needed to draw the ellipse is obtained using the get_data function, as shown below:
We can use this information and employ the skimage function to draw an elliptical segmentation mask.
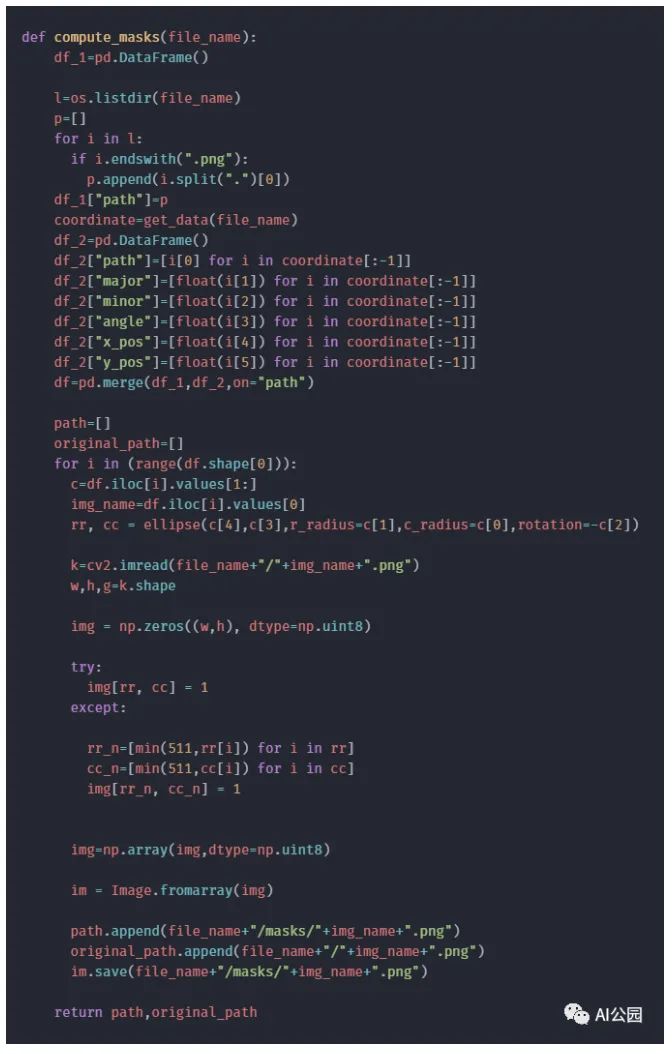
It is worth noting that this only applies to defective images. For defect-free images, we need to create blank images as segmentation masks.
6.2 Loading Images
The structured data is obtained in the form shown below.
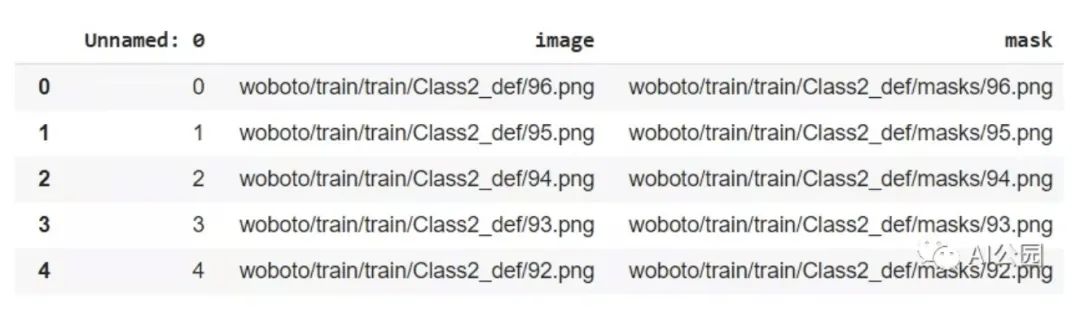
The “images” column contains the full file paths of each image, while the “mask” column contains the corresponding mask images.
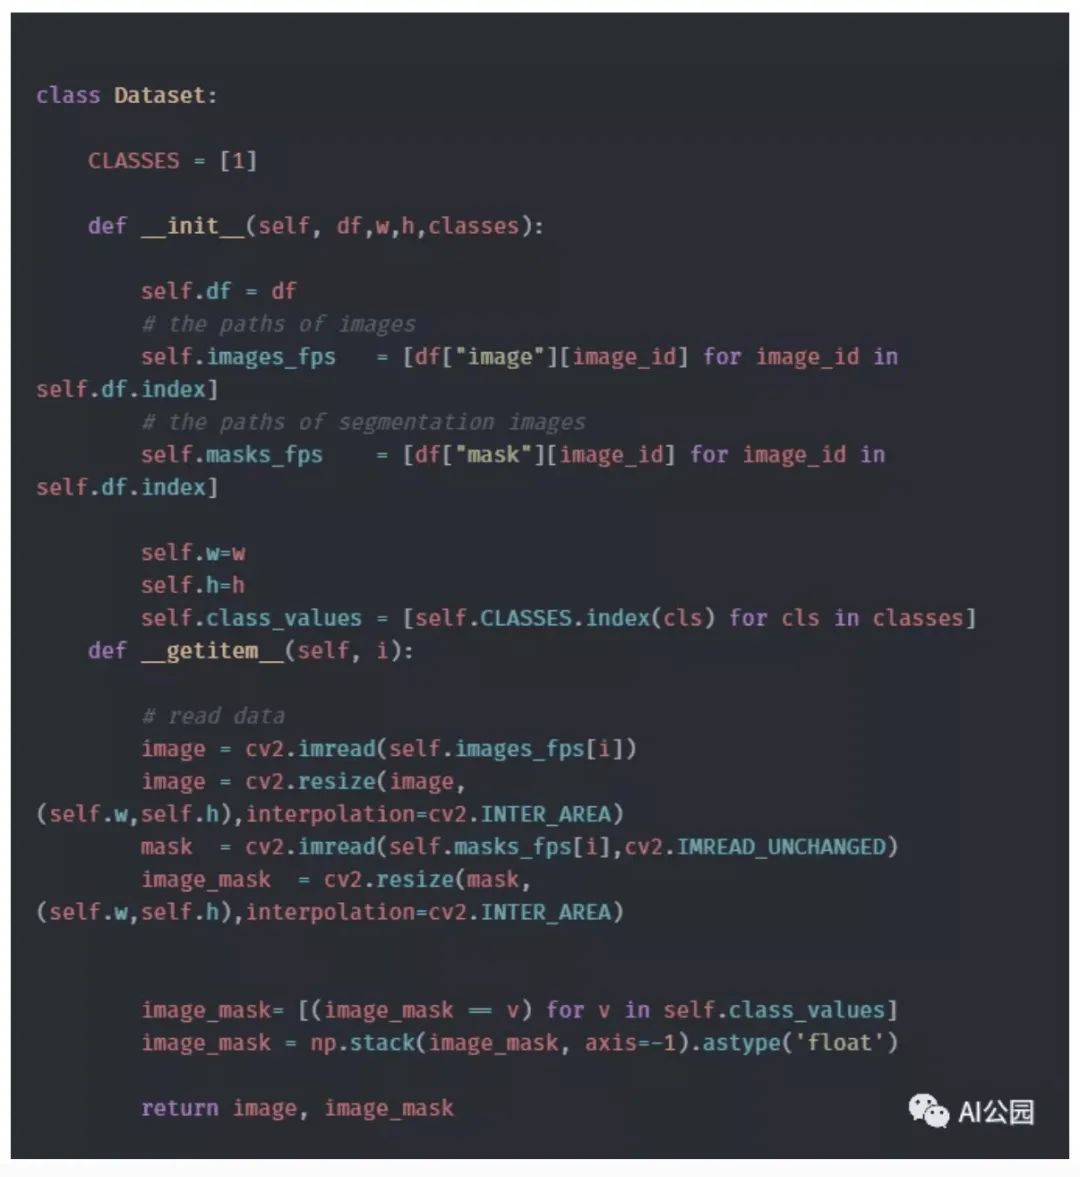
The next step is to load the data.
7. Model
Now that we have all the data, the next step is to find a model that can generate segmentation masks for the images. Let me introduce the UNet model, which is very popular for image segmentation tasks. The UNet architecture consists of two paths: the contracting path and the expansive path. The diagram below can help better understand the UNet architecture.
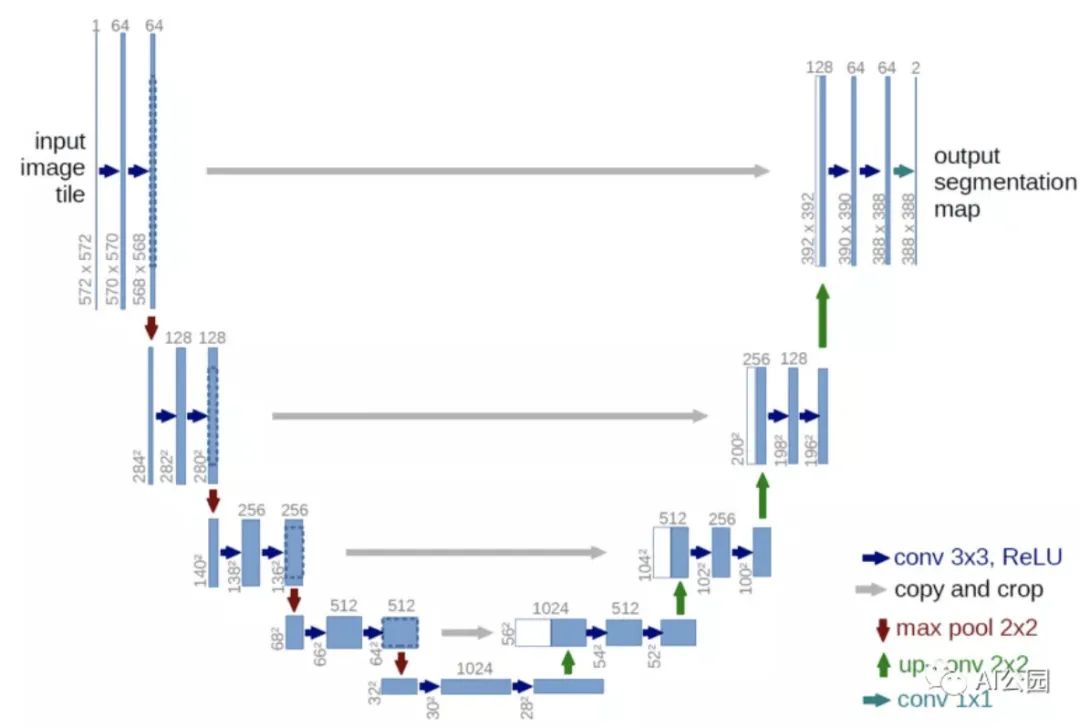
Figure 7, UNet Structure
The model structure resembles the letter “U”, hence the name UNet. The left side of the model contains the contracting path (also known as the encoder), which helps capture context in the image. This encoder is simply a stack of traditional convolutional and max-pooling layers. Here we can see that the pooling layers reduce the height and width of the image while increasing the depth and number of channels. At the end of the contracting path, the model will understand the shapes, patterns, edges, etc., present in the image, but it loses the information of “where” they appear. Since our problem is to obtain the segmentation mapping of the image, the information we get from the contracting path is not sufficient. We need a high-resolution image as output where all pixels are classified. “If we use a regular convolutional network, pooling layers, and dense layers, we will lose the WHERE information, retaining only the WHAT information, which is not what we want. In segmentation, we need both WHAT and WHERE information, so we need to upsample the image to retain the WHERE information. This is done in the expansive path on the right. The expansive path (also known as the decoder) is used to locate the captured context using upsampling techniques. Upsampling techniques include bilinear interpolation, nearest neighbor, transposed convolution, etc.
8. Training
Now that we have prepared all the training data and identified the model, let’s train the model. Since the number of defect-free images far exceeds that of defective images, we only sample from defect-free images for better results. The Adam optimizer is used to train the model, with Dice loss as the loss function. The performance metric used is the IoU score.

After 10 epochs, we were able to achieve an IoU score of 0.98 and a Dice loss of 0.007, which is quite good. Let’s take a look at some segmentation maps of the images.
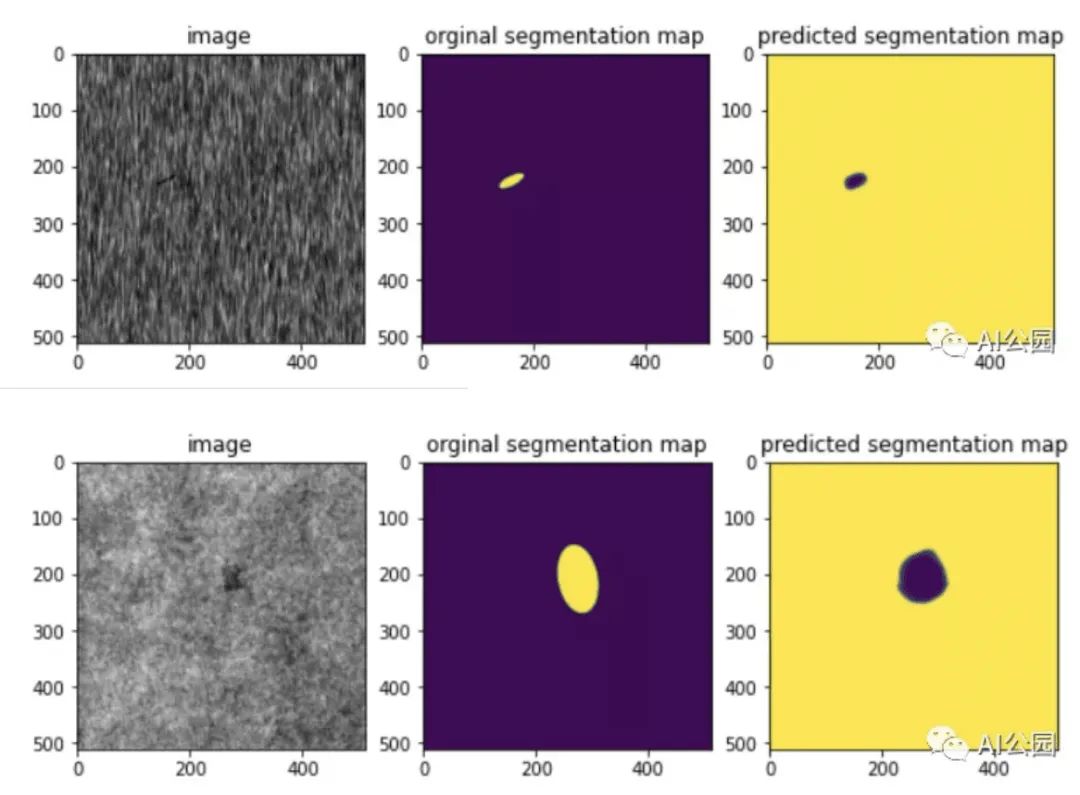
We can see that the model is able to predict segmentation maps similar to the original segmentation maps.
9. Predictions of Segmentation Maps for Test Data
Now let’s try to solve the problem at hand, which is to predict and draw the segmentation masks for the test images. The image below shows some predicted segmentation maps for test images.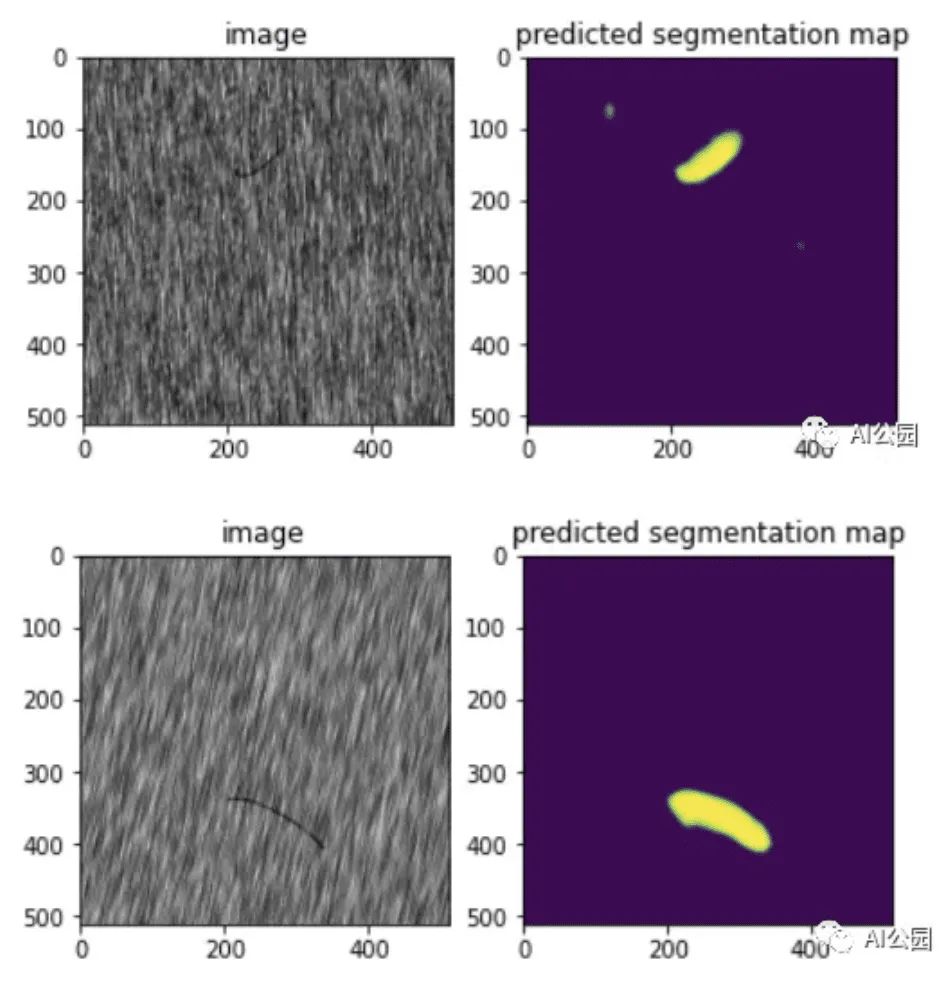
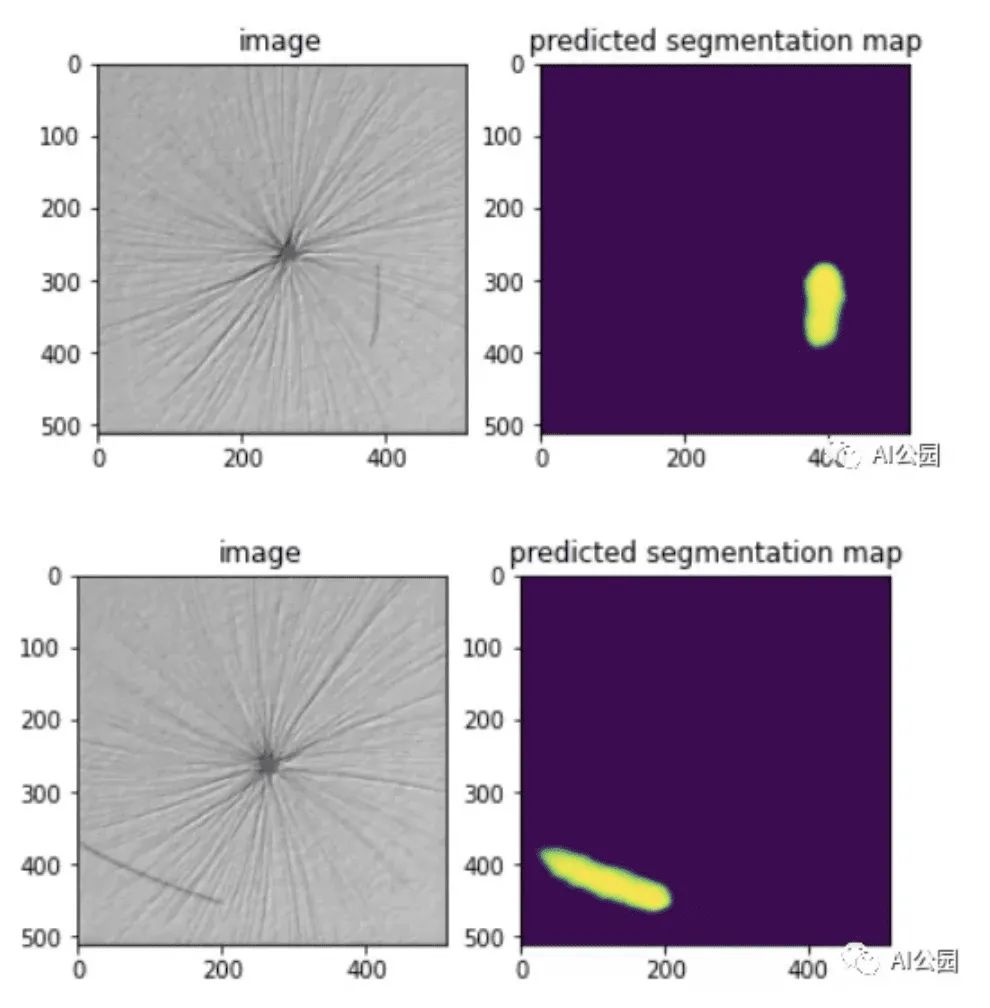
It can be seen that the model performs well on the test data, effectively detecting defects in the test images.
10. Future Work
As mentioned above, the number of defective images is very small compared to defect-free images. Therefore, applying upsampling and augmentation techniques to defective images can improve training outcomes.
Original text in English: https://medium.com/analytics-vidhya/defect-detection-in-products-using-image-segmentation-a87a8863a9e5
Download 1: OpenCV-Contrib Extension Module Chinese Version Tutorial

Reply "Extension Module Chinese Tutorial" in the backend of "Xiaobai Learns Vision" public account to download the first OpenCV extension module tutorial in Chinese on the internet, covering installation of extension modules, SFM algorithms, stereo vision, object tracking, biological vision, super-resolution processing, and more than 20 chapters of content.

Download 2: Python Vision Practical Project 52 Lectures

Reply "Python Vision Practical Project" in the backend of "Xiaobai Learns Vision" public account to download 31 practical projects including image segmentation, mask detection, lane detection, vehicle counting, eyeliner addition, license plate recognition, character recognition, emotion detection, text content extraction, face recognition, etc., to help quickly learn computer vision.

Download 3: OpenCV Practical Project 20 Lectures

Reply "OpenCV Practical Project 20 Lectures" in the backend of "Xiaobai Learns Vision" public account to download 20 practical projects based on OpenCV, achieving advanced learning of OpenCV.

Group Chat

Welcome to join the public account reader group to communicate with peers. Currently, there are WeChat groups for SLAM, 3D vision, sensors, autonomous driving, computational photography, detection, segmentation, recognition, medical imaging, GANs, algorithm competitions, etc. (will gradually be subdivided in the future). Please scan the WeChat number below to join the group, and note: "Nickname + School/Company + Research Direction", for example: "Zhang San + Shanghai Jiao Tong University + Vision SLAM". Please follow the format for notes, otherwise, you will not be approved. After successful addition, you will be invited into the relevant WeChat group based on your research direction. Please do not send advertisements in the group, otherwise, you will be removed from the group. Thank you for your understanding~