The following article is from Caiyun Translation Design , authored by Caiyun Sky
This article is authorized to be reproduced from: Caiyun Translation Design (ID: caiyunyisheji)
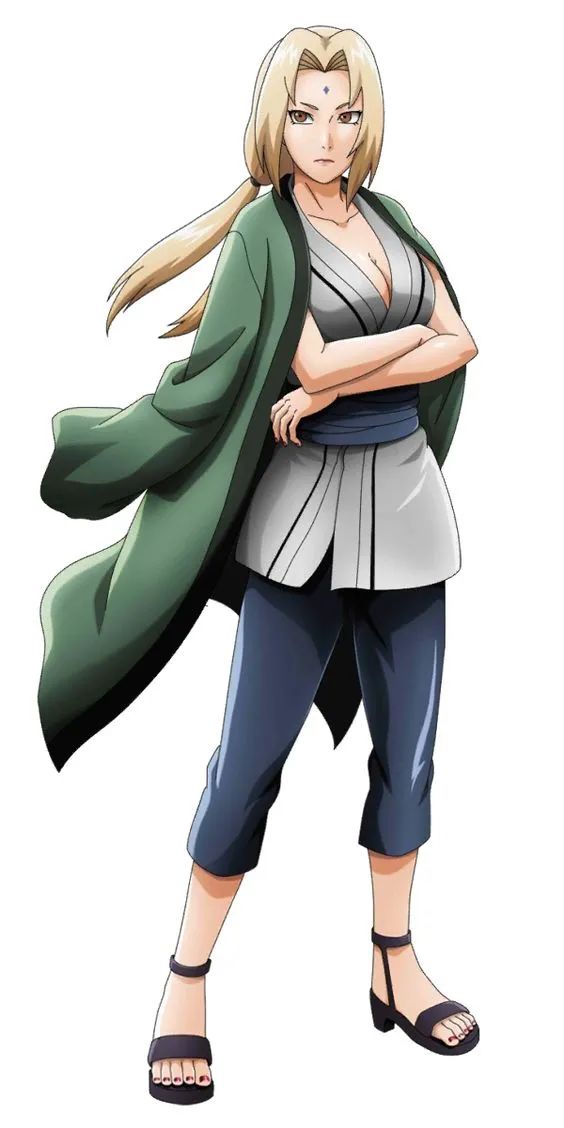
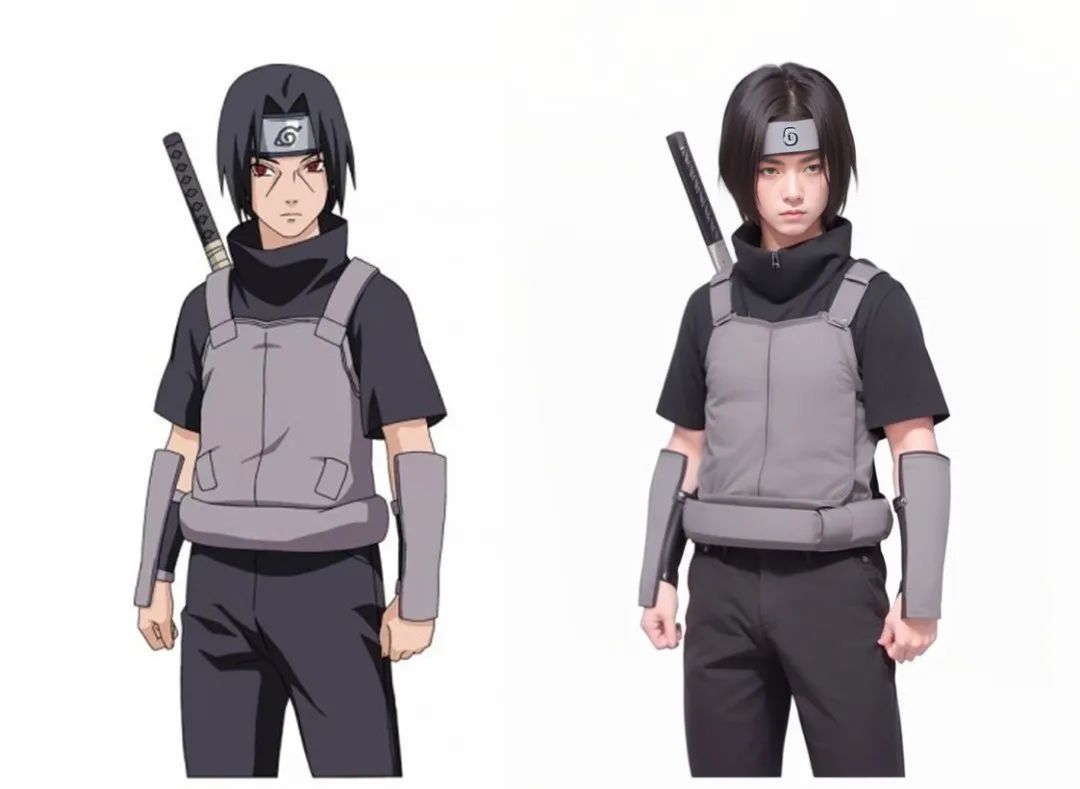
I have often wondered what it would be like if my favorite anime characters were real. With the advent of AI drawing, this idea has become much easier to realize. I have used AI to transform many anime characters into realistic versions, and the results are quite impressive.
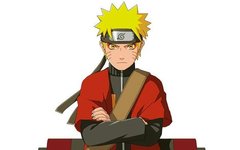
Today, I will take Naruto as an example and show some classic characters transformed into realistic images using Stable Diffusion. I wonder how many readers are Naruto fans; do these AI-generated characters match your imagination?
First, I will show the images, and then I will share the tutorial on how I achieved this.
1. Transforming Naruto Characters into Realistic Images
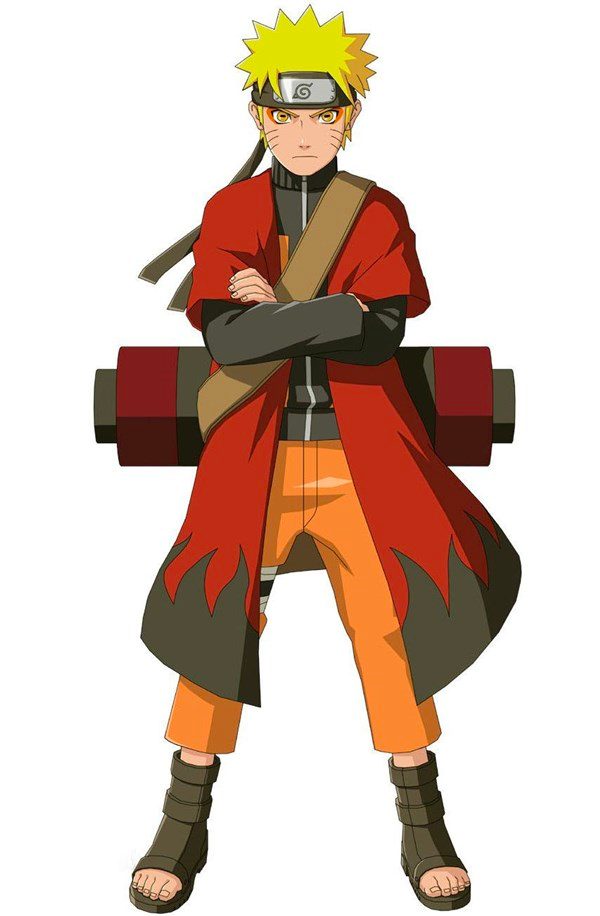
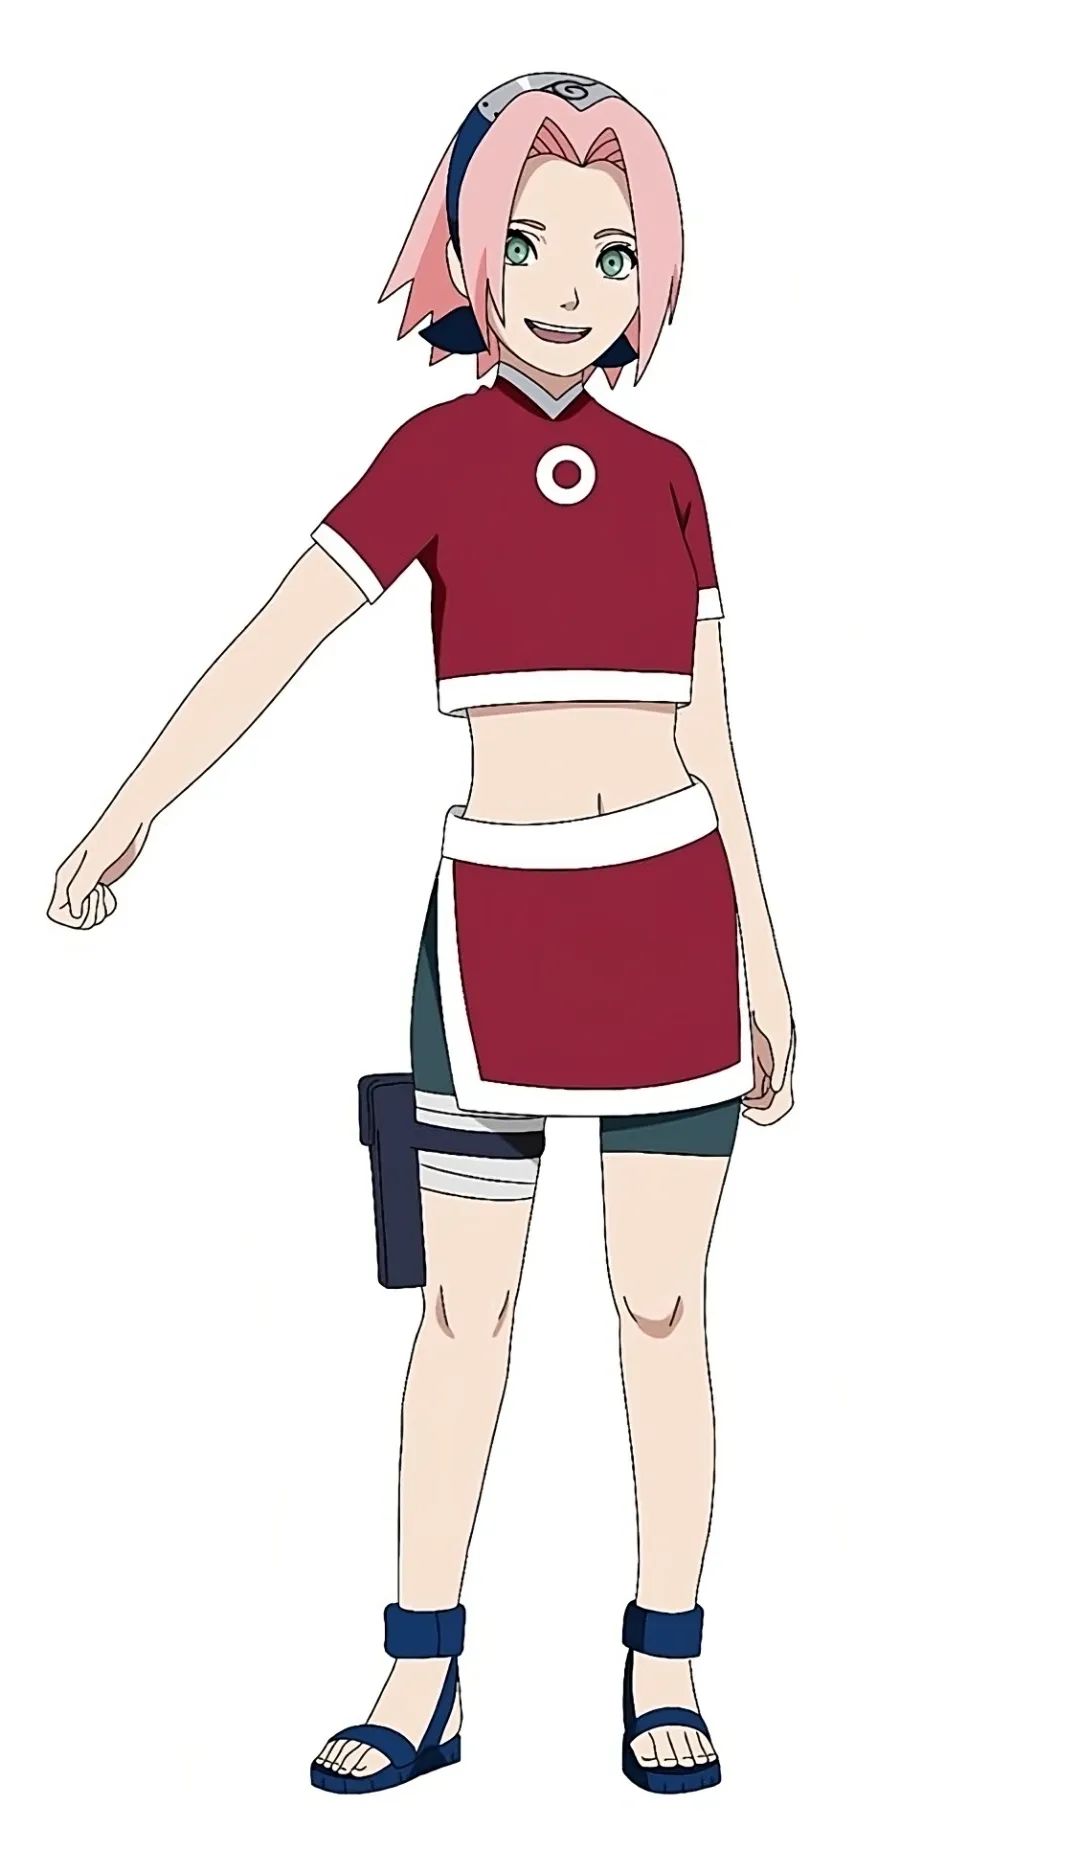
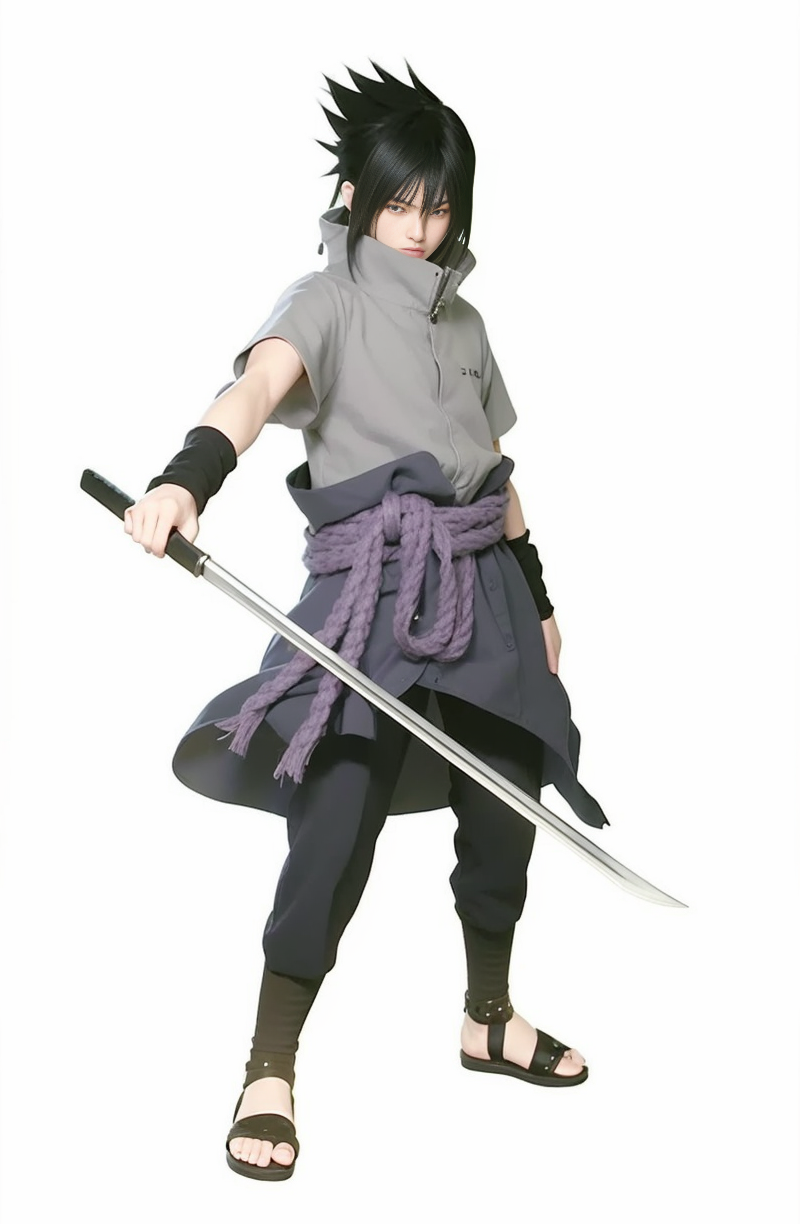
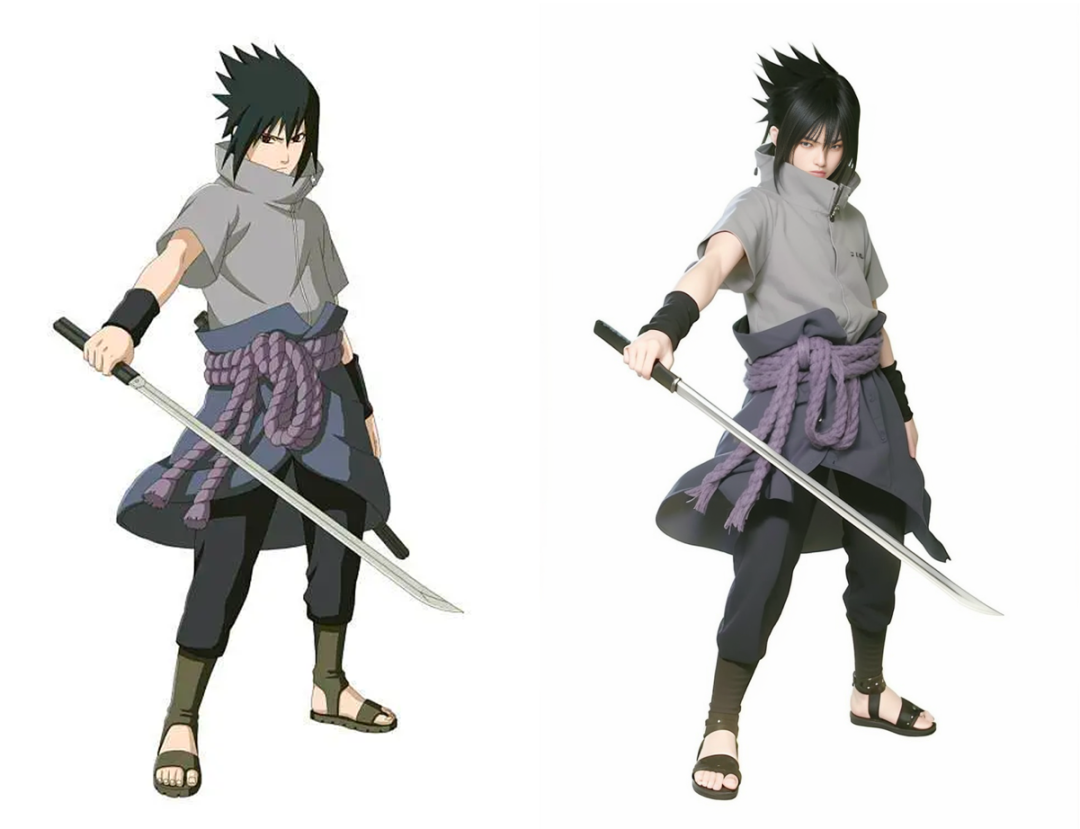
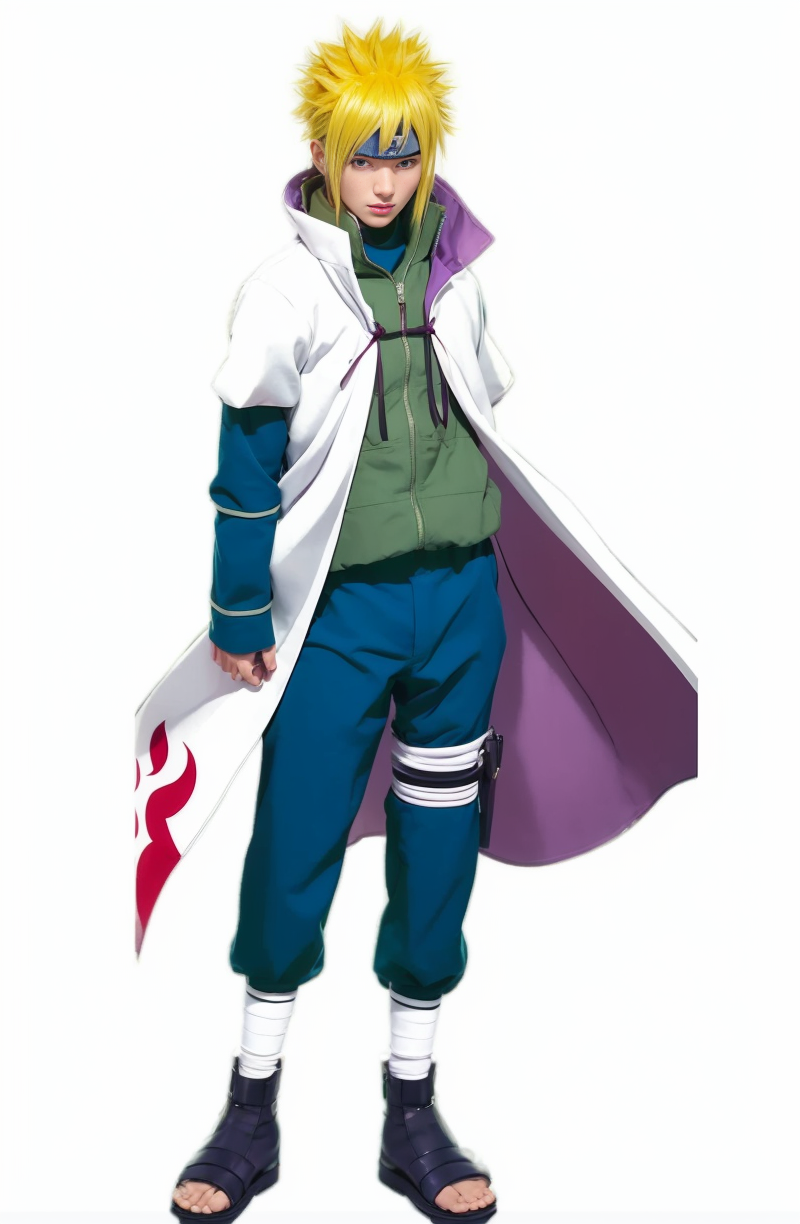
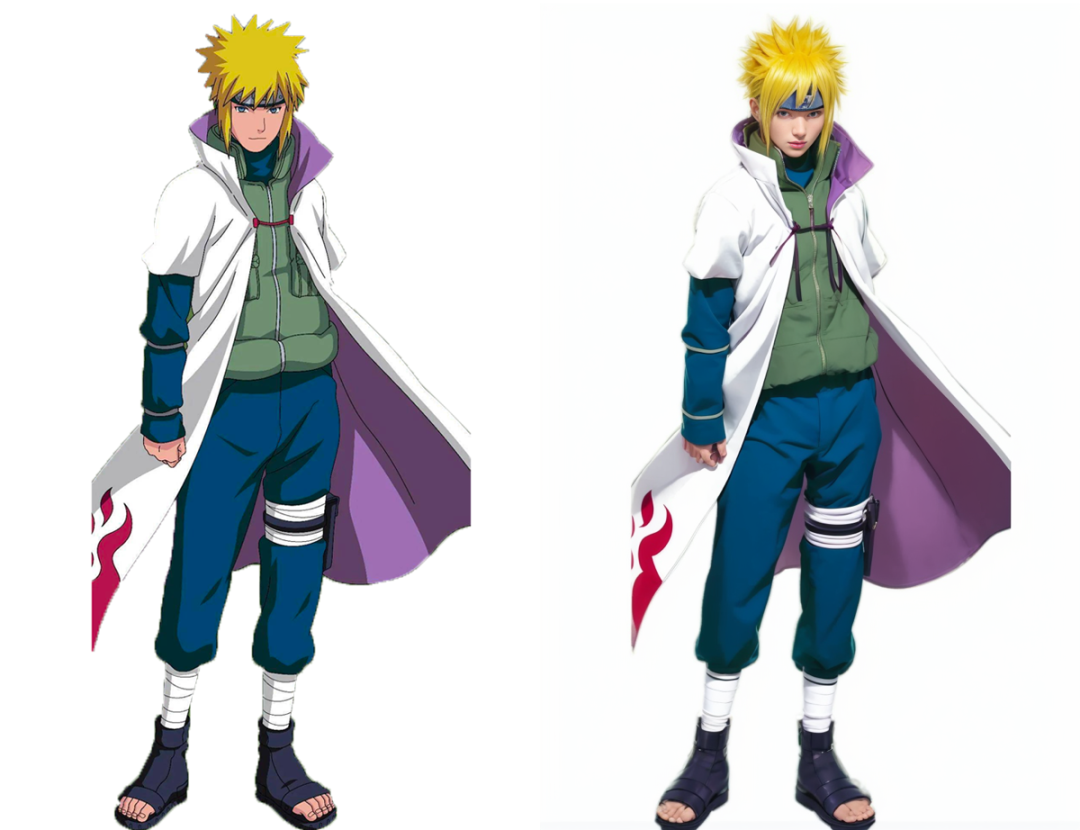
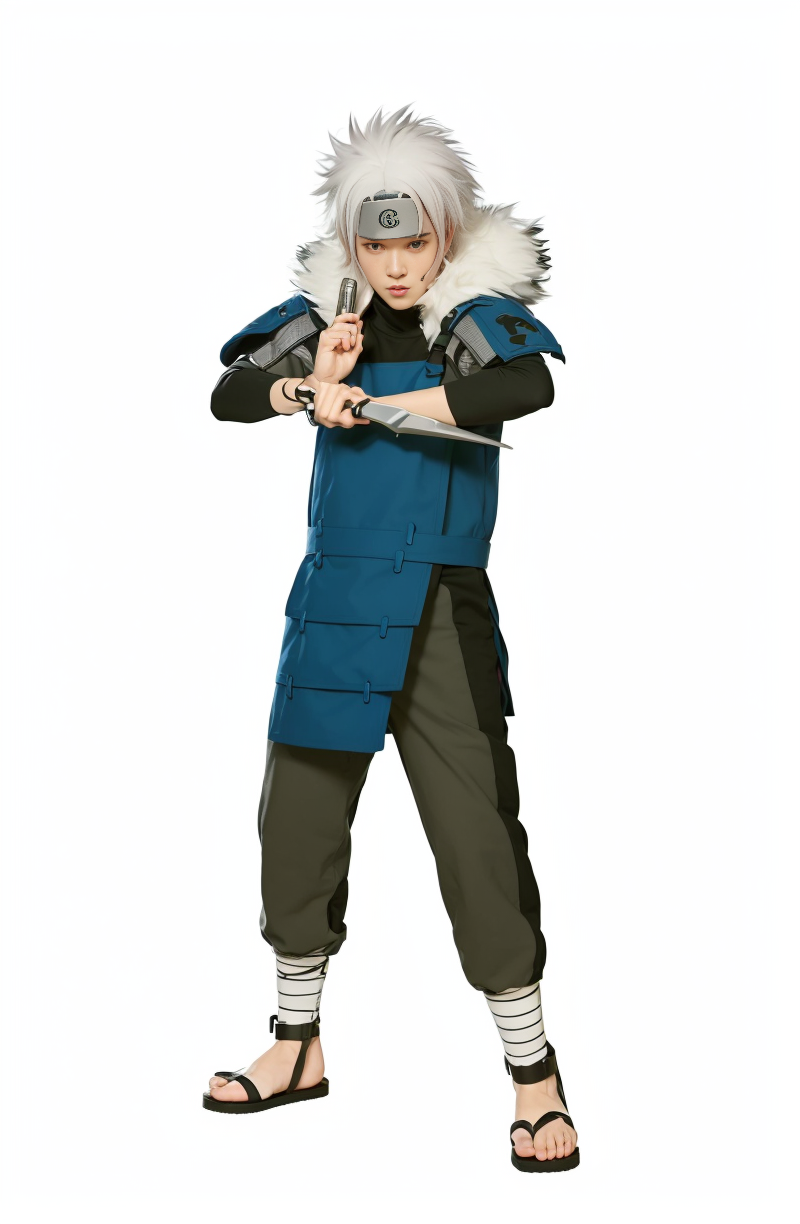
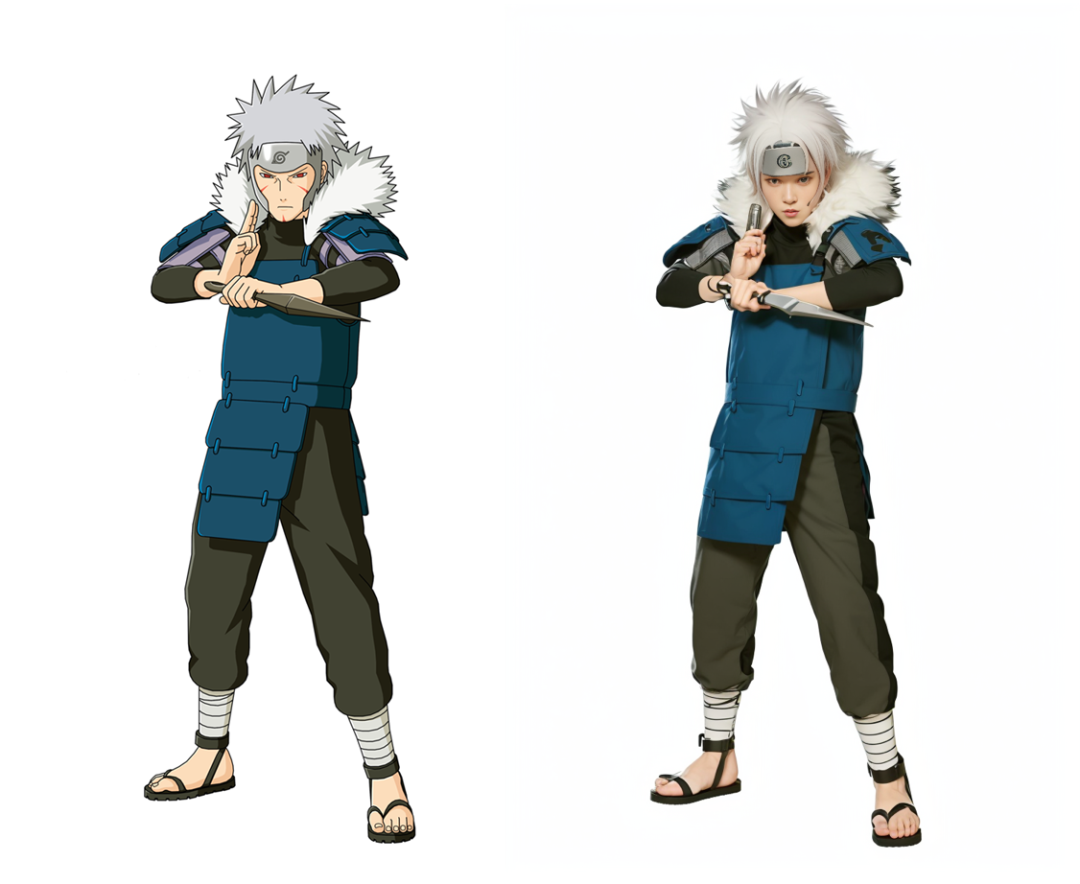
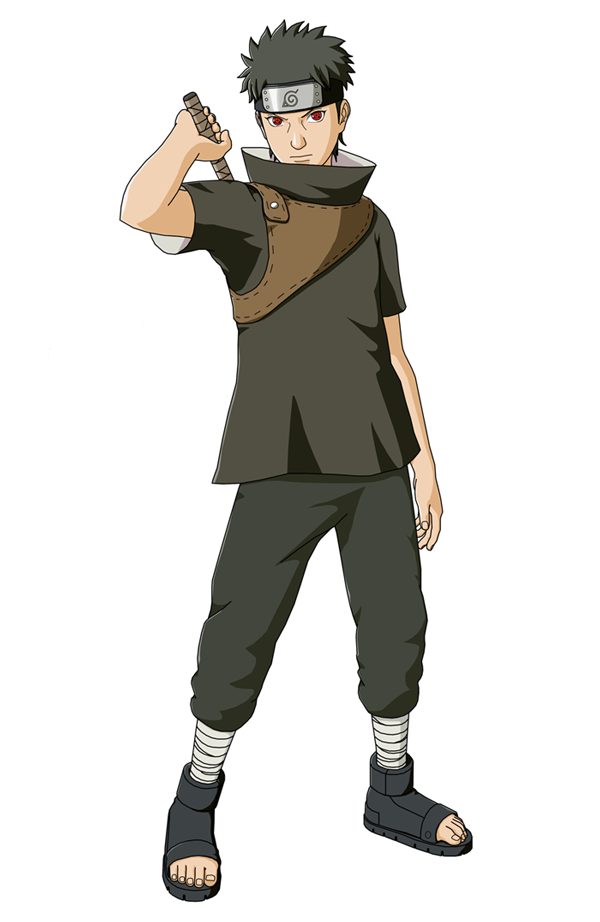
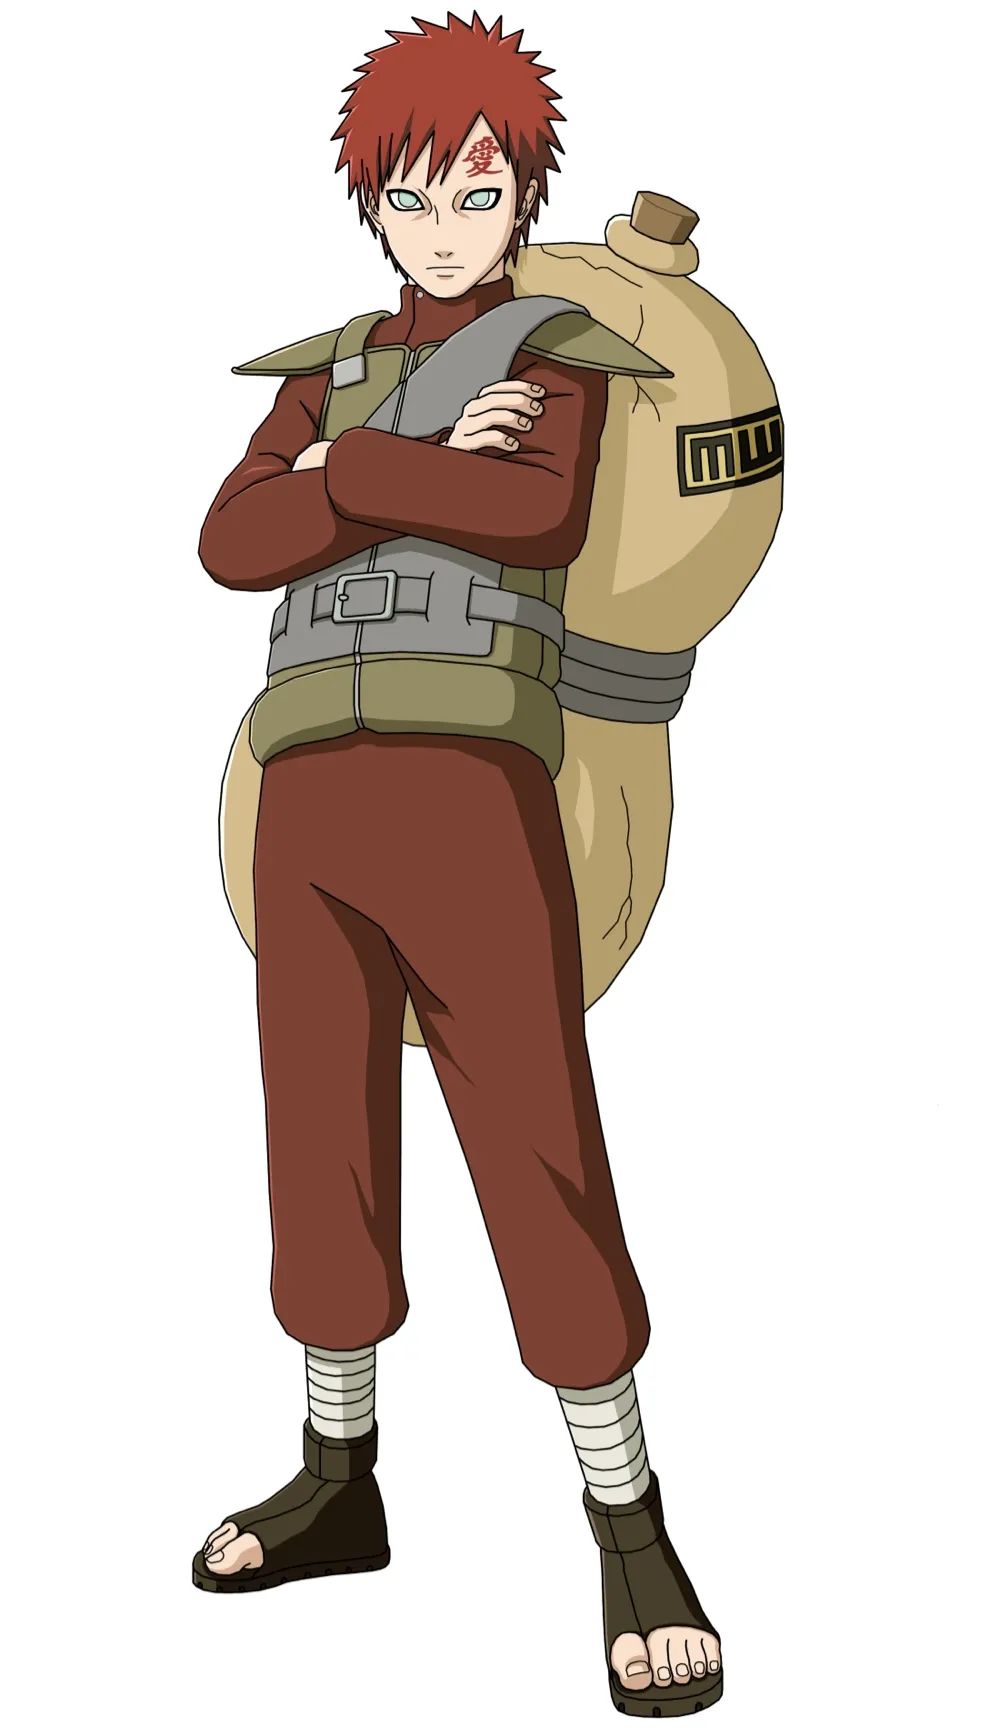
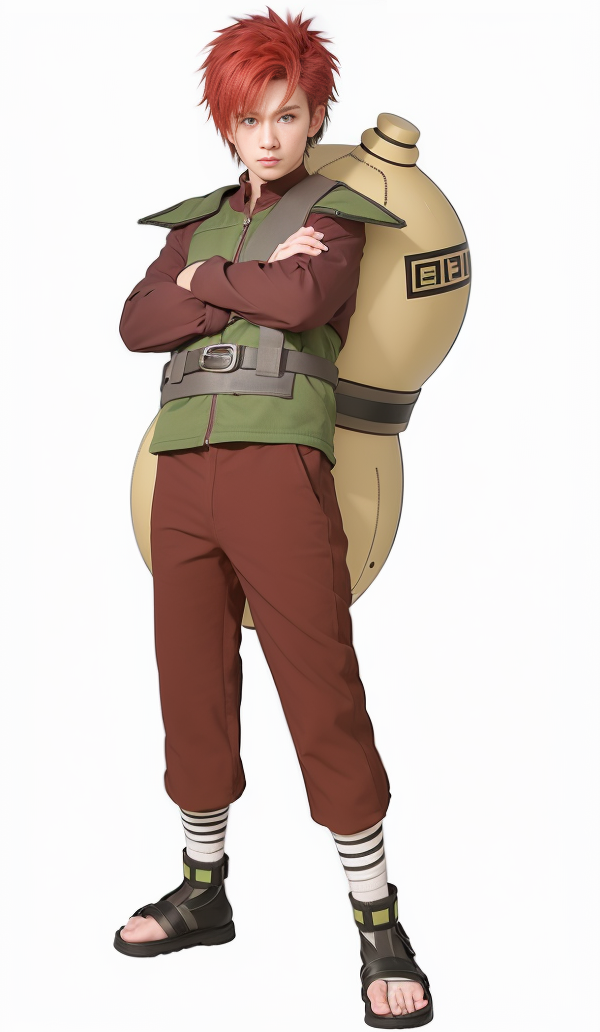
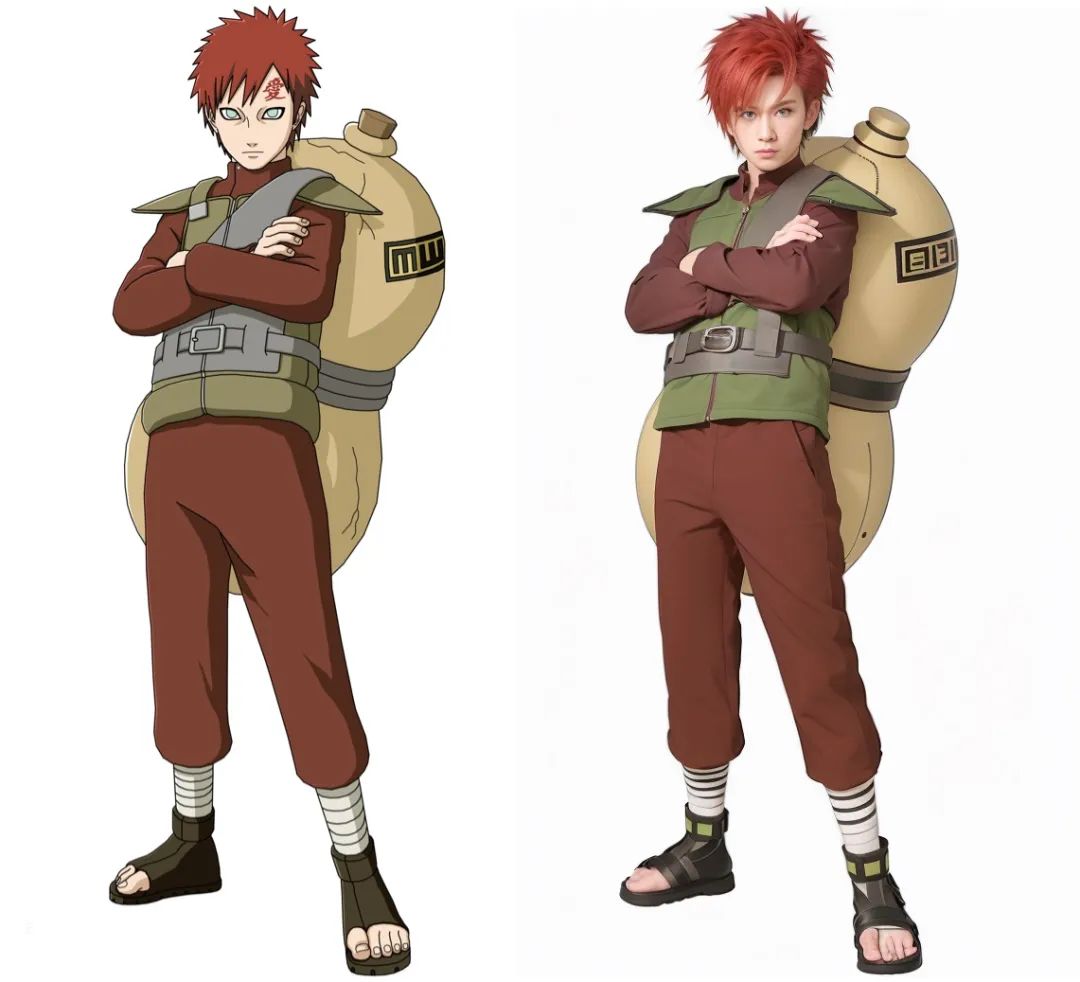
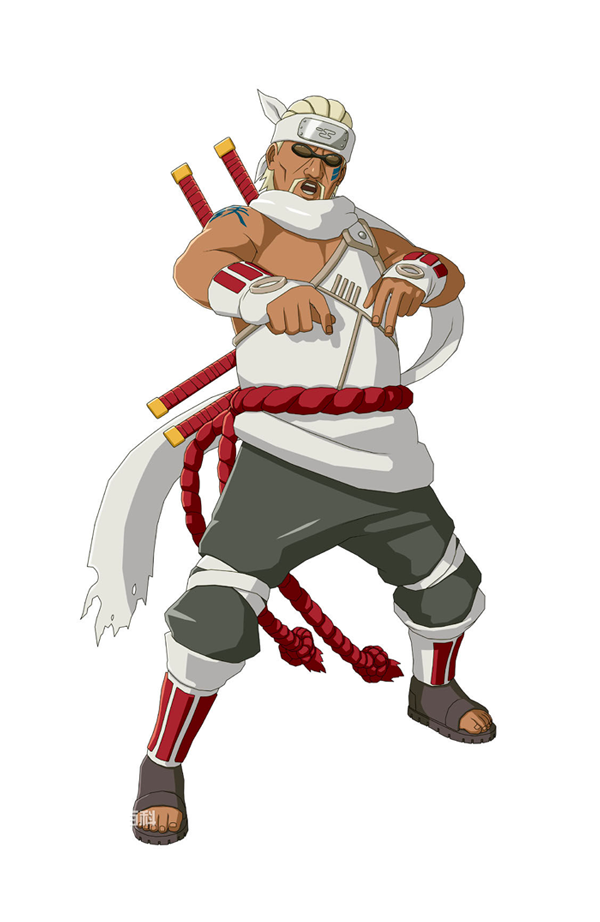
Due to time constraints, I attempted to generate realistic images for 13 main Naruto characters. Let’s take a look at what the AI-generated Naruto characters look like.
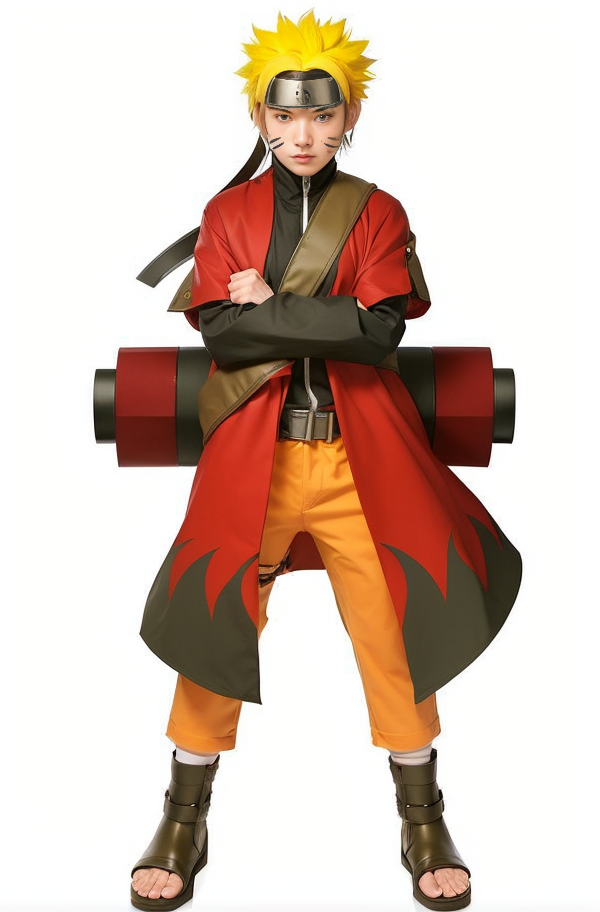
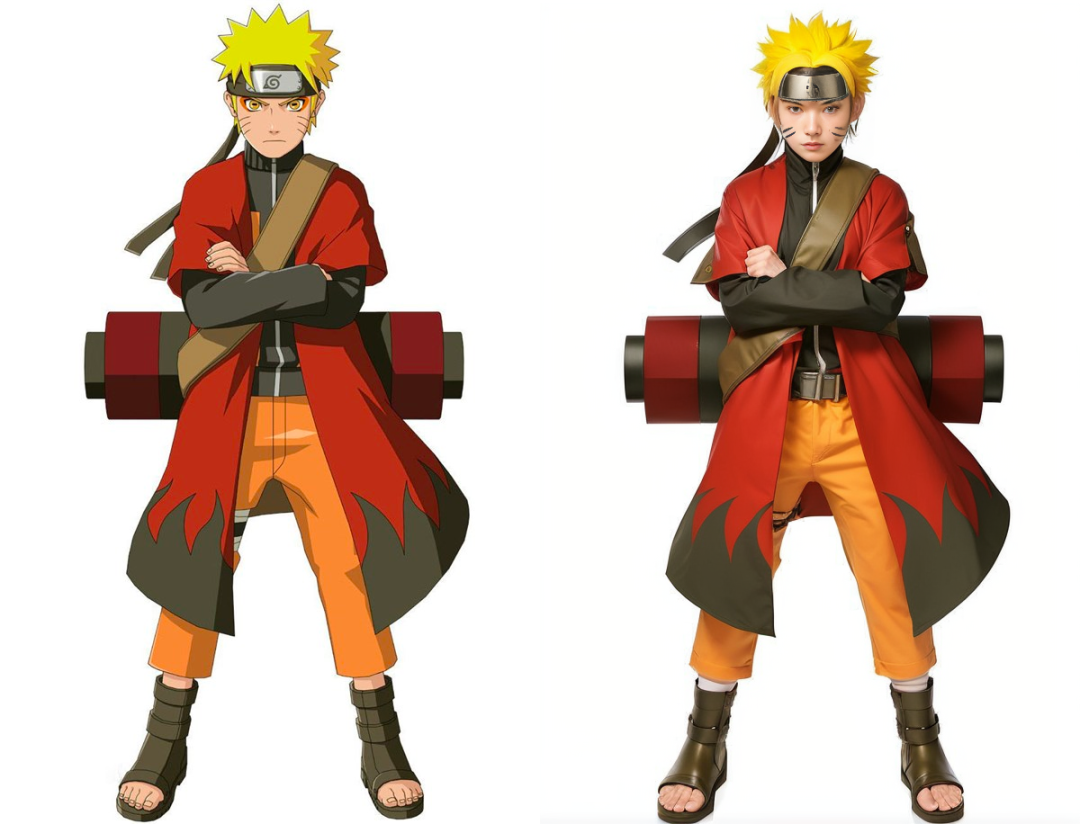
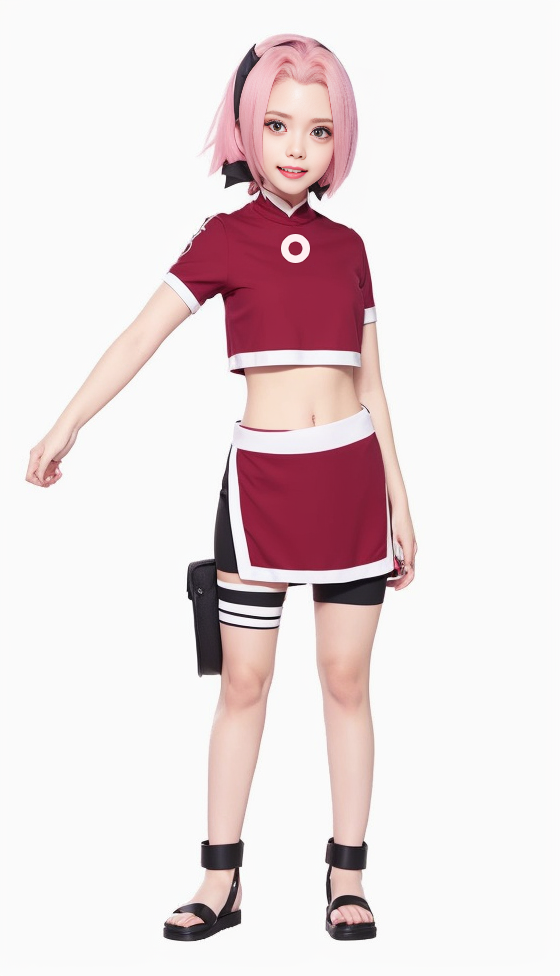
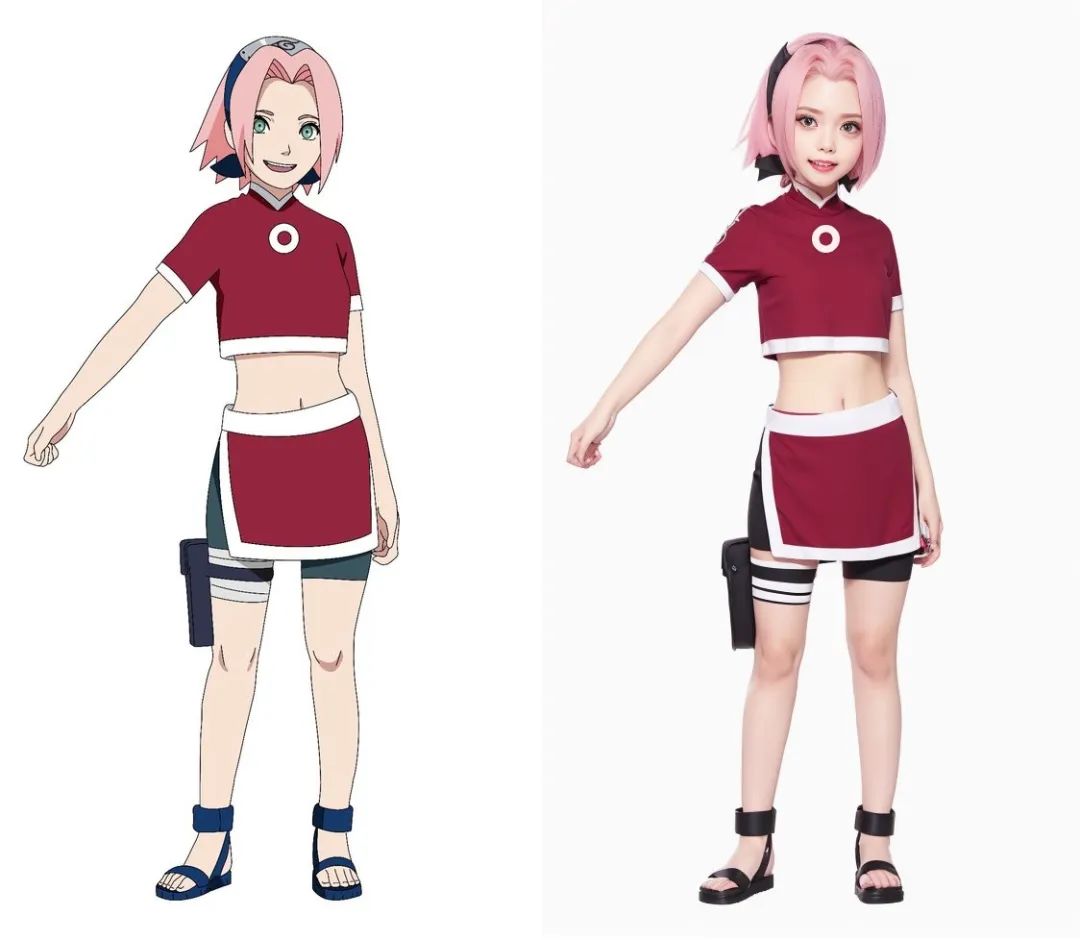
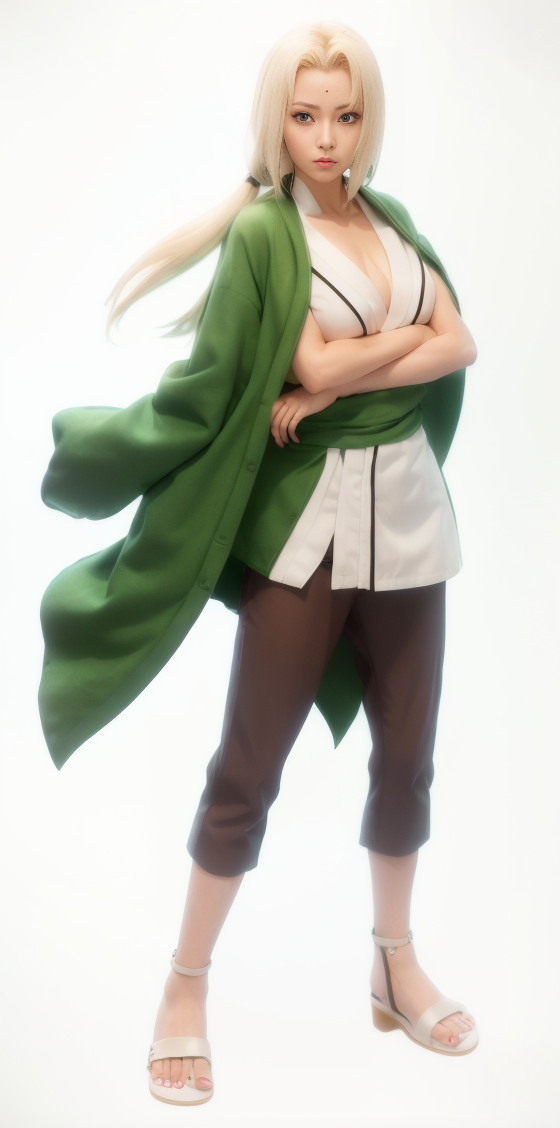
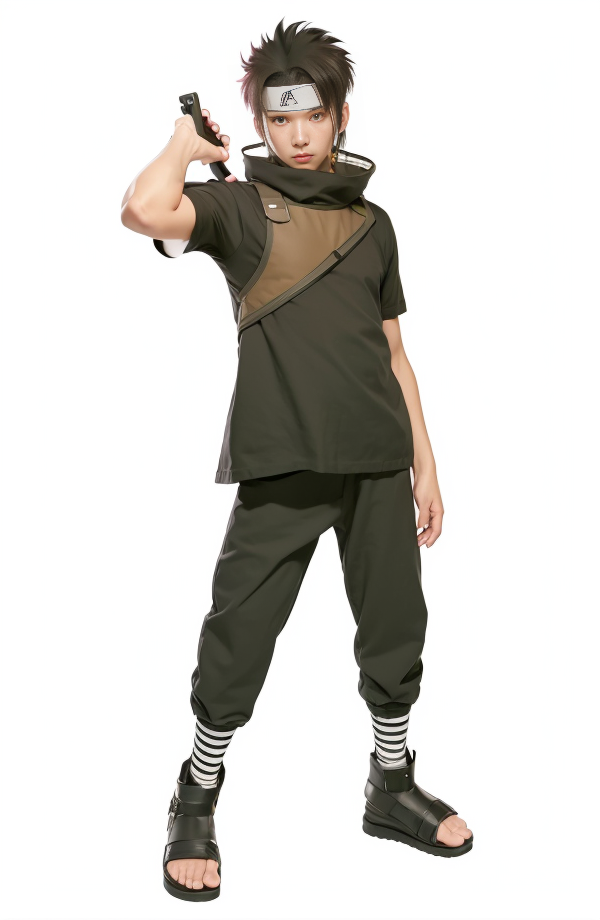
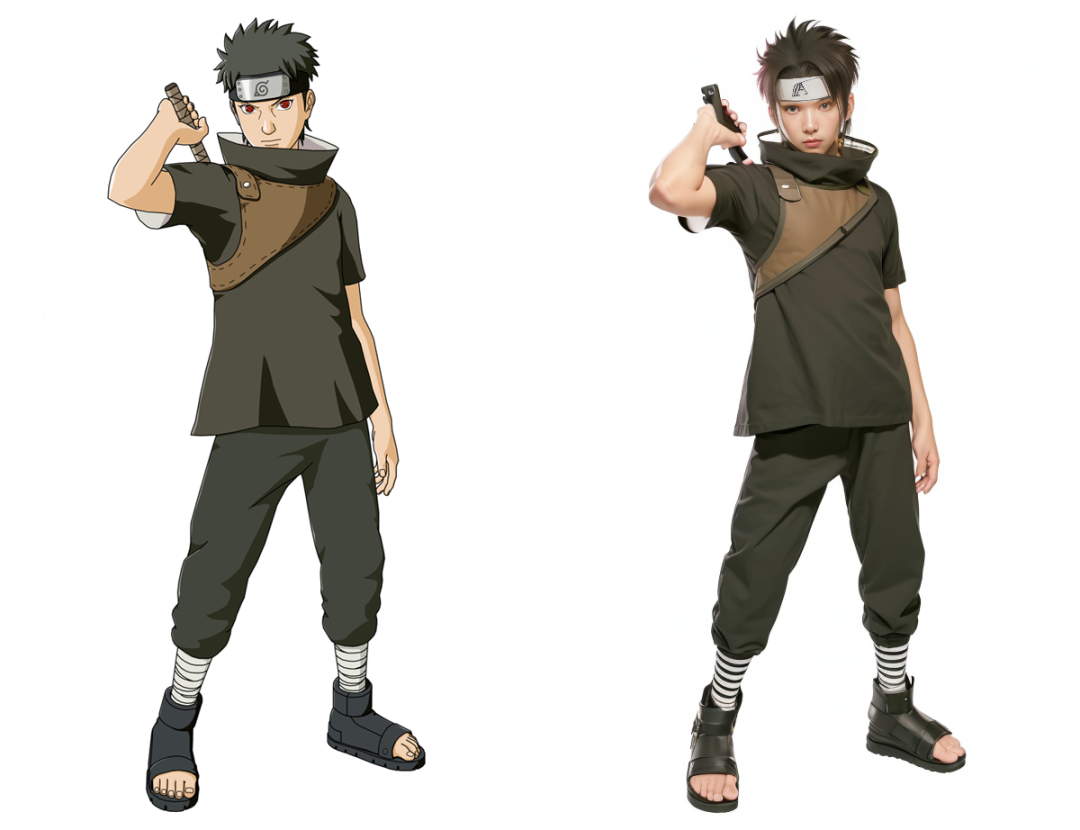
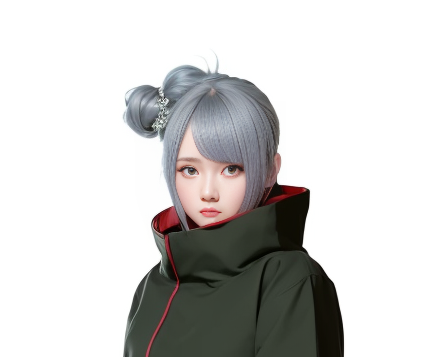
Realistic effect generated by Stable Diffusion
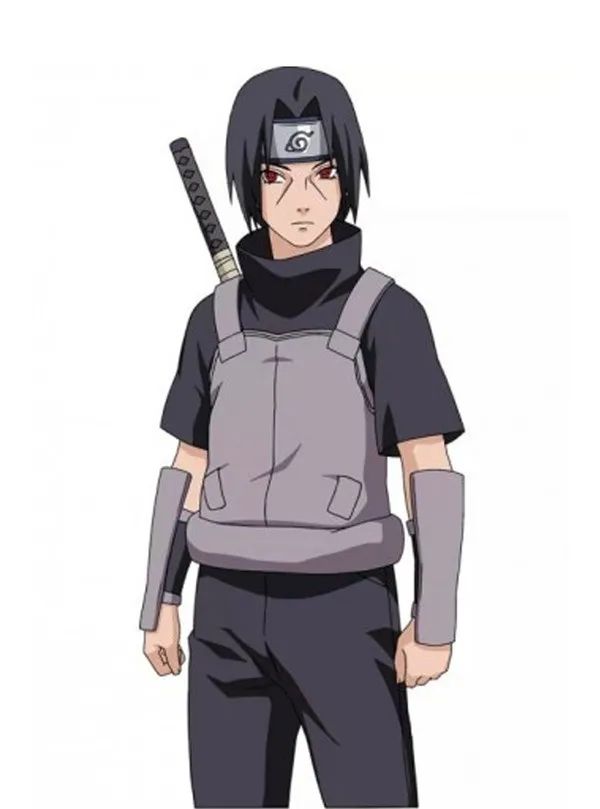
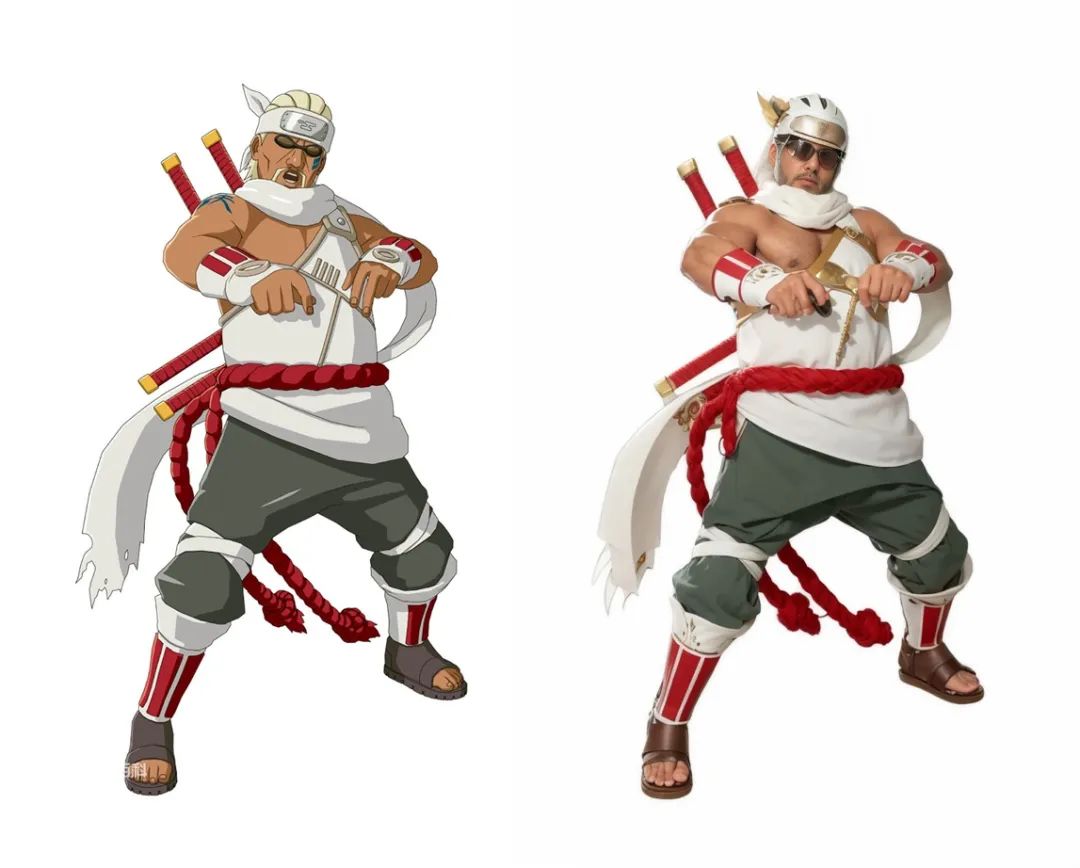
Realistic effect generated by Stable Diffusion
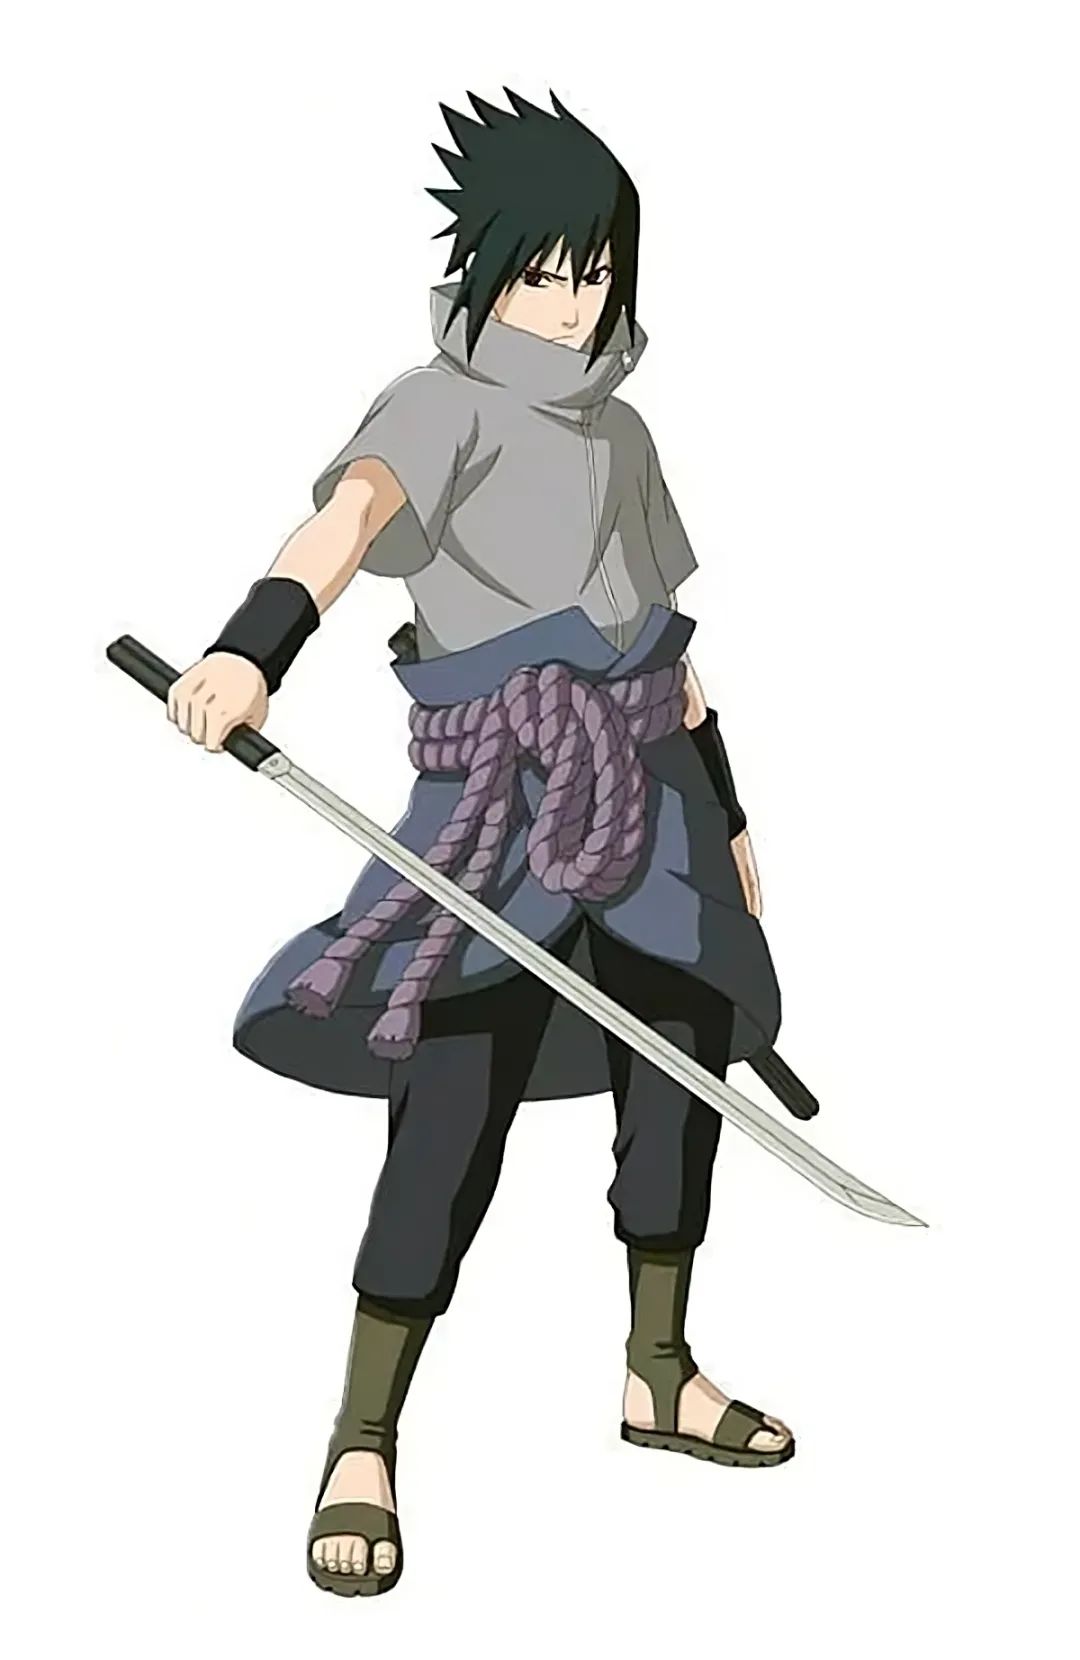
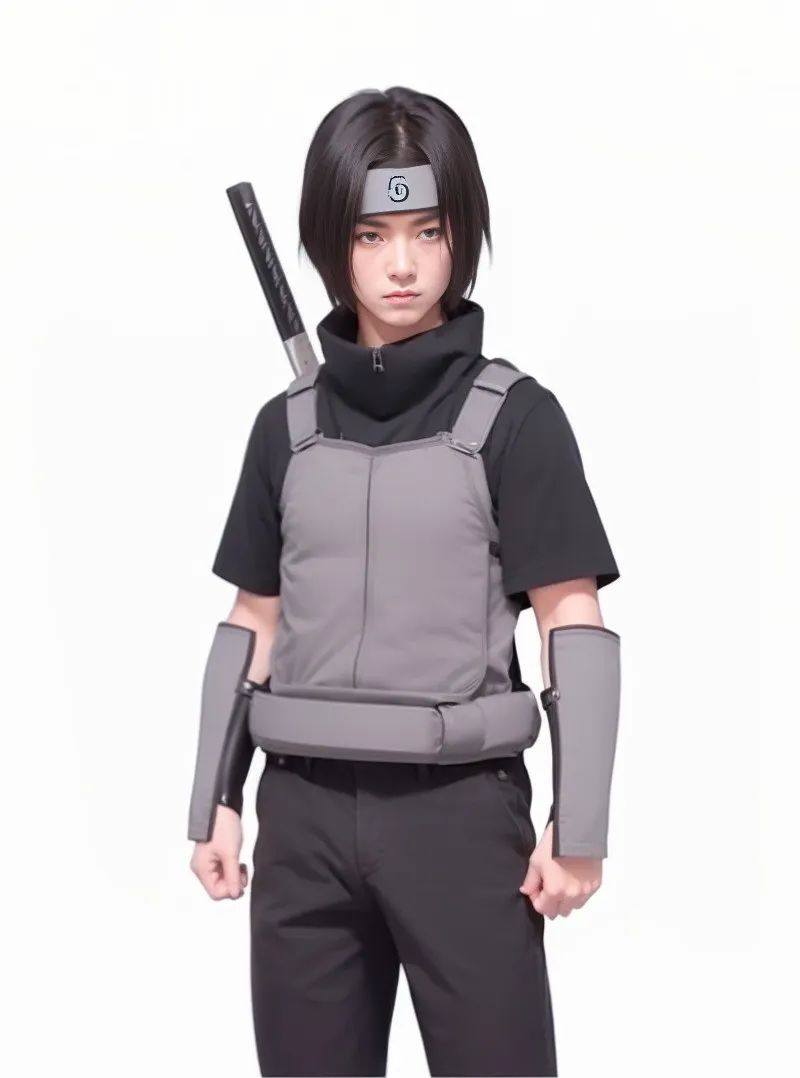
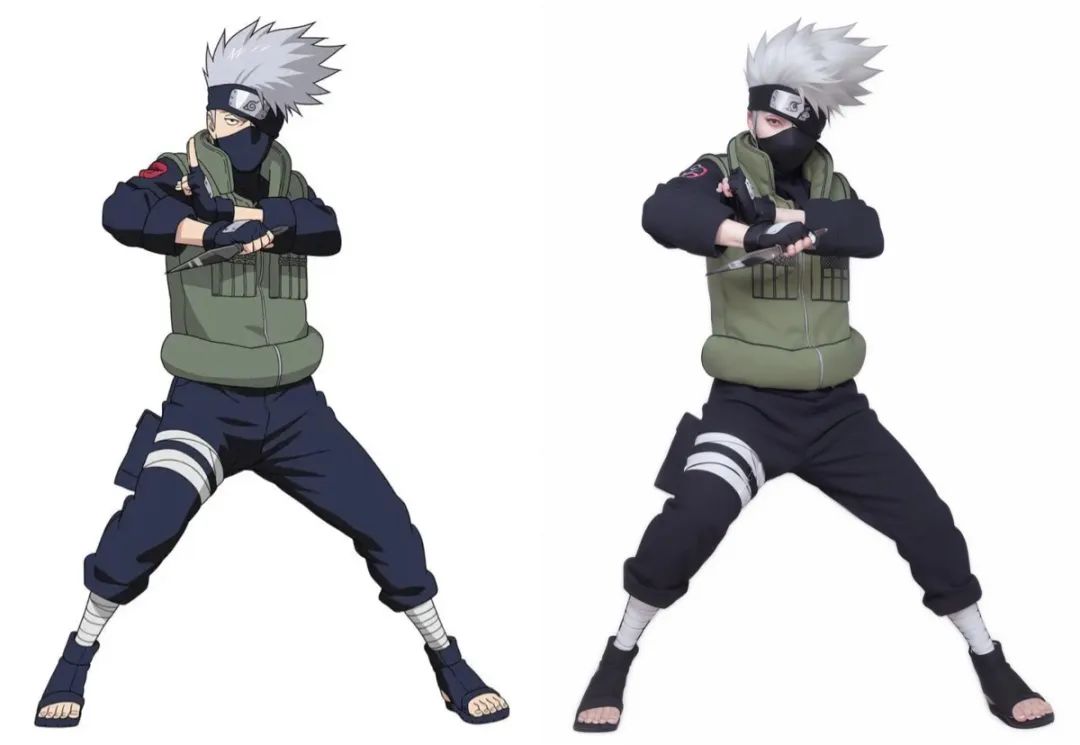
Realistic effect generated by Stable Diffusion
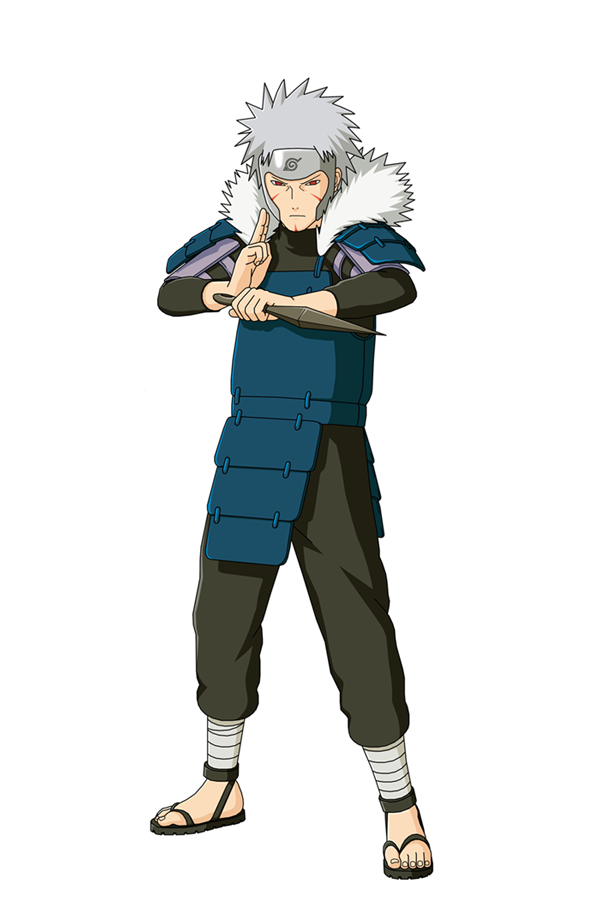
Realistic effect generated by Stable Diffusion
Realistic effect generated by Stable Diffusion
Realistic effect generated by Stable Diffusion
Realistic effect generated by Stable Diffusion
Realistic effect generated by Stable Diffusion
Realistic effect generated by Stable Diffusion
Realistic effect generated by Stable Diffusion
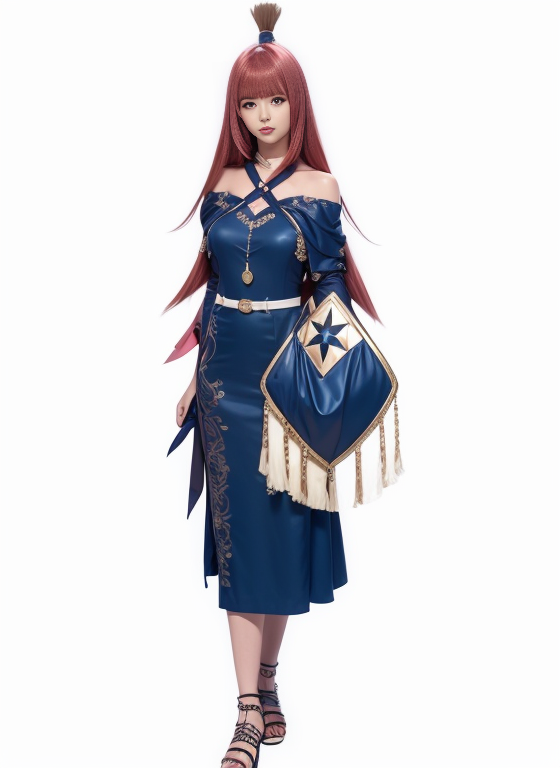
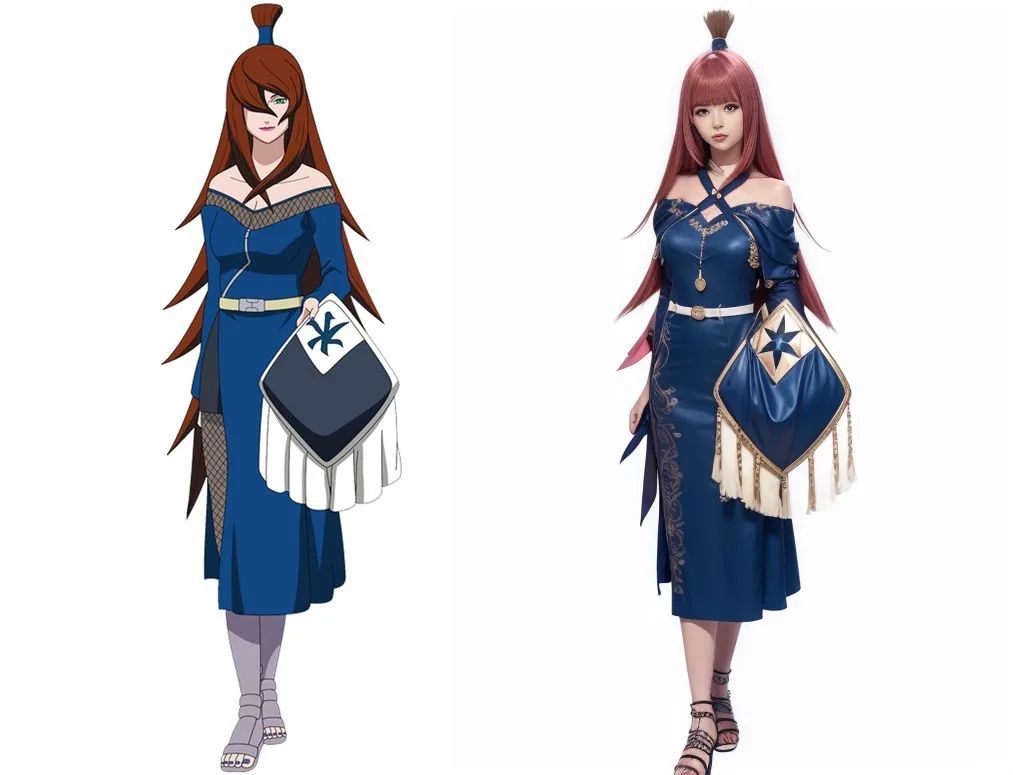
Fifth Mizukage Mei Terumi
Realistic effect generated by Stable Diffusion
Realistic effect generated by Stable Diffusion
Realistic effect generated by Stable Diffusion
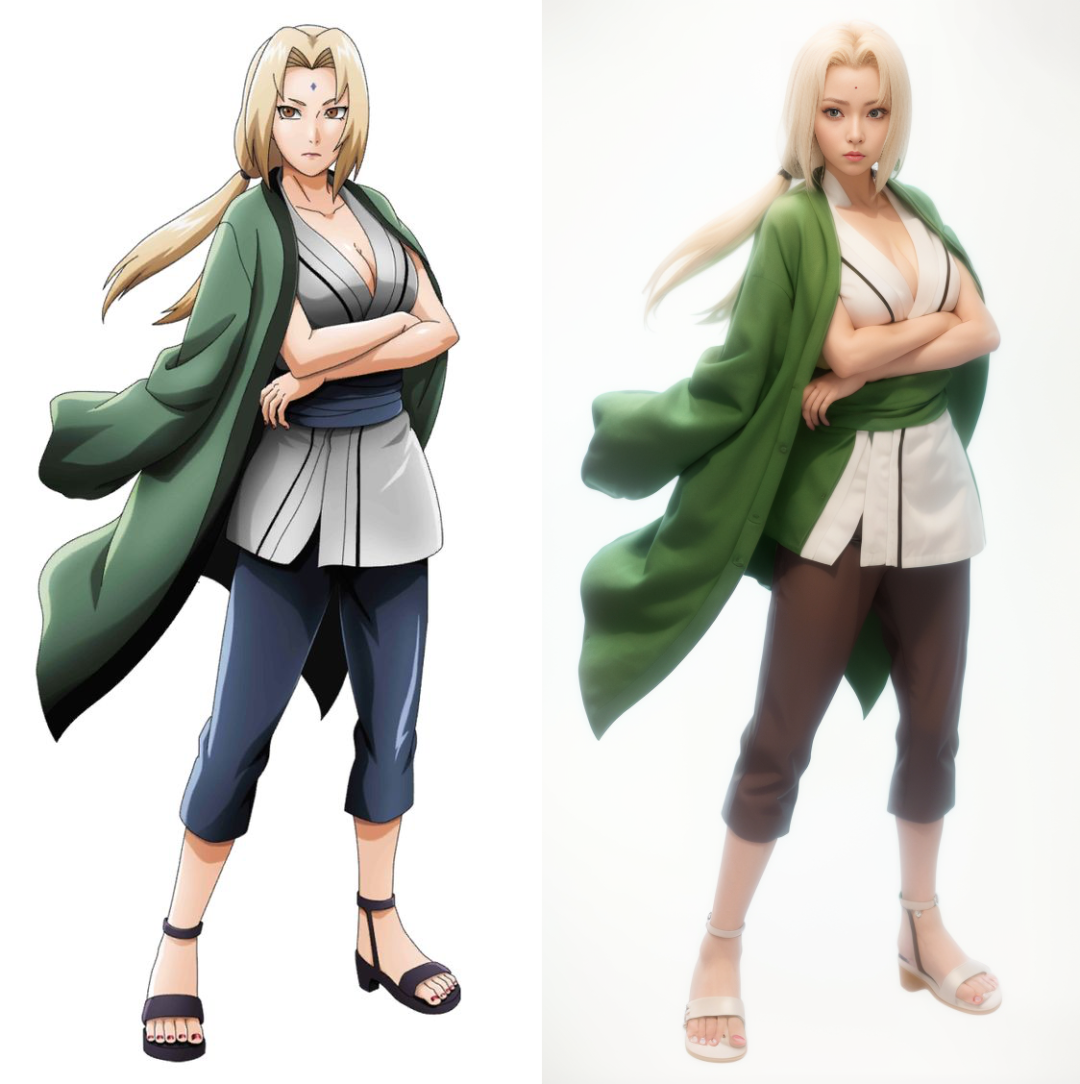
In fact, if you look closely, each character still has some issues, but overall, I think the effect is quite good.
If anyone has other anime characters they want me to generate, feel free to leave a message or try it yourself. I will share the production tutorial below.
2. How to Use Stable Diffusion to Generate Realistic Images?
1. Preparation Work
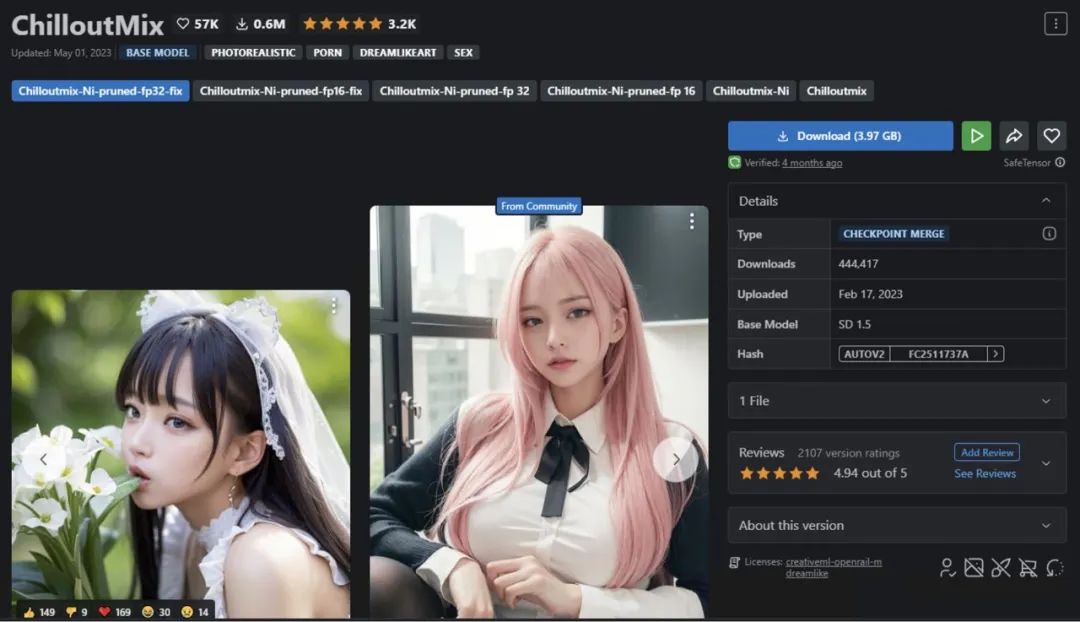
Before starting the production, you need to prepare some essential AI models and image materials.
1) First, install Stable Diffusion on Mac or Windows. For specific installation steps, you can refer to my previous tutorial
Although both can be used, it is significantly faster on Windows than on Mac. I actually tested it on both a Mac M2 chip and a Windows 4090 graphics card with identical AI settings and prompts, and found that the Mac took about 1 minute and 20 seconds to generate an image, while the Windows version only took 14 seconds.
The difference in speed leads to a completely different experience. If you want to play with AI efficiently and produce images you like quickly, having a good graphics card is crucial.
3) Install the ControlNet plugin, which can help optimize the details of the generated images, making them easier to control. For installation methods, refer to my previous tutorial article “Stable Diffusion Ultra-Detailed Series Tutorial 2 – Easily Solve Various Installation and Plugin Issues”; if you haven’t seen it, go check it out.
4) Prepare the anime images you want the AI to generate; it is recommended to crop them to size beforehand, and the size should not exceed 1000px, as it may easily cause memory overflow. Then unify the size of all images to be generated and ensure the background is clean to reduce the need for later adjustments to the AI settings, making it more convenient.
2. Production Steps
The production method is not difficult; it can be completed in just a few steps. The only hassle may be that the results can vary, and achieving the desired effect may require some luck. However, there are methods to improve this, and I will share some more precise methods I have practiced.
1) Use Stable Diffusion’s image-to-image function. This function allows you to use a reference image as a direction for drawing, resulting in a high degree of adherence to the reference. However, having just a reference image is not enough; you also need a very precise prompt.
Actually, text-to-image can also be used, but the results may deviate from what you want. I found that some effects can be quite good, but they are too unpredictable.
2) Reverse prompt engineering. The prompt part needs to be a precise description of your reference image, including all character features depicted in the image, which may be challenging for many people. But don’t worry; we have ways to solve this.
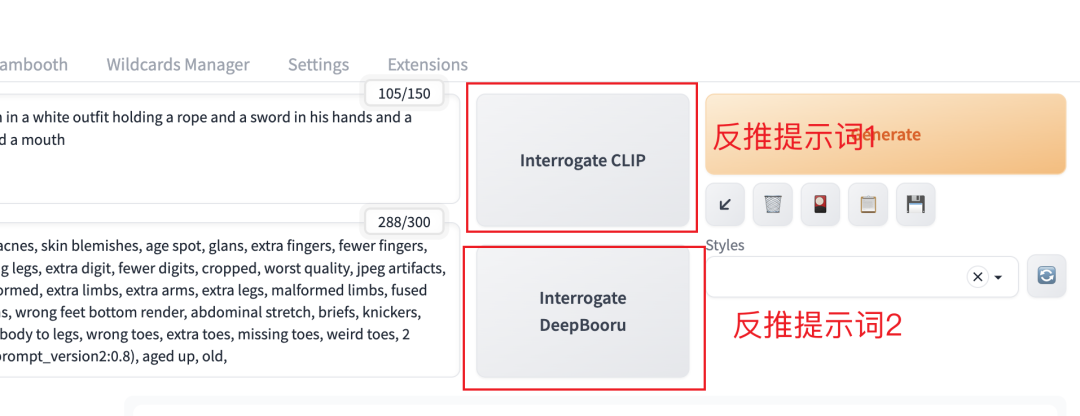
Use Stable Diffusion’s reverse prompt engineering function. There are two reverse prompt functions available, and I will explain them briefly:
-
Interrogate CLIP is better at reasoning about realistic images, focusing on the relationships within the image and generating natural language descriptions, which can be understood as a sentence.
-
Interrogate DeepBooru is great for capturing various elements of 2D art and is more suitable for images in the anime style, generating tags for 2D images and providing segmented keywords.
Since this is about transforming anime into realism, I recommend using the second reverse prompt function to obtain the prompts. However, it is advisable to review what it generates, checking which parts are necessary, which should be removed, and what else needs to be added. A key point to note is that having more prompts is not better; accuracy is what matters.
3) Add quality and style prompts. After writing the main image prompts, you also need to include quality prompts and optional small models for targeted optimization of the image.
Here are the quality prompts I used, which can be reused:
(RAW photo, best quality), (realistic, photo-realistic:1.3), masterpiece, an extremely delicate and beautiful, extremely detailed, CG, unity, 8k, amazing, finely detailed, ultra-detailed, highres, absurdres, soft light
If you need to generate realistic images, you can also add the following prompts:
realistic, masterpiece, best quality, (detailed eyes and skin), extremely detailed eyes and face, beautiful detailed nose, beautiful detailed eyes, extremely detailed hair
4) Add negative prompts. You also need to add negative prompts, which can be directly reused from what I have written.
paintings, sketches, (worst quality:2), (low quality:2), (normal quality:2), lowres, ((monochrome)), ((grayscale)), skin spots, acnes, skin blemishes, age spots, glans, extra fingers, fewer fingers, ((watermark:2)), (white letters:1), (multi nipples), bad anatomy, bad hands, text, error, missing fingers, missing arms, missing legs, extra digits, fewer digits, cropped, worst quality, jpeg artifacts, signature, watermark, username, bad feet, {Multiple people}, blurry, poorly drawn hands, poorly drawn face, mutation, deformed, extra limbs, extra arms, extra legs, malformed limbs, fused fingers, too many fingers, long neck, cross-eyed, mutated hands, polar lowres, bad body, bad proportions, gross proportions, wrong feet bottom render, abdominal stretch, briefs, knickers, kecks, thong, {{fused fingers}}, {{bad body}}, bad-picture-chill-75v, ng_deepnegative_v1_75t, EasyNegative, bad proportion body to legs, wrong toes, extra toes, missing toes, weird toes, 2 bodies, 2 pussies, 2 uppers, 2 lowers, 2 heads, 3 hands, 3 feet, extra long leg, super long leg, mirrored image, mirrored noise, (bad_prompt_version2:0.8), aged up, old,
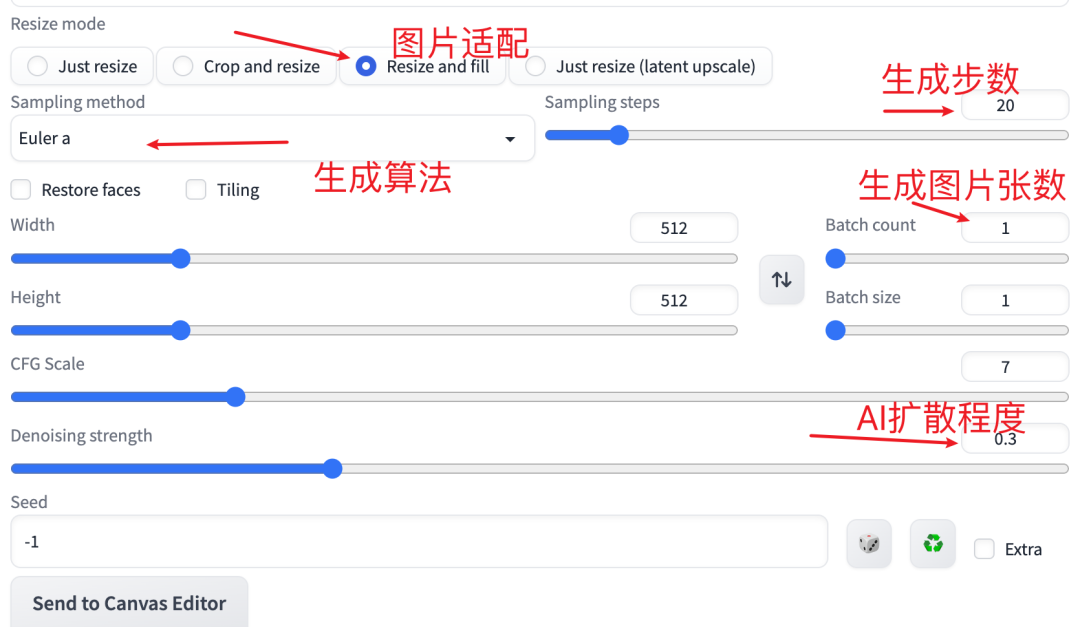
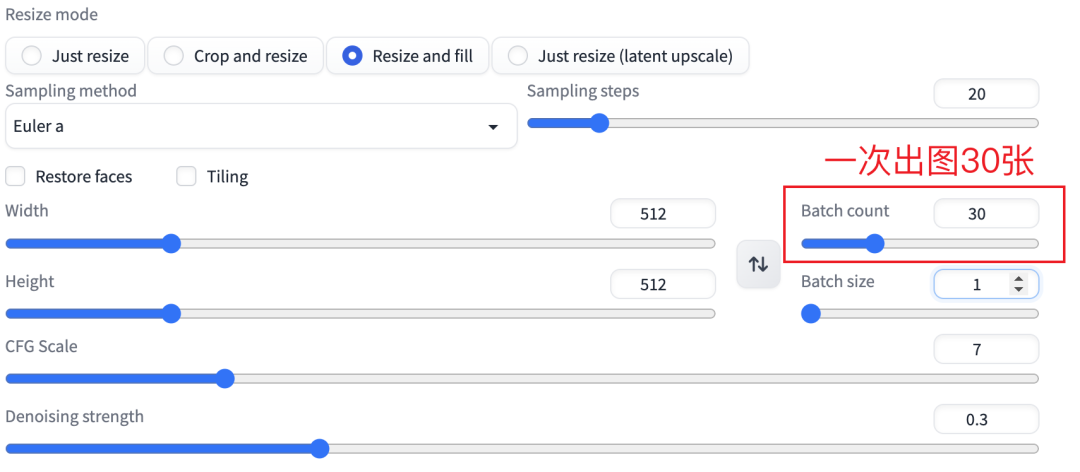
The generation algorithm has a significant impact on the results. After testing, I found that for the need of transforming anime into realism, using Euler a works well. The number of steps for generation: the higher the number, the more detailed the result, but it takes longer. However, more detail does not always mean better results; I recommend keeping it between 20-30.
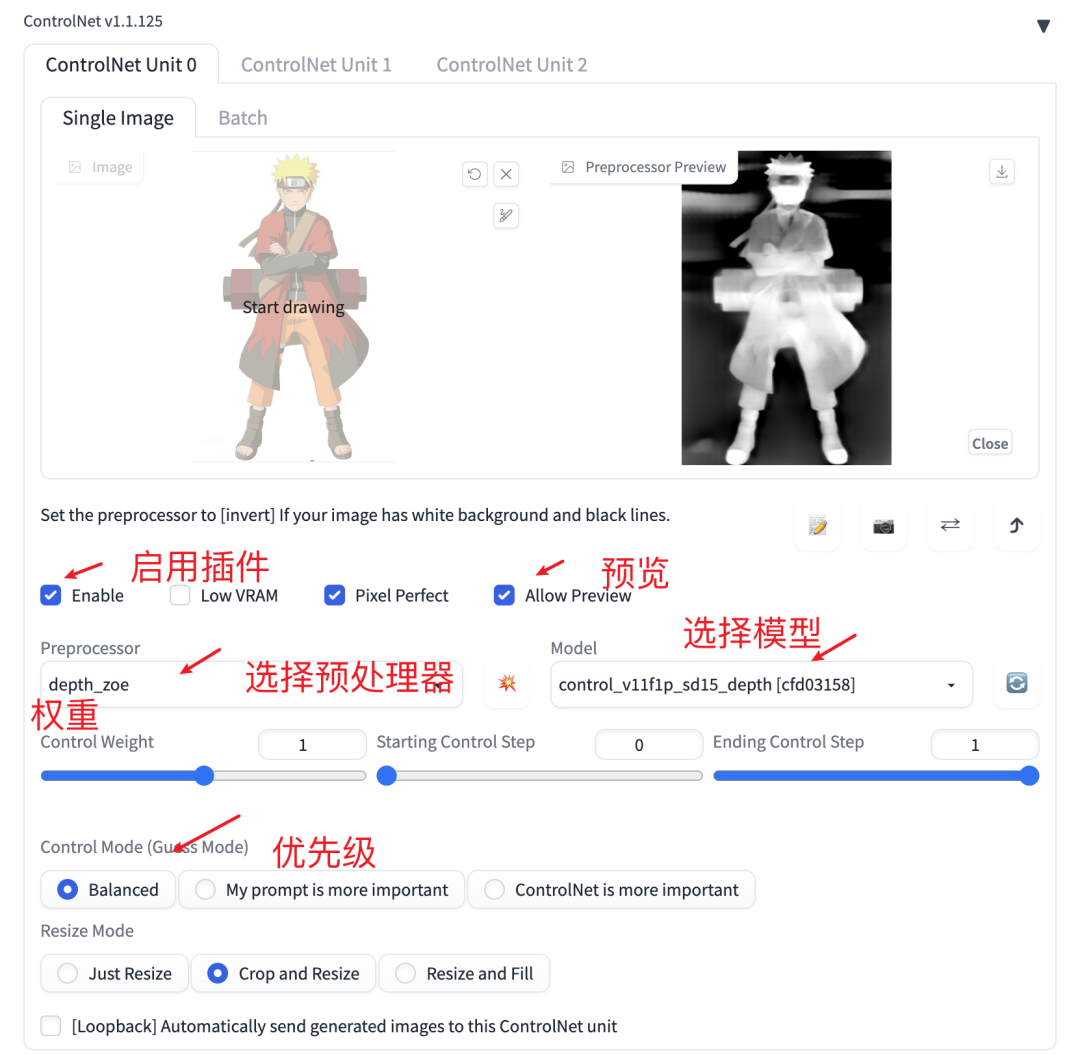
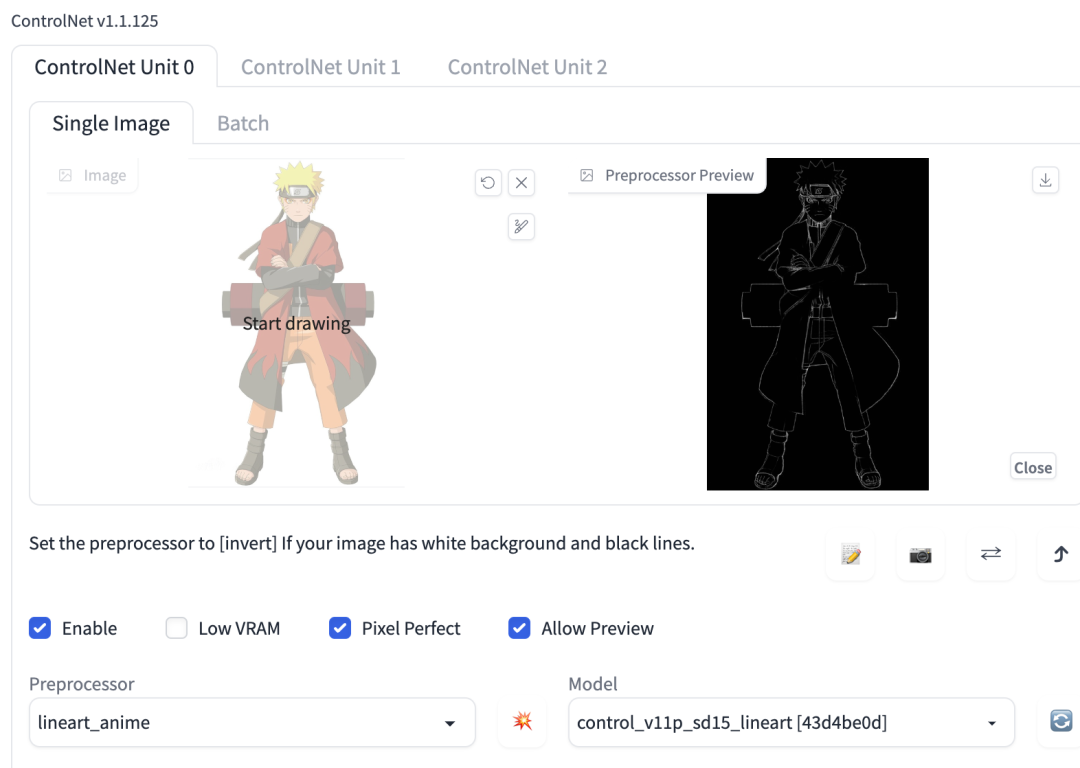
6) Use the ControlNet plugin to further fine-tune the image.
This plugin is a more advanced usage, and there is a lot of content to cover. I will briefly explain it here and discuss it in detail later when I get the chance.
Key factors that significantly affect the results include the pre-processor. When selecting, you should analyze the specific situation. Generally, depth and lineart are suitable for anime. By adjusting their priority and weight, you can influence the plugin’s impact on the results.
If you are unsure how to adjust, you can start with my configuration. Note that the pre-processor and model need to correspond one-to-one. For example, if I select depth as the pre-processor, the model must also be depth. This depth algorithm will give the generated images a more three-dimensional feel.
3. Production Experience Sharing
In the process of generating images with AI, I have also accumulated some production experience to share with you.
1) Test the correctness of the direction first. After adjusting all settings and prompts, generate 1-2 images to test the effect. If the results deviate significantly from expectations, check what prompts might be missing or which ones are influencing the deviation, and make adjustments.
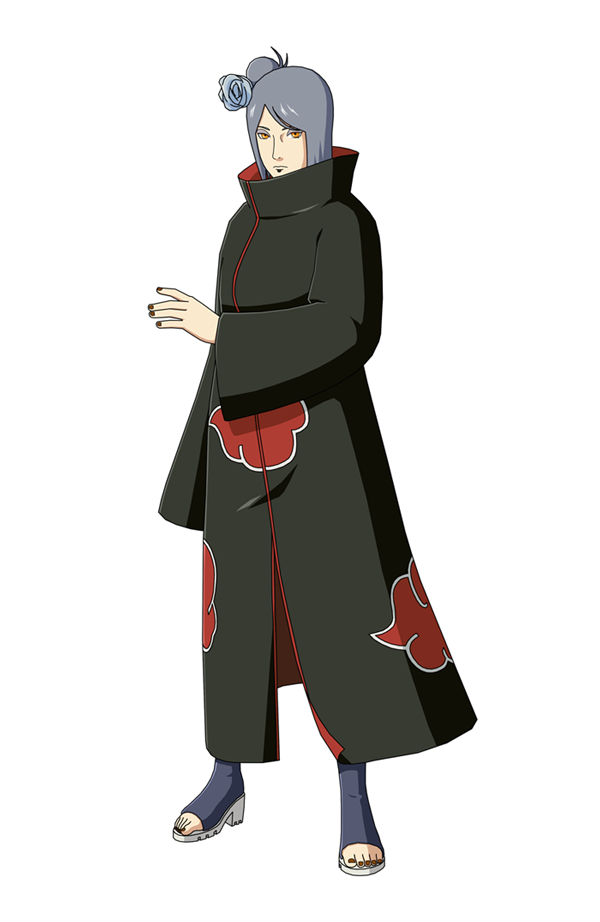
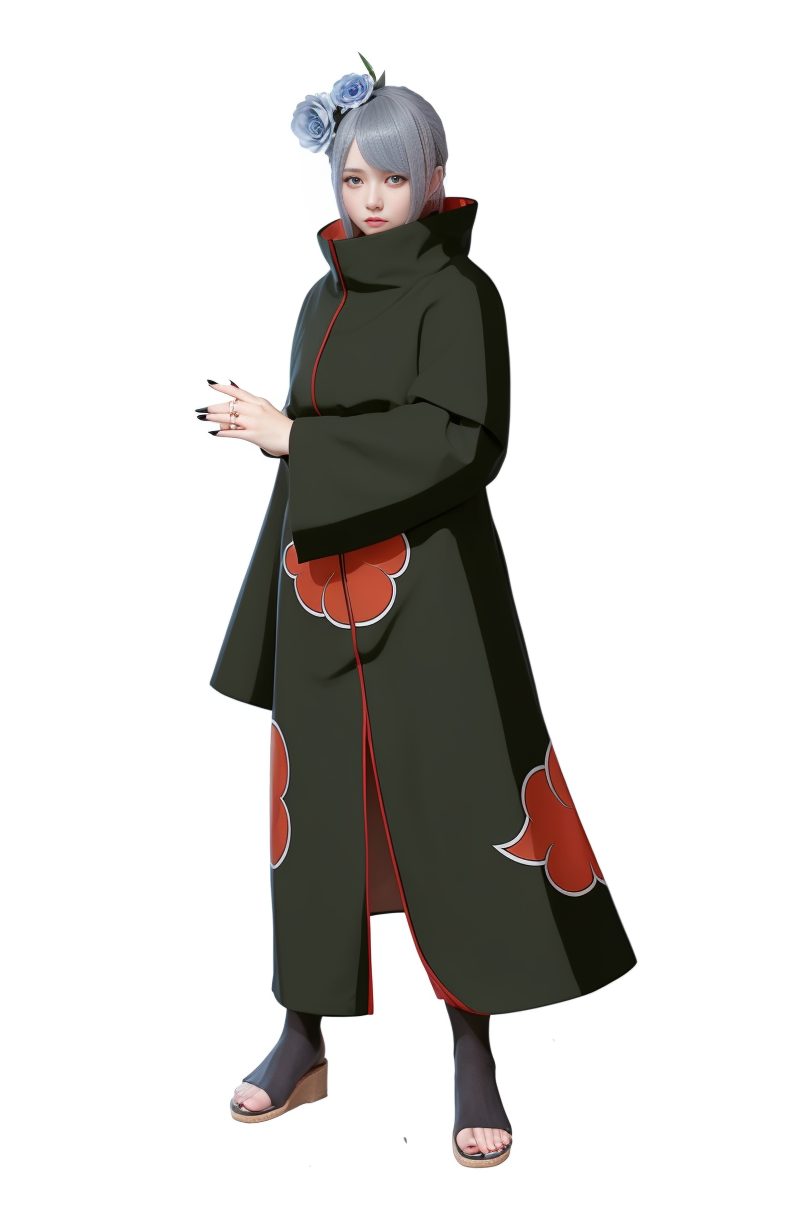
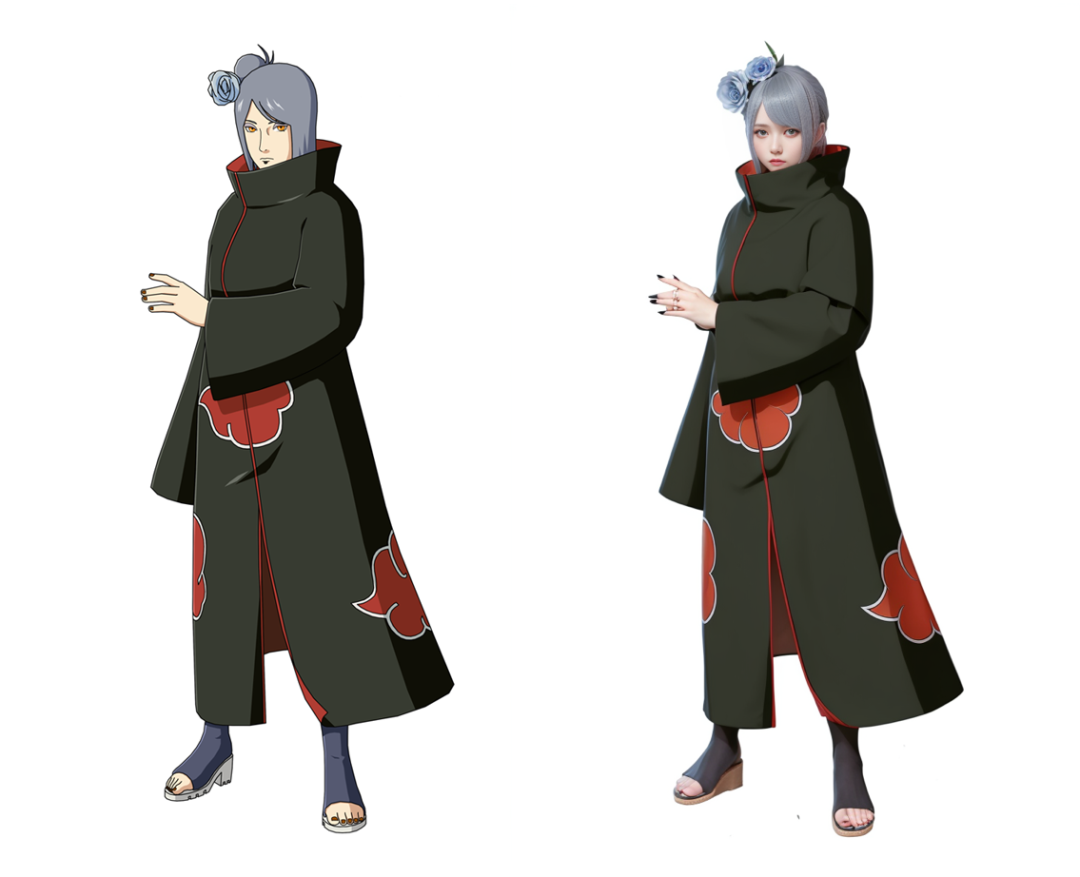
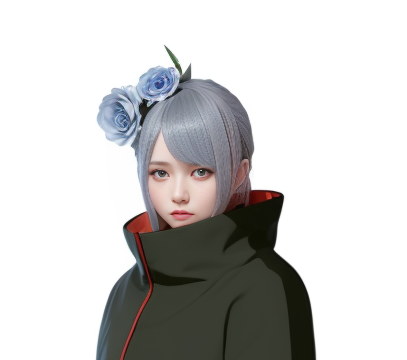
For example, when generating Konan, I noticed that the image did not have white flowers on her head.
So to ensure the generated image has the flowers, I added the prompt “White flowers on her head” to the prompts, and now she has flowers on her head.
2) Modify configuration parameters. If the generated effect is still not satisfactory after multiple attempts, consider changing the sampling method and other settings, such as switching the sampling to line mode. This mode can better recognize image edges, resulting in more realistic details, but it may also limit the focus to very small details.
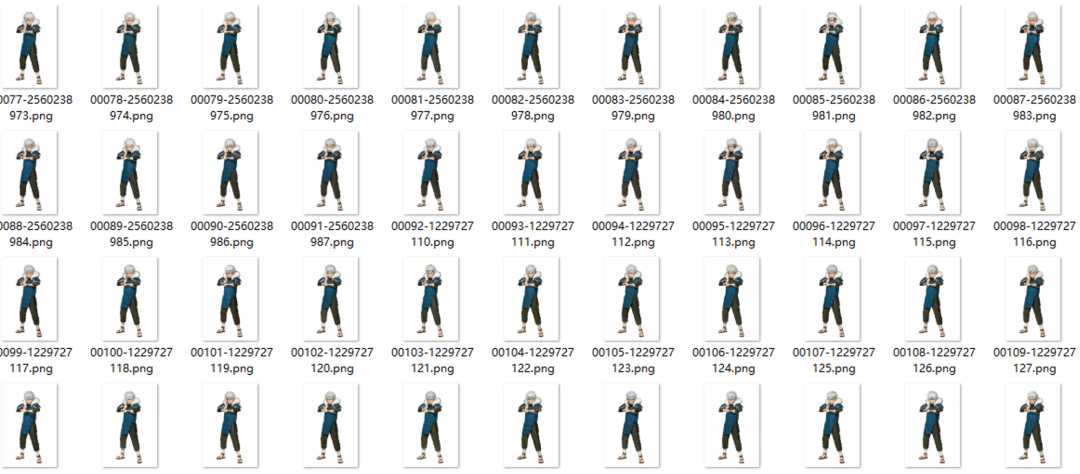
3) Batch generate more images. If you find that the first few images are on the right track, you can increase the number of generated images. I usually generate 30 images at once and then compare the results.
4. Notes
Finally, here are some notes that can help make it easier to generate images.
1) To generate visually appealing characters, ensure that the base image is of good quality. If the generated effect is consistently unsatisfactory, try switching to a different base image.
2) Avoid overly complex accessories on the anime characters, such as headbands woven into the hair, which can make the generated effects difficult to control.
3) The chosen anime image’s action and angle should be relatively normal; it is recommended to use frontal images.
4) Avoid selecting images that focus on hands, as the results for hands are still a mystery; currently, the effects with SD are not very good.
5) It is best to keep the image size below 1000px to avoid memory overflow.
6) When testing effects at the beginning, do not generate multiple images; first generate 1-2 images to check if the direction is correct, and then proceed to generate more. I usually like to generate 30 images at once after confirming the direction. If it’s nighttime before bed, I might generate more at once, like 100 images.
Conclusion
I spent nearly four weeks writing this article. I knew the methods long ago, but I encountered various peculiar problems during the practical process. Initially, the generated images looked quite ghostly, and I fell into many pitfalls. However, it is precisely because of the various challenges I faced during the process that I gained a new understanding of Stable Diffusion, and I have developed a deep understanding of its various functions and plugin usage.
To obtain the images in this article, I output nearly 10,000 images.
As with learning any skill, to master a skill for your own use, you cannot just stay at the level of understanding; more practice and experience are needed. Only then can you achieve improved abilities.
Article reproduced: Caiyun Translation Design, copyright belongs to the original author. Original link: https://mp.weixin.qq.com/s/Fbsxt3DM4QANysKr9_a52w Copyright statement: The articles pushed by "IXDC" will indicate the author and source unless it is truly impossible to confirm. This public account maintains neutrality regarding the content, statements, and judgments of the reproduced and shared content and does not provide any explicit or implied guarantees regarding the accuracy, reliability, or completeness of the content. It is for reader reference only. Some articles may not have been able to contact the original author when pushed; if there are copyright issues regarding content or works, please contact us with the URL of the content and provide relevant proof materials, and we will verify and immediately correct or delete the relevant content! This public account does not bear any responsibility and reserves the final interpretation right of this statement. Contact WeChat: 18802086168 Contact phone: 18802086168 Final review | Lü Jing Editor | Ye Xuan