“Your Majesty, I am really confused! This user behavior tracking system has been giving me a headache, and I have been stuck for days without a solution…”
“Oh? Is my beloved encountering difficulties? Let me take a look.”
“Yes! I need to track user actions such as clicks and scrolls on the page, and also record the time spent. It feels like I have to write a lot of code…”
“Don’t worry, my dear, with Cursor, this is a piece of cake! Let me teach you a few tricks.”
1.
First Trick: Quickly Generate Basic Tracking Code

zz
“Let’s create a simple user behavior tracking class. Just tell Cursor your requirements.”
class UserTracker {
    constructor() {
        this.events = [];
        this.startTime = new Date();
        this.initializeTracking();
    }
    initializeTracking() {
        // Track click events
        document.addEventListener('click', (e) => {
            this.trackEvent('click', {
                x: e.clientX,
                y: e.clientY,
                target: e.target.tagName
            });
        });
        // Track scroll events
        document.addEventListener('scroll', this.debounce(() => {
            this.trackEvent('scroll', {
                scrollY: window.scrollY,
                scrollX: window.scrollX
            });
        }, 500));
    }
    trackEvent(type, data) {
        this.events.push({
            type,
            timestamp: new Date(),
            data
        });
    }
    // Debounce function
    debounce(func, wait) {
        let timeout;
        return function executedFunction(...args) {
            const later = () => {
                clearTimeout(timeout);
                func(...args);
            };
            clearTimeout(timeout);
            timeout = setTimeout(later, wait);
        };
    }
}
“Wow! Your Majesty, this code looks very professional! But… I want to know how long users stay on each page…”
“That’s simple, let’s enhance the tracking functionality.”
2.
Second Trick: Add Page Stay Time Statistics

zz
class UserTracker {
    constructor() {
        this.events = [];
        this.startTime = new Date();
        this.pageVisits = new Map();
        this.currentPage = window.location.pathname;
        this.initializeTracking();
        this.trackPageView();
    }
    trackPageView() {
        const visitInfo = {
            startTime: new Date(),
            endTime: null,
            duration: 0
        };
        this.pageVisits.set(this.currentPage, visitInfo);
        // Record stay time when the page is closed or switched
        window.addEventListener('beforeunload', () => {
            this.updatePageDuration();
        });
        // Listen for route changes (suitable for SPA)
        window.addEventListener('popstate', () => {
            this.updatePageDuration();
            this.currentPage = window.location.pathname;
            this.trackPageView();
        });
    }
    updatePageDuration() {
        const visitInfo = this.pageVisits.get(this.currentPage);
        if (visitInfo) {
            visitInfo.endTime = new Date();
            visitInfo.duration = visitInfo.endTime - visitInfo.startTime;
        }
    }
}
“That’s amazing! So this way we can know how long users stayed?”
“Exactly! But to analyze user behavior better, let’s add the heatmap feature.”
3.
Third Trick: Generate Click Heatmap

zz
class UserTracker {
    constructor() {
        // Inherit previous code...
        this.clickMap = new Map();
        this.heatmapResolution = 50; // Heatmap resolution
    }
    trackClick(x, y) {
        const gridX = Math.floor(x / this.heatmapResolution);
        const gridY = Math.floor(y / this.heatmapResolution);
        const key = `${gridX},${gridY}`;
        this.clickMap.set(key, (this.clickMap.get(key) || 0) + 1);
    }
    generateHeatmap() {
        const heatmapData = [];
        this.clickMap.forEach((value, key) => {
            const [x, y] = key.split(',');
            heatmapData.push({
                x: parseInt(x) * this.heatmapResolution,
                y: parseInt(y) * this.heatmapResolution,
                value: value
            });
        });
        return heatmapData;
    }
}
“Wow! This way we can see the areas where users click the most! Your Majesty, you are amazing!”
“Haha, these are just basic functions. Let me teach you how to use this tracking system.”
4.
Practical Application

zz
-
First, include the tracking code in your page:
const tracker = new UserTracker();
-
Get tracking data:
// Get all events
console.log(tracker.events);
// Get page stay time
tracker.pageVisits.forEach((visit, page) => {
    console.log(`Page ${page} stay time: ${visit.duration / 1000} seconds`);
});
// Get heatmap data
const heatmap = tracker.generateHeatmap();
console.log('Click heatmap data:', heatmap);
“Did you learn, my dear?”
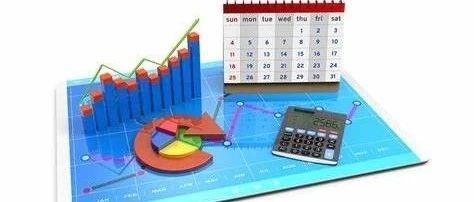
“Awesome! I used to think these features were complex, but with Cursor, it’s so simple to implement! But Your Majesty, we’ve collected the data, how do we analyze it?”
“That’s a good question! Next time, we will explain how to quickly visualize data using Cursor and turn this data into beautiful charts!”
5.
Tips
zz
-
Remember to consider data privacy and user authorization in actual use. -
You can use localStorage to temporarily store data or send it to the backend server. -
It is recommended to add throttling or debouncing to avoid excessive event triggers. -
The code can be extended and modified according to actual needs.
Now you are also a tracking system expert! Go ahead and try it out~
“Thank you for your guidance, Your Majesty! I will go practice right away!”

Click
Save
Read Good Articles
