Click the blue text to follow us
Travel back to the Tang Dynasty and see Your Majesty lead the beloved concubine through the wonderful world of Cursor intelligent development~
Concubine: Your Majesty, I’ve just received a request to develop a smart report, and I need to complete it in one day. I’m so anxious!
Your Majesty: Don’t worry, today I will teach you how to use the so-called “AI programming assistant” Cursor, which will help you easily tackle this challenge.
Concubine: Cursor? What kind of magical tool is that?
Your Majesty: This is a powerful editor based on VS Code, built with the GPT-4 large model. It’s like having a programming mentor online at all times, helping you write code, refactor code, explain code, and even discuss technical issues with you.
Concubine: Wow! That sounds amazing! How do I get started?
Your Majesty: Let me demonstrate for you. First, we need to download and install Cursor by visiting the official website cursor.sh. Once installed, let’s start creating a new project.
Concubine: Your Majesty, I’m ready! What should I do next?
Your Majesty: Let’s first create a basic report project structure using Cursor. Press Cmd/Ctrl + L to open the AI command panel and enter:
Please help me create a basic directory structure for a smart report project, including a front-end and back-end separation.In an instant, Cursor provided the recommended directory structure:
smart-report/
├── frontend/
│   ├── src/
│   │   ├── components/
│   │   ├── pages/
│   │   ├── utils/
│   │   └── App.js
│   ├── package.json
│   └── README.md
└── backend/
    ├── src/
    │   ├── controllers/
    │   ├── models/
    │   ├── routes/
    │   └── app.js
    ├── package.json
    └── README.md
Concubine: Wow! That was so fast! How do we implement the specific functions of the report?
Your Majesty: Don’t rush, let’s first implement the back-end API. In Cursor, we can directly describe the requirements, and it will help us generate the code. For example, to create a data statistics interface:
// backend/src/controllers/reportController.js
const generateReport = async (req, res) => {
    try {
        const { startDate, endDate, reportType } = req.query;
        // Get statistical data based on query parameters
        const reportData = await Report.aggregate([
            {
                $match: {
                    createTime: {
                        $gte: new Date(startDate),
                        $lte: new Date(endDate)
                    }
                }
            },
            {
                $group: {
                    _id: "$category",
                    total: { $sum: "$amount" }
                }
            }
        ]);
        res.json({
            success: true,
            data: reportData
        });
    } catch (error) {
        res.status(500).json({
            success: false,
            message: error.message
        });
    }
};
Concubine: That’s amazing! What about displaying it on the front end?
Your Majesty: We can quickly generate a report component based on React using Cursor. Just describe the requirements in the AI command panel:
// frontend/src/components/ReportChart.jsx
import React, { useState, useEffect } from 'react';
import { Line } from '@antd/charts';
const ReportChart = ({ reportData }) => {
    const [chartConfig, setChartConfig] = useState({
        data: [],
        xField: 'date',
        yField: 'value',
        seriesField: 'category',
        smooth: true,
    });
    useEffect(() => {
        if (reportData) {
            setChartConfig(prev => ({
                ...prev,
                data: reportData
            }));
        }
    }, [reportData]);
    return (
        <div classname="report-chart">
            <line {...chartconfig}=""></line>
        </div>
    );
};
export default ReportChart;
Concubine: That’s fantastic! But I still don’t quite understand some of this code. Can Cursor explain it?
Your Majesty: Of course. Just select the code, press Cmd/Ctrl + K, and then enter “Please explain the function of this code”.
Concubine: Oh! I see now. What if I want to add new features or modify the code?
Your Majesty: The best part of Cursor is that it understands your intent. For example, if you want to add a PDF export feature, just enter a natural language description in the command panel:
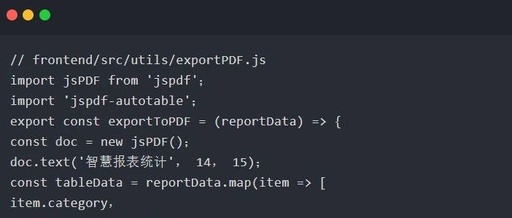
// frontend/src/utils/exportPDF.js
import jsPDF from 'jspdf';
import 'jspdf-autotable';
export const exportToPDF = (reportData) => {
    const doc = new jsPDF();
    doc.text('Smart Report Statistics', 14, 15);
    const tableData = reportData.map(item => [
        item.category,
        item.total.toFixed(2)
    ]);
    doc.autoTable({
        head: [['Category', 'Amount']],
        body: tableData,
        startY: 20
    });
    doc.save('report.pdf');
};
Concubine: Your Majesty, this is incredible! I feel like my development efficiency has increased many times!
Your Majesty: That’s right, Cursor is that powerful. It can help you not only write code but also:
-
Automatically complete code
-
Real-time code review
-
Intelligent refactoring suggestions
-
Answer technical questions
-
Generate unit tests
Concubine: Now that I’ve learned this, I won’t be afraid when similar requests come up again!
Your Majesty: Exactly. Remember the key shortcuts for using Cursor:
-
Cmd/Ctrl + L: Open AI command panel -
Cmd/Ctrl + K: Get code explanation -
Cmd/Ctrl + I: Inline code completion -
Cmd/Ctrl + Shift + L: Open chat window
Concubine: I really learned a lot! Thank you, Your Majesty!
Your Majesty: You’re welcome, Concubine. Your after-class task: Try using Cursor to add a data filtering feature to make the report display more flexible. Remember, if you encounter problems, just ask Cursor; it will be your best programming assistant.
Concubine: Yes, Your Majesty! I will practice right away. With Cursor’s help, I believe I will complete it soon!
If you like this article, please like and share!