In the previous issue, we introduced how to use HTTP forwarding to allow other devices on the local network to access the internet through a proxy. However, this requires configuring the client’s proxy settings, which is not very user-friendly for beginners. To solve this problem, this issue will teach you how to configure the router so that the Wi-Fi signal emitted by the router can access the internet, greatly simplifying the internet access process for beginners! Let’s take a look!
Preparation tools: QuickQ + Ubuntu computer (Windows version in development) + Xiaomi router
Principle introduction: To enable the Wi-Fi emitted by the router to access the internet directly, two conditions must be met: 1. There must be a proxy server, and 2. The router must support proxy forwarding. When mobile devices connect to the Wi-Fi and make internet requests, the router forwards the request to the proxy server. The proxy server downloads the website information and sends it back to the router, which finally sends the website content to the mobile device. This is the entire process of accessing the internet.
In the previous issue, we already introduced the method for setting up a proxy server and provided the <ip:11000> HTTP service port. This issue focuses on how to configure a router that supports HTTP proxy.
The operating system of traditional routers is modified from a Linux operating system by manufacturers, and its functions are limited. For example, the interface of the Xiaomi router:

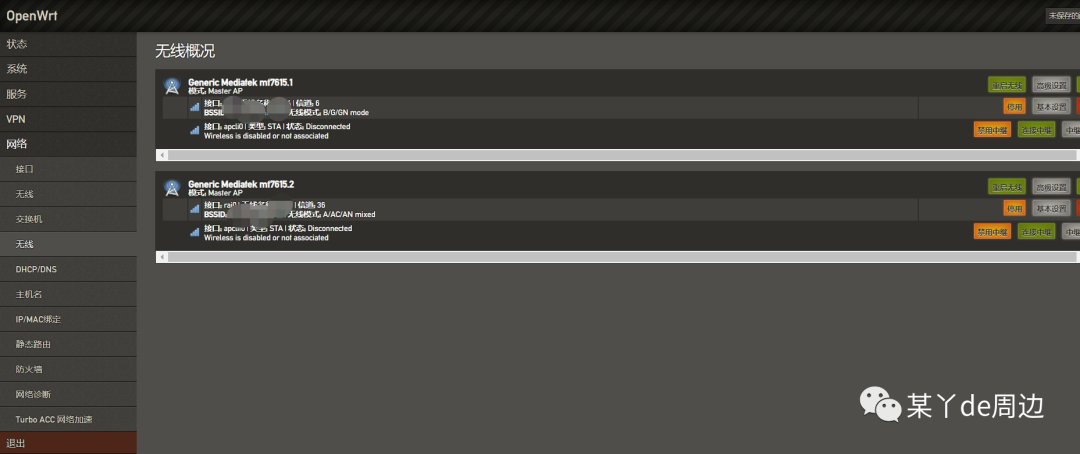
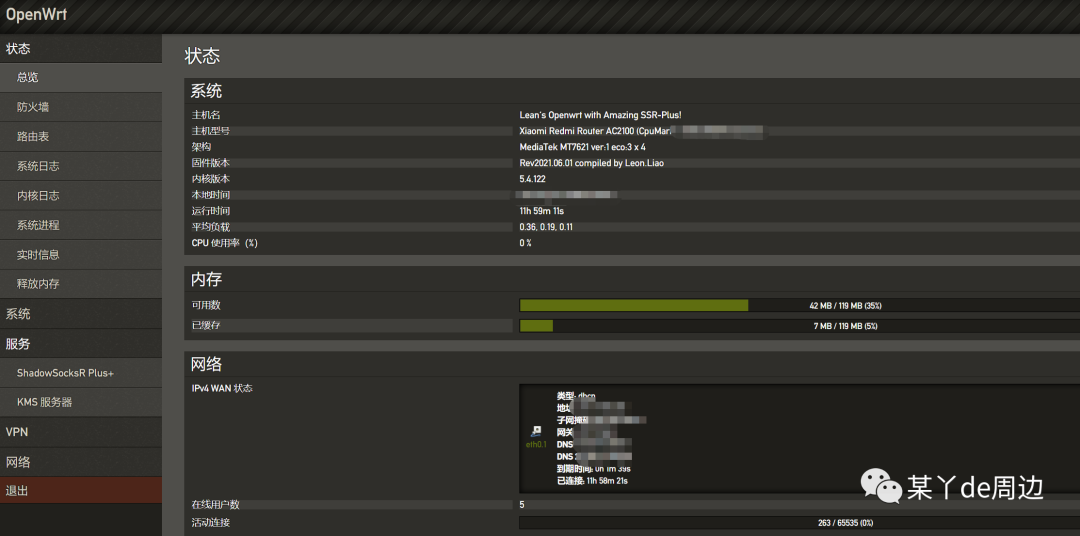
On the other hand, the OpenWrt operating system is an open-source router operating system with powerful functions and strong expandability. After installing this system, the router transforms into a small Linux server, supporting proxy forwarding services, and can be used for various applications such as cloud storage, smart home, etc.
By using OpenWrt’s proxy forwarding service, you can achieve Wi-Fi signal internet access!
Warning! Warning! Warning! During the installation of the OpenWrt operating system, if an error occurs, the router may fail to start and become unusable. At that point, it can only be repaired through “hardware programming.” Beginners are advised to watch the relevant tutorials repeatedly and understand the principles before proceeding with the operating system installation.
Flashing the router’s operating system consists of three steps: first, obtain root privileges for the router; second, flash the Breed firmware; third, flash the OpenWrt operating system based on the Breed firmware.
https://www.cnblogs.com/5h4d0w/p/14506983.html
https://www.right.com.cn/FORUM/forum.php?mod=viewthread&tid=4070233
The following operations will use the Redmi AC 2100 router as an example. Other routers may have significant hardware differences and cannot be mixed. If you need flashing tutorials for other routers, feel free to contact me!
1. Download the operating system and related tools:
https://bhpan.buaa.edu.cn:443/link/AF8C2351119564F8271CA33B67B69001
2. Enter 192.168.31.1 to access the Xiaomi interface, press F12 to open the developer tools.
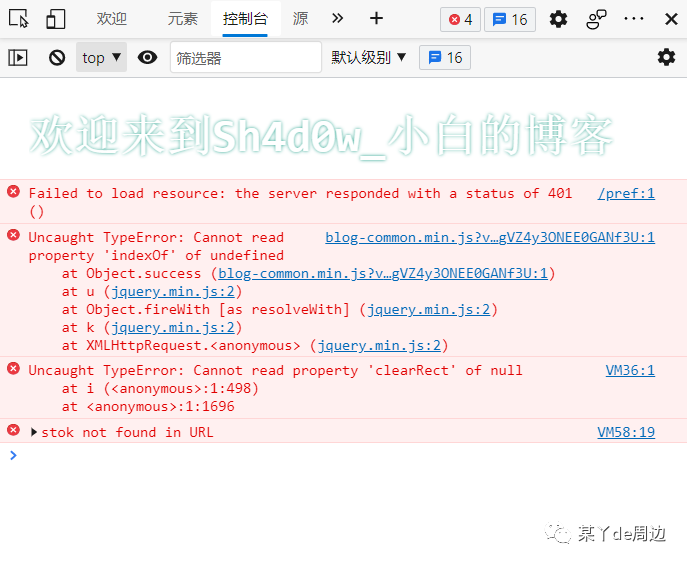
3. Click on the console and enter the following code:
function getSTOK() {    let match = location.href.match(/;stok=(.*?)\//);    if (!match) {        return null;    }    return match[1];}
function execute(stok, command) {    command = encodeURIComponent(command);    let path = `/cgi-bin/luci/;stok=${stok}/api/misystem/set_config_iotdev?bssid=SteelyWing&user_id=SteelyWing&ssid=-h%0A${command}%0A`;    console.log(path);    return fetch(new Request(location.origin + path));}
function enableSSH() {    stok = getSTOK();    if (!stok) {        console.error('stok not found in URL');        return;    }    console.log(`stok = "${stok}"`);
    password = prompt('Input new SSH password');    if (!password) {        console.error('You must input password');        return;    }
    execute(stok, `nvram set ssh_en=1nvram commitsed -i 's/channel=.*/channel=\"debug\"/g' /etc/init.d/dropbear/etc/init.d/dropbear start`)
        .then((response) => response.text())
        .then((text) => console.log(text));
    console.log('New SSH password: ' + password);
    execute(stok, `echo -e "${password}\n${password}" | passwd root`)
        .then((response) => response.text())
        .then((text) => console.log(text));}
enableSSH();
4. If successful, a pop-up window will prompt you to set the SSH password. Enter the password and click OK. The default account is root.
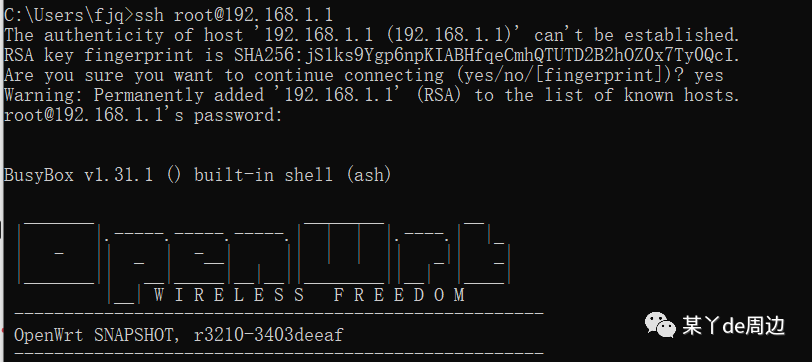
5. Use ssh root@ip to access the router and gain root privileges. The interface will look similar to the following:
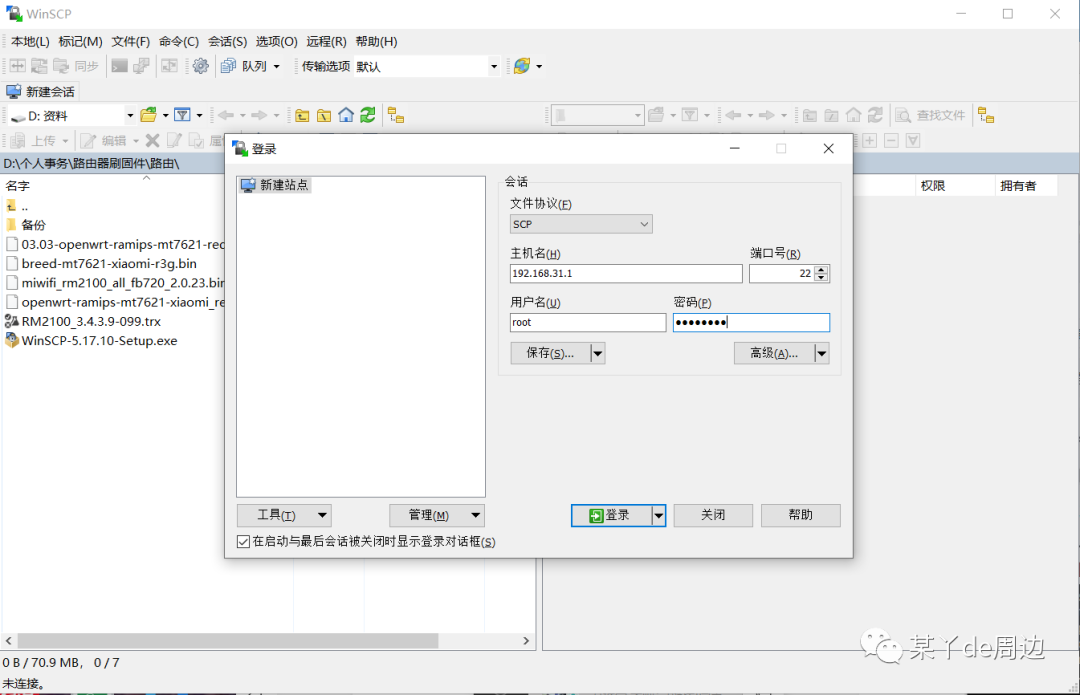
6. Open WinSCP from the installation package, create a new SCP session, and fill in the router’s IP, username, and password to establish a connection:
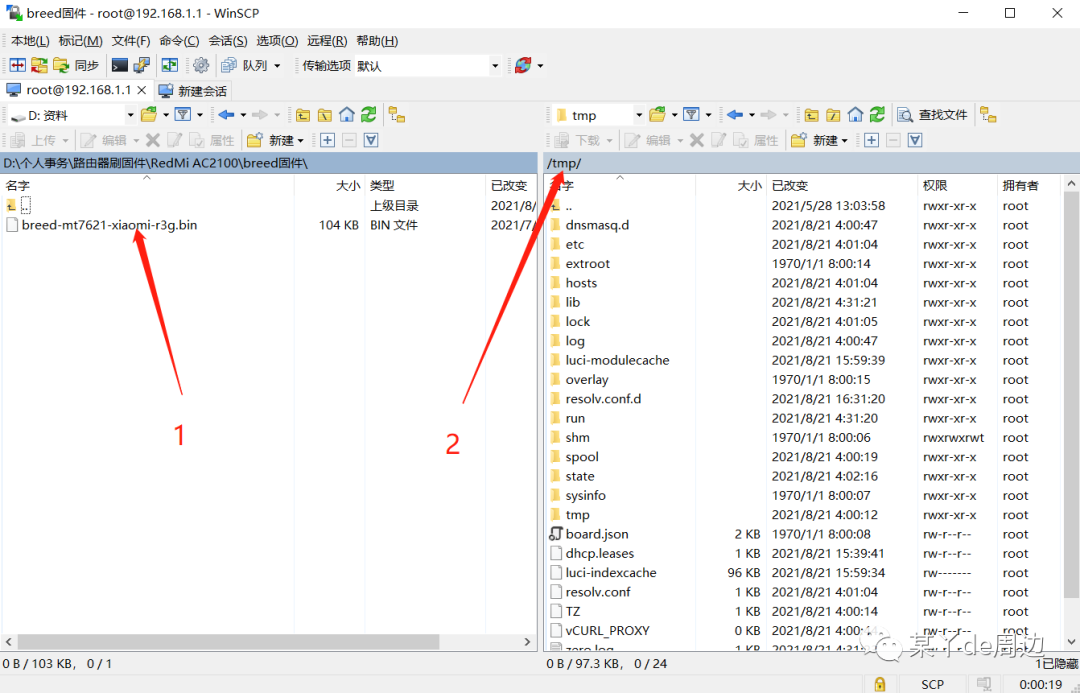
7. Transfer the Breed firmware installation package to the router’s /tmp directory.
8. In the SSH connection, enter the following command to set the Breed firmware as the router’s bootloader (this step is very risky; if the Breed firmware is flashed incorrectly, the router will become unusable! Please confirm repeatedly that the Breed firmware version matches the router model!!!)
cd /tmp
mtd -r write breed-mt7621-xiaomi-r3g.bin Bootloader

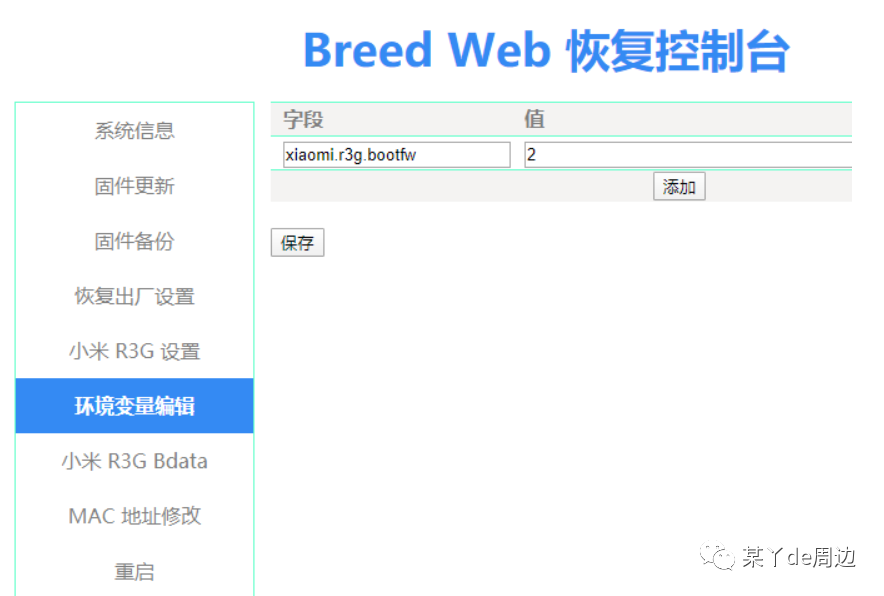
9. After flashing, turn off the router power, hold the reset button, and turn the power back on until the system light on the router turns blue and flashes. Then release the reset button and access 192.168.1.1 in your browser to verify that the Breed firmware has been successfully flashed. Click on the environment variable editor and add a new variable field: xiaomi.r3g.bootfw, with the value of 2.
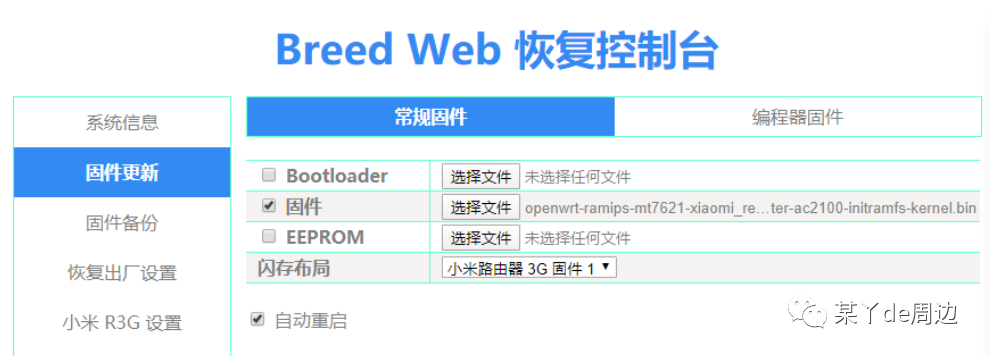
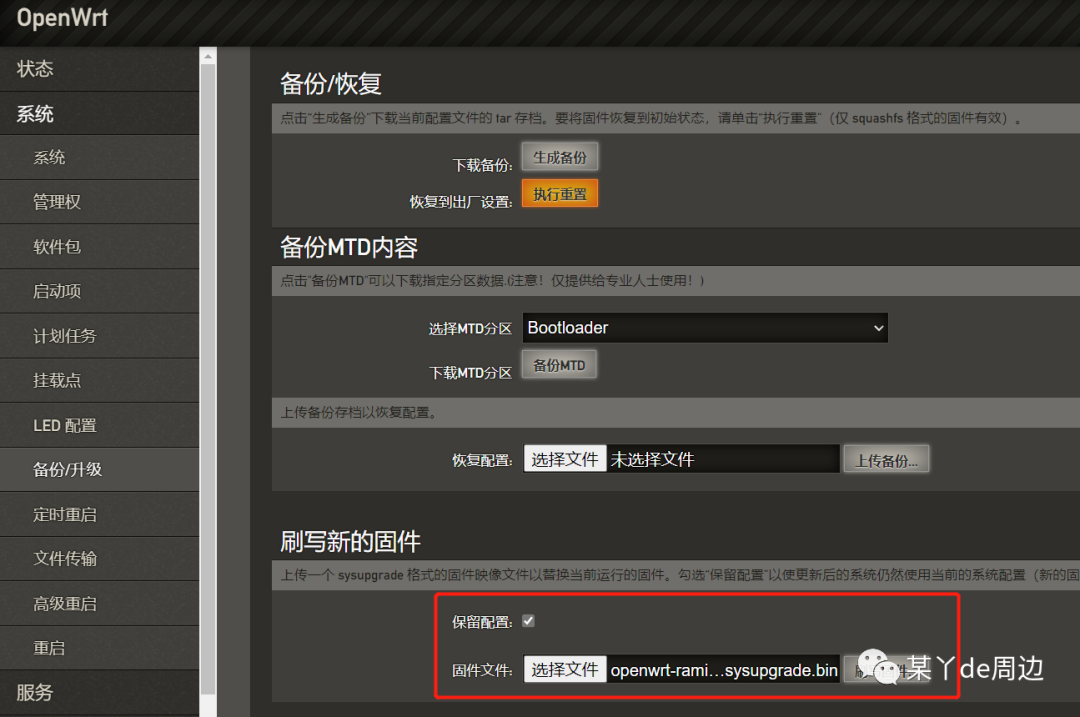
10. Click on firmware update and flash the OpenWrt operating system (in the order of 1, 2, 3). For detailed steps, refer to the link: https://www.right.com.cn/forum/thread-4025861-1-1.html
Firmware 1 IP: 192.168.1.1 Username: root Password: none
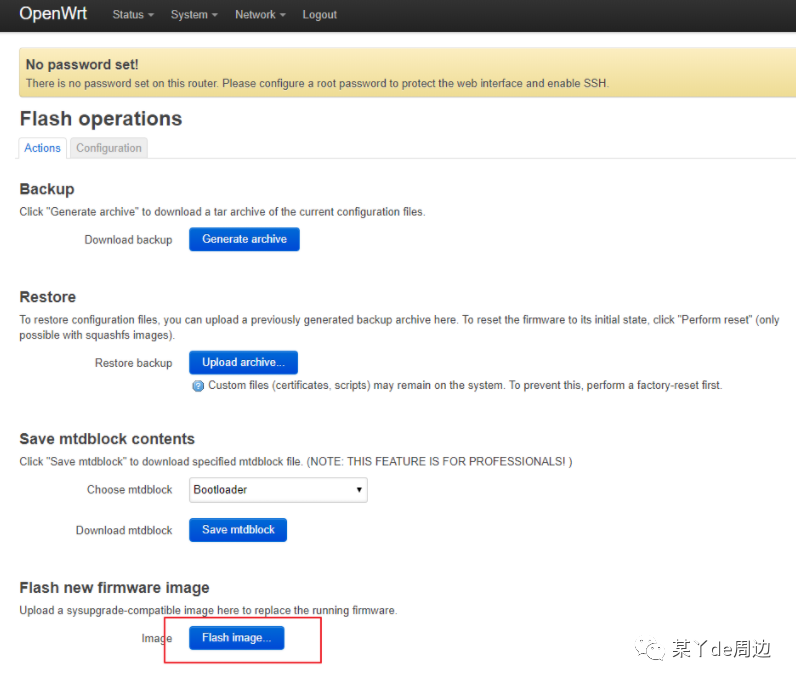
Firmware 2 IP: 192.168.1.1 Username: root Password: password
Firmware 3 IP: 192.168.1.1 Username: root Password: password
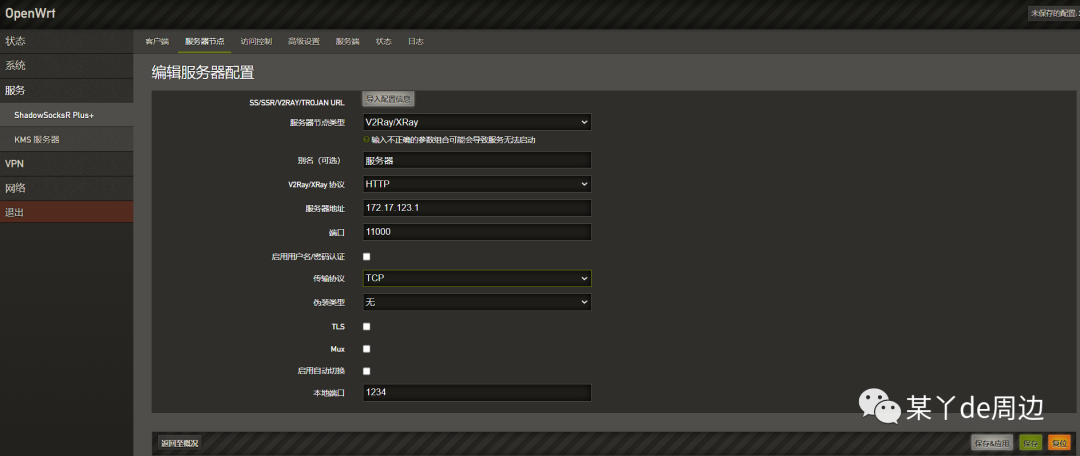
11. Add the proxy server to the router, with the proxy server information as follows:
HTTP Proxy, IP: 172.17.123.1, Port: 11000
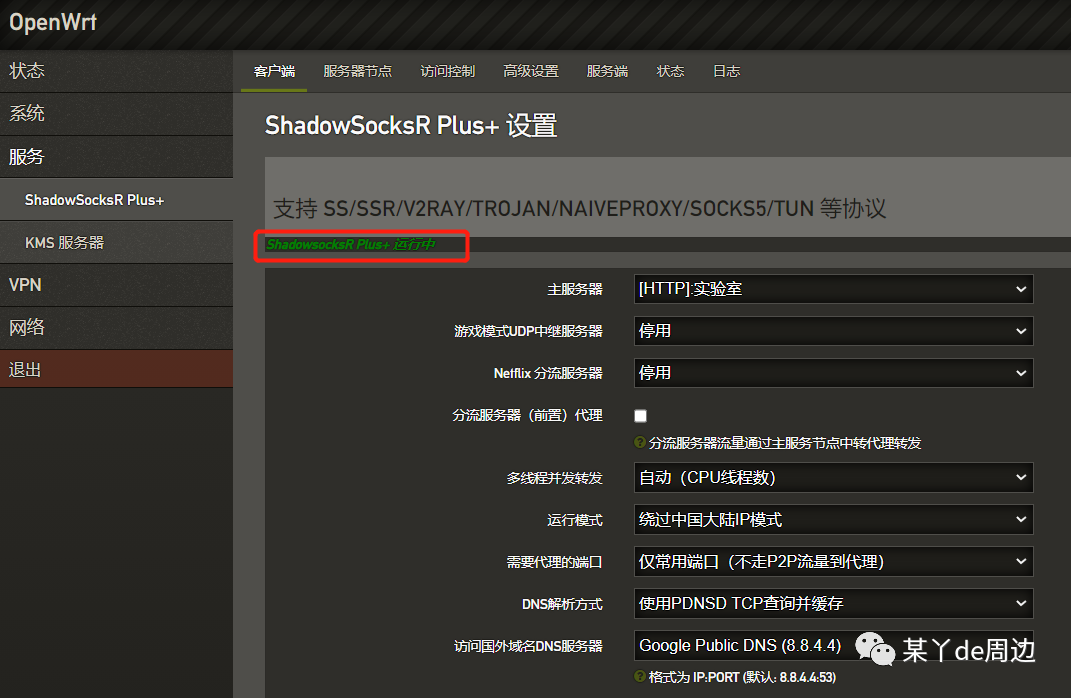
12. Enable the proxy service.
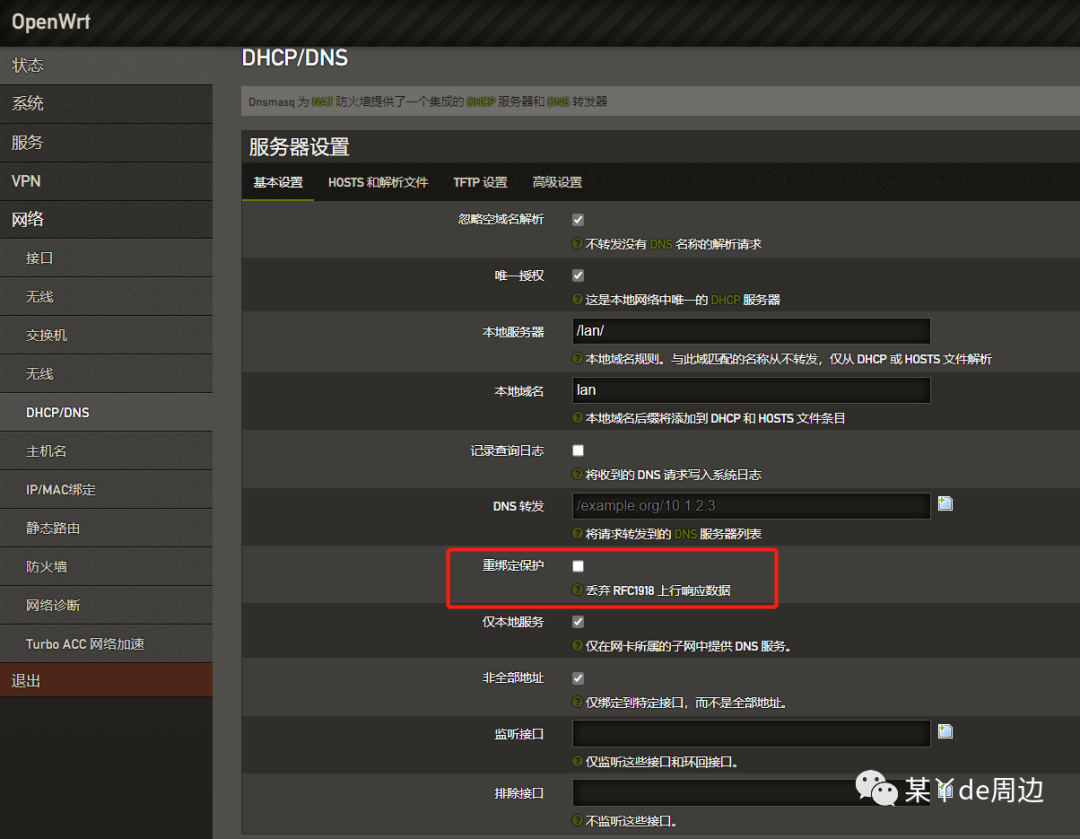
13. Set up DNS resolution service.
14. Configure Wi-Fi functionality.