Aitrainee | Public Account: AI Trainee
🌟 Drag-and-drop UI to build your custom LLM workflows:
Flowise, a user-friendly, no-code platform that simplifies the process of building LangChain workflows, allows developers to create LLM applications without writing code.
Flowise’s key features include drag-and-drop UI, user-friendliness, and versatility.

Simplifying LangChain workflow development with an intuitive drag-and-drop interface
Flowise provides developers with a special tool designed to build LLM applications without delving deep into coding.
This is equally beneficial for organizations striving to quickly build prototypes and develop LLM applications in an agile manner. Let’s look at some of the standout features of Flowise AI:
-
• Drag-and-drop UI: Flowise makes it easy to design your own custom LLM workflows.
-
• Open-source: As an open-source project, Flowise can be freely used and modified.
-
• User-friendly: Flowise is easy to get started with, even for those without coding experience.
-
• Versatile: Flowise AI can be used to create various LLM applications.
Example 1: Building a Basic LLM Chain
Follow these steps:
-
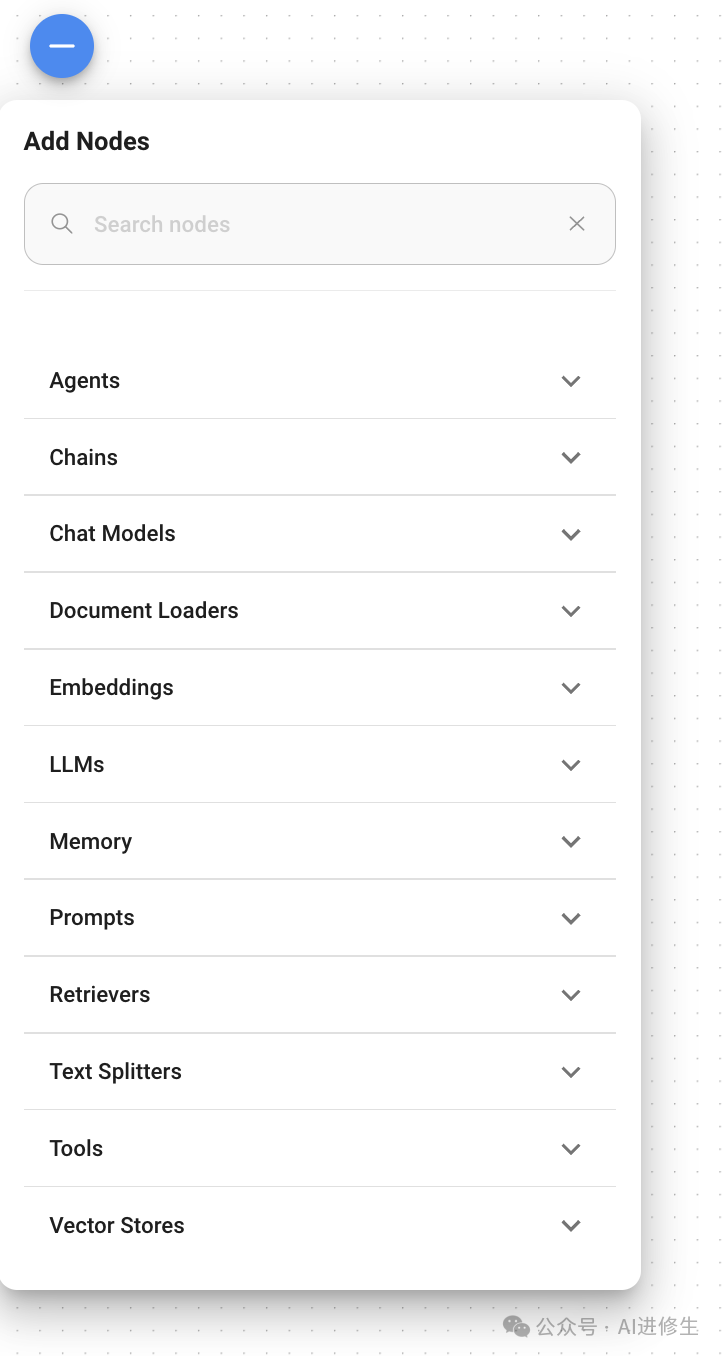
1. On a blank canvas, click the “+ Add New” button to bring up the “Add Nodes” panel on the left.
-
2. Select the following components from the “Add Nodes” panel, which will appear on the canvas:
-
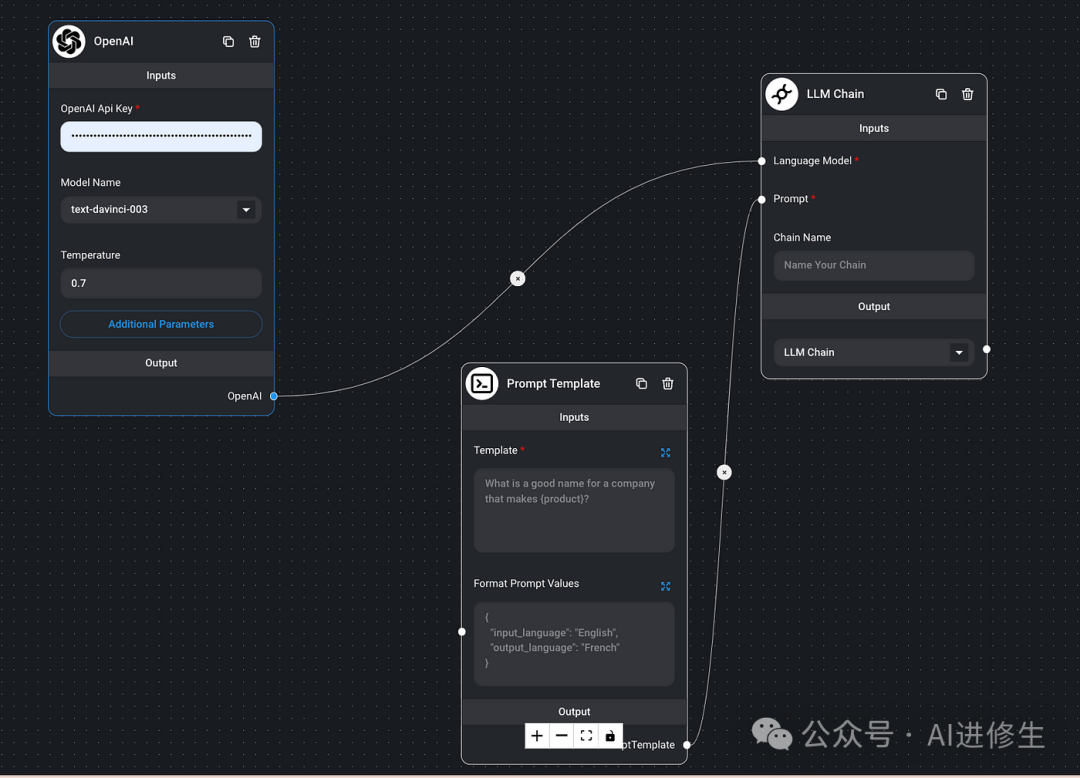
• Drag OpenAI from the LLMs section to the panel
-
• Drag LLM chain from the Chains category
-
• Drag Prompt Template from the Prompts category
Now, the canvas should look like this:

-
1. Connect the components
-
• Link the output of OpenAI to the input of the LLM Chain’s language model
-
• Link the output of the Prompt Template to the input of the LLM Chain’s Prompt
-
2. Enter the necessary information
• Input your OpenAI key in the OpenAI field
• Write the following prompt template in the “Template” field of the Prompt Template:
What is a good name for a company that makes {product}?-
• Name the LLM Chain.
-
• Click the “save” icon in the upper right corner to save.
-
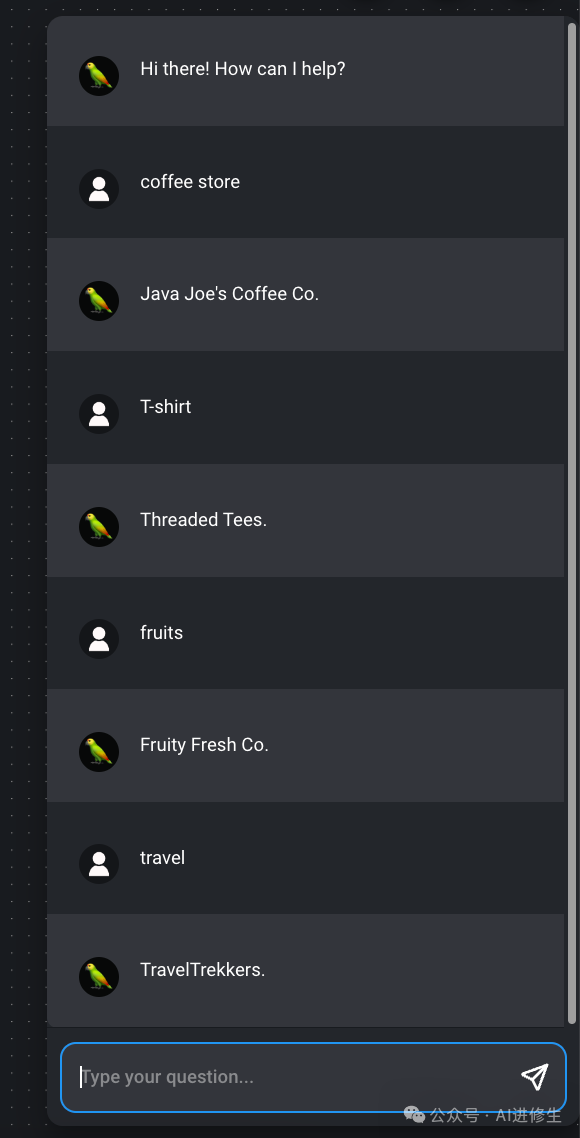
• Click the chat icon in the upper right corner to start sending “product names.” Here, we got the expected answer.
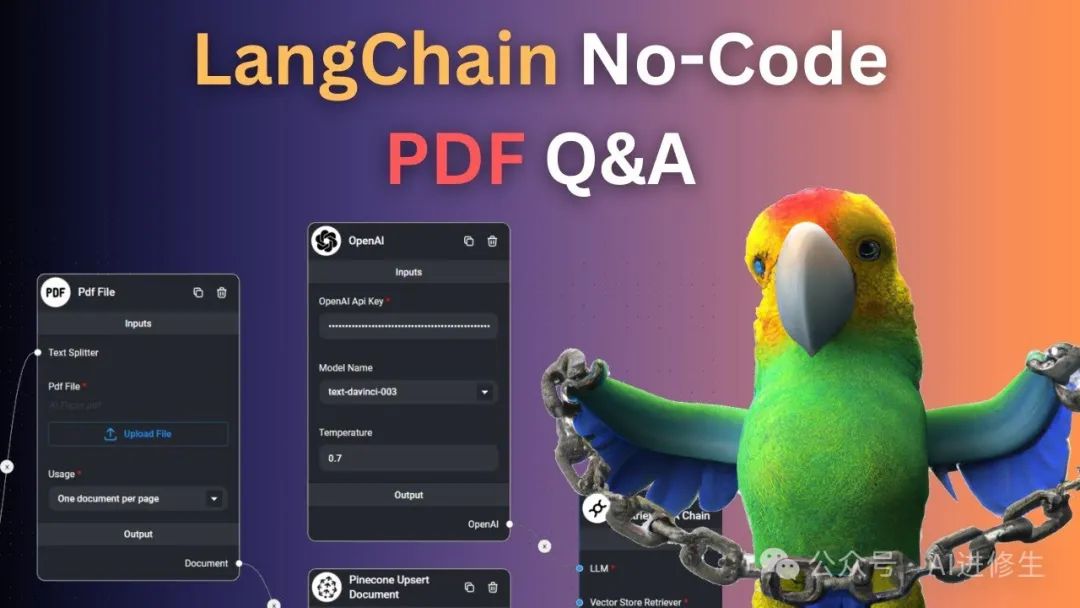
Example 2: Building a PDF Reader Bot
In a previous blog post, I demonstrated how to create a PDF Reader Bot using LangFlow. Now, let’s create the same bot using Flowise.
Add the following components to the blank canvas:
-
• Select “Recursive Character Text Splitter” from “Text Splitters”
-
• Select “PDF file” from “Document Loaders”
-
• Select “OpenAI Embeddings” from “Embeddings”
-
• Select “In-memory Vector Store” from “Vector Stores”
-
• Select “OpenAI” from “LLMs”
-
• Select “Conversational Retrieval QA Chain” from “Chains”
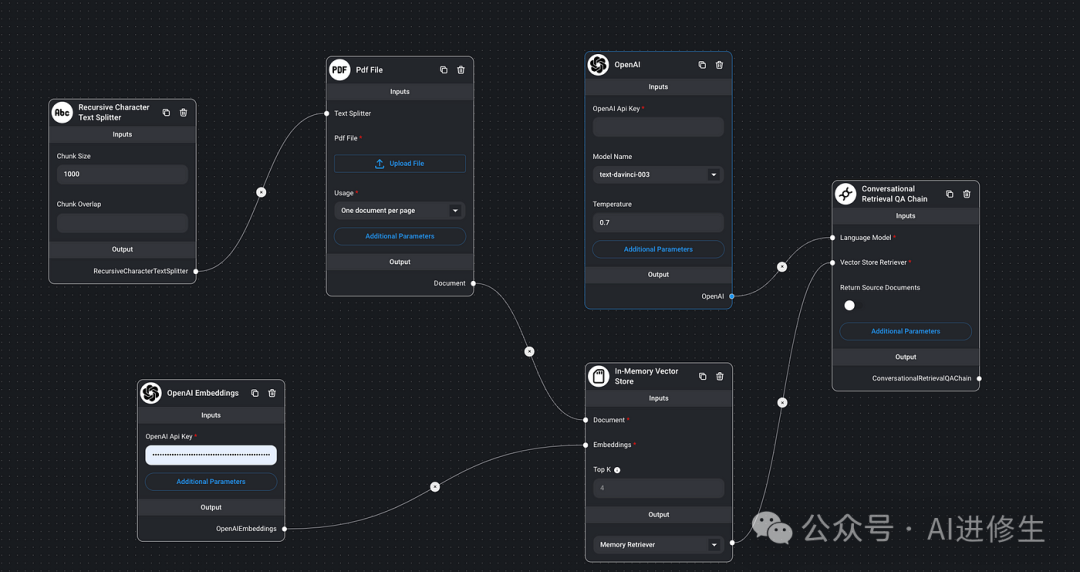
Now we have all the necessary components in the canvas.
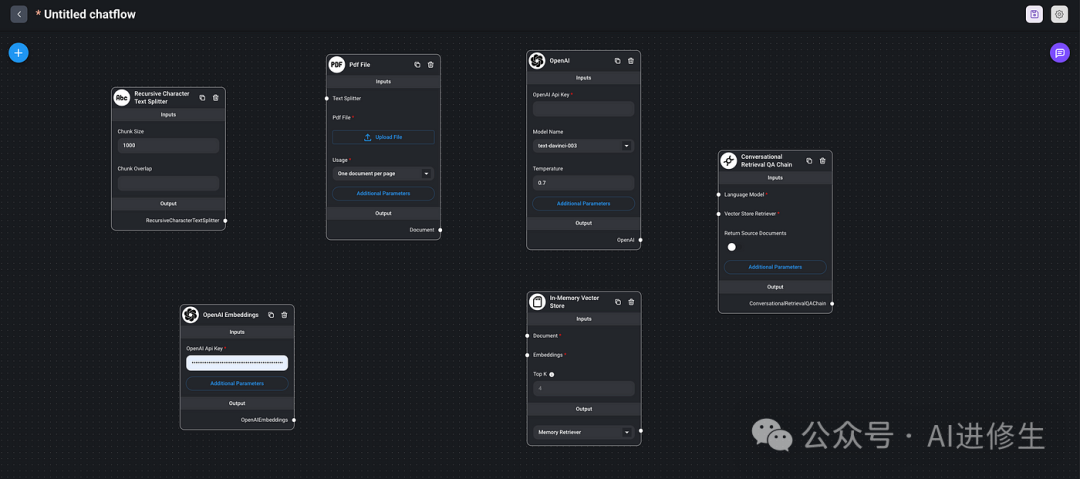
Connect the Components
-
1. Link the output of “Recursive Character Text Splitter” to the input of “PDF file”
-
2. Link the output of “PDF file” to the input of “In-memory Vector Store”
-
3. Link the output of “OpenAI Embeddings” to the input of “In-memory Vector Store”
-
4. Link the output of “In-memory Vector Store” to the input of “Conversational Retrieval QA Chain”
-
5. Link the output of “OpenAI” to the input of “Conversational Retrieval QA Chain”
Enter Necessary Information
-
1. Click “Upload File” in “PDF File” to upload a sample PDF file titled “Introduction to AWS Security.”
-
2. Input your OpenAI key in the fields for “OpenAI” and “OpenAI Embeddings”
-
3. Click the “save” button, then click the chat button to start sending requests.

⚡ Quick Start
Download and install NodeJS >= 18.15.0
-
1. Install Flowise
npm install -g flowise -
2. Start Flowise
npx flowise startWith username and password
npx flowise start --FLOWISE_USERNAME=user --FLOWISE_PASSWORD=1234 -
3. Open http://localhost:3000
🐳 Docker
Docker Compose
-
1. Navigate to the
dockerfolder in the project root directory -
2. Create a
.envfile and specify thePORT(refer to.env.example) -
3. Run
docker-compose up -d -
4. Open http://localhost:3000
-
5. You can stop the container with
docker-compose stop
Docker Image
-
1. Build the image locally:
docker build --no-cache -t flowise . -
2. Run the image:
docker run -d --name flowise -p 3000:3000 flowise -
3. Stop the image:
docker stop flowise
👨💻 Developer
Flowise has 3 different modules in a single codebase.
-
•
server: Node backend providing API logic -
•
ui: React frontend -
•
components: Third-party node integrations
Prerequisites
-
• Install PNPM
npm i -g pnpm
Setup
-
1. Clone the repository
git clone https://github.com/FlowiseAI/Flowise.git -
2. Navigate into the repository folder
cd Flowise -
3. Install dependencies for all modules:
pnpm install -
4. Build all code:
pnpm build -
5. Start the application:
pnpm startNow you can access the application at http://localhost:3000
-
6. For development builds: Any code changes will automatically reload the application, access http://localhost:8080
-
• Create a
.envfile inpackages/uiand specify theVITE_PORT(refer to.env.example) -
• Create a
.envfile inpackages/serverand specify thePORT(refer to.env.example) -
• Run
pnpm dev
🔒 Authentication
To enable application-level authentication, add FLOWISE_USERNAME and FLOWISE_PASSWORD in the .env file of packages/server:
FLOWISE_USERNAME=user
FLOWISE_PASSWORD=1234
🌱 Environment Variables
Flowise supports various environment variables to configure your instance. You can specify the following variables in the .env file in the packages/server folder. For more information, please read the documentation
📖 Documentation
[Flowise Documentation]:(https://docs.flowiseai.com/)
🌐 Self-Hosting
Deploy self-hosted Flowise in your existing infrastructure; we support various deployments
-
• AWS
-
• Azure
-
• Digital Ocean
-
• GCP
— The End —
Click here👇 to follow me, remember to star it~
One-click triple connection “Share”, “Like” and “View”
Daily updates on technological advancements ~
