
This article discusses how to use Traefik with Docker containers for stable deployment of Traefik services.
Introduction
It has been nearly four years since the release of Traefik v2.0.0[1]. Over the past four years, I have written extensively about practical content related to Traefik, which interested readers can explore here[2].
Last month, the official release of Traefik 3.0.0 beta 3[3] marked the second official merge of the new version’s code into the main branch, bringing us closer to the official use of version 3.0.
Compared to the version from a quarter ago, the current Traefik version changes should be nearing stability. To facilitate an easier switch to the new version later, it may be time to start trying out service migration.
Therefore, I am writing a detailed article on how to use Traefik with Docker to help those who are not yet familiar with it or those who are using it but not yet proficient.
Basic Container Configuration for Traefik with Docker
Before diving into detailed Traefik container configurations and optimizations, let’s first look at what the simplest container configuration looks like.
Minimal Traefik Docker Configuration
The most basic configuration is less than ten lines. We only need to declare the container image used by the Traefik service, the ports to expose, and the basic command-line parameters.
version: "3"
services:
traefik:
image: traefik:v3.0.0-beta3
ports:
- 8080:8080
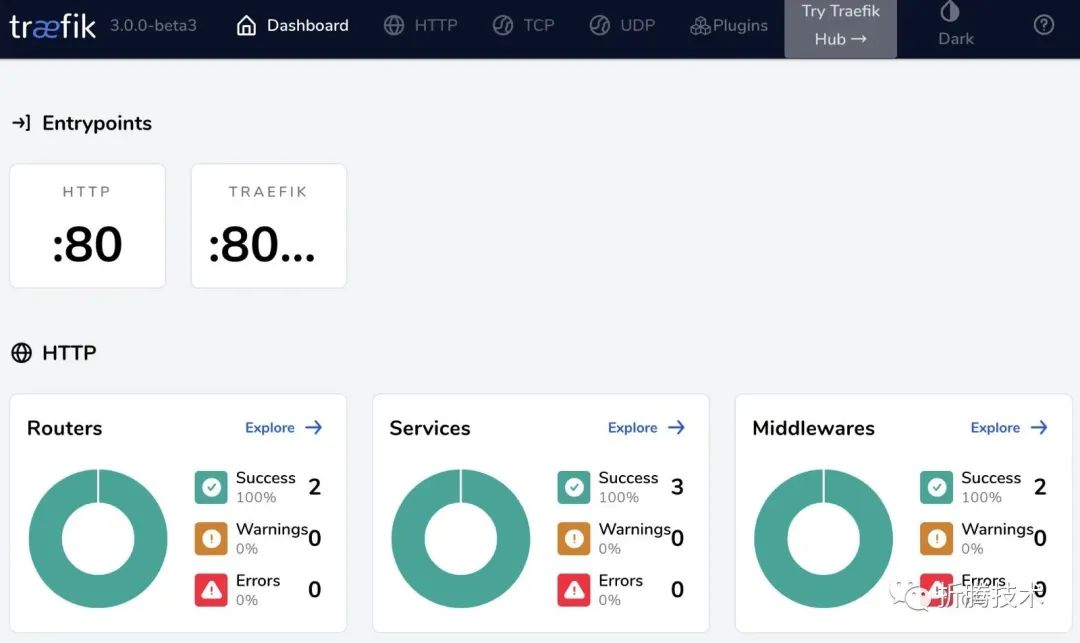
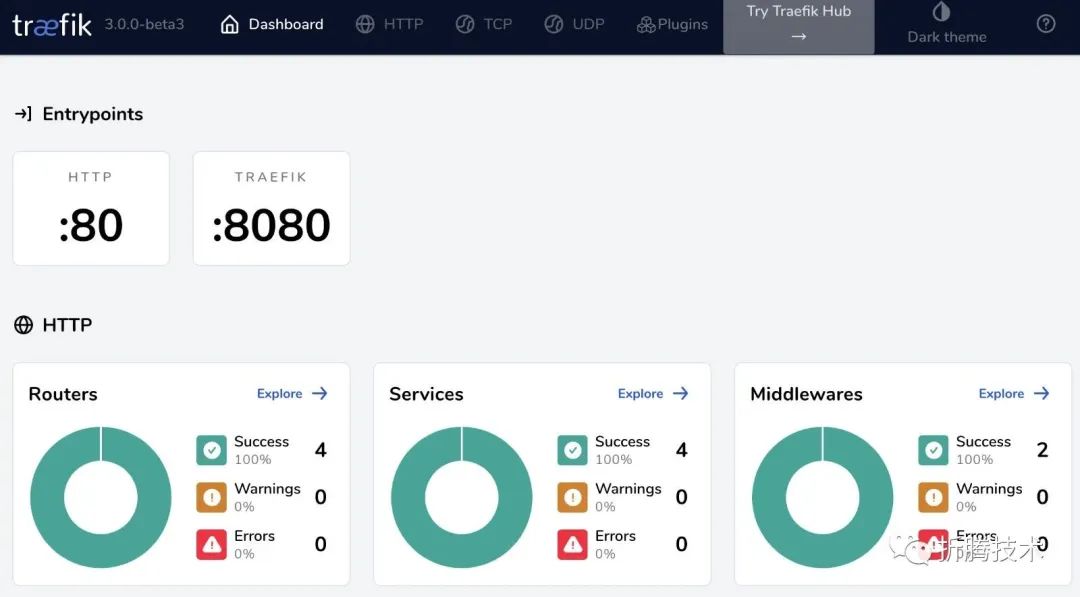
command: "--api=true --api.dashboard=true --api.insecure=true"After saving the above content as docker-compose.yml, we can start the Traefik container service using docker compose up. By opening the browser at localhost:8080/dashboard, we can see the Traefik Dashboard.
However, this container only allows us to view the Traefik Dashboard and the default internal services. It cannot provide magical features like service discovery or various advanced customizations and service observability.
Therefore, we need to continue with configuration extensions and adjustments.
Binding Service Domain Names with Traefik
Traefik excels at service discovery, allowing services that provide external network access capabilities (HTTP/TCP) to be accessed via domain names and specific URLs.
Assuming the Dashboard we accessed via localhost:8080/dashboard is a formal service with an official domain name and no “unofficial” port number, how do we set it up using Traefik?
For example, if we want to use the domain name traefik.console.lab.io to access the above service, we must first ensure that this domain points to the network IP address of the Traefik service. You can adjust this using DNS management tools (including various cloud service provider web control panels) or modify /etc/hosts if your Traefik service runs locally to fulfill the first prerequisite.
# Modify /etc/hosts

127.0.0.1 traefik.console.lab.io
Next, we will adjust the previous configuration:
version: "3"

services:
  traefik:
    image: traefik:v3.0.0-beta3
    ports:
      - 8080:8080
      - 80:80
    command: "--api=true --api.dashboard=true --api.insecure=true --entrypoints.http.address=:80 --providers.docker=true --providers.docker.endpoint=unix:///var/run/docker.sock"
    labels:
      - "traefik.http.routers.traefik-dashboard.entrypoints=http"
      - "traefik.http.routers.traefik-dashboard.rule=Host(`traefik.console.lab.io`)"
      - "traefik.http.routers.traefik-dashboard.service=dashboard@internal"
      - "traefik.http.routers.traefik-dashboard-api.entrypoints=http"
      - "traefik.http.routers.traefik-dashboard-api.rule=Host(`traefik.console.lab.io`) && PathPrefix(`/api`)"
      - "traefik.http.routers.traefik-dashboard-api.service=api@internal"
    volumes:
      - /var/run/docker.sock:/var/run/docker.sock:ro
Using the above content, update the previously saved docker-compose.yml file, and again use docker compose up to start the Traefik container service. In addition to being able to access the Dashboard at localhost:8080/dashboard, we can also access the service using the domain name traefik.console.lab.io.
In the above configuration, we first added the port 80:80 exposed by the container and added the parameter --entrypoints.http.address=:80 to the Traefik startup parameters to create a network entry point named http.
Next, we mapped the local docker.sock to the container’s sock file /var/run/docker.sock:/var/run/docker.sock:ro, allowing Traefik to subscribe to Docker service events to dynamically add or remove network services to expose to users. The startup parameters also include the corresponding content --providers.docker=true --providers.docker.endpoint=unix:///var/run/docker.sock.
Finally, by adding declarative routing in Docker Labels, we registered both the Dashboard web page (route name traefik-dashboard) and the API (route name traefik-dashboard-api) on the http network entry point, allowing users to access the services through the domain names we set.
Here, service=dashboard@internal and service=api@internal are internal service aliases of Traefik. In daily use, we can replace them with Service Name, Container Name, or specific IP:port in Docker Compose.
By following the above approach, we can achieve access to our network services via different domain names instead of port numbers, simply by creating different route names and address rules according to actual needs.
Reducing Exposed Ports
In the above configuration, we can access the same service through two methods.
In practical use, unless we need to debug, it is clearly better to access services only through the domain names provided by Traefik. Additionally, in this process, we can add various extra operations in our declared routes: add authentication, modify request headers, modify response content, perform redirects, limit traffic, and impose access restrictions, etc.
Therefore, we can adjust the previously exposed ports from the following:
ports:
  - 8080:8080
  - 80:80
to:
ports:
  - 80:80
Optimizing Traefik Command-Line Configuration
In the above configuration, the way we wrote the command-line parameters for Traefik is as follows:
command: "--api=true --api.dashboard=true --api.insecure=true --entrypoints.http.address=:80 --providers.docker=true --providers.docker.endpoint=unix:///var/run/docker.sock"In practical use, we will use more than twenty parameters. If we write them in the above manner, it will be a large chunk of text mixed together, which is not conducive to subsequent debugging and adjustments. However, we can use a small trick to improve this:
command:
  - "--api=true"
  - "--api.dashboard=true"
  - "--api.insecure=true"
  - "--entrypoints.http.address=:80"
  - "--providers.docker=true"
  - "--providers.docker.endpoint=unix:///var/run/docker.sock"
Adding Health Checks for Traefik Services
Like all other network services that aim for stable operation, we need to conduct regular health checks and restart the service when it is unhealthy to ensure service capability.
Traefik has a built-in service check interface. We can enable the /ping route by adding --ping=true in the command parameters.
Next, we add the following content in docker-compose.yml to allow Traefik to perform self-checks every 3 seconds. If it fails continuously for ten checks (30 seconds), it will inform Docker that the service status is abnormal:
healthcheck:
  test: ["CMD-SHELL", "wget -q --spider --proxy off localhost:8080/ping || exit 1"]
  interval: 3s
  retries: 10
To ensure the service can automatically restart when it encounters problems, we can add the following content to the configuration:
restart: alwaysThe complete configuration is as follows:
version: "3"

services:
  traefik:
    image: traefik:v3.0.0-beta3
    restart: always
    ports:
      - 80:80
    command:
      - "--api=true"
      - "--api.dashboard=true"
      - "--api.insecure=true"
      - "--ping=true"
      - "--entrypoints.http.address=:80"
      - "--providers.docker=true"
      - "--providers.docker.endpoint=unix:///var/run/docker.sock"
    labels:
      - "traefik.http.routers.traefik-dashboard.entrypoints=http"
      - "traefik.http.routers.traefik-dashboard.rule=Host(`traefik.console.lab.io`)"
      - "traefik.http.routers.traefik-dashboard.service=dashboard@internal"
      - "traefik.http.routers.traefik-dashboard-api.entrypoints=http"
      - "traefik.http.routers.traefik-dashboard-api.rule=Host(`traefik.console.lab.io`) && PathPrefix(`/api`)"
      - "traefik.http.routers.traefik-dashboard-api.service=api@internal"
    volumes:
      - /var/run/docker.sock:/var/run/docker.sock:ro
    healthcheck:
      test: ["CMD-SHELL", "wget -q --spider --proxy off localhost:8080/ping || exit 1"]
      interval: 3s
      retries: 10
After starting the service again with docker compose up, we can open a command line window and execute docker compose ps to see logs similar to the following:
NAME                            IMAGE                  COMMAND                  SERVICE             CREATED             STATUS                    PORTS
traefikconsolelabio-traefik-1   traefik:v3.0.0-beta3   "/entrypoint.sh --ap…"   traefik             18 seconds ago      Up 17 seconds (healthy)   0.0.0.0:80->80/tcp
The log entry (healthy) indicates that the service is running in a healthy state.
Of course, after adding the healthcheck declaration, if the service status is not healthy, Traefik will not register and expose the service to the outside (it will be inaccessible).
Therefore, if we register a service to Traefik and require it to provide external services using specific domain names and paths, but we cannot access the service, aside from typographical errors, the most likely reason is that the service health status is not “healthy”.
Using Traefik’s Built-in Middleware: Compressing Web Content
As mentioned earlier, we can “stack buffs” on the registered service routes. Now, let’s use Traefik’s built-in middleware capability to compress web content. We just need to add a line in the configuration to define a middleware named gzip:
labels:
  - "traefik.http.middlewares.gzip.compress=true"
After defining the middleware, we can add this service to the previously defined routes:
labels:
  - "traefik.http.routers.traefik-dashboard.middlewares=gzip@docker"
  - "traefik.http.routers.traefik-dashboard-api.middlewares=gzip@docker"
Since our gzip service is written in the Docker configuration file, for the sake of rigor, it is recommended to add the @docker suffix when calling the middleware to specify that the service should look for usable middleware defined in “Docker” (since we can also define middleware in files).

Upon accessing the service again, we can find that our page has been compressed, and the web access speed has improved.
Providing HTTPS Services with External Software
In the above configuration and experiments, we can access different network services using traditional HTTP methods. However, in many scenarios, whether due to data security needs or features like Server Push, we need to enable HTTPS.
To enable Traefik to provide HTTPS services, we essentially need to correctly mount HTTPS certificates on Traefik or other services in front of Traefik.
Before diving into HTTPS configuration, let’s discuss two simple, high-performance methods used in production environments.
Using Load Balancing Software from Cloud Service Providers
Let’s start with the simplest method.
Load balancing services from cloud providers like Alibaba Cloud and Tencent Cloud support mounting HTTPS certificates. We only need to set the upstream port to the 80 port of our Traefik server after mounting the HTTPS certificate.
Here, we do not need to use our own server to handle HTTPS handshake, certificate parsing, and other computations. All computational resources can be used for services, making it the most efficient.
Using Nginx with Existing Certificates to Provide HTTPS Access
Some users may have registered or purchased HTTPS certificates and then used them with Nginx. Similar to the method using cloud service providers, our Nginx acts as a “load balancing gateway.” We only need to “configure Nginx HTTPS certificates” and set the “Nginx reverse proxy address to the Traefik service address:80 port.”
Since Nginx does not support dynamic service registration like Traefik and has undergone extensive optimizations for web service scenarios using C, its performance is significantly higher than using Traefik alone. If our service access domain name is fixed, this method is an excellent performance optimization technique.
Using Traefik to Provide HTTPS Access Services
Next, let’s discuss how to let Traefik directly provide HTTPS services without relying on external software. Although performance may decrease somewhat, it has lower maintenance costs, more cohesive code configuration, and is easier to migrate and manage.
Creating HTTPS Service Interfaces for Traefik
To provide HTTPS services, creating Traefik HTTPS interfaces and preparing certificates are both essential. Let’s first look at how to create HTTPS service interfaces in Traefik.
Since the default HTTPS service port is 443, we can add the port for external access in the container configuration:
ports:
  - 443:443
In the above content, we defined port 80. By analogy, we can define a https port named 443:
command:
  - "--entrypoints.https.address=:443"
Then, we can add or modify the original service routes to use the entrypoints interface:
labels:
  - "traefik.http.routers.traefik-dashboard.entrypoints=http"
  - "traefik.http.routers.traefik-dashboard-api.entrypoints=http"
From http to https:
labels:
  - "traefik.http.routers.traefik-dashboard.entrypoints=https"
  - "traefik.http.routers.traefik-dashboard.tls=true"
  - "traefik.http.routers.traefik-dashboard-api.entrypoints=https"
  - "traefik.http.routers.traefik-dashboard-api.tls=true"
Of course, in addition to simply renaming, we also need to add an additional configuration declaration tls=true:
labels:
  - "traefik.http.routers.traefik-dashboard.entrypoints=https"
  - "traefik.http.routers.traefik-dashboard.tls=true"
  - "traefik.http.routers.traefik-dashboard-api.entrypoints=https"
  - "traefik.http.routers.traefik-dashboard-api.tls=true"
If we do not set tls=true, Traefik will not enable TLS to respond to content on our port. In other words, a network interface without this tag will respond with ordinary HTTP (for example, we can provide HTTP services on port 443).
Now that we understand how to adjust the configuration, let’s tackle the certificates to make HTTPS services more complete.
Using Traefik and DNS Services to Automatically Complete HTTPS Certificate Application and Services
Like most modern HTTP servers, Traefik also supports directly registering and using free certificates from Let’s Encrypt to provide HTTPS services.
In this section, we will only elaborate on how to use services that can modify domain records through Cloudflare. More information regarding other domain service providers should be covered in a separate article.
First, we add the following three environment variables to the configuration:
environment:
  - CF_API_EMAIL=${CF_DNS_EMAIL}
  - CLOUDFLARE_DNS_API_TOKEN=${CF_API_TOKEN}
  - CLOUDFLARE_ZONE_API_TOKEN=${CF_API_TOKEN}
CF_API_EMAIL is the email address of our Cloudflare account, while the other two *_API_TOKEN can be created from the Cloudflare control panel.
Next, we need to add commands to the Traefik command line to allow Traefik to request certificates from the specified domain DNS service provider, Cloudflare, and save the certificates in our desired directory. Here, do not forget to modify the email field.
command:
  - "--certificatesresolvers.le.acme.email=${CF_DNS_EMAIL}"
  - "--certificatesresolvers.le.acme.storage=/certs/acme.json"
  - "--certificatesresolvers.le.acme.dnsChallenge.resolvers=1.1.1.1:53,8.8.8.8:53"
  - "--certificatesresolvers.le.acme.dnsChallenge.provider=cloudflare"
  - "--certificatesresolvers.le.acme.dnsChallenge.delayBeforeCheck=30"
Finally, we configure the network routes for the services we want to provide HTTPS:
labels:
  - "traefik.http.routers.traefik-dashboard-secure.tls.certresolver=le"
  - "traefik.http.routers.traefik-dashboard-secure.tls.domains[0].main=${CF_DNS_MAIN}"
  - "traefik.http.routers.traefik-dashboard-secure.tls.domains[0].sans=${CF_DNS_LIST}"
The variable CF_DNS_MAIN should be replaced with the root domain (e.g., example.com) or subdomain (e.g., console.example.com) you want to apply for (which you own), while CF_DNS_LIST can be a string of domains like *.console.example.com,*.data.example.com,*.example.com. After updating the configuration, we can start the service with docker compose up. After a short wait, Traefik will automatically register the certificates for the domains listed, allowing us to access our services via those domain names.
To ensure Traefik remembers the certificates we spent time applying for, we need to persistently store the container files:
volumes:
  - ./certs/:/certs/:ro
After all the above operations, our Traefik can automatically apply for and use HTTPS certificates and will automatically renew them before they expire.
For the complete configuration file, you can refer to the configuration example submitted earlier on GitHub.[4]
Using Traefik with Existing Certificates to Provide Services
Whether purchasing or applying for HTTPS certificates through cloud service providers or using tools like Let’s Encrypt for certificate registration and storage, or generating self-signed certificates, we can obtain the certificate files needed to enhance service.
Here, we will use the simplest and most flexible method for the upcoming configuration explanation: self-signed certificates.
A few years ago, I wrote a simple 4MB-sized container tool: soulteary/certs-maker[5], which can quickly generate HTTPS certificates for any domain name. With some DNS settings, like those on a private DNS server or modifying /etc/hosts, we can allow Traefik to support HTTPS access for any service with any domain name. For example, you can provide a service with a page containing an apple, accessible via https://www.apple.com.
While using Docker command lines can seem more concise, for clarity and readability, we will create a docker-compose.certs.yml file to help us generate HTTPS certificates.
version: "2"
services:
  certs-maker:
    image: soulteary/certs-maker:v3.2.0
    environment:
      - CERT_DNS=lab.io,*.lab.io,*.console.lab.io
    volumes:
      - ./ssl:/ssl
By using docker compose -f docker-compose.certs.yml up, you will see newly generated certificate files and configurations in the command execution directory.
├── lab.io.conf
├── lab.io.crt
└── lab.io.key
To ensure our Traefik uses the certificates correctly and provides TLS transport capabilities supported by browsers, we need to first create a tls.toml configuration file:
[tls]
  [tls.options.default]
  minVersion = "VersionTLS12"
  sniStrict = true
  cipherSuites = [
    # TLS 1.3
    "TLS_AES_128_GCM_SHA256",
    "TLS_AES_256_GCM_SHA384",
    "TLS_CHACHA20_POLY1305_SHA256",
    # TLS 1.2
    "TLS_ECDHE_RSA_WITH_CHACHA20_POLY1305_SHA256",
    "TLS_ECDHE_RSA_WITH_AES_128_GCM_SHA256",
    "TLS_ECDHE_RSA_WITH_AES_256_GCM_SHA384"
  ]

  [tls.stores.default.defaultCertificate]
  certFile = "/certs/lab.io.crt"
  keyFile = "/certs/lab.io.key"

  [[tls.certificates]]
  certFile = "/certs/lab.com.crt"
  keyFile = "/certs/lab.com.key"

  [[tls.certificates]]
  certFile = "/certs/lab.io.crt"
  keyFile = "/certs/lab.io.key"
In the above configuration, we define the minimum version of the TLS service, as well as relatively secure algorithms for TLS versions 1.2 and 1.3, and set the certificate paths for Traefik. (You can refer to this example to add more certificates for different domains.)
Next, we adjust the file directory, placing the tls.toml configuration file in config/tls.toml, and moving the certificates generated in the ssl directory to the certs directory. If you want your device to access services like using paid certificates or public certificates, you need to trust the self-signed certificates in the system or browser (which is very simple, you can search for it :D).
Then, we will map the directory to the container environment:
volumes:
  - ./certs/:/certs/:ro
  - ./config/:/etc/traefik/config/:ro
And add parameters to the command to read configurations such as tls.toml from the directory:
command:
  - "--providers.file.directory=/etc/traefik/config"
As before, we adjust the previous route labels to include the entrypoints and add the tls=true configuration:
- "traefik.http.routers.traefik-dashboard.entrypoints=https"
- "traefik.http.routers.traefik-dashboard.tls=true"
We will adjust the configuration for providing HTTP services as follows, resulting in the complete configuration:
version: "3"

services:
  traefik:
    image: traefik:v3.0.0-beta3
    restart: always
    ports:
      - 443:443
    command:
      - "--api=true"
      - "--api.dashboard=true"
      - "--api.insecure=true"
      - "--ping=true"
      - "--entrypoints.https.address=:443"
      - "--providers.docker=true"
      - "--providers.docker.endpoint=unix:///var/run/docker.sock"
      - "--providers.file.directory=/etc/traefik/config"
    labels:
      - "traefik.http.middlewares.gzip.compress=true"
      - "traefik.http.routers.traefik-dashboard.middlewares=gzip@docker"
      - "traefik.http.routers.traefik-dashboard-api.middlewares=gzip@docker"
      - "traefik.http.routers.traefik-dashboard.entrypoints=https"
      - "traefik.http.routers.traefik-dashboard.tls=true"
      - "traefik.http.routers.traefik-dashboard.rule=Host(`traefik.console.lab.io`)"
      - "traefik.http.routers.traefik-dashboard.service=dashboard@internal"
      - "traefik.http.routers.traefik-dashboard-api.entrypoints=https"
      - "traefik.http.routers.traefik-dashboard-api.tls=true"
      - "traefik.http.routers.traefik-dashboard-api.rule=Host(`traefik.console.lab.io`) && PathPrefix(`/api`)"
      - "traefik.http.routers.traefik-dashboard-api.service=api@internal"
    volumes:
      - /var/run/docker.sock:/var/run/docker.sock:ro
      - ./ssl/:/certs/:ro
      - ./config/:/etc/traefik/config/:ro
    healthcheck:
      test: ["CMD-SHELL", "wget -q --spider --proxy off localhost:8080/ping || exit 1"]
      interval: 3s
      retries: 10
After starting the service with docker compose up, we can access the service at https://traefik.console.lab.io.

In the certificate information tab of the browser, we can see the detailed information of this self-signed certificate. If you want to customize the information, you can refer to the certs-maker[6] project documentation to adjust the parameters used to generate the certificate.
Providing Both HTTP and HTTPS Services
In the above article, we implemented several methods for providing HTTP and HTTPS services separately to simplify the code and reduce unnecessary understanding costs. Now, let’s combine the configurations to complete a comprehensive service configuration.
First, we define command and ports to allow Traefik to provide both 80 port HTTP services and 443 port HTTPS services.
ports:
  - 80:80
  - 443:443
command:
  - "--api=true"
  - "--api.dashboard=true"
  - "--api.insecure=true"
  - "--ping=true"
  - "--entrypoints.http.address=:80"
  - "--entrypoints.https.address=:443"
  - "--providers.docker=true"
  - "--providers.docker.endpoint=unix:///var/run/docker.sock"
The above configuration gives Traefik the basic ability to provide services, but it does not include service content. Next, we create route configurations that can provide service content:
labels:
  - "traefik.http.routers.traefik-dashboard.entrypoints=http"
  - "traefik.http.routers.traefik-dashboard.rule=Host(`traefik.console.lab.io`)"
  - "traefik.http.routers.traefik-dashboard.service=dashboard@internal"

  - "traefik.http.routers.traefik-dashboard-api.entrypoints=http"
  - "traefik.http.routers.traefik-dashboard-api.rule=Host(`traefik.console.lab.io`) && PathPrefix(`/api`)"
  - "traefik.http.routers.traefik-dashboard-api.service=api@internal"

  - "traefik.http.routers.traefik-dashboard-secure.entrypoints=https"
  - "traefik.http.routers.traefik-dashboard-secure.tls=true"
  - "traefik.http.routers.traefik-dashboard-secure.rule=Host(`traefik.console.lab.io`)"
  - "traefik.http.routers.traefik-dashboard-secure.service=dashboard@internal"

  - "traefik.http.routers.traefik-dashboard-api-secure.entrypoints=https"
  - "traefik.http.routers.traefik-dashboard-api-secure.tls=true"
  - "traefik.http.routers.traefik-dashboard-api-secure.rule=Host(`traefik.console.lab.io`) && PathPrefix(`/api`)"
  - "traefik.http.routers.traefik-dashboard-api-secure.service=api@internal"
Since we want to ensure that both the web service and API service can support HTTP and HTTPS, the content here may seem repetitive, but there are still differences in detail. First, the names of each route are different, and secondly, as mentioned earlier, the tls=true and entrypoints settings differ.
After restarting the service, we can access the service at both http://traefik.console.lab.io and https://traefik.console.lab.io.
Improving Service Access Experience with Middleware
In the above configuration, there is considerable redundancy. Although Traefik 1.x does not have any other options, we must do it this way. However, if our service only requires HTTPS access, when users access the HTTP protocol (by directly entering the domain in some browsers and hitting enter), this configuration can be significantly simplified.
First, we define a middleware rule that automatically switches the service protocol from HTTP to HTTPS:
- "traefik.http.middlewares.redir-https.redirectscheme.scheme=https"
- "traefik.http.middlewares.redir-https.redirectscheme.permanent=false"
Then, we add this middleware rule to the HTTP web service route:
- "traefik.http.routers.traefik-dashboard.middlewares=redir-https@docker"After restarting the service, when we access http://traefik.console.lab.io, we will automatically be redirected to https://traefik.console.lab.io.
Tips for Automatic Redirection from HTTP Protocol
In this example, our service provides both HTTP and HTTPS access, with separate routes for the web and API.
If users directly access HTTP, the browser will receive an HTTP 302 response, which will not provide service content and will not reach the HTTP protocol API route. Therefore, we can delete the HTTP API routes that need to be redirected to HTTPS from the web service:
labels:
  - "traefik.http.middlewares.redir-https.redirectscheme.scheme=https"
  - "traefik.http.middlewares.redir-https.redirectscheme.permanent=false"

  - "traefik.http.routers.traefik-dashboard.middlewares=redir-https@docker"

  - "traefik.http.routers.traefik-dashboard.entrypoints=http"
  - "traefik.http.routers.traefik-dashboard.rule=Host(`traefik.console.lab.io`)"
  - "traefik.http.routers.traefik-dashboard.service=noop@internal"

  - "traefik.http.routers.traefik-dashboard-secure.entrypoints=https"
  - "traefik.http.routers.traefik-dashboard-secure.tls=true"
  - "traefik.http.routers.traefik-dashboard-secure.rule=Host(`traefik.console.lab.io`)"
  - "traefik.http.routers.traefik-dashboard-secure.service=dashboard@internal"

  - "traefik.http.routers.traefik-dashboard-api-secure.entrypoints=https"
  - "traefik.http.routers.traefik-dashboard-api-secure.tls=true"
  - "traefik.http.routers.traefik-dashboard-api-secure.rule=Host(`traefik.console.lab.io`) && PathPrefix(`/api`)"
  - "traefik.http.routers.traefik-dashboard-api-secure.service=api@internal"
Since our web service does not call the underlying real program for computation, defining real services here may involve Traefik searching for and matching the real service network address. We can use Traefik’s internal “magic variable” to replace the real service with an empty service.
labels:
  - "traefik.http.routers.traefik-dashboard.entrypoints=http"
  - "traefik.http.routers.traefik-dashboard.rule=Host(`traefik.console.lab.io`)"
  - "traefik.http.routers.traefik-dashboard.service=noop@internal"
Advanced: Perfecting Traefik Configuration Details
After getting HTTP and HTTPS services working, let’s look at some advanced configuration optimization methods.
Explicitly Declare All Static Configuration Parameters
Many articles will use Traefik configuration files to manage service behavior and capabilities. Based on my personal experience and viewpoint, for static configurations, it is more reasonable to manage them using the parameterized method mentioned in this article:
1.Dynamic parameters are optional and do not affect core service capabilities.2.Dynamic parameters can be dispatched through files to update service behavior.3.Static parameters and service configurations can avoid writing static parameters in the configuration, ensuring consistency between configuration and service behavior before restarting the service.
For all static configuration files supported by Traefik version 3.0, you can refer to this online documentation for usage and adjustments[7].
Although many parameters default to false or “empty” values that don’t require us to set them, to avoid issues with Traefik version upgrades changing default behaviors and affecting our expected service behaviors, it is recommended to explicitly declare all relevant configurations used:
command:
  - "--global.sendanonymoususage=false"
  - "--global.checknewversion=false"
  - "--entrypoints.http.address=:80"
  - "--entrypoints.https.address=:443"
  - "--api=true"
  - "--api.insecure=true"
...
Creating a Dedicated Virtual Network for Traefik Service Discovery
By default, Traefik will use the network of the current Traefik application service for service discovery. Simply put, we must write all software that needs to provide public services in the same docker-compose.yml as the Traefik service and manage the services using the docker compose up command.
This model is “unscientific” for several reasons: it may affect overall services, such as mistakenly adjusting configurations that should not change, like those of Traefik; secondly, for services to take effect, they must always restart, which can cause temporary service interruptions; thirdly, having different service configuration codes written together makes the code lengthy and inconvenient for management and CI/CD integration.
To solve this problem, we can use a virtual network for Traefik. First, we create a virtual network named traefik for service discovery via the command line:
docker network create traefikThen, add the following field to the applications that require Traefik to provide service discovery, allowing applications to join the network:
networks:
  - traefik
Finally, at the end of the docker-compose.yml configuration, declare that this traefik network is an external independent network rather than a virtual network created within the scope of the current configuration file:
networks:
  traefik:
    external: true
Since Docker containers often have multiple virtual networks, we need to specify the network name to be used in the command:
command:
  - "--providers.docker.network=traefik"
To prevent Traefik from automatically resolving and attempting to expose all services in the Traefik network, we can add the following command to let Traefik only provide services for applications we declare in labels:
"--providers.docker.exposedbydefault=false"In the labels, our definition will look like this:
labels:
  - "traefik.enable=true"
There are also some small tricks, such as further filtering the services planned for discovery or adjusting the virtual network used for Traefik for each service. We will discuss these in future articles.
Adjusting Container Service Ports
In the previous article, we used a simplified mode to expose ports for simplicity. To allow Traefik to correctly retrieve the access client’s IP address in the container, we need to adjust the ports as follows:
ports:
  - target: 80
    published: 80
    protocol: tcp
    mode: host
  - target: 443
    published: 443
    protocol: tcp
    mode: host
Avoiding Traefik Data Reporting
To avoid Traefik from performing data reporting, we can achieve this by setting the following two command parameters:
command:
  - "--global.sendanonymoususage=false"
  - "--global.checknewversion=false"
If you are still concerned, you can set the following configurations to prevent the container from accessing the API addresses below:
extra_hosts:
  # https://github.com/traefik/traefik/blob/master/pkg/version/version.go#L64
      - "update.traefik.io:127.0.0.1"
  # https://github.com/containous/traefik/blob/master/pkg/collector/collector.go#L20
  - "collect.traefik.io:127.0.0.1"
  - "stats.g.doubleclick.net:127.0.0.1"
Preventing Container Service Log Size from Becoming Too Large
Similar to Traefik and other HTTP services, long-running services will accumulate a considerable amount of log content. Even if we turn off log file saving and only allow the service to print logs to stdout, Docker will save all output content completely.
To mitigate this issue, we can configure Docker’s Log parameters to automatically discard excessive log outputs after they exceed a certain size:
logging:
  driver: "json-file"
  options:
    max-size: "1m"
For example, in the above configuration, logs exceeding 1MB will be automatically discarded.
The Final Container Configuration File
Now, we can reasonably combine all the above content to derive the final configuration (related code has been uploaded to soulteary/Home-Network-Note/tree/master/example/traefik-v3.0.0[8]):
version: "3"

services:
  traefik:
    image: traefik:v3.0.0-beta3
    restart: always
    ports:
      - target: 80
        published: 80
        protocol: tcp
        mode: host
      - target: 443
        published: 443
        protocol: tcp
        mode: host
    command:
      - "--global.sendanonymoususage=false"
      - "--global.checknewversion=false"
      - "--api=true"
      - "--api.dashboard=true"
      - "--api.insecure=true"
      - "--api.debug=false"
      - "--ping=true"
      - "--log.level=INFO"
      - "--log.format=common"
      - "--accesslog=false"
      - "--entrypoints.http.address=:80"
      - "--entrypoints.https.address=:443"
      - "--providers.docker=true"
      - "--providers.docker.watch=true"
      - "--providers.docker.exposedbydefault=false"
      - "--providers.docker.endpoint=unix:///var/run/docker.sock"
      - "--providers.docker.useBindPortIP=false"
      - "--providers.docker.network=traefik"
      - "--providers.file=true"
      - "--providers.file.watch=true"
      - "--providers.file.directory=/etc/traefik/config"
      - "--providers.file.debugloggeneratedtemplate=true"
    networks:
      - traefik
    labels:
      - "traefik.enable=true"
      - "traefik.docker.network=traefik"

      - "traefik.http.middlewares.gzip.compress=true"
      - "traefik.http.middlewares.redir-https.redirectscheme.scheme=https"
      - "traefik.http.middlewares.redir-https.redirectscheme.permanent=false"

      - "traefik.http.routers.traefik-dashboard.middlewares=redir-https@docker"
      - "traefik.http.routers.traefik-dashboard-secure.middlewares=gzip@docker"
      - "traefik.http.routers.traefik-dashboard-api-secure.middlewares=gzip@docker"

      - "traefik.http.routers.traefik-dashboard.entrypoints=http"
      - "traefik.http.routers.traefik-dashboard.rule=Host(`traefik.console.lab.io`)"
      - "traefik.http.routers.traefik-dashboard.service=noop@internal"

      - "traefik.http.routers.traefik-dashboard-secure.entrypoints=https"
      - "traefik.http.routers.traefik-dashboard-secure.tls=true"
      - "traefik.http.routers.traefik-dashboard-secure.rule=Host(`traefik.console.lab.io`)"
      - "traefik.http.routers.traefik-dashboard-secure.service=dashboard@internal"

      - "traefik.http.routers.traefik-dashboard-api-secure.entrypoints=https"
      - "traefik.http.routers.traefik-dashboard-api-secure.tls=true"
      - "traefik.http.routers.traefik-dashboard-api-secure.rule=Host(`traefik.console.lab.io`) && PathPrefix(`/api`)"
      - "traefik.http.routers.traefik-dashboard-api-secure.service=api@internal"
    volumes:
      - /var/run/docker.sock:/var/run/docker.sock:ro
      - ./certs/:/certs/:ro
      - ./config/:/etc/traefik/config/:ro
    healthcheck:
      test: ["CMD-SHELL", "wget -q --spider --proxy off localhost:8080/ping || exit 1"]
      interval: 3s
      retries: 10
    logging:
      driver: "json-file"
      options:
        max-size: "1m"

networks:
  traefik:
    external: true
Conclusion
This article will conclude here. Unexpectedly, it should be the simplest and most detailed tutorial on Traefik you can find online.
In the upcoming series, I plan to gradually share some small experiences I have had using Traefik over the past few years, including service authentication, user login, automatic scaling, service monitoring, and more.
–EOF
Reference Links
[1] Release of Traefik v2.0.0: https://github.com/traefik/traefik/releases/tag/v2.0.0[2] Explore here: https://soulteary.com/tags/traefik.html[3] Release of Traefik 3.0.0 beta 3: https://github.com/traefik/traefik/releases/tag/v3.0.0-beta3[4] Configuration example: https://github.com/soulteary/Home-Network-Note/blob/2191fdeeab261722638bb2e324be6cb24fc8ed36/minimal/console/traefik/docker-compose.yml[5] soulteary/certs-maker: https://github.com/soulteary/certs-maker[6] certs-maker: https://github.com/soulteary/certs-maker[7] Online documentation for usage and adjustments: https://doc.traefik.io/traefik/v3.0/reference/static-configuration/cli/[8] soulteary/Home-Network-Note/tree/master/example/traefik-v3.0.0: https://github.com/soulteary/Home-Network-Note/tree/master/example/traefik-v3.0.0[9] Some suggestions and views on “friendship”: https://zhuanlan.zhihu.com/p/557928933[10] Su Yang: Thoughts on joining groups: https://zhuanlan.zhihu.com/p/56159997
If you find the content useful, feel free to like and share it with your friends. Thank you in advance.
If you want to see updates on subsequent content faster, please hit “like,” “share,” “favorite”. These free encouragements will influence the update speed of future content.
This article is licensed under the “Attribution 4.0 International (CC BY 4.0)” license. You are welcome to reproduce or modify it, but you need to indicate the source. Attribution 4.0 International (CC BY 4.0)
Author: Su Yang
Creation Date: July 18, 2023 Word Count: 22551 words Reading Time: 46 minutes Link to this article: https://soulteary.com/2023/07/18/traefik-v3-docker-comprehensive-user-guide-basics.html