Introduction to AI
AI stands for Adobe Illustrator, a software primarily used for print publishing, poster and book layout, professional illustration, multimedia image processing, and web page creation. It provides rich pixel drawing capabilities and smooth, flexible vector graphics editing features.
Before learning the AI software, we need to understand the advantages of vector graphics:
1. Small file size;
2. Editable image elements;
3. Image scaling does not affect resolution;
4. Image resolution is independent of output devices;
5. Lines are very smooth and of uniform thickness;
6. Color edges are very smooth.
Once we understand this, let’s look at the basic applications of AI, keyboard shortcuts, and file exporting.
Introduction to the AI Interface
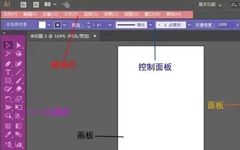
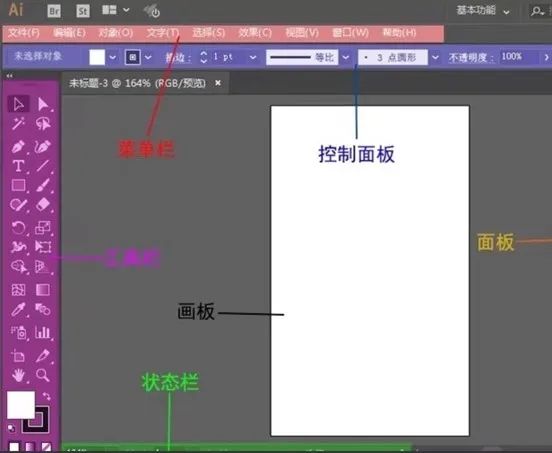
When we open the AI software, we can see that its interface is mainly divided into six parts: menu bar, toolbar, status bar, artboard, control panel, and panels.
Overview of the Toolbar and Simple Applications
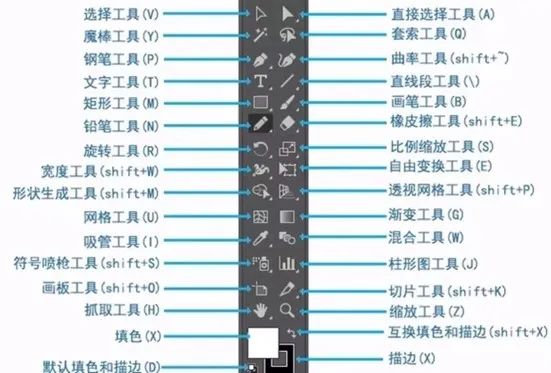
Here, I will introduce a few commonly used tools:
1
Select Tool
When the mouse hovers over an object, a blue outline appears around it. Clicking on the selected object will show a control box, indicating that the object is selected and can be modified. To select multiple objects, you can drag to select or hold down the [shift] key while clicking to select multiple objects.
2
Direct Selection Tool
This tool allows you to select individual anchor points and paths. Hovering over the shape will show the anchor points and paths, and you can click and drag to change the shape of the object.
3
Magic Wand Tool
This tool selects objects based on multiple criteria, requiring all criteria to be met for selection, based on fill color or stroke.
4
Lasso Tool
This tool selects anchor points in the drawn area.
5
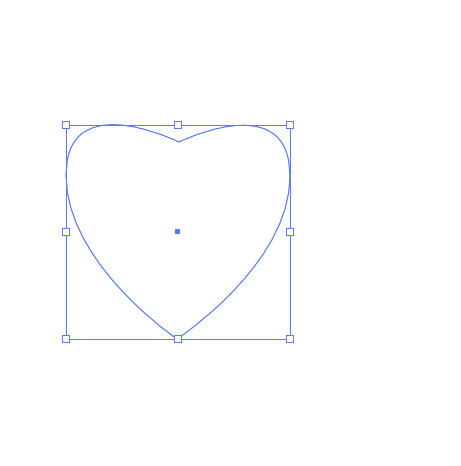
Pen Tool
This tool is used to draw shapes with anchor points, allowing for various degrees of curvature.

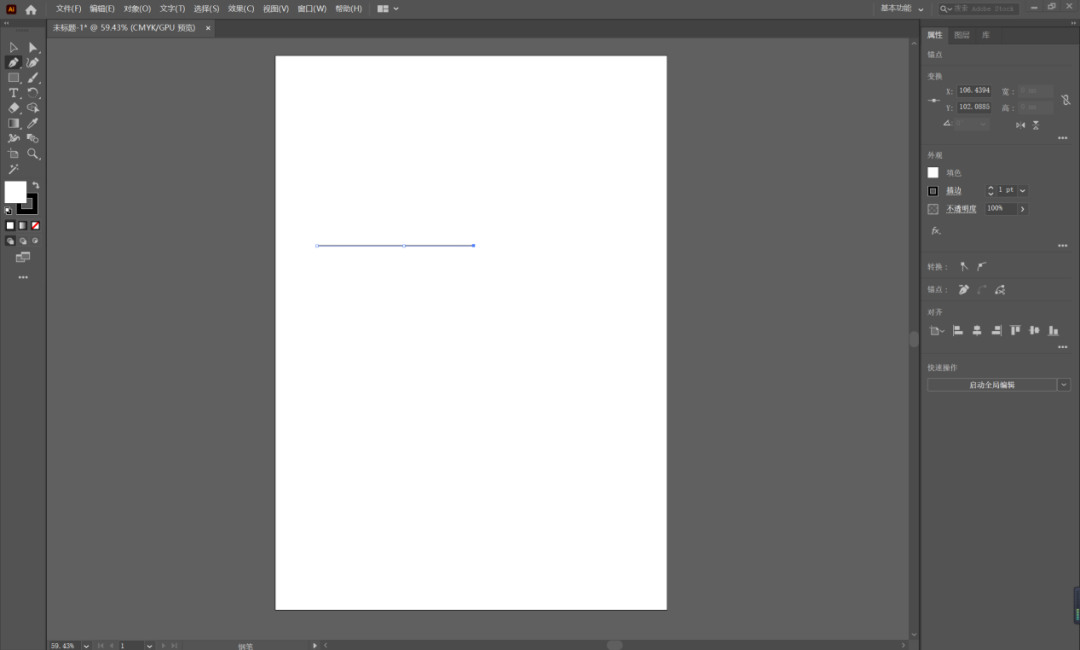
① Drawing Straight Lines
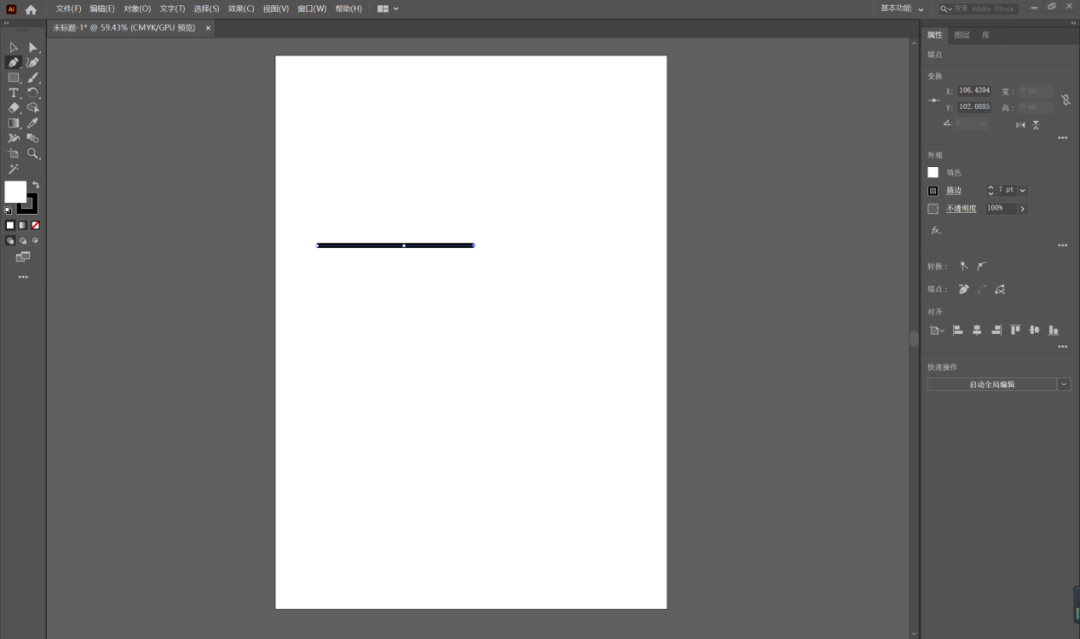
Click the pen tool icon in the toolbar and click on the artboard to create the first anchor point (do not drag). Click again at the end of the line to create a straight path. Continue clicking to draw straight lines, creating a new anchor point with each click. The last added anchor point is always displayed as a solid square, indicating it is selected.
If you need to fill the drawn line, you can find the “Stroke” option in the right panel to change its value and color for filling.
a. Click the first anchor point with the pen tool (when the pen tool is close to the first anchor point, a small circle will appear at the bottom right of the pen tool), to close the path and finish drawing;
b. To keep the path open, hold down the Ctrl / Command key and click anywhere outside of all objects or select another tool to finish drawing; pressing Enter / Return will also keep the path open.

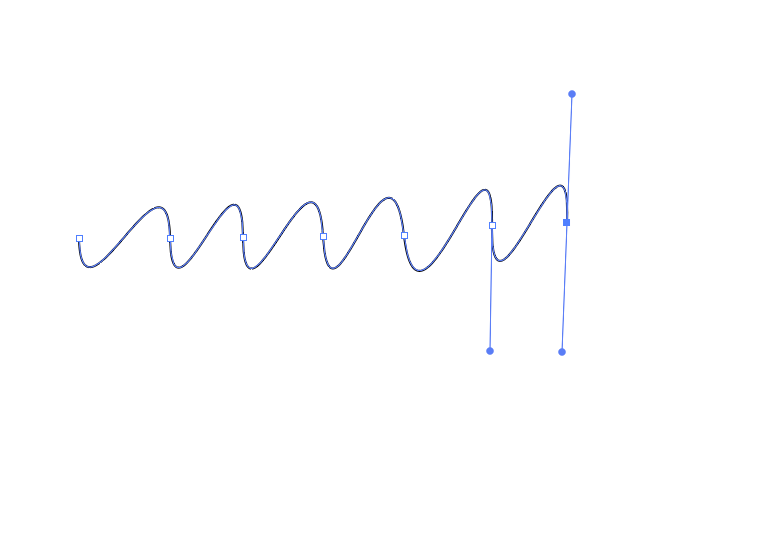
② Drawing C-shaped Curves
Select the pen tool, click and drag the mouse to create direction lines, which determine the slope and length of the curve.

At the end of the desired curve segment, click again and drag the mouse. If the drag direction of the mouse is consistent with the first anchor point, an “S” curve will be created; if the drag direction is opposite, a “C” curve will be created.
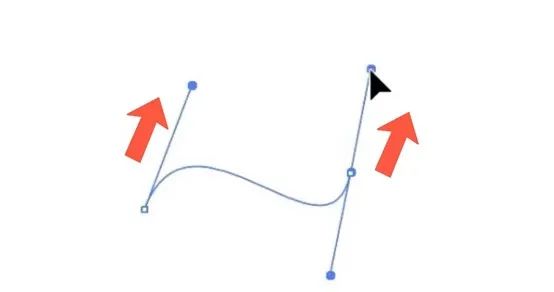
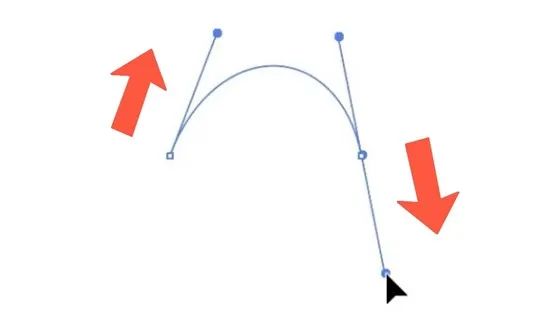
Click and drag the mouse to continue drawing curve segments; the anchor points should be placed at the beginning and end of each curve, not at the curve’s vertex.

6
Filling Color
Select the object to open the fill panel.

Using the select tool, select the area to fill with color, and click on the fill panel in the properties bar. In the pop-up box, choose a color based on your actual needs.
7
Rectangle Tool
This tool is used to draw rectangles and squares. You can also click the arrow at the bottom right to enter the submenu, which contains more tools you may need.


8
Text Tool
This tool allows you to input text in the artboard area, and you can change the font color and other attributes in the panel area.
9
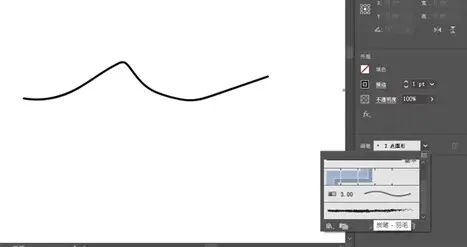
Brush Tool
This tool allows you to freely draw lines with a mouse or graphics tablet, and you can adjust the stroke style in the panel.
AI Keyboard Shortcuts
1
Toolbar
Temporary Hand Tool: Space
Default Foreground and Background Color: D
Zoom Tool: Z
View Pan, Page, Size Tool: H
Color Sampler: I
Gradient Fill Tool: G
Free Transform Tool: E
Move Tool: V
2
File Operations
New Graphic File: Ctrl+N
Open Existing Image: Ctrl+O
Close Current Image: Ctrl+W
Save Current Image: Ctrl+S
Save As: Ctrl+Shift+S
Save a Copy: Ctrl+Alt+S
3
Edit Operations
Undo Previous Operation: Ctrl+Z
Redo Operation: Ctrl+Shift+Z
Delete Selected Object: Delete
Select All Objects: Ctrl+A
4
Text Processing
Left or Top Align Text:
Ctrl+Shift+L
Center Align Text:
Ctrl+Shift+C
Right or Bottom Align Text:
Ctrl+Shift+R
Justify Text:
Ctrl+Shift+J
5
View Operations
Display Image in Outline Mode:
Ctrl+Y
Generate Preview for Selected Object:
Ctrl+Shift+Y
Zoom In:
Ctrl+
Zoom Out:
Ctrl-
Zoom to Page Size:
Ctrl+0
Show or Hide Ruler:
Ctrl+R
Show or Hide Guides:
Ctrl+;
Lock or Unlock Guides:
Ctrl+Alt+;
Convert Selected Object to Guide:
Ctrl+5
Restore Object Converted to Guide:
Ctrl+Alt+5
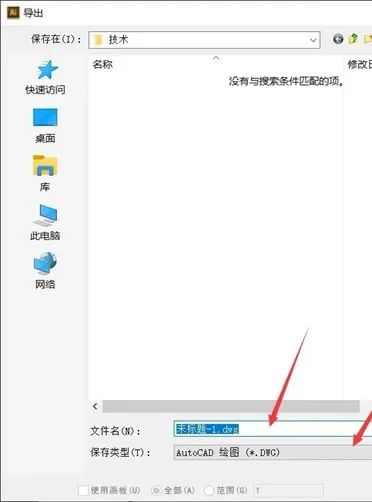
AI File Export Methods
1. Click “File”.
2. Click “Export” in the dropdown menu.
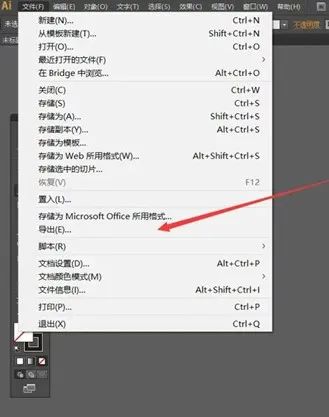
3. Name the exported file and choose the storage format, then click save.
This issue is edited by: He Weisen
Image and text source: Feng Zirui
Editors: Wang Jinyue, He Weisen, Song Wanqi