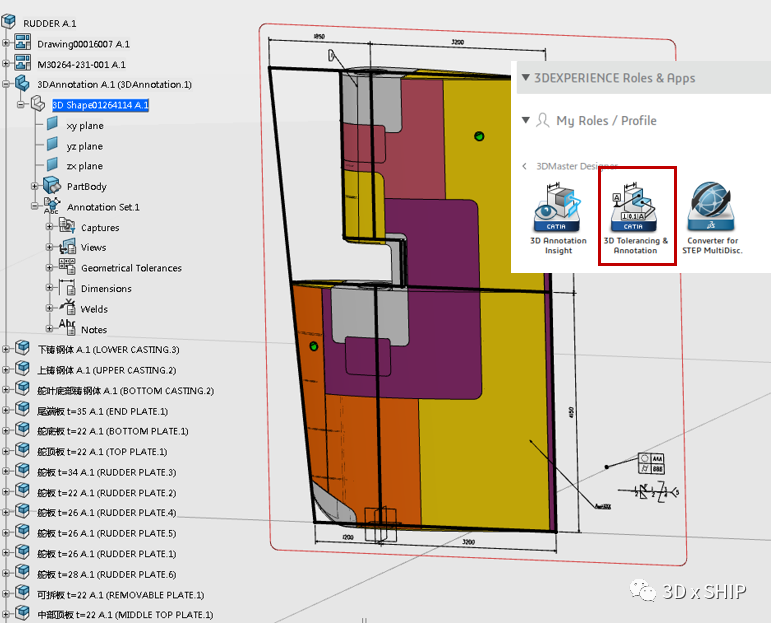
As shown in the figure below, when you have the M3D (3D Master Designer) role package, first activate 3dshape, then switch to the 3D Tolerancing & Annotation module. Users can then add 3D annotations to the model.
The generated annotation objects will be stored in a specific annotation set collection.
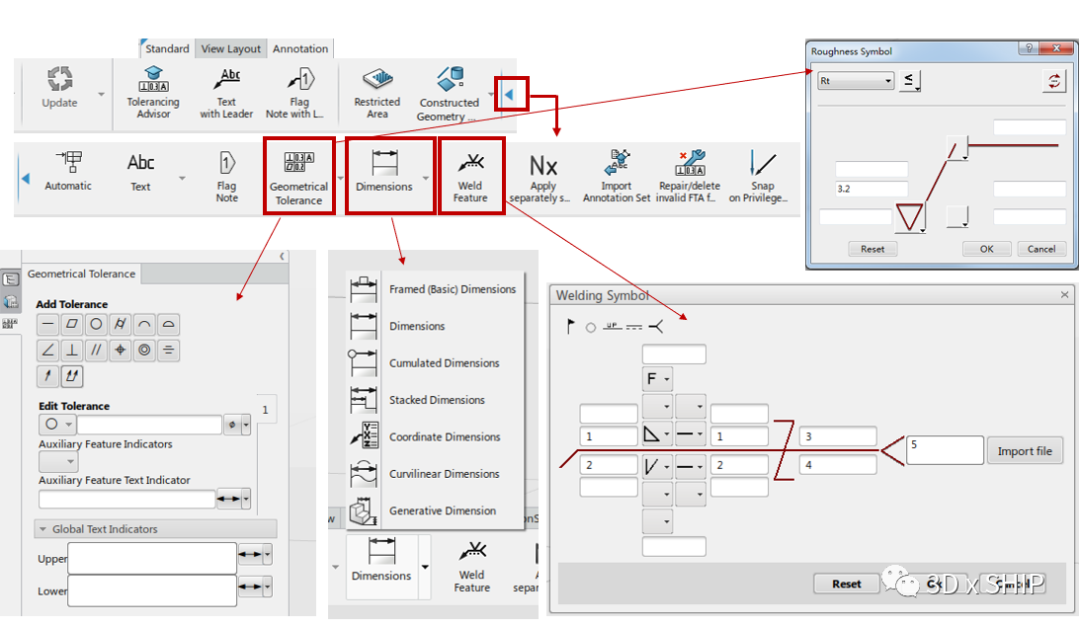
Click the expansion arrow in the toolbar to access a wide range of annotation template tools, which basically support most forms of annotations (roughness, welding, dimensions, tolerances). Additionally, as shown in the figure above, 3D annotations can be uniformly created in a separate part, making it easier to manage their visibility after export.
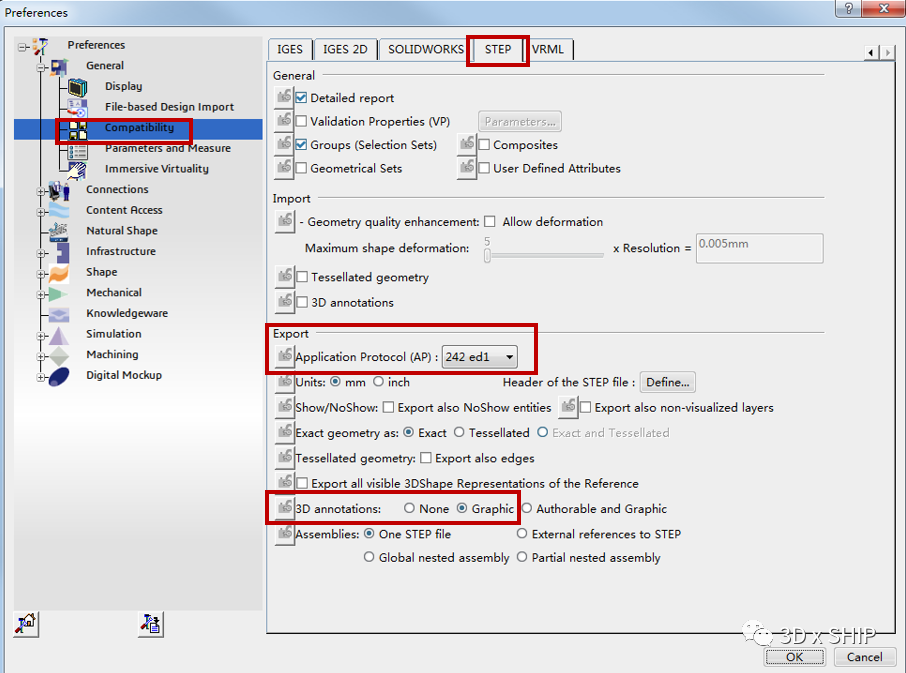
Before officially exporting, be sure to set the preferences as shown in the image below. In the AP options, select 242.
It is important to note that the 242 standard will only appear in the AP drop-down menu if you have the M3D role package. Other standards do not currently support the output of 3D annotations.
Additionally, note that by default, the preferences do not export 3D annotations. You should adjust it to graphic in the 3D annotation section.
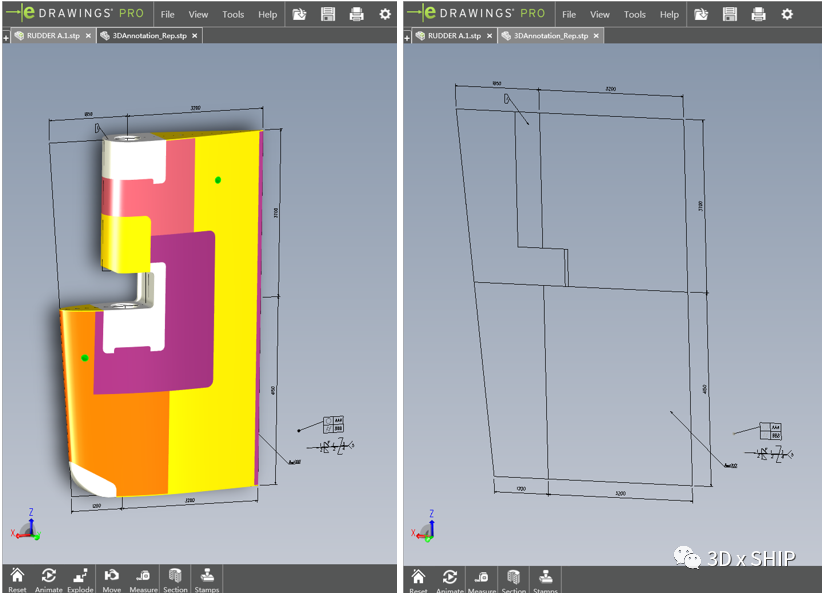
After exporting the model as STEP, use the model viewer to check the model. (The image below uses eDrawings, Dassault’s official model viewer, for reference.)
The display effect is as follows: