Compiled by Li Lin, Produced by QbitAI | WeChat Official Account QbitAI
From the various image recognition software we have seen, machines seem to recognize faces, cats, dogs, flowers, various cars, and other objects that appear in daily life. However, there is a prerequisite: you need to train the system with images of these categories.
To be precise, it should be called “image classification.”
Building an image classifier is not complicated. A recent article on the technical blog Source Dexter explains how to quickly implement image classification using TensorFlow.
Here are excerpts from this article as presented by QbitAI:
Before diving into the main topic, let’s discuss some basic concepts.
How is Image Classification Achieved?
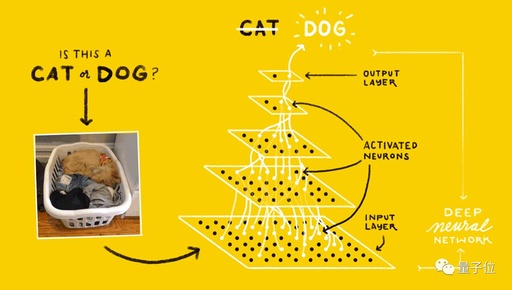
When an image is input into a trained system, we get a set of probability values: each trained category has one, and then the system assigns the image to the category with the highest probability.
For example, if you trained a system to recognize cats and dogs, when you input an image, the system will output the probability that the image is a cat and the probability that it is a dog.
However, this type of classifier has a flaw: if you input an image of a snake, it can only determine whether the image has a higher probability of being a cat or a dog.
Neural Networks and Deep Neural Networks
In summary, a neural network is a connection of computational units that can learn from a set of data provided to it.
By stacking multiple layers of neural networks together, we obtain a deep neural network. The process of building, training, and running deep neural networks is called deep learning.
QbitAI previously published an article detailing the “25 Fundamental Concepts of Deep Learning“, which you can click to view.
TensorFlow
TensorFlow is a mathematical library and the most widely used open-source framework in the field of deep learning, developed by Google.
In this article, we will set up our classifier using TensorFlow’s pre-trained model.
To set up this classifier, there are a few prerequisites:
-
You have installed and set up TensorFlow on your machine;
-
You know how to use Python.
Training a deep learning classifier from scratch can take weeks or even months, depending on the hardware you use. To avoid this hassle, we will use a pre-trained model. TensorFlow’s pre-trained models can typically recognize about 1000 different categories of objects.
Next, let’s start setting up our image classifier:
Step 1: Download Pre-trained Models, Computation Graphs, and Scripts
Clone this repository and enter it with the following commands:
git clone https://github.com/akshaypai/tfClassifier

cd tfClassifier
Step 2: Run the Script to Find the Best Predictions
You can provide an image to classify by running this script. By default, it will display the highest probability result.
python classifier.py --image_file file_path_to_imageIf you want to get the top few classification results, you can use the following parameter.
python classifier.py --image_file file_path_to_image --num_top_predictions number_of_top_resultsExample: Below is the result we obtained after inputting an image of a pomegranate.
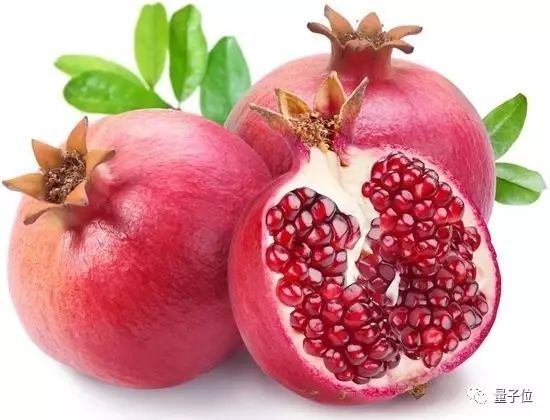
python classifier.py --image_file ~/Pictures/fruit.jpg

pomegranate (score = 0.98216)
The classifier says that this image is a pomegranate with a probability of 98%.
Step 3: Run the Script to Get the Top n Recognized Classes
Now let’s try to provide an image with more attributes, such as the image of the house below:
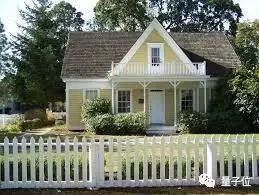
python classifier.py --image_file ~/Pictures/house.jpg --num_top_predictions 5
picket fence, paling (score = 0.95750)

worm fence, snake fence, snake-rail fence, Virginia fence (score = 0.03615)

beacon, lighthouse, beacon light, pharos (score = 0.00018)

boathouse (score = 0.00013)

patio, terrace (score = 0.00007)
From the above results, the classifier believes that the image contains a fence with a probability of 95%, and it may also contain another type of fence, a patio/terrace, etc.
Image classification using TensorFlow’s pre-trained models is that simple. However, the classes that the pre-trained models can recognize are limited. If you want the classifier to distinguish categories that you need, you will need to retrain the model.
Next, we will introduce how to retrain the model.
Step 1: Set Up the Image Folder
This step involves setting up the folder structure so that TensorFlow can easily access these categories. For example, if you want to train a neural network to recognize five types of flowers: roses, tulips, dandelions, cocoa flowers, and marigolds.
When creating the folder structure:
Create a folder for each type of flower, naming the folder after the category (in our example, the name of the flower);
Add images of the flowers to their respective folders. For example, put all images of roses in the “roses” folder.
Add all folders to another parent folder, such as “flowers”.
Once completed, you will see a folder structure like this:
~/flowers

~/flowers/roses/img1.jpg

~/flowers/roses/img2.jpg

...

~/flowers/tulips/tulips_img1.jpg

~/flowers/tulips/tulips_img2.jpg

~/flowers/tulips/tulips_img3.jpg

...
With all folders set up this way, the folder structure is ready.
Step 2: Run the Retraining Script
Run the script with the following command:
python retrain.py --model_dir ./inception --image_dir ~/flowers --output_graph ./output --how_many_training_steps 500Command line parameters:
-model_dir: This parameter gives the location of the pre-trained model. The pre-trained model is stored in the inception folder of the git repository.
-image_dir: The path to the image folder created in the previous step.
-output_graph: The location to store the newly trained graph.
-how_many_training_steps: Training steps represent the number of iterations to perform, with the default being 4000. Finding the right number requires trial and error; once you find the best settings, you can start using it.
The following parameters can be used to improve the model’s accuracy:
random_crop: Random cropping allows you to focus on the main parts of the image.
random_scale: Similar to cropping but can randomly scale the image size.
flip_left_right: Flipping.
That’s all for the steps needed to retrain a deep learning model so that it can recognize custom objects.
[End]
Recruitment
We are recruiting editors, reporters, operations, and other positions, located in Zhongguancun, Beijing. We look forward to your arrival to experience the surge of artificial intelligence together.
For related details, please reply with the word “recruitment” in the WeChat official account dialog interface.
One More Thing…
What else in the AI field is worth paying attention to today? Reply “today” in the QbitAI WeChat official account conversation interface to see the AI industry and research dynamics we have collected from across the internet. Thank you~
Additionally, feel free to add the QbitAI assistant on WeChat: qbitbot. If you are researching or working in the AI field, the assistant will add you to the QbitAI group.

△ Scan to forcibly follow ‘QbitAI’
Track the most exciting content in the field of artificial intelligence