Feature Introduction
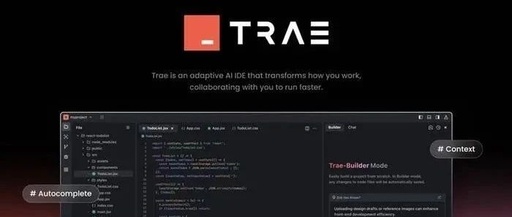
Trae is Byte’s newly launched AI IDE, based on the open-source code of VSCode, integrating two large models: Claude-3.5-Sonnet and GPT-4o, competing with Cursor and Windsurf.
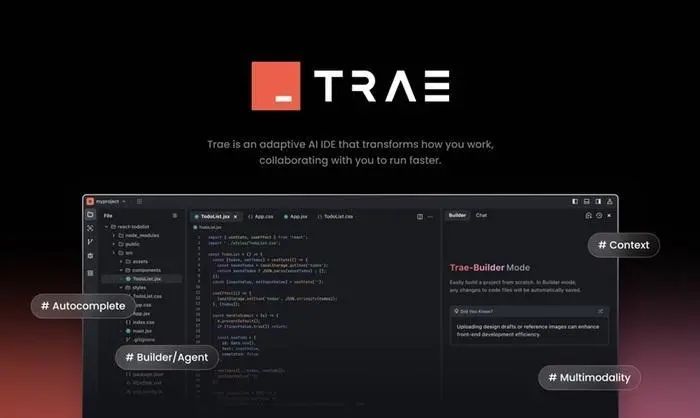
Trae supports basic functionalities such as AI Q&A, code auto-completion, AI programming based on agents, project management, and version control, while also providing AI programming capabilities through Claude 3.5 Sonnet and GPT-4o.
-
AI Q&A: Chat with AI anytime to explain code, fix errors, and generate comments. -
Real-time Code Suggestions: AI understands the code and provides completion and optimization suggestions in real time. -
Code Snippet Generation: Describe requirements in natural language, and AI automatically generates code. -
Project Development from 0 to 1: Describe project ideas, and AI automatically creates project structure and related files.
Startup Method
Install and Start Trae: Currently supports direct installation for Mac, while Windows users need to fill out an email application to join the waiting list. Download link: https://www.trae.ai/ (Note: Trae will enter beta testing on January 20, 2025, and is currently free to use, but requires a proxy.)
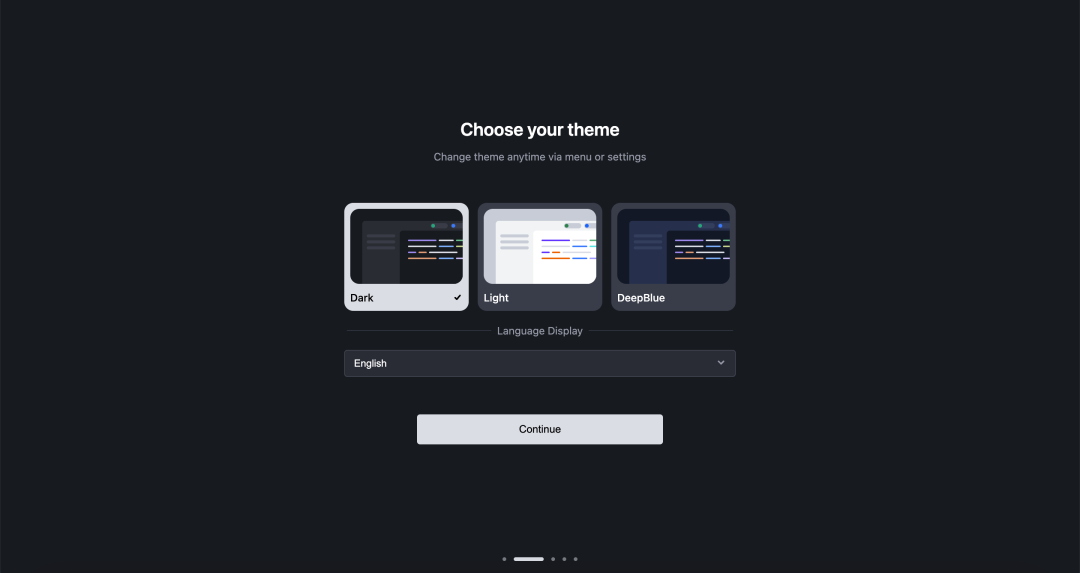
Select Theme and Language: Choose a theme from Dark, Light, DeepBlue, and select a language from English or Simplified Chinese, with English as the default. This can be changed later in the settings center, then click “Continue”.
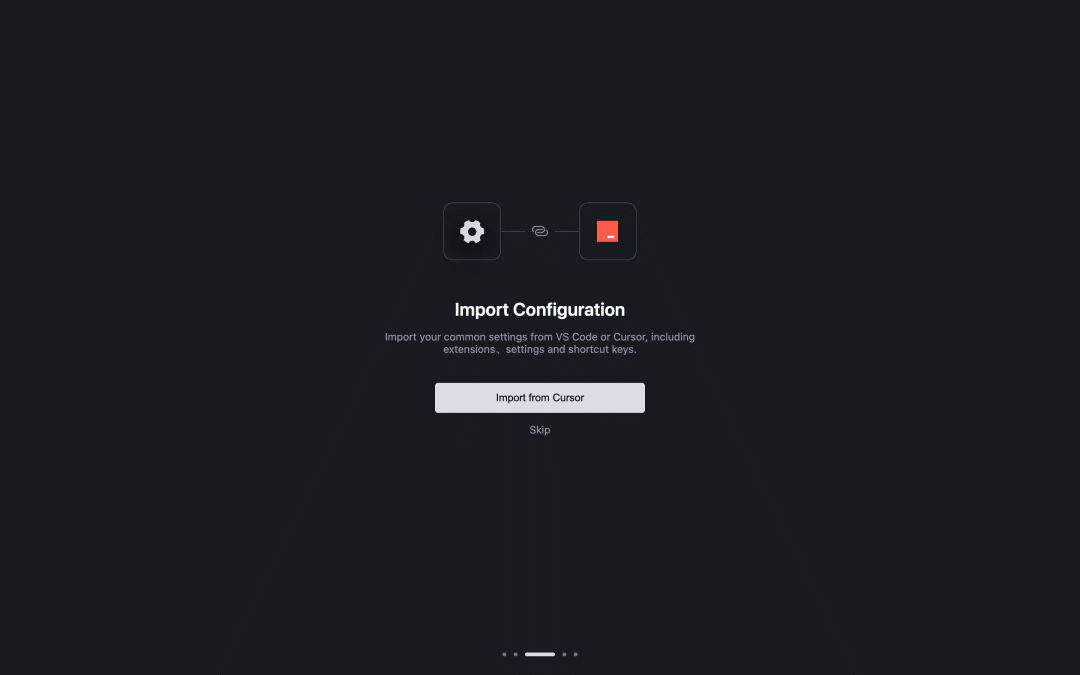
Import Configuration: If VS Code or Cursor is already set up on the PC, you can click the corresponding import button to import its extensions, settings, and shortcut key bindings into Trae.
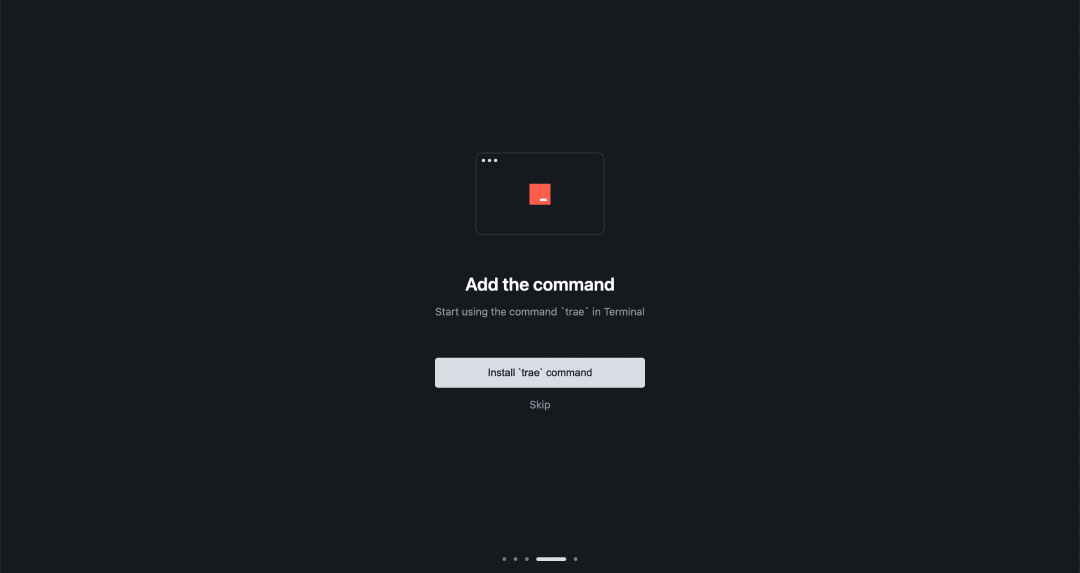
Install Trae Command: Adding Trae-related commands allows for quick task execution in the terminal, such as starting with trae or opening projects with trae my – react – app. Click the “Install ‘trae’ command” button, follow the prompts, enter the Mac login password, and Trae will request permission to install shell commands.
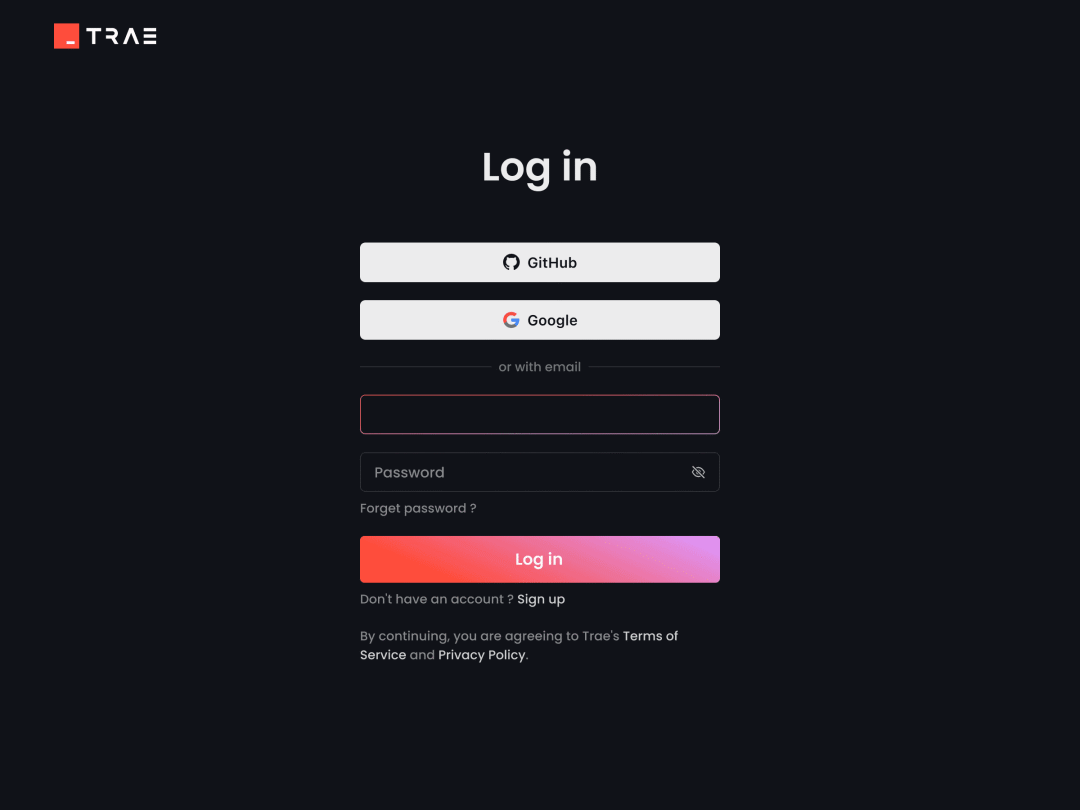
Log in to Trae: You must log in to use the AI assistant, which can be done using a Google or GitHub account or by registering an email. If you don’t have an account, you can create one. Click “Log in”, follow the instructions, and after logging in, you will enter the main interface.
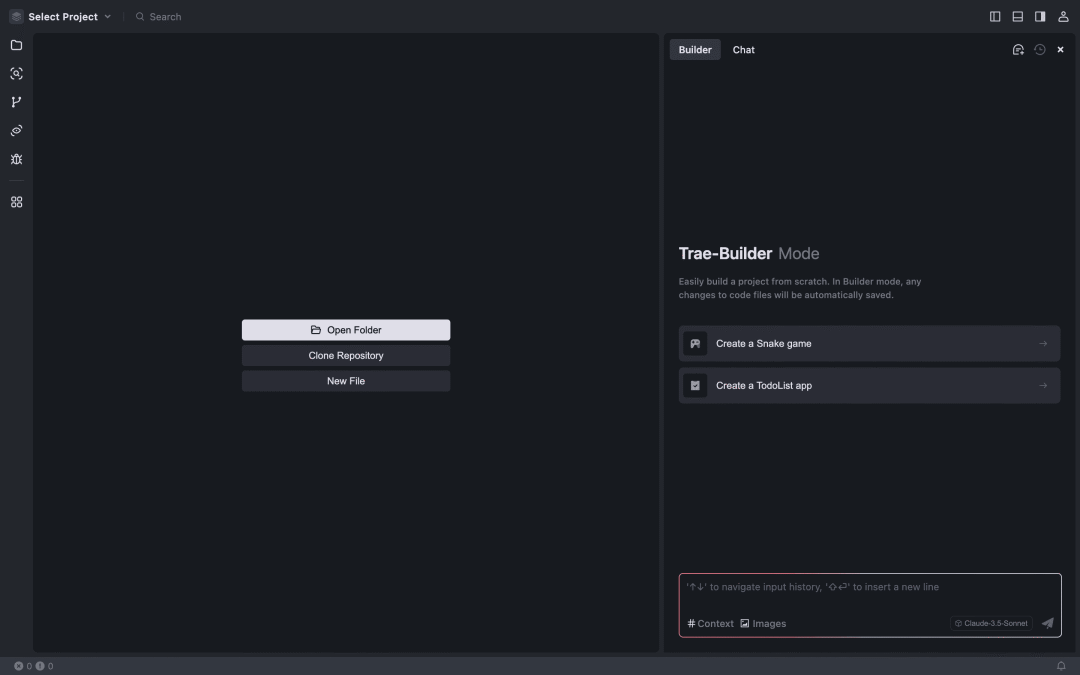
Start Development: There are multiple ways to create a new project:
-
Open from a local folder
-
Clone from a Git repository (from GitHub or a private Git service)
-
Create a project from scratch with the AI assistant (Builder mode)
Development Experience:
Currently, Trae has two built-in modes: Builder and Chat:
-
Chat Mode: AI will understand the current code, and you can ask questions or seek suggestions anytime. It also supports real-time code suggestions within the editor. -
Builder Mode: Just tell the AI what kind of application you want, and it will easily complete the project build from zero to one.
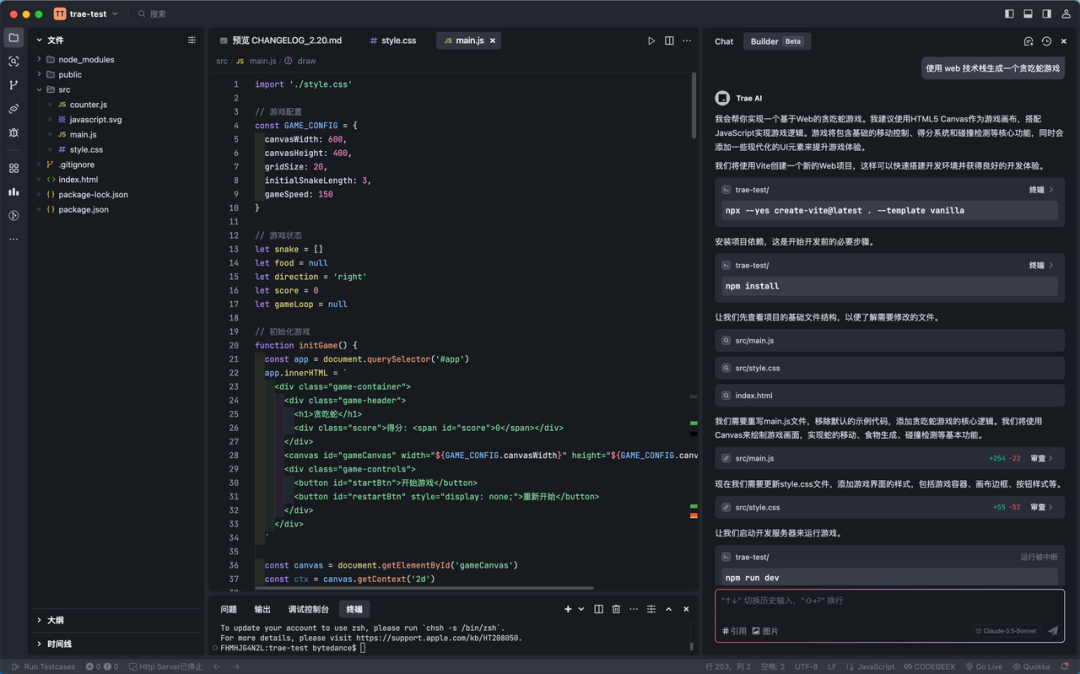
The Build mode is very impressive; it can even create a complete game project from scratch with just one prompt: “Generate a Snake game using web technology stack.”
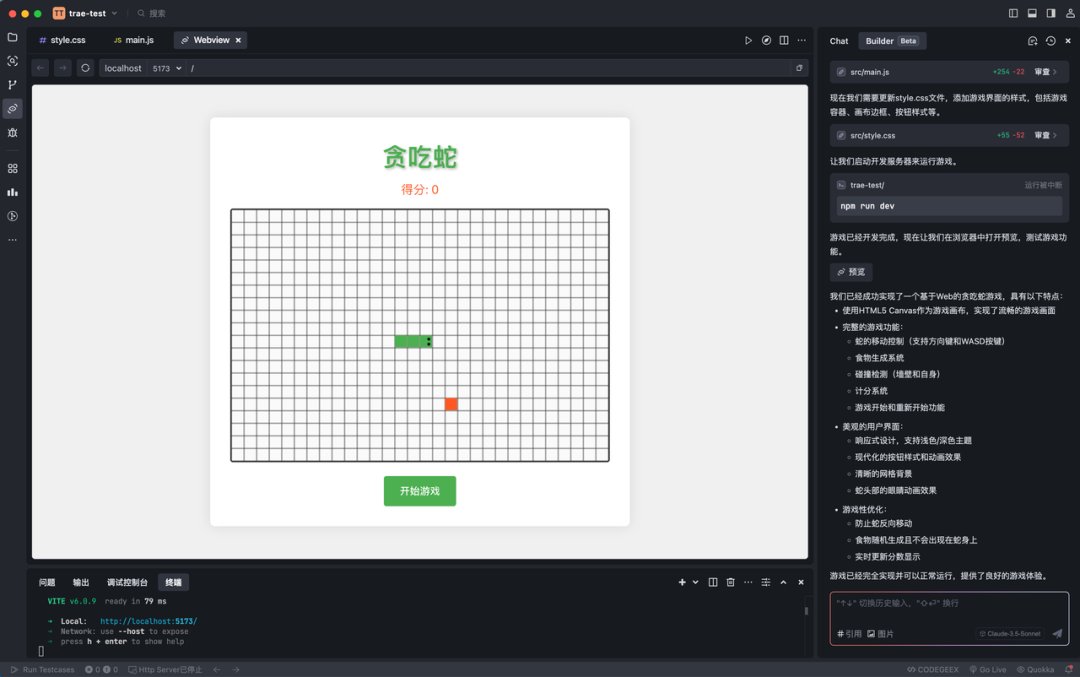
The development process is also very straightforward:
-
Create a Vite project using Trae to quickly set up the development environment.
-
AI automatically generates core code, style files, and complete logic, including Canvas drawing, scoring systems, and animation effects.
-
Finally, start the development server to run and preview the game with one click.
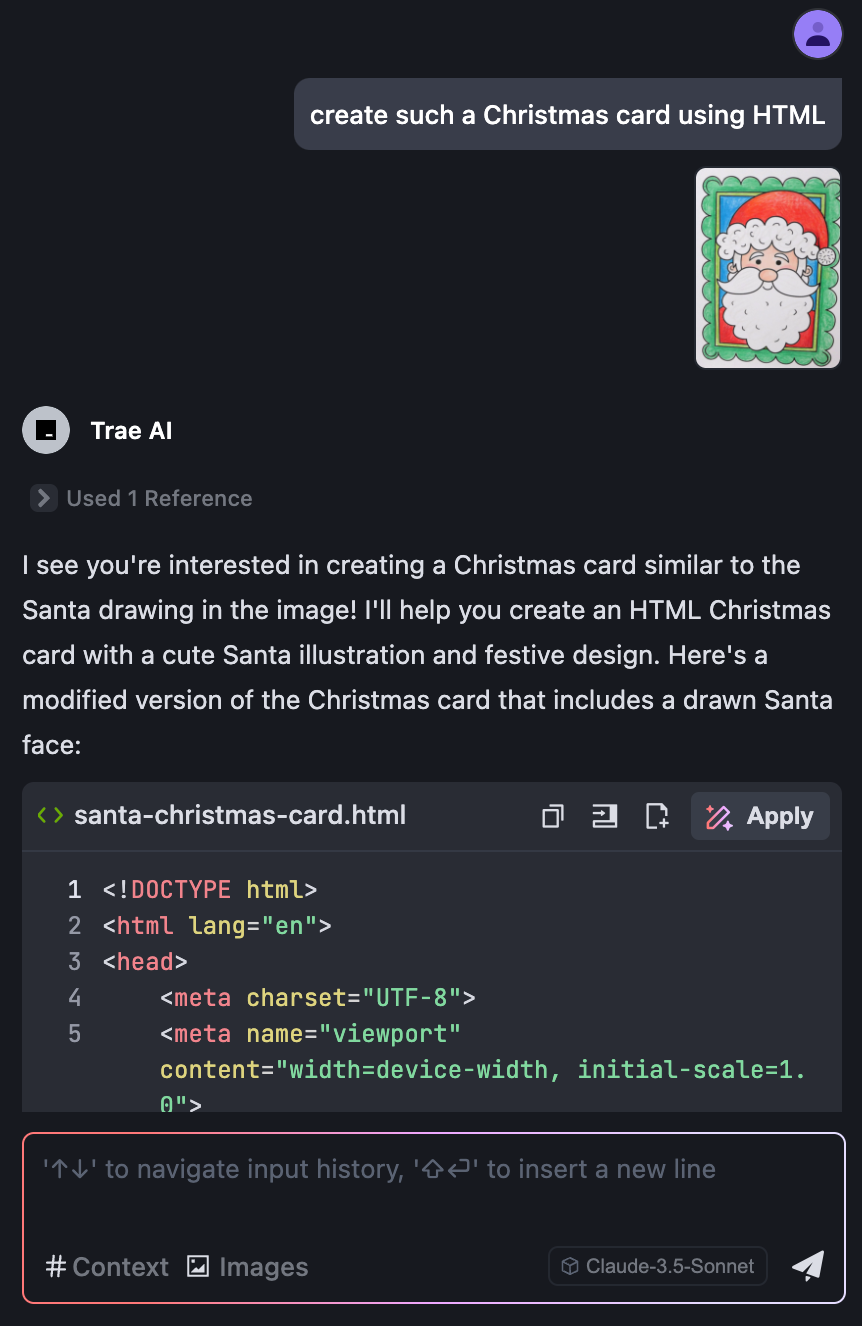
Additionally, both Build and Chat modes support multimodal input, such as allowing image input to generate front-end code. The methods for inputting images are very user-friendly, including:
-
Dragging images from external sources into the chat input box; -
Dragging images from the current project file tree into the chat input box; -
Pasting images from the clipboard directly into the input box; -
Clicking the “Image” button at the bottom left of the input box to select images from the local computer.
Summary of Advantages
-
Chinese-friendly, currently free: Built-in GPT-4o and Claude-3.5 models, eliminating concerns about language barriers. -
Rapid project building: Complete project construction from 0 to 1 without multiple modifications, suitable for beginners. -
Excellent user experience: Outstanding interaction details, supporting smooth migration from VSCode or Cursor.
Usage Tips
Finally, here are some usage tips:
Shortcut Keys
-
command + U to open the side chat box
-
command + I to open the inline chat box
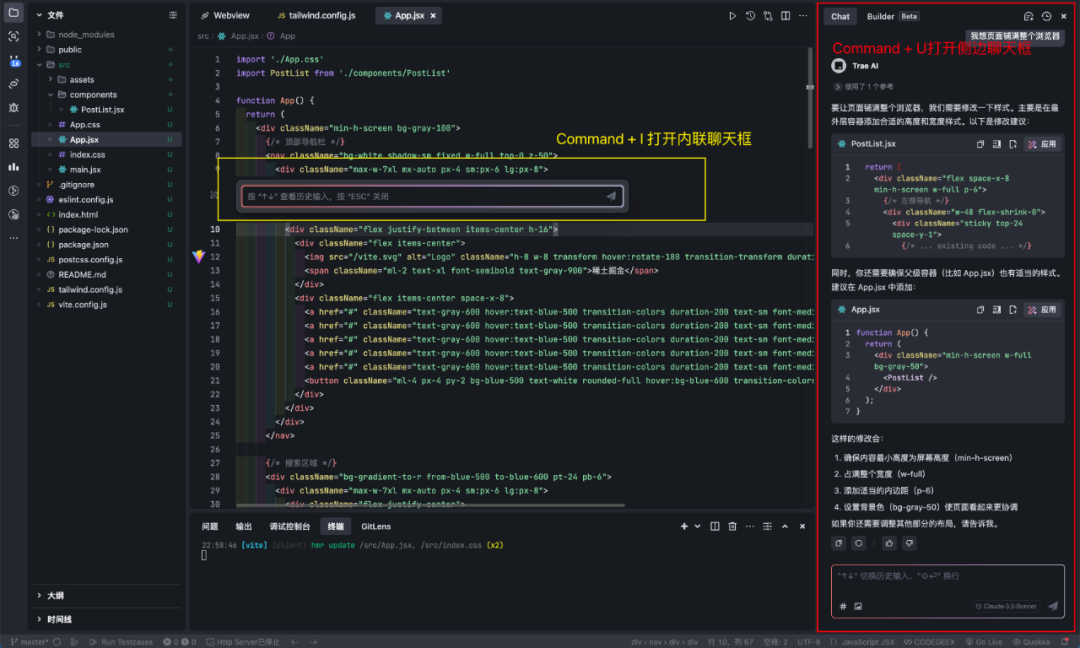
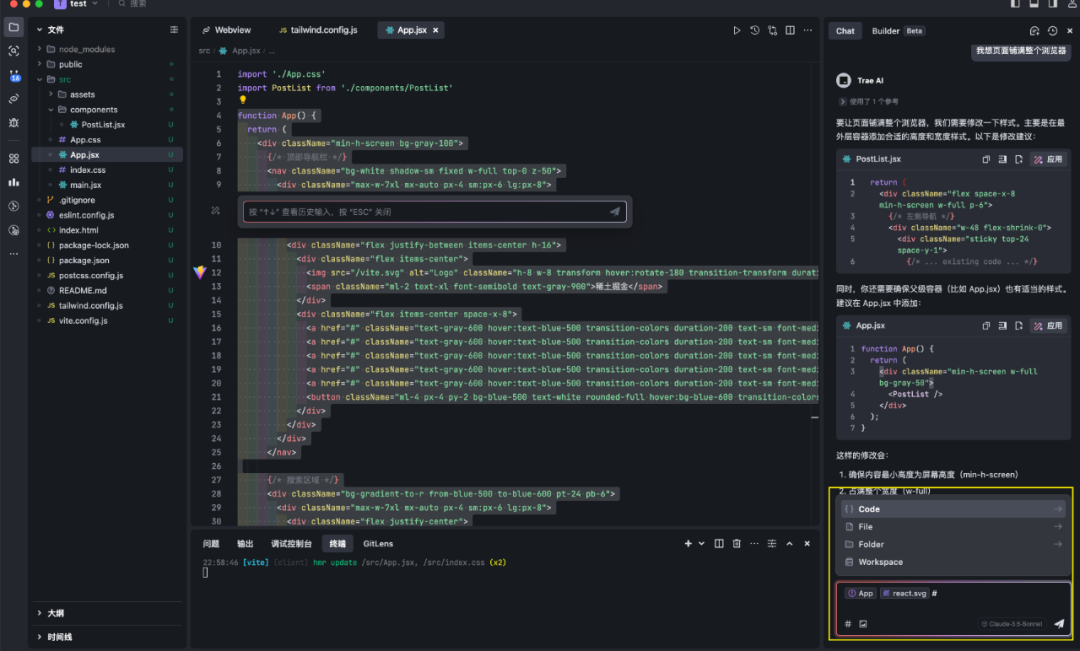
Select Context: Use the # symbol in the input box on the sidebar to select code, files, folders, and workspace, allowing multiple selections.
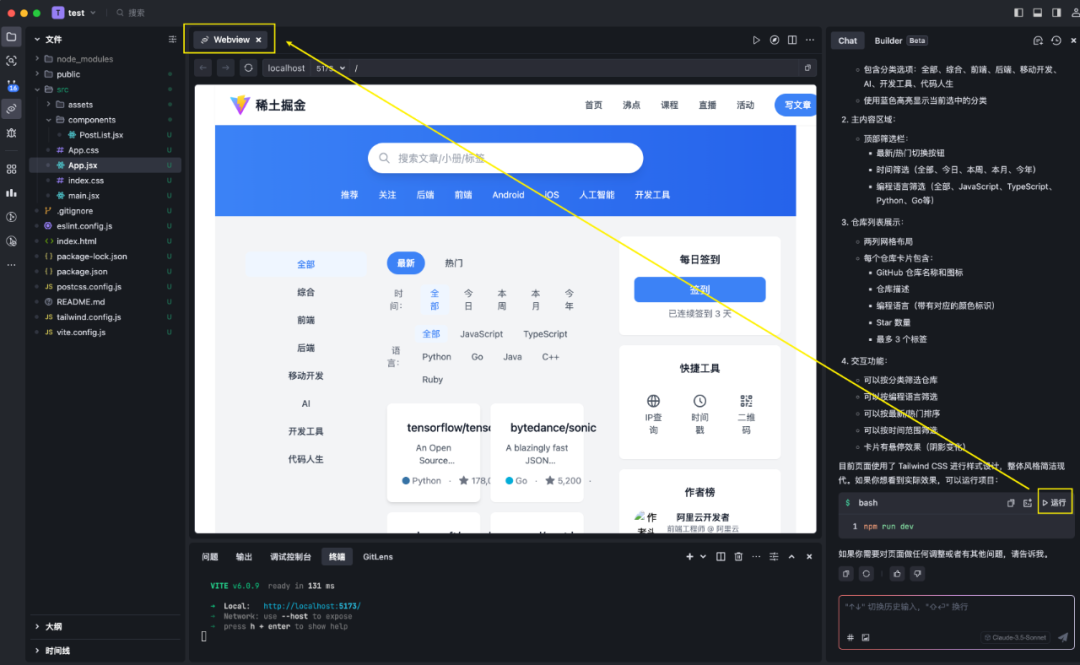
Built-in Webview: You can directly open project pages in chat form, and click the run button to see the built-in Webview page.
— END —
Recommended Reading
-
Studio Bot – Let AI Help Me Write Android Code
-
Recommendations and Thoughts on Android AI Bot Tools
-
Highly Useful Plugin Recommendations for Android Studio