
Click the “Blue Word” to Follow Us

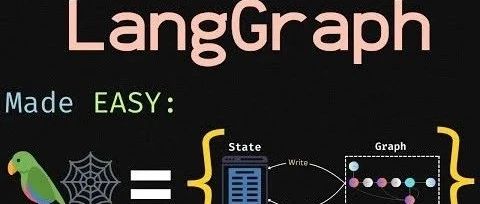
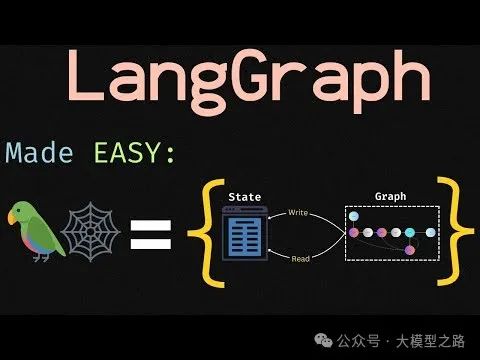
In today’s rapidly evolving AI field, building Agents (Which Multi-Agent Framework is Better? A Deep Dive into Five Popular Options) has become an important means of achieving automation and decision optimization. LangGraph, as a powerful tool, provides developers with an intuitive and efficient way to build AI Agents through a graph structure approach. Today, let’s learn how to use LangGraph to build AI Agents.
1. Basic Concepts of LangGraph
(1) Basic Components of Graphs
-
Nodes
-
In LangGraph, nodes are represented by Python functions. These functions have specific requirements and must accept a state parameter as the first argument, which represents the state of the graph. Nodes use this state parameter to obtain information about what is happening in the graph and can update and write to the state. For example, in an AI Agent processing text information, the node function may decide the next operation based on the current state (such as the processed text part) and update the state to reflect the processing progress.
-
Nodes by default override the previous state value, meaning each node’s operation will affect the graph’s state, thus enabling the transmission of information and the advancement of the processing flow between nodes.
Edges
Edges can be viewed as elements connecting two endpoints, where the endpoints are nodes in LangGraph. The main function of edges is to establish connections between nodes, allowing data and control flows to be passed between them.
There are two types of edges:
-
Normal Edge: Traversed every time the graph runs without specific conditions. It ensures basic connections and information flow between nodes in the graph, forming the foundation of the graph structure.
-
Conditional Edge: Traversed only when specific conditions are met. By using conditional edges, the next node to visit can be dynamically determined based on the output of the nodes or the state of the graph. For example, in a decision tree-like AI Agent structure, different branch nodes can be selected for processing based on different input conditions through conditional edges.
State
-
The state is an important component of the graph in LangGraph, used to track what is happening in the graph. The state is essentially an object that passes between different nodes and edges, containing information for communication between nodes and edges, serving as the input pattern for all nodes and edges.
-
For example, in a multi-step AI task, the state may contain information such as the current progress of the task, processed data, and data to be processed. Each node operates based on the state information and updates the state, allowing subsequent nodes to make decisions based on the latest situation.
(2) Orphan or Isolated Nodes
In graph theory, an orphan node refers to a node that has no edges connected to other nodes in the graph, with a degree of 0. In a graph constructed using LangGraph, orphan nodes may lead to an incomplete structure or unexpected behavior, so care should be taken to avoid their existence during graph construction and inspection.
2. Steps to Build a Simple Graph
(1) Constructing Graph Nodes
-
Defining Node Functions
First, determine the functions that the graph needs to accomplish in the AI Agent system, then convert these functions into Python functions that will become the nodes of the graph. For example, if we are to build a simple text processing AI Agent, we might need to define nodes to read text, clean text, extract key information, etc.
Here is a simple example defining three node functions:
def node_01(state: State): print(f"node_01: {state['graph_msg']}") # Override the graph_msg in the state return {"graph_msg": state["graph_msg"] + "node_01"}def node_02(state: State): print(f"node_02: {state['graph_msg']}") return {"graph_msg": state["graph_msg"] + "node_02"}def node_03(state: State): print(f"node_03: {state['graph_msg']}") return {"graph_msg": state["graph_msg"] + "node_03"}Each node function accepts the state as a parameter and can operate and update the state as needed. In the example above, the node functions print the current message in the state, add the node name to the message, and return the updated state.
(2) Constructing Graph State
from typing import TypedDictclass State(TypedDict): graph_msg: strThis state class will be used to pass and update information throughout the graph’s construction and execution process. Different nodes can modify the value of graph_msg as needed, enabling information transmission and accumulation between nodes.
(3) Creating the Actual Graph
1. Importing Necessary Classes and Modules
First, we need to import classes such as StateGraph, END, and START from Langchain, which will be used to build and define the structure and behavior of the graph.
from langgraph.graph import StateGraph, END, START2. Defining the Graph and Adding Nodes
Use the StateGraph class to define the graph, passing the previously defined state class as a parameter. Then, add all the nodes to the graph.
# Define the graph and its statebuilder = StateGraph(State)# Add all nodesbuilder.add_node("node_01", node_01)builder.add_node("node_02", node_02)builder.add_node("node_03", node_03)The START node is a special node used to send input (state) into the graph to initialize the graph agent, representing the starting point of execution; the END node represents the termination point of the graph.
(4) Adding Edges
Connecting Nodes with Edges
After adding the nodes, edges need to be added using the add_edge and add_conditional_edges methods.For example:
# Connect graph nodes and edgesbuilder.add_edge(START, "node_01") # Normal edgebuilder.add_conditional_edges("node_01", select_next_node) # Conditional edgebuilder.add_edge("node_02", END) # Normal edgebuilder.add_edge("node_03", END) # Normal edgeHere, the add_edge method is used to add normal edges, while the add_conditional_edges method is used to add conditional edges, where select_next_node is a function used to determine the next node based on specific conditional logic.
(5) Compiling the Graph
Checking the Structural Integrity of the Graph
Once the nodes and edges of the graph are set up, the graph can be compiled.The compilation process will perform checks, such as looking for orphan nodes and other basic checks on the graph’s structure to ensure its correctness and validity.
graph = builder.compile()(6) Visualizing the Graph (Optional)
Visualizing the Graph in Python Notebook
If running the code in a Python Notebook environment, the graph can be visualized as follows:
from IPython.display import Image, display# Visualize the graphdisplay(Image(graph.get_graph().draw_mermaid_png()))This will graphically display the structure of the graph, including nodes and edges (normal edges as solid lines, conditional edges as dashed lines), helping to intuitively understand the logic and flow of the graph.
(7) Invoking the Graph
Passing the Initial State and Running the Graph
Once the graph is compiled, it can be invoked.When invoking the graph, the initial state needs to be passed, and each node in the graph will receive the current state and process it, continuing until the END node is reached.
graph.invoke({"graph_msg": "Hello, "})Here, a state dictionary containing the initial message “Hello, ” is passed in, and the graph will process it according to the logic defined by the nodes and edges, with each node operating on and updating the state, ultimately returning the state after being processed by all nodes.
3. Advantages
(1) Advantages of Using LangGraph to Build AI Agents
1. Flexibility and Scalability
LangGraph allows developers to flexibly define the functions of nodes and edges according to specific needs, easily adding, deleting, or modifying components of the graph to adapt to different application scenarios and business requirements. Whether building simple text processing tasks or complex intelligent decision systems, the structure of the graph can be gradually expanded to achieve the desired functionality.
2. Visualization and Understandability
With visualization tools (such as visualizing the graph in a Python Notebook), developers can intuitively see the structure of the graph, including the connections between nodes and the direction of data flow. This helps in understanding the workflow of the AI Agent, facilitating debugging and optimization. It is also very beneficial for team collaboration, as different members can quickly understand the system’s architecture and logic through the visualized graph.
3. Integration with the LangChain Ecosystem
LangGraph is part of the LangChain ecosystem, allowing seamless integration with other components in LangChain (such as various language models, toolchains, etc.). This enables developers to leverage the rich resources and functionalities of LangChain, such as invoking powerful pre-trained language models for natural language processing tasks and combining external tools (like database queries, API calls, etc.) to enhance the capabilities of the AI Agent.
Using LangGraph to build AI Agents (Smyth OS: Opening the No-Code Revolution Era for Personal AI Agents) provides us with a powerful and flexible way to develop intelligent systems. By deeply understanding concepts such as nodes, edges, states, and orphan nodes, as well as mastering the steps of creating graphs, adding nodes and edges, compiling graphs, visualizing graphs, and invoking graphs, we can build powerful and flexible AI Agents. Hope this helps everyone!