
In the era of large models led by ChatGPT, designing prompts to get large models to execute user instructions is an art, giving rise to the profession of ‘Prompt Engineer’. Not everyone can design good prompts, and even the same prompt can yield different results when applied to different large models. Although ChatGPT or GPT-4 can utilize some plugins to achieve more functions, their overall capabilities are limited. What does the post-large model era look like? Could it be Agents?
An Agent can break down tasks, plan them, and execute them based on user task descriptions. This article will share one of the representative works of Agent: AutoGPT.
1. Introduction to AutoGPT


On March 30, 2023, AutoGPT was introduced as an experimental open-source project that can define a specific role (for example, ‘Book Market Analyst’) and a series of goals (such as ‘Research the most successful science fiction novels of 2022’, ‘Summarize them’, ‘Save the summaries to a file’, etc.), allowing GPT-4 to automatically create and execute all necessary tasks to achieve these goals, specifically including:
-
Conducting research via search engines;
-
Browsing websites;
-
Scraping data;
-
Locally storing files;
-
Using long-term memory;
-
Generating new instances of GPT-3.5 robot programs with specific roles to complete sub-tasks
(Don’t worry, if you cannot access GPT-4, you can also run it using a GPT-3.5 API key)
2. Using AutoGPT
2.1 Development Environment
-
Python 3.8 or higher;
-
OpenAI API keys (can be applied for at https://platform.openai.com/account/api-keys)
2.2 Cloning the AutoGPT Code
git clone https://github.com/Torantulino/Auto-GPT.git # Switch to stable branch git checkout stablePS: You can also download the ZIP file directly.
2.3 Installing Required Python Libraries
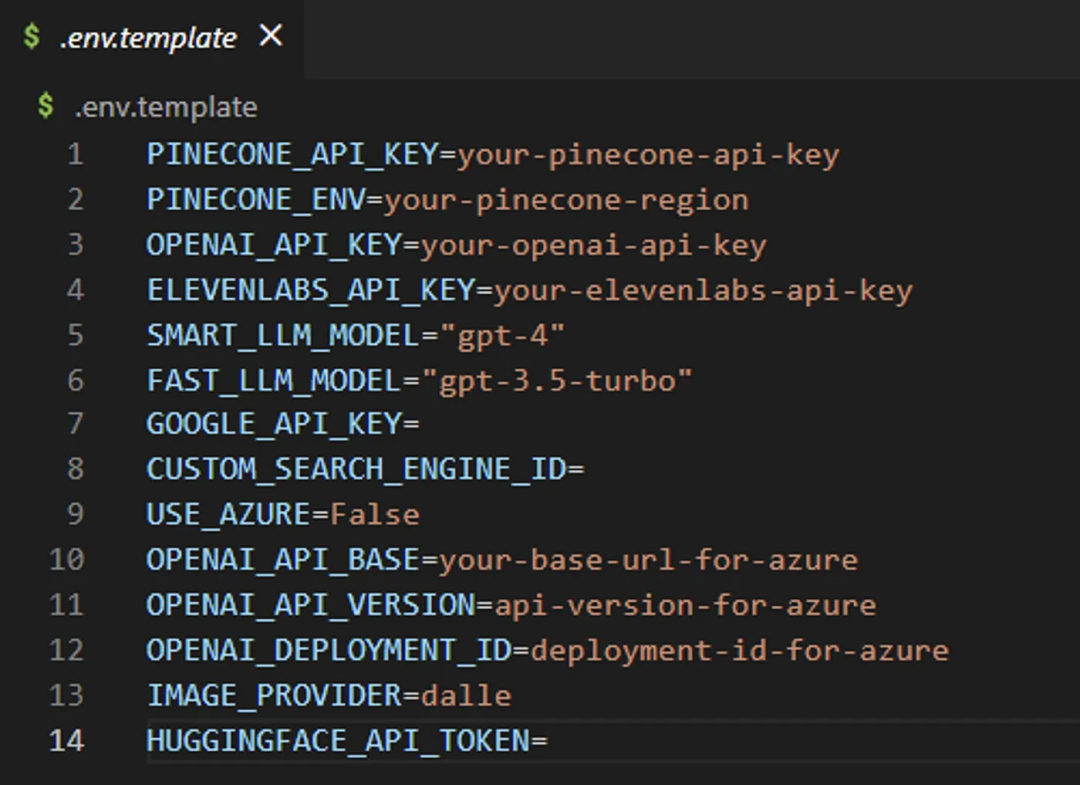
# Switch to the Auto-GPT root directory and execute the following code pip install -r requirements.txt2.4 Adding GPT-4 API Keys Copy .env.template to .env, and fill in the GPT-4 API keys in the .env file under the field OPENAI_API_KEY.
The format of the .env.template file is as follows:
2.5 Starting AutoGPT
python -m autogpt # If you do not want to use GPT-4, you can start AutoGPT with the following code python -m autogpt --gpt3onlyAt this point, the interface will prompt the user to choose whether they want to continue using the last AI agent they created. If you want to give it a try, type ‘y’, or type ‘n’ to create a new one.
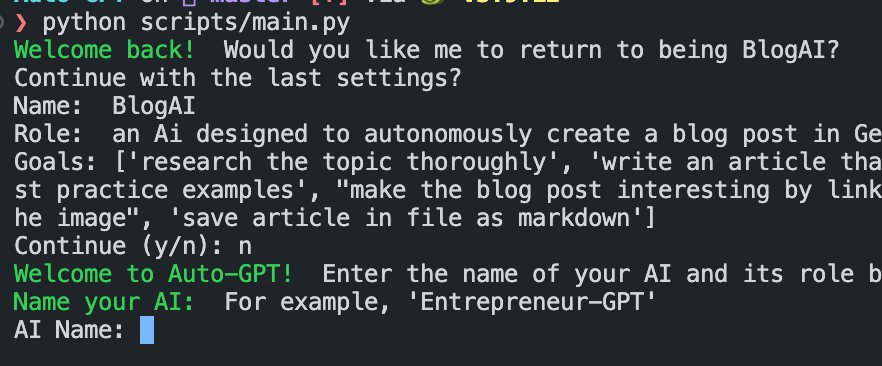
If you confirm to create a new Agent, you need to define a name and a description of the role:
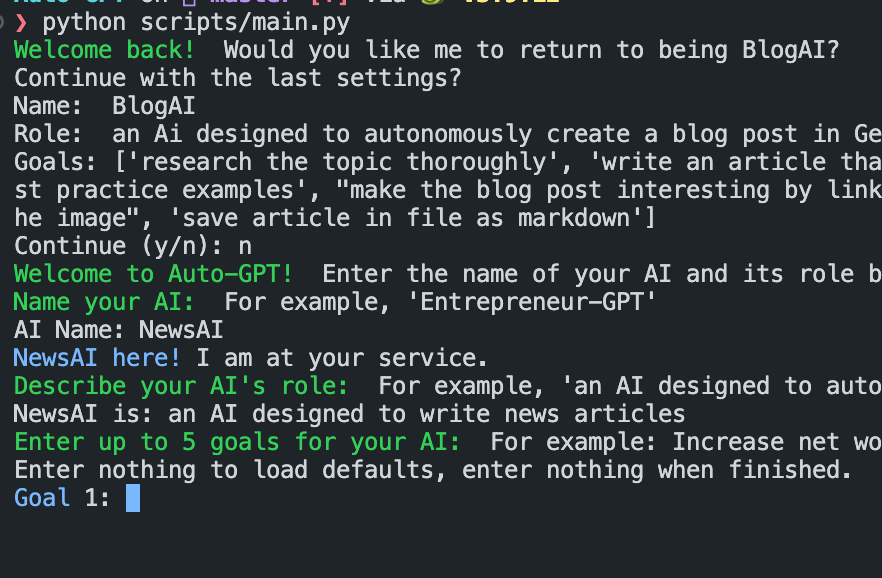
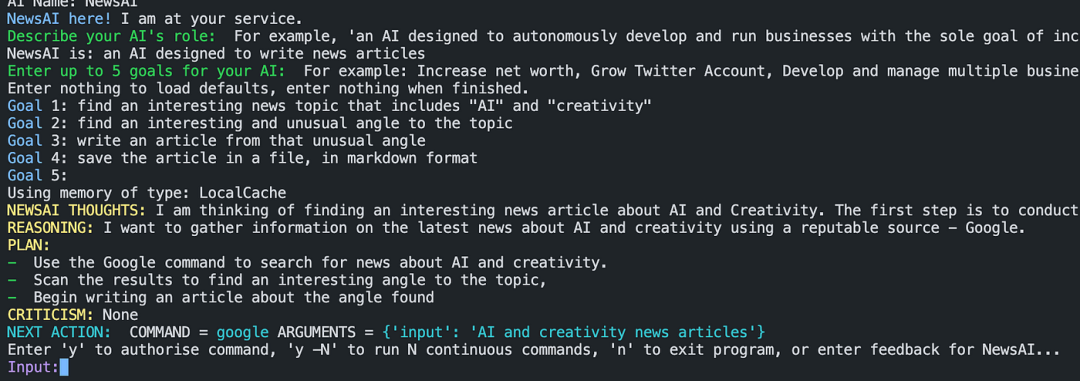
Next, define up to 5 goals.
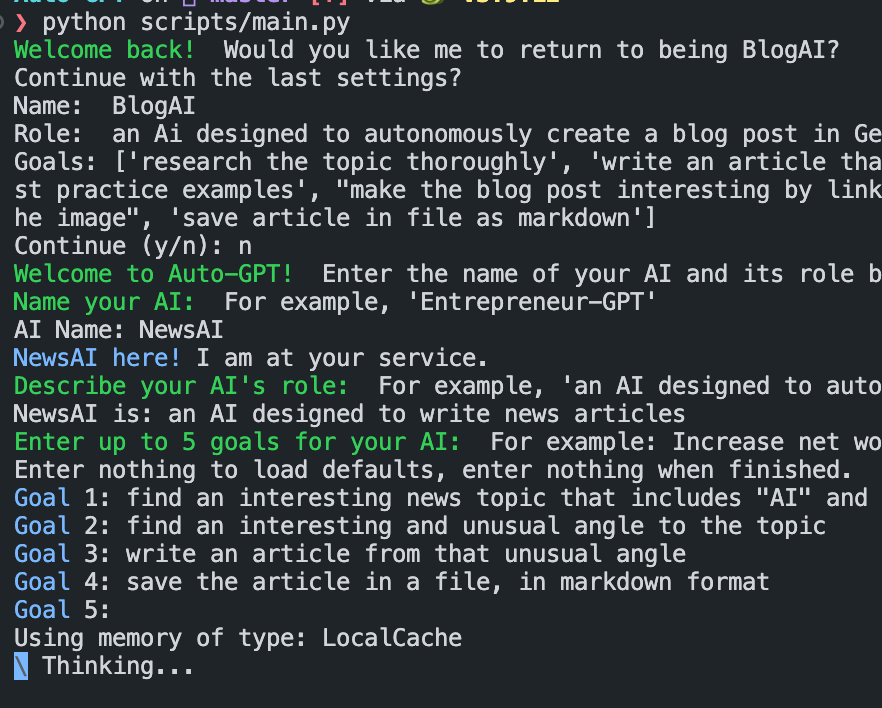
At this point, Auto-GPT will begin executing as expected, but user authorization is required for the next operations. Users can input ‘y’ to authorize the next operation, input ‘y-N’ to authorize several subsequent steps, or input ‘n’ to exit; of course, if other content is input, Auto-GPT will treat it as human feedback and will evaluate it:
2.6 Checking Generated Results
The results generated by Auto-GPT can be viewed in the folders ‘/outputs/logs’ or ‘/auto_gpt_workspace’.
3. AutoGPT & Vector Databases
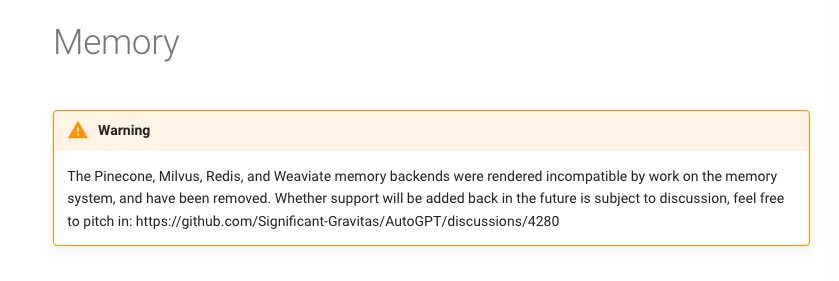
For LLM application development, vector databases seem to be indispensable, and even the early AutoGPT defaults to supporting the following five storage modes:
-
LocalCache (will be renamed to JSONFileMemory)
-
Redis
-
Milvus
-
Pinecone
-
Weaviate
However, recent AutoGPT documentation indicates that all vector database implementations will be removed, as shown in the image below:
For more content, please refer to: https://mp.weixin.qq.com/s/mlUg1N7jQ5f6HVKKOvKOjA
Is a vector database really necessary?
References:
[1] https://generativeai.pub/complete-guide-to-setup-autogpt-revolutionize-your-task-automation-with-gpt-4-39eda5a85821
[2] https://github.com/Torantulino/Auto-GPT