Today, I want to share with you the king of AI-generated videos, Runway!
Many of the cool videos you see online are generated by Runway.
I couldn’t contain my excitement and finally tried out this website, and I found it very easy to use; even a beginner can learn it easily!
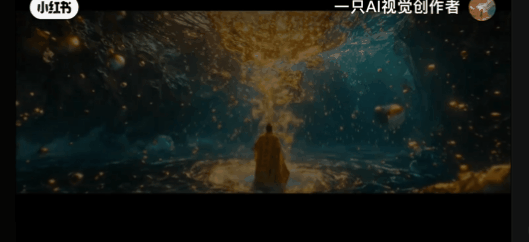
First, let me share my finished product:
Let’s start our tutorial:
Step 1: Upload Your Images
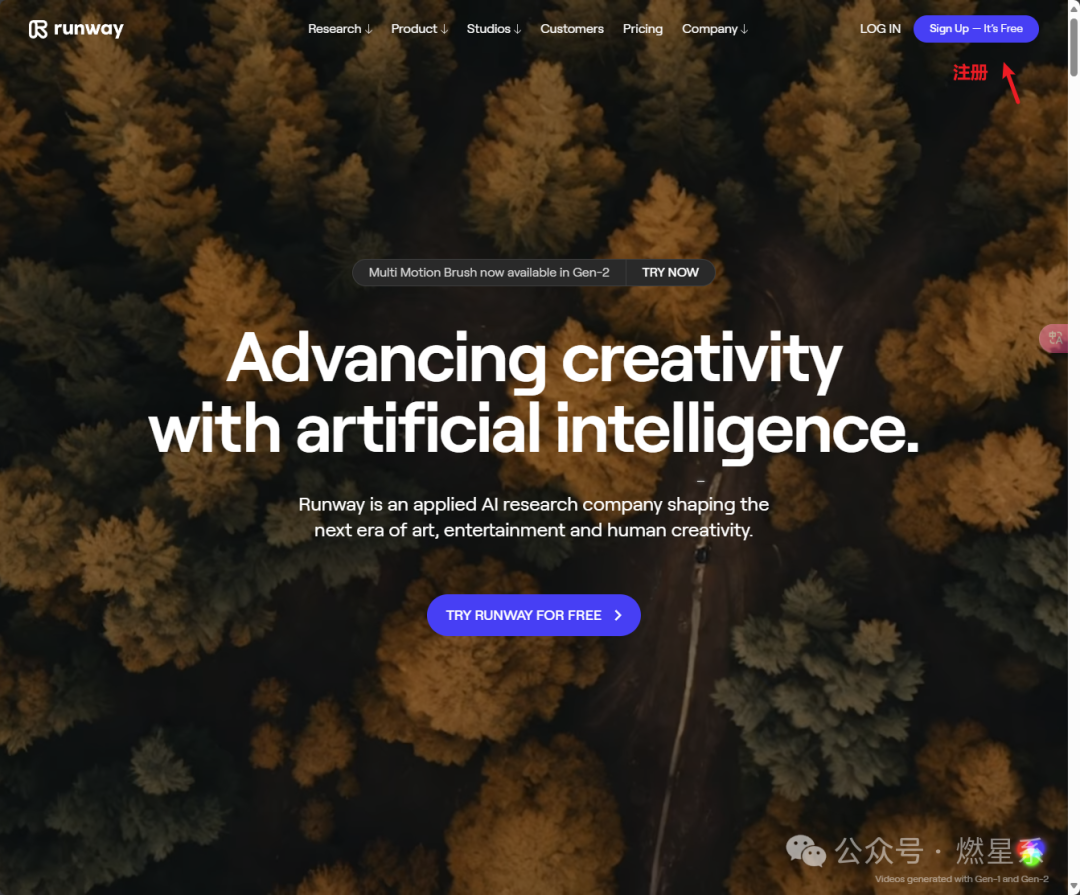
First, open the Runway website:https://app.runwayml.com/login
You will see this cover; click on the top right corner to register or log in.
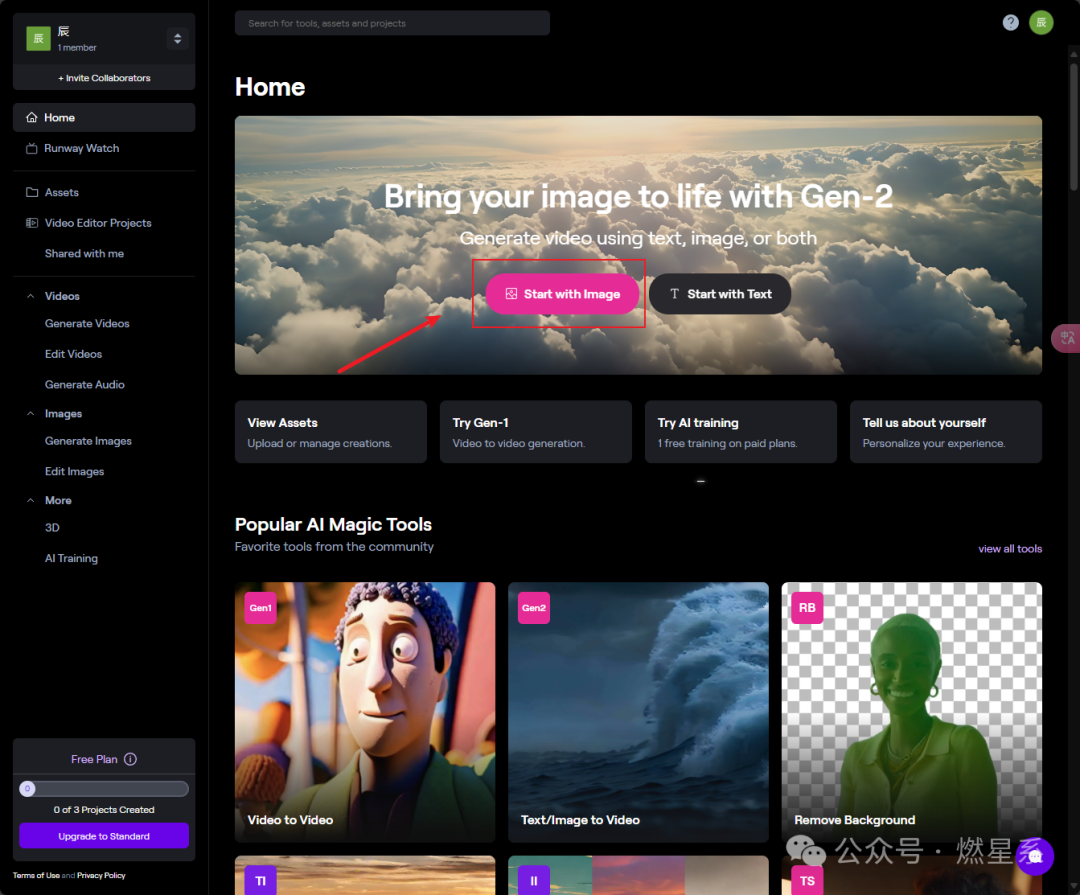
Next, go to your homepage, and click on this [Start with image].
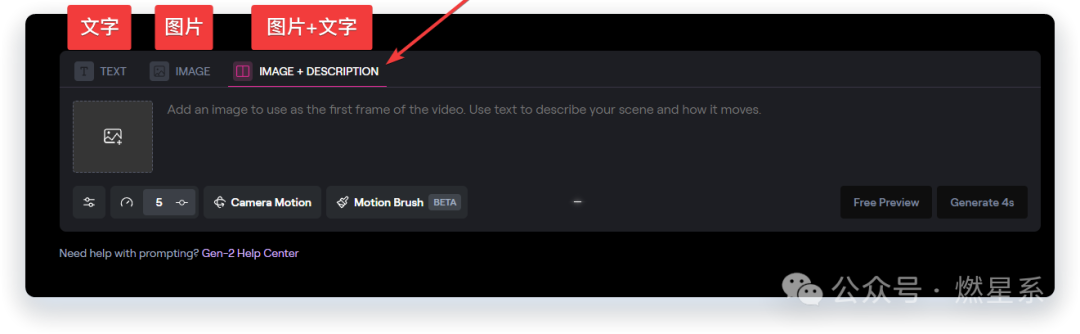
Then, upload your image or drag it directly into the gray box in the middle. Note that there are three options here: [TEXT] for text-generated videos, [IMAGE] for image-generated videos, and [IMAGE+DESCRIPTION] for image + text-generated videos.
We usually choose the third option, [IMAGE+DESCRIPTION], as it produces much better results.
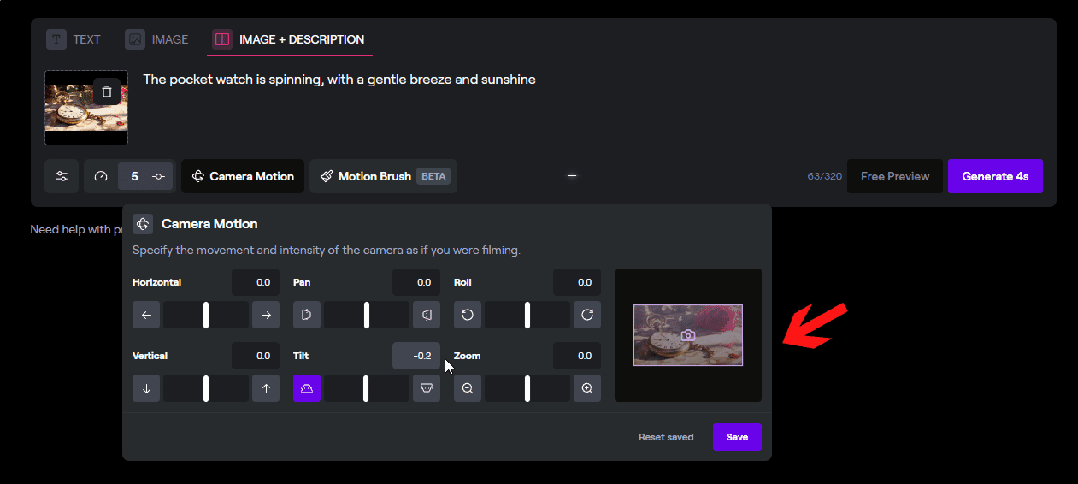
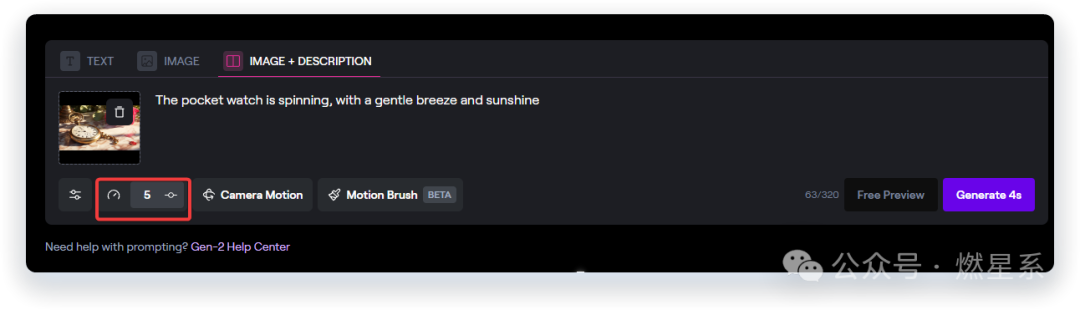
Upload the image and add a description. My description is quite simple: The hands of the pocket watch are turning, the sunshine is bright, the breeze is gentle.
If you need to adjust the duration, you can do that here. The default is 4 seconds, but you can leave it as is unless you have specific needs. From my experience, the quality of the generated images decreases the further you go (without upgrading to a premium account).
Step 2: Set the Motion Effects
There are two types of motion settings here:
This controls the camera movements such as zooming in and out and rotating. You can intuitively feel the changes in the lens by looking at the preview in the small window.
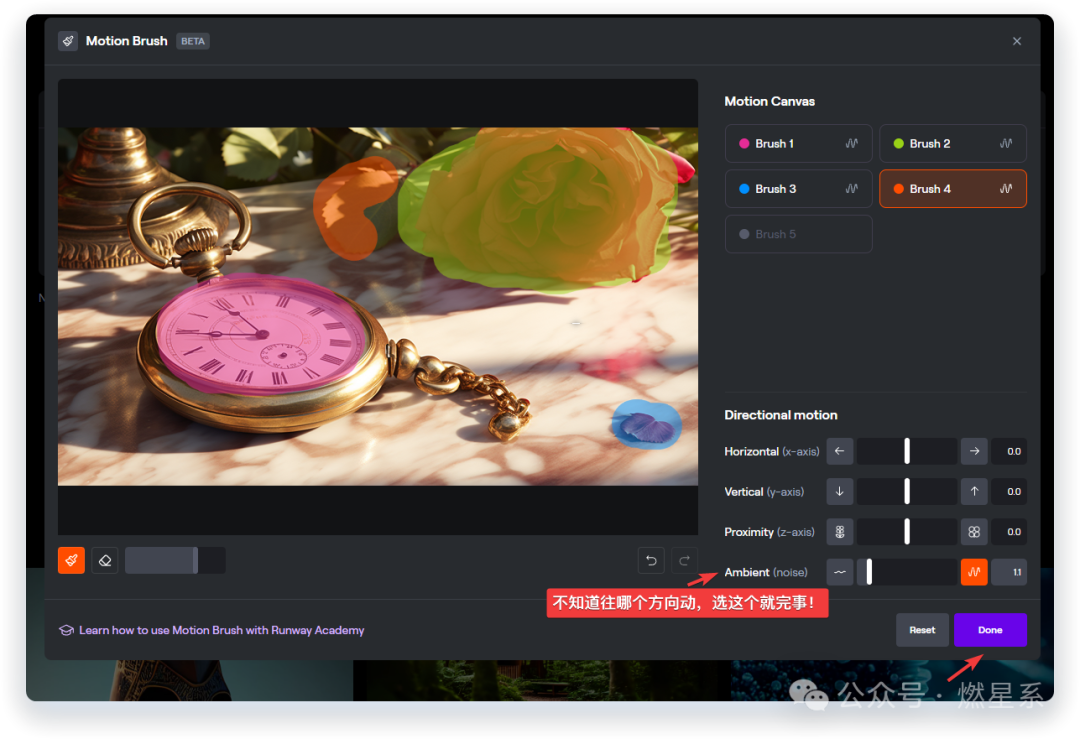
Motion Brush
This is the legendary simple five strokes! You only need five strokes to make the image move in the way you want. It provides movement along the X, Y, and Z axes. If you don’t know how the object should move, just pull the [Ambient (noise)] slider, and the algorithm will help you animate it.
Tip: After drawing the strokes, make sure to adjust the parameters below a bit; otherwise, the [Done] button won’t activate.
Next, just wait for the generation!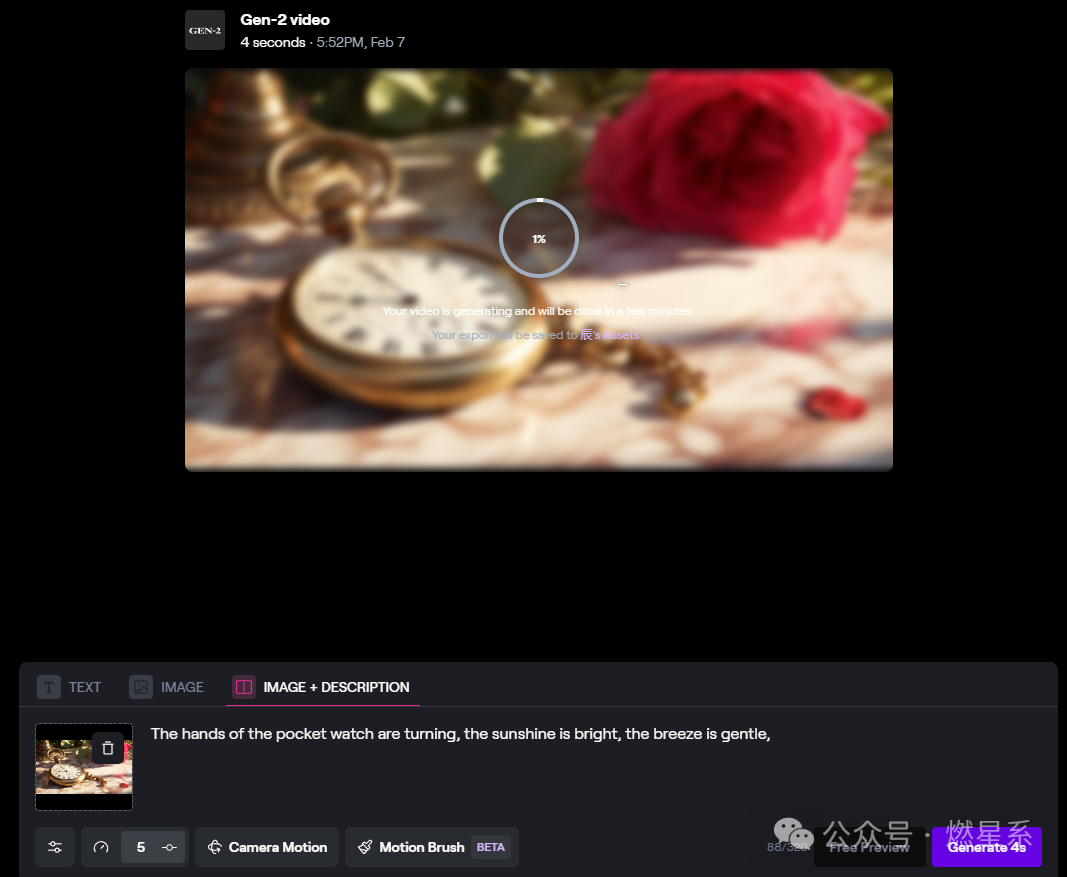
Step 3: Publish and Download
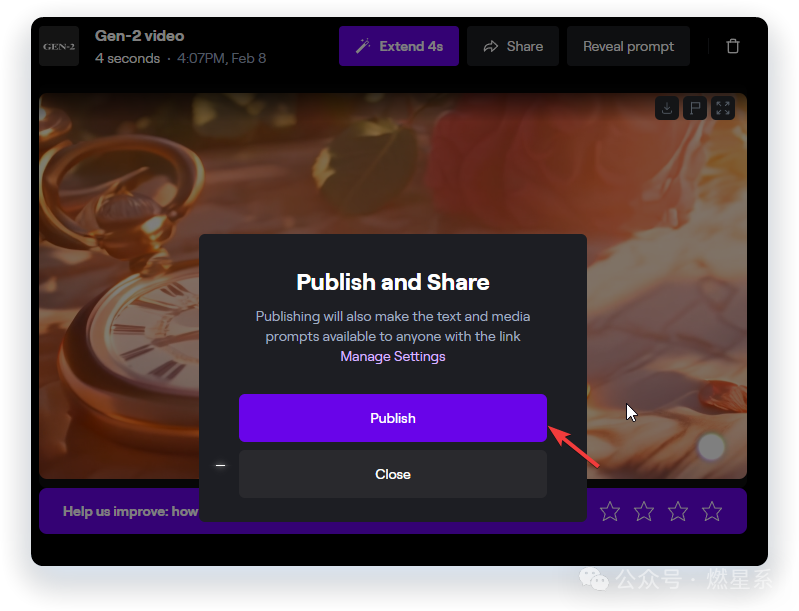
After a short wait, our video effect is ready! Let’s take a look at the result! Wow~~ The sunshine and gentle breeze create a warm atmosphere~ First, we choose [Share].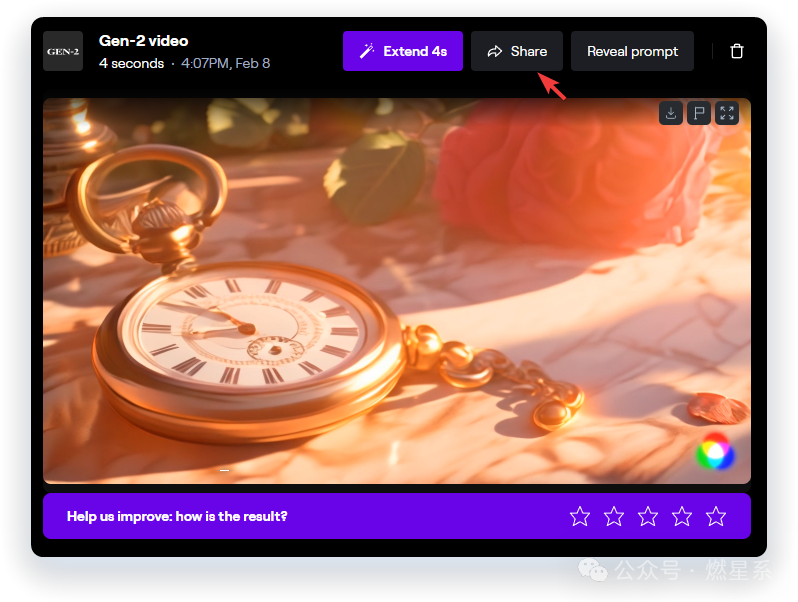 Click [Publish]
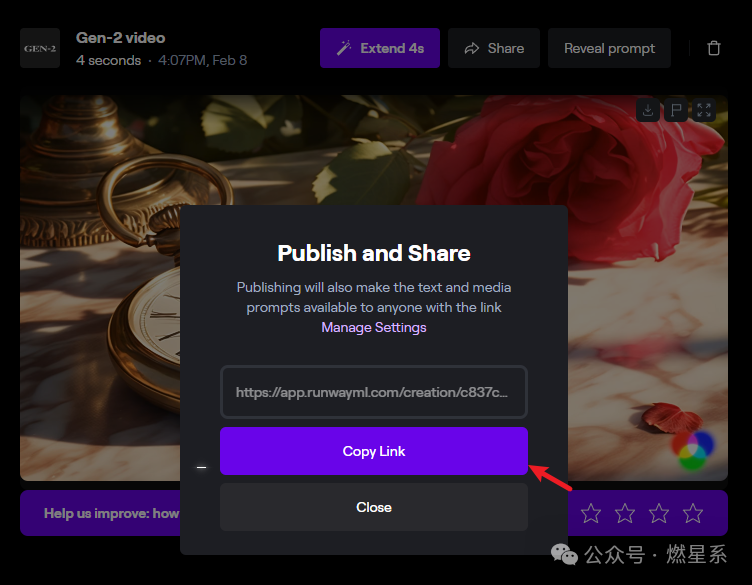
A link will pop up; click Copy Link to paste this link into your browser.
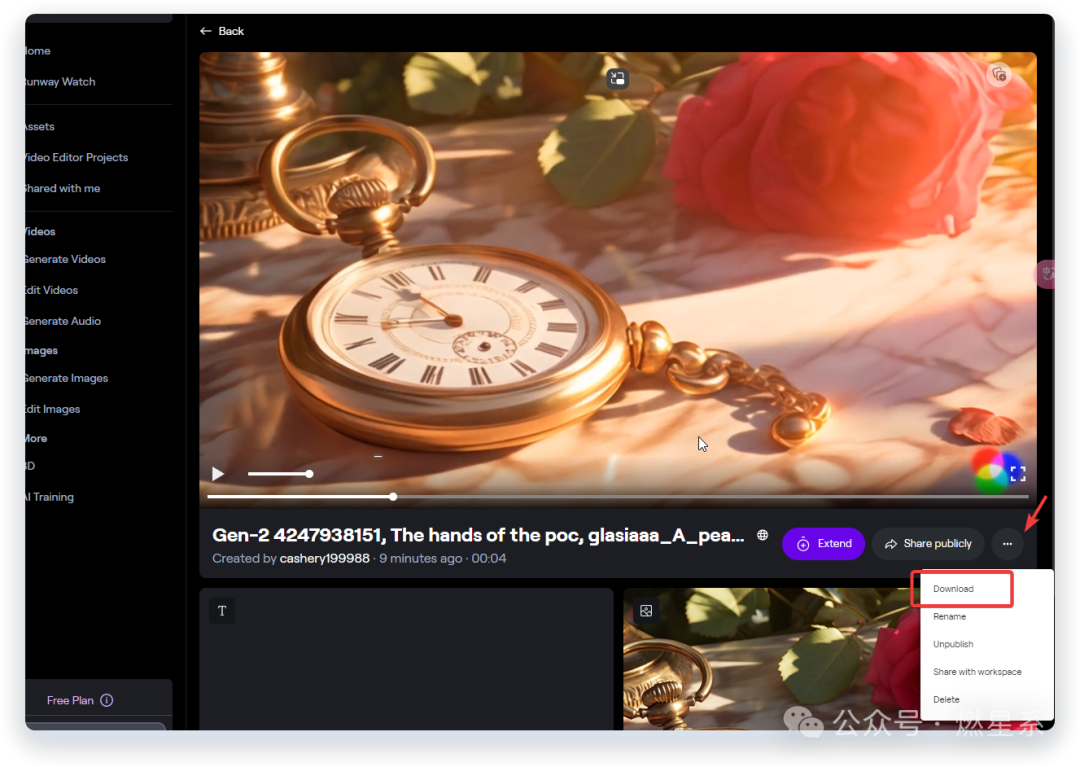
Click the three dots in the bottom right corner of the video, and click Download to download it~~
Then generate the other images sequentially and combine them in your video editing software.
Ultimately, you will get the finished product you saw at the beginning~~
I will share more knowledge related to AI-generated videos later. If you are interested, feel free to add me on WeChat to chat~~