
1. AutoGPT
Recently, the hot topic has been AutoGPT. I must say, AI is developing so fast that new things are coming out every few days, and we can barely keep up with the times.
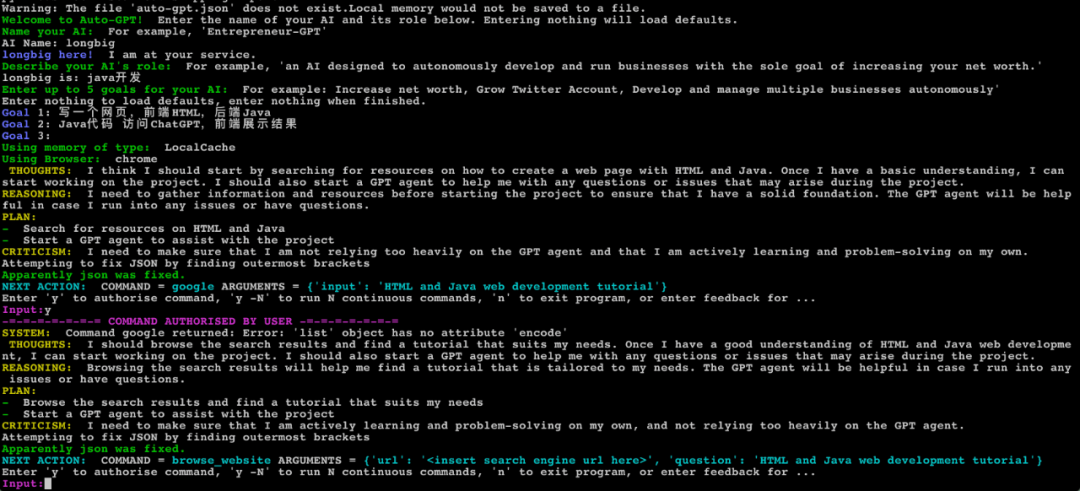
AutoGPT is an open-source application that showcases the capabilities of the GPT-4 language model. This program is powered by GPT-4 and autonomously develops and manages tasks. Simply put, you give AutoGPT a topic, and it will think for itself, providing the steps and implementation details.
AutoGPT open-source address: https://github.com/Significant-Gravitas/Auto-GPT
Effect demonstration:
2. Installation Process
Preparation:
-
A cloud server overseas or local will do, but the local network needs to be able to access OpenAI.
We will directly follow the installation steps on Github without any other pitfalls. Here, we take the cloud server Ubuntu as an example.
2.1 Install Python3
apt-get install python3
2.2 Configuration Acquisition
-
Obtain the API key for your ChatGPT account at: https://platform.openai.com/account/api-keys -
(Optional) Obtain the PINECONE API key at: https://www.pinecone.io
2.3 Installation
Download the code:
git clone https://github.com/Torantulino/Auto-GPT.git
Navigate to the directory and install dependencies:
# Navigate to the directory
cd Auto-GPT

# Install dependencies
pip install -r requirements.txt
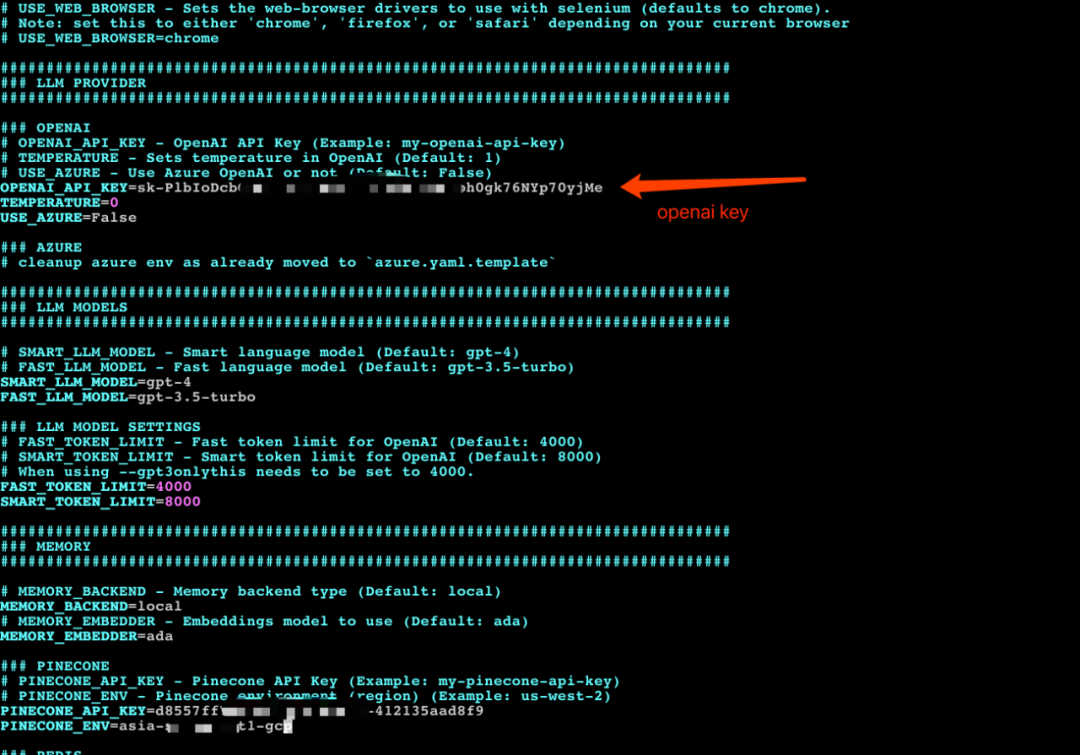
2.4 Modify Configuration
Rename the .env.template file to .env:
mv .env.template .env
Edit the .env file and write in your OpenAI key:
vim .env
Modify the content as follows:
2.5 Run
python3 -m autogpt
You can now run AutoGPT in the command line!
3. Effect Demonstration
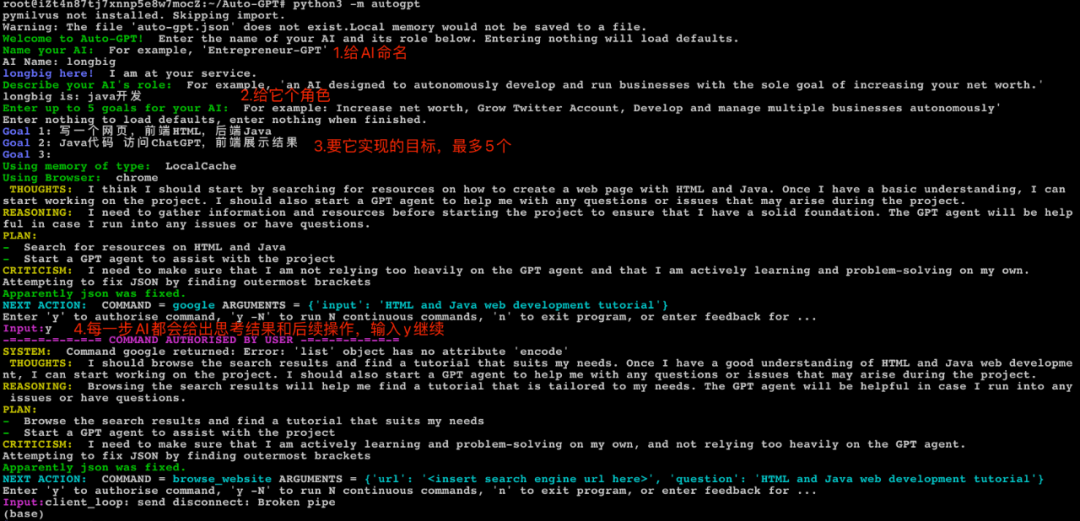
Overall, the performance is average and not as impressive as advertised online. It might also be because I’m still using GPT-3.5; using GPT-4 would yield better results.
Everyone can try it out themselves, and feel free to share your experiences afterward.