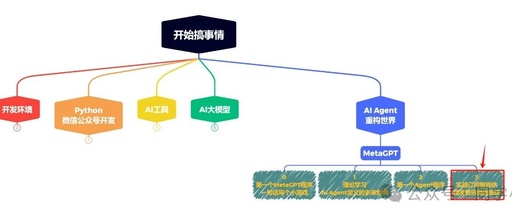

Series Articles
[The Future of AI – AI Agent Series][MetaGPT] 0. Your First MetaGPT Program: Write a Mini Game in One Sentence
[The Future of AI – AI Agent Series][MetaGPT] 1. See How AI Agents Reshape the World
[The Future of AI – AI Agent Series][MetaGPT] 2. Implement Your First Agent
[AI Agent Series][MetaGPT] 3. Step-by-Step Guide: Build Your Personal WeChat News Assistant with MetaGPT, Never Miss a Precise Push!
[AI Agent Series][MetaGPT] 3. Step-by-Step Guide: Build Your Personal WeChat News Assistant with MetaGPT, Never Miss a Precise Push! (2)
[AI Agent Series][MetaGPT] 3. Step-by-Step Guide: Build Your Personal WeChat News Assistant with MetaGPT, Never Miss a Precise Push! (3)
Main Content of This Article
Taking Task 4 of the “Introduction to MetaGPT Agent Development” course as an example, this article demonstrates how to create your own subscription agent from scratch using MetaGPT. The agent will regularly collect webpage information, summarize it, and automatically send it to WeChat and email. This article is the fourth task of Task 4, focusing on implementing email push functionality:
Independently implement scraping of the Github Trending (https://github.com/trending) page, retrieving each project’s name, URL link, and description,customize the Agent’s SubscriptionRunner class, independently implement Trigger and Callback functionalities, allowing your Agent to periodically send the summarized information document to notification channels (attempt to implement email sending functionality)
This lesson essentially teaches us the main components of a subscription agent and practices how to connect them using MetaGPT.
-
Main Components of a Subscription Agent:
-
Timer: Triggers subscription tasks at specified intervals
-
Information collection and summarization: Web scraping + Large model
-
Callback: Summarized information is sent to third parties (WeChat, email, etc.) via callback

Task 4 – Task Four: Implement Email Sending Functionality
Implementing email sending functionality means creating a callback that uses an email interface to send information.
Code and Comments
-
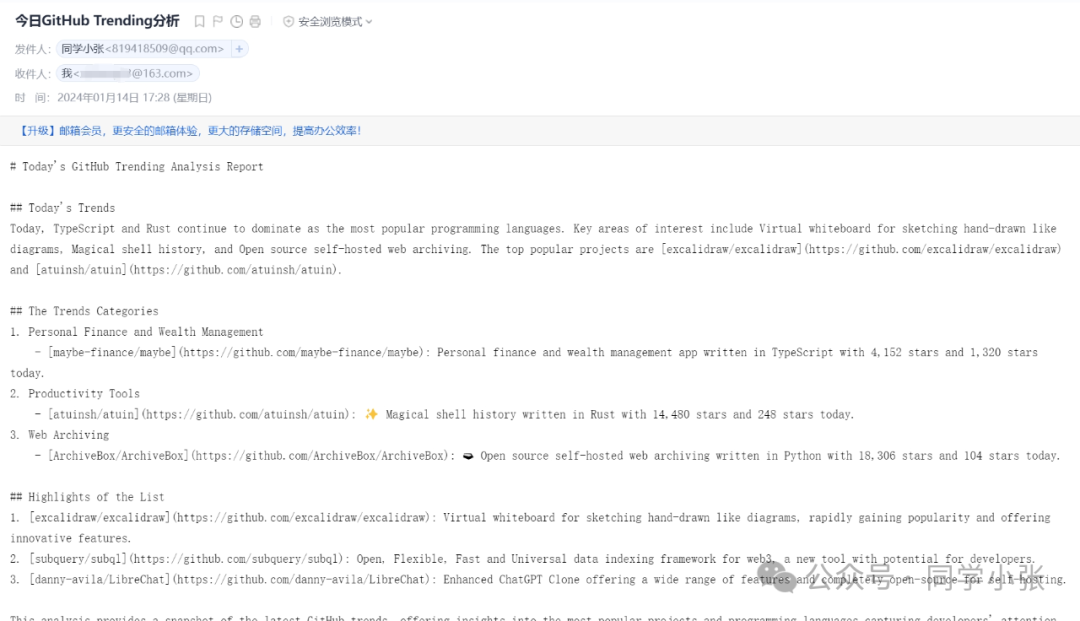
First, let’s look at the results
-
Code and Detailed Comments
...... Action and role, as well as timer code remain unchanged

import email.utils
from metagpt.schema import Message
import smtplib
from email.mime.text import MIMEText

class EmailClient:
    def __init__(self):
        pass

    async def send_email(self, sender_email, receiver_email, subject, message):
        # Set sender and receiver email addresses
        sender = sender_email
        receiver = receiver_email

        # Set email content
        msg = MIMEText(message, 'plain', 'utf-8')
        msg['Subject'] = subject
        msg['From'] = email.utils.formataddr(('Student Xiao Zhang', sender))
        msg['To'] = receiver_email

        # Connect to SMTP server
        smtp_server = 'smtp.qq.com'
        smtp_port = 25
        smtp_username = '[email protected]'
        smtp_password = 'xxxxxxxxx' # The password here is generated after enabling STMP in QQ email, not the account password

        try:
            server = smtplib.SMTP(smtp_server, smtp_port)
            server.login(smtp_username, smtp_password)
            server.sendmail(sender, receiver, msg.as_string())
            server.quit()
            print("Email sent successfully!")
        except Exception as e:
            print("Failed to send email:", str(e))

async def email_pusher_callback(msg: Message):
    client = EmailClient()
    # Call function to send email
    sender_email = '[email protected]' # Sending email
    receiver_email = '[email protected]' # Receiving email
    subject = 'Today's GitHub Trending Analysis'
    message = msg.content
    await client.send_email(sender_email, receiver_email, subject, message)

# asyncio.run(email_pusher_callback(Message("test"))) # Email interface test

# Entry point,
from datetime import datetime, timedelta
current_time = datetime.now()
target_time = current_time + timedelta(minutes=1)
cron_expression = target_time.strftime('%M %H %d %m %w')
spec = cron_expression
logger.info(f"cron expression: {spec}")
async def main(spec: str = spec, wxpusher: bool = True):
    callbacks = []
    callbacks.append(wxpusher_callback) # WeChat callback
    callbacks.append(email_pusher_callback) # Email callback

    if not callbacks:
        async def _print(msg: Message):
            print(msg.content)
        callbacks.append(_print)

    async def callback(msg):
        await asyncio.gather(*(call(msg) for call in callbacks))

    runner = SubscriptionRunner()
    await runner.subscribe(OssWatcher(), GithubTrendingCronTrigger(spec), callback)
    await runner.run()

if __name__ == "__main__":
    import fire
    fire.Fire(main)
This is where I’ll stop for now. Overall, the subscription agent task is up and running, and I’ve gained an understanding of some concepts and the usage of MetaGPT. In the future, I will further break down and summarize the implementation details of each step, the pitfalls encountered during the process, and how to solve them. Additionally, I will explore how to write web scraping code using GPT, how to implement WeChat pushes, how to implement email pushes, and a simple exploration of timers. These related skills used in this lesson will also need further breakdown and study.
If you’ve read this far, please give a thumbs up before you leave~
Click [Read Original] to use ChatGPT4, Gemini, and DELL·E3 drawing for free!