Skip to content
Recently, Ethereum has fallen below $3000 for the first time since February this year, plummeting nearly 15% in a day. According to CoinGlass data, in the last 24 hours, a total of 257,508 people have been liquidated across the cryptocurrency market, with a total liquidation amount of $967 million (approximately 7.027 billion RMB). The largest single liquidation occurred on Binance-BTCUSDT, valued at $8.4613 million.
Happy Monday everyone, let’s keep pushing through this new week!
This article is reprinted from coder_pig‘s blog, mainly sharing how to master GitHub Copilot, which I believe will be helpful to everyone!
Original article address:
https://juejin.cn/post/7355666189475971109
GitHub Copilot is an AI coding assistant launched by GitHub, based on a deep learning model trained on a large amount of publicly available source code. It aims to help developers write code faster and smarter and was officially launched on June 22, 2022.
💁♂️ So, it’s not something new. I’ve been using GitHub Copilot + GPT-4 extensively for a while now, and I feel like I’ve become a coding assistant myself. I can’t write code; I can only ask questions and press the Tab key 🤡.
I used to tinker with some tricks to improve development efficiency for automatic code generation.
But in front of these AI coding assistants, I truly feel like a novice; this is what automatic generation is all about! Besides GitHub Copilot, I have also tried several domestic alternatives, such as CodeGeex and Tongyi Lingma, but in the end, I found Copilot to be the most useful 😄. Its core features include:
-
Intelligent code generation: It infers and generates corresponding code snippets based on the context of the current code or comments edited by the developer, including but not limited to functions, variables, classes, test code, comments, and documentation strings. It usually provides appropriate completion options, and in most cases, you can easily complete code writing by just pressing the Tab key.
-
Code understanding and interaction: Copilot answers your questions and provides instant help and guidance during coding, including code explanations, code optimization suggestions, and code debugging.
🤔 By the way, be sure to distinguish it from Microsoft’s Microsoft Copilot:
Microsoft Copilot is an AI assistant launched by Microsoft and integrated into Windows 11, targeting a broader user base. Its specific features and advantages include a deep AI experience, cross-product task completion capabilities, intelligent assistant dialogues, daily AI companion roles, voice or text interaction modes, full system integration, deep system integration and control, the potential to create “killer” applications, and new skills that enhance the PC experience.
Tips: 😁 In this article, Copilot refers to GitHub Copilot!!!
/ GitHub Copilot is not free!!! /
😬 Such a useful tool naturally comes at a cost 💰, with a subscription model charged monthly or yearly, as follows (unit: ❗️ USD):
-
Individual version: $10/month, $100/year
-
Business version: $19/month/user
-
Enterprise Plus version: $39/month/user
If you don’t have a foreign credit card or PayPal as a payment method, you can get a virtual foreign credit card; there are many tutorials online for this. GitHub Copilot offers a 30-day free trial, and after that, you need to pay for a subscription to continue using it.
😏 By the way, if you are a certified student/teacher or a contributor to popular open-source libraries, you can use it for free. You can check the official GitHub Copilot website; if it shows “Use GitHub Copilot for free” instead of “Start your 30-day free trial,” congratulations, you can enjoy a year of Copilot for free 🎉.
😑 Of course, the official subscription prices can be a bit pricey for regular developers. There are mainly two “affordable” ways to use it on platforms like Taobao and XFish:
-
Student package: Unstable, with a risk of account suspension! It’s recommended to create a secondary account and avoid using your primary account! Sometimes, you may also need to verify your student status.
-
Remote authorization: Make sure to recognize enterprise authorization! Some unscrupulous merchants use the 30-day free authorization for low-priced sales, which is extremely unstable.
😐 Finally, there is a risk that the seller might run away, so if you buy it, try to choose monthly payments. If something goes wrong, the loss can be minimized~
/ Installing GitHub Copilot /
😄 Assuming the reader has resolved the payment issue, let’s discuss how to use GitHub Copilot in the two mainstream IDEs~
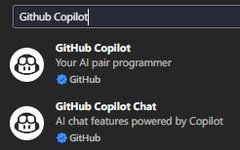
Click on the left Extensions, search for GitHub Copilot, and install both plugins.
GitHub Copilot requires a VPN, so you need to set up a proxy. Click Settings, search for proxy, fill in the proxy address. I used Clash with the default port 7890, and after setting it, press Ctrl+S to save:
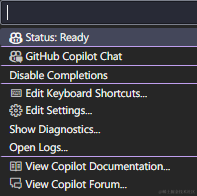
Next, you need to authorize your GitHub account to log in. Click on the Copilot icon at the bottom right, and an authorization prompt will pop up. Just follow the instructions. After successful authorization, the slash on the icon will disappear, and clicking it will show a pop-up like this at the top:
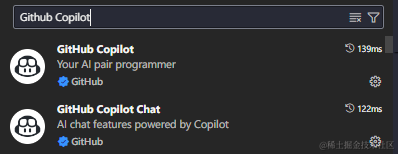
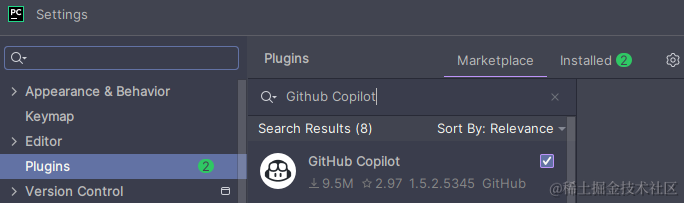
Click on File → Settings → Plugins → Marketplace → Search for GitHub Copilot, and click Install:
You also need to set the proxy here. Search for proxy in Settings, locate the HTTP Proxy option, and fill in the proxy address in the corresponding field:
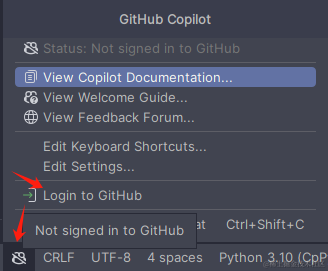
Then click the small icon at the bottom right and select Login to GitHub:
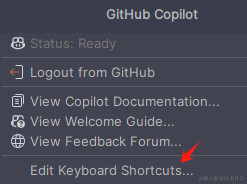
Again, a pop-up will appear, just follow the instructions, and after successful authorization, you will see a prompt like this~
💁♂️ Below is a summary of my usage experience. For more detailed/latest tutorials, you can refer to the “GitHub Copilot Official Documentation” for learning~
-
-
-
Alt + ] → Next suggestion (only when there are multiple suggestions).
-
Alt + [ → Previous suggestion.
-
Alt + \ → Trigger suggestion (if Copilot hasn’t provided a suggestion or if you accidentally rejected it).
-
Ctrl + Enter → Open a separate Copilot panel to provide 10 suggestions.
-
Ctrl + Shift + C → Open GitHub Copilot Chat
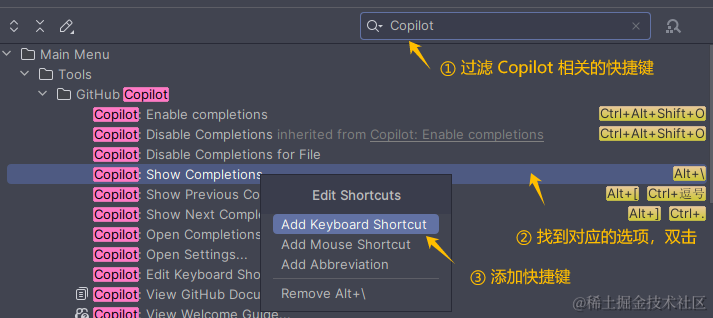
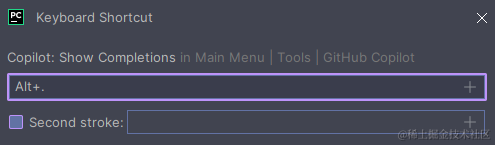
😐 The default shortcuts may have conflicts, for example: in my PyCharm, Ctrl + \ expands the File tab. Click Edit Keyboard Shortcuts… to customize the shortcuts:
In the search box, enter Copilot to filter, locate the option to modify, double-click, and click Add Keyboard Shortcut to add a shortcut:
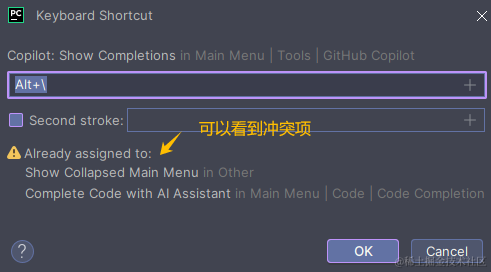
Then, you can see the conflicting items:
After trying several, I found that Alt+. is not occupied, so I used this to trigger suggestions. Click OK to save.
The method for modifying shortcuts in VS Code is similar~
Intelligent Code Generation
😑 I feel the core of it boils down to these two points:
After pressing Enter/code changes, passively wait for Copilot to provide completion suggestions, accept suggestions with Tab or reject with Esc.
Write prompts in comments to explain the logic and steps for generating the target content, and Copilot will generate the corresponding content.
The former does not require 🧠 Tab, while the latter only requires that you are good at prompts to create 🌸. Let me demonstrate simply~
① Describe the function requirements to be generated
😂 I reduced the frame rate of the GIF here, so it doesn’t look that smooth. After pressing Enter, you still have to wait for Copilot’s prompt~
④ Make the requirements more detailed and specific, such as specifying function names, parameter names, and the language of comments:
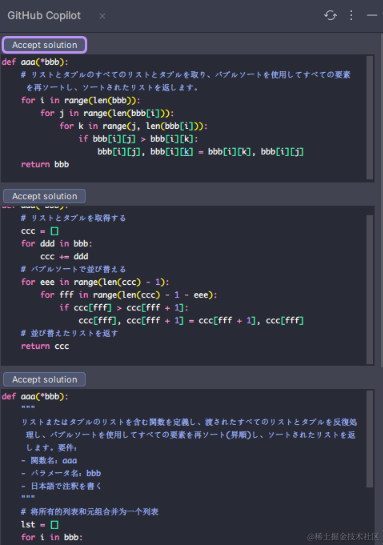
After pressing Enter, it will not trigger the suggestion prompt. You need to press Ctrl + Enter → to open the Copilot panel separately:
Click Refresh, wait for Copilot to generate 10 suggestions, select the preferred prompt, and click Accept solution to accept the suggestion. You can also copy and paste suitable content as needed:
🤏 In summary, the content generated depends on how you write your prompts. You can use Copilot for translation:
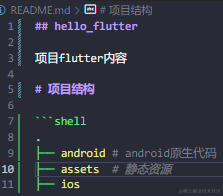
😂 It can even assist in document writing, such as writing a README.md file:
However, markdown suggestions are not enabled by default. Click Edit Setting, find markdown, and change the value from false to true.
Code Understanding and Interaction
😳 The GitHub Copilot Chat function in the two IDEs has some differences. The commands are designed to provide more professional or targeted help and interaction while using Copilot Chat. They are not mandatory; for example, you can use “explain xxx” instead of “/explain”!
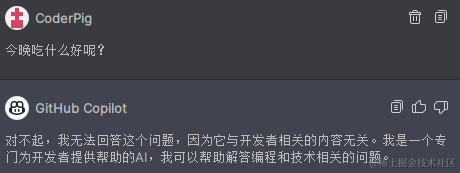
😄 You can use it as a simplified version of ChatGPT, but it only answers technical questions:
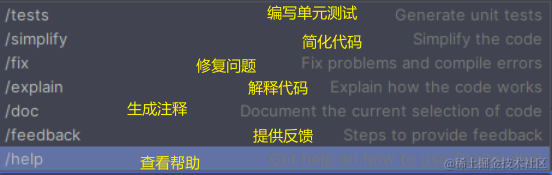
In the chat box, type /, and it can provide assistance based on the selected code/current mouse position/current file or project:
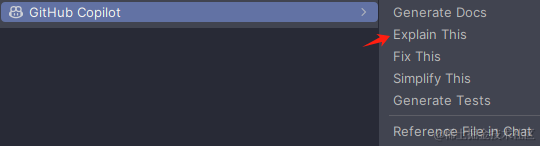
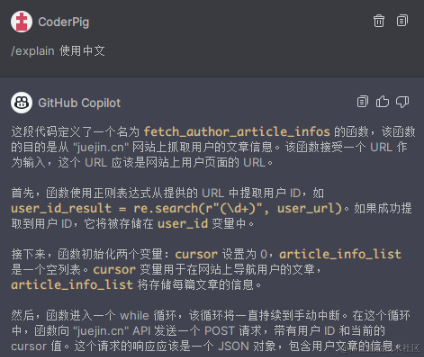
For example, to explain code, select the line of code to be explained, and in addition to typing /explain in the chat box, you can also right-click and select GitHub Copilot → Explain This:
By the way, it defaults to explaining in English; if you need it in Chinese, you can add “in Chinese” after /explain:
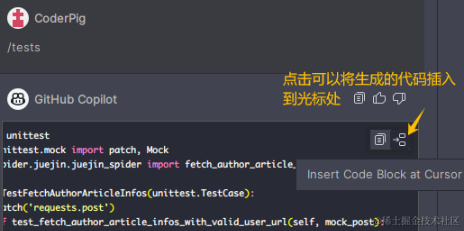
In addition to copying generated code, you can also insert the code directly at the cursor position~
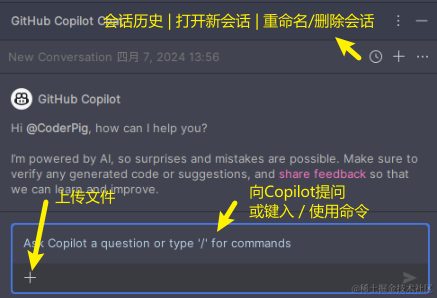
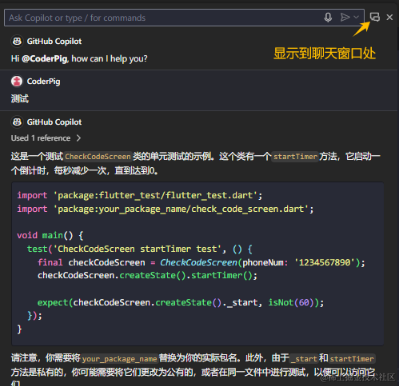
Click the Copilot icon at the bottom, select GitHub Copilot Chat, and type /help to discover many commands:
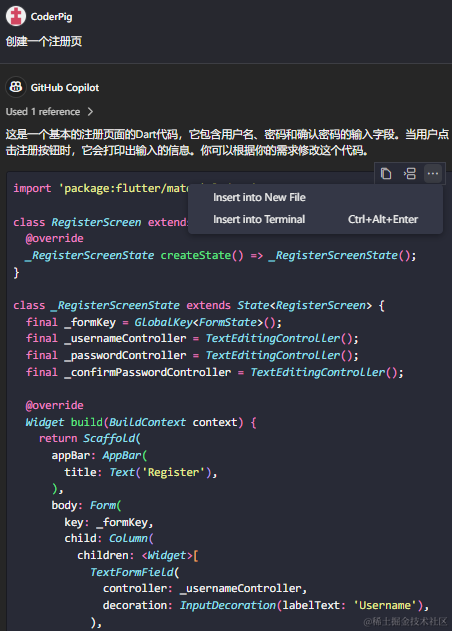
Example of combined commands: Check terminal error → @workspace /explain #terminalLastCommand. In addition to supporting insertion at the cursor position, it can also insert into new files or the terminal.
Additionally, the Copilot plugin in VS Code supports inline shortcuts: Ctrl + I → brings up an input box in the current cursor line for questions or commands:
If you want to invoke it globally, you can press Ctrl + Shift + I:
🤔 I feel that the basic gameplay of GitHub Copilot is just these. If there are any omissions or cool tricks, feel free to add them in the comments. Thank you 🙏~
My new book, “The First Line of Code 3rd Edition,” has been published!
Jetpack Bluetooth – A More Elegant Way to Use Bluetooth
Yes, the Android version of the Edge browser now supports Extensions!
Feel free to follow my public account
Learn technology or contribute articles

Long press the image above to scan the QR code to follow