Introduction
Recently, ChatGPT has gained immense popularity in the community, with many users sharing interesting interactions with it. It acts like the “strongest expert” on Earth, easily answering various questions with clear and structured responses, often citing examples to support its points. When asked to help with programming, it not only provides usable code but also outlines the implementation ideas.
Thus, I found a ChatGPT plugin that can be installed in the IDE, allowing AI to assist in coding.
Installing the ChatGPT Plugin
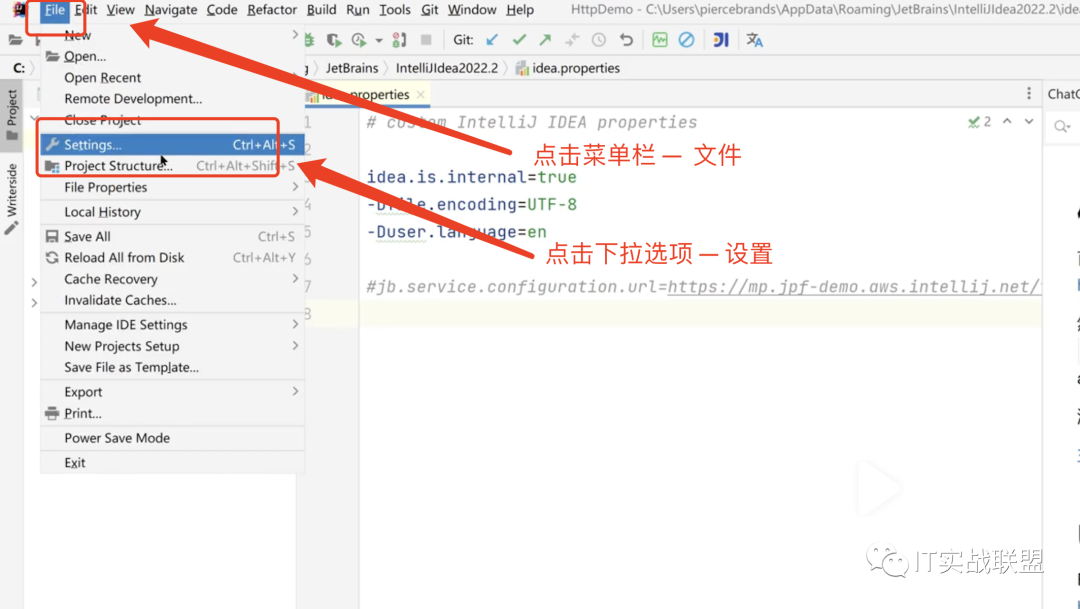
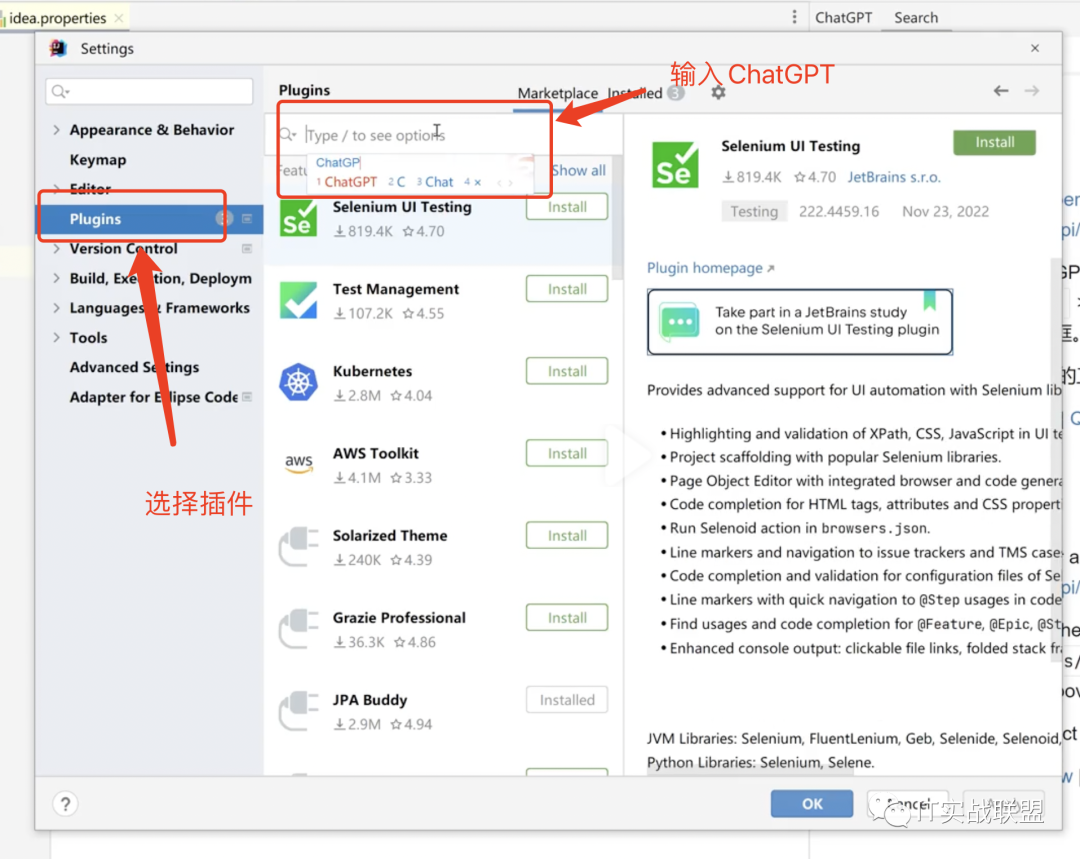
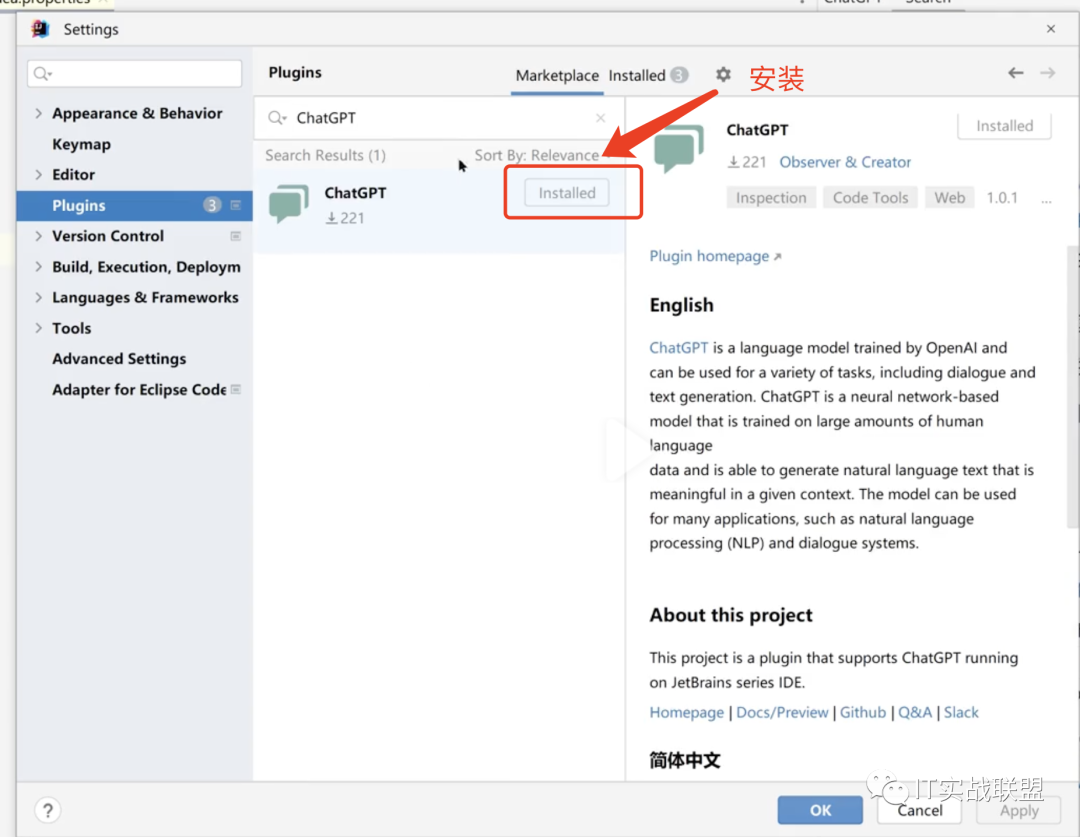
Open IDEA and click on the menu bar File > Settings/Preferences > Plugins > Marketplace > search for “ChatGPT” > Install Plugin, as shown in the images below:
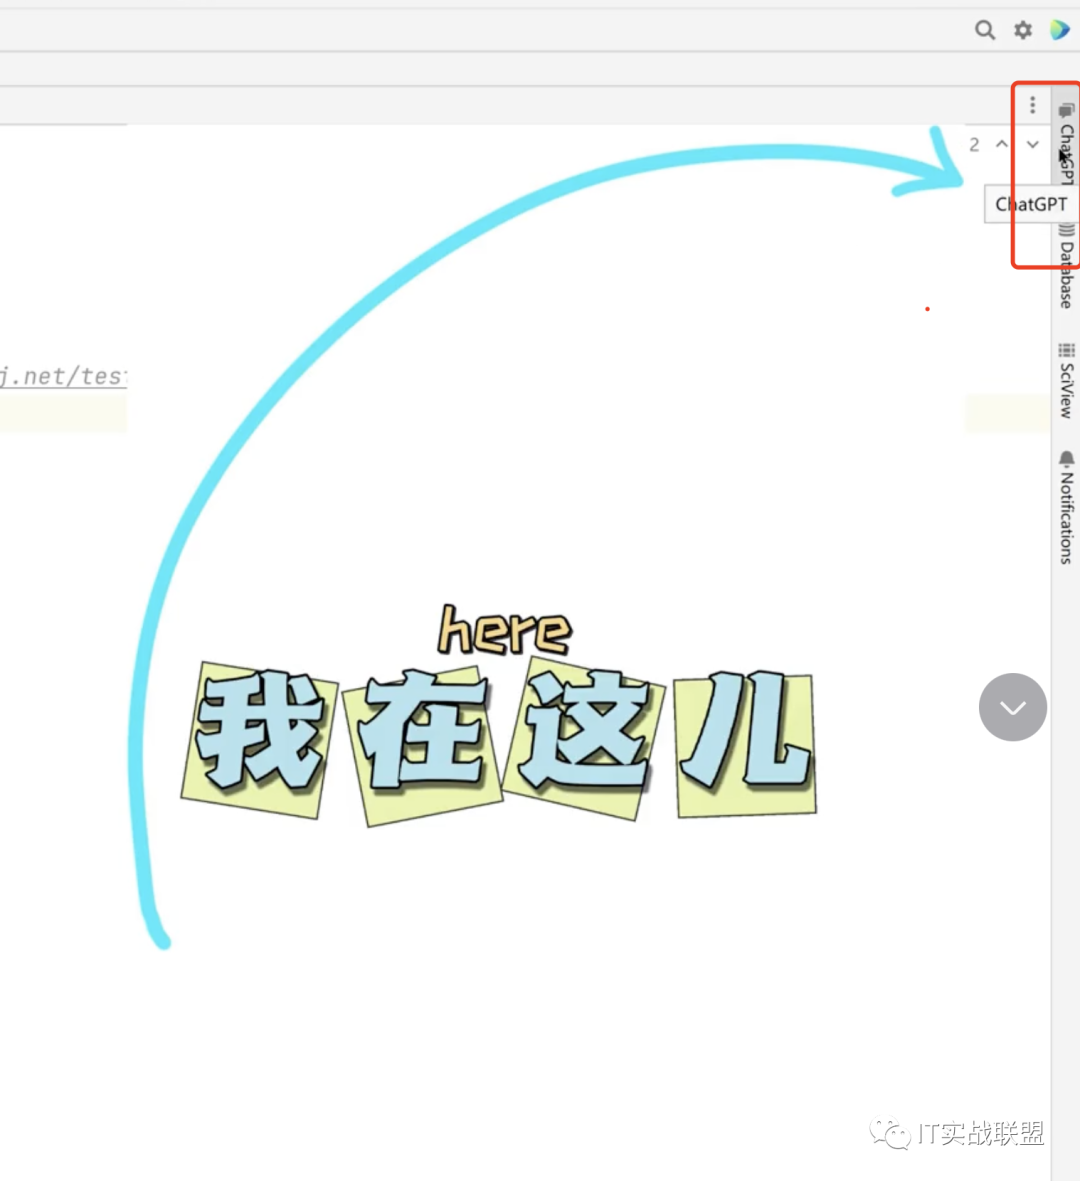
After successful installation, there will be a ChatGPT menu on the far right of the IDE; click it to open the main interface.
Plugin Configuration – Setting Encoding
For Windows computers, open the installation directory and find idea64.exe.vmoptions. If you are using another system, it may not be named idea64; you can find the corresponding .vmoptions file.

Open the idea64.exe.vmoptions file and add the UTF-8 configuration at the end:
-Dfile.encoding=UTF-8;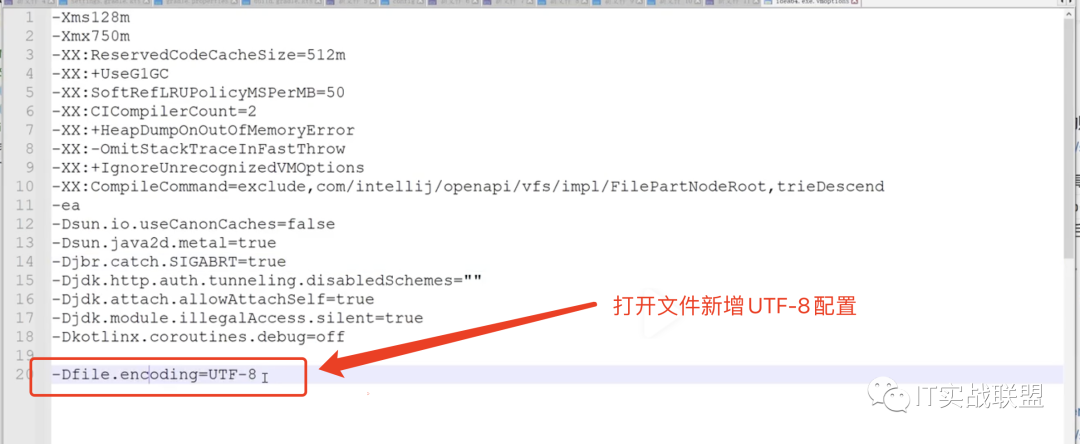
Restart IDEA!
Plugin Configuration – Setting URL
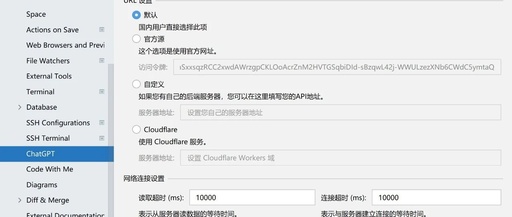
Open the ChatGPT settings:
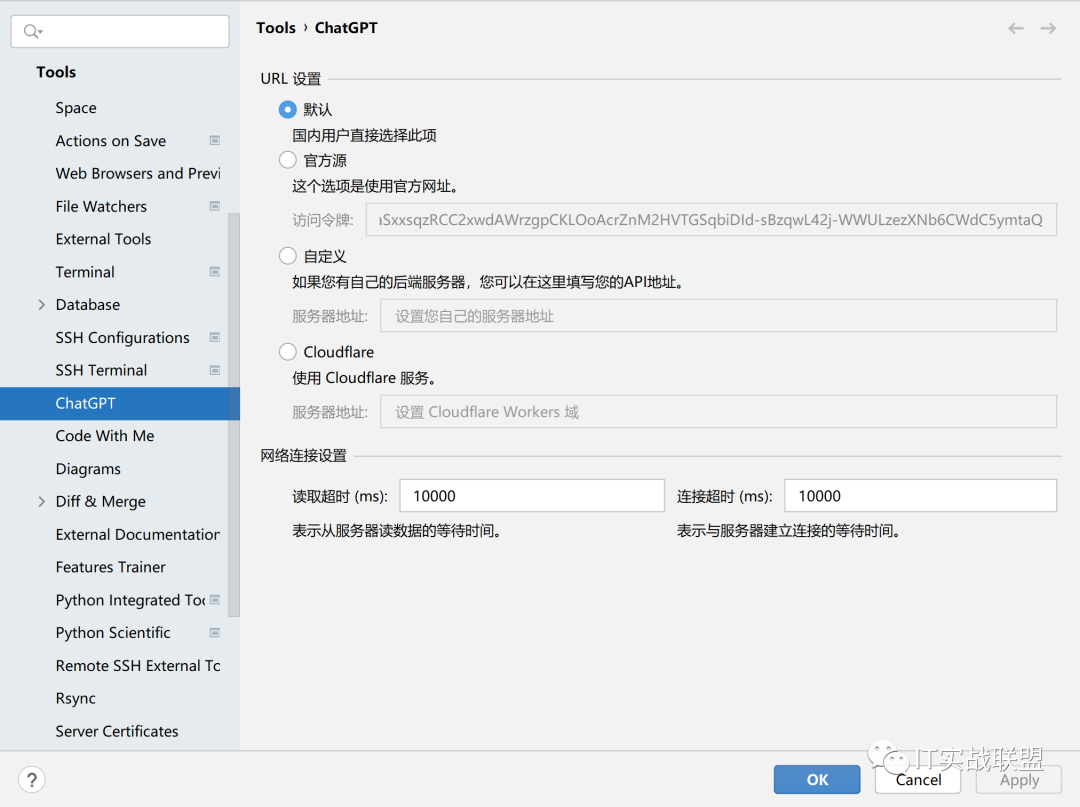
There are four sources in total. For those who want to take the easy route, simply select the first option “Default” without needing to set the access token information; you can use it directly. Interested users can also check the other options, which have different characteristics.
Default
This uses a domestic server source by default. You do not need to configure an access token; just use it directly.
Advantages: Convenient to use, plug and play.
Disadvantages: May experience instability and slow network speeds.
Official Source
As the name implies, this is the source provided by OpenAI.
Advantages: It works relatively well if the network conditions are good, plug and play. It is also a recommended server source at the moment.
Disadvantages: Requires configuring an access token, which is relatively cumbersome.
Custom
Custom refers to servers that you set up yourself. It is similar to the default source, with the difference being that the server is self-hosted.
Advantages: Network issues should not be a problem. It should be faster and relatively stable.
Disadvantages: Requires setting up your own server, which is more cumbersome than configuring the access token for the official source.
Cloudflare
Uses Cloudflare as an intermediary proxy service.
Advantages: Relatively stable, access speed is decent (depending on network conditions).
Disadvantages: Requires your own domain name and some configuration. Slightly more troublesome than configuring the access token for the official source.
Summary: The above introduces the differences between several URL sources; please set according to your actual situation.
Plugin Configuration – Setting Network
Read Timeout
This indicates the wait time for reading data from the server. Default: 10s (10000). If the time for reading data exceeds the set time below, the connection will be disconnected.
Recommendation: If network conditions are poor, you can appropriately increase this value. For example, set it to 20s (20000) or even 30s (30000).
Connection Timeout
This indicates the wait time for establishing a connection with the server, default: 10s (10000). If the set time is exceeded without establishing a connection, the connection will be disconnected.
Recommendation: If network conditions are poor, you can appropriately increase this value. For example, set it to 20s (20000) or even 30s (30000).
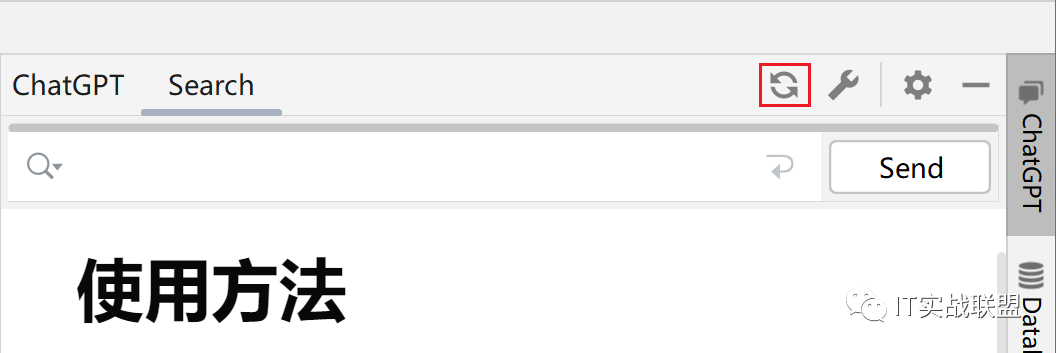
Usage
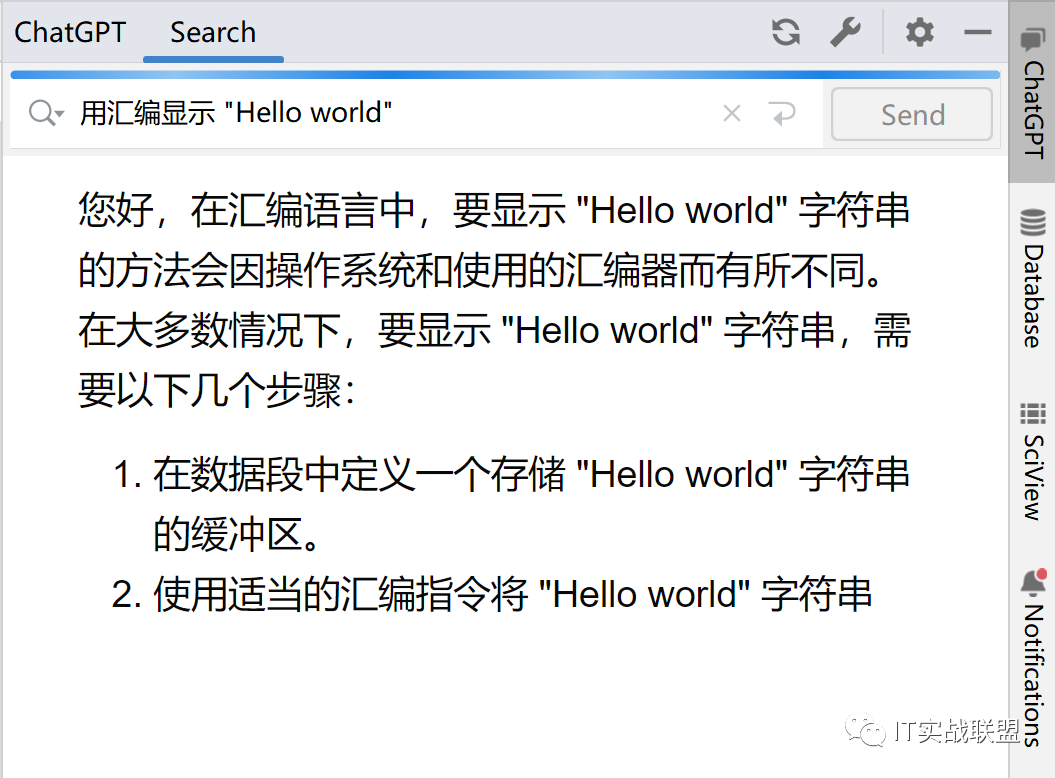
Once the above configurations are complete, open ChatGPT in the tool window, input “Display Hello World in Assembly” in the text box, and click the send button on the right to start requesting data from the server. After receiving the data returned from the server, the content will be displayed in the area below.
When we want to end the current question and start a new one, we can click the tool window menu bar button  to create a new thread.
Create HTTP Client
Input: create http client with java
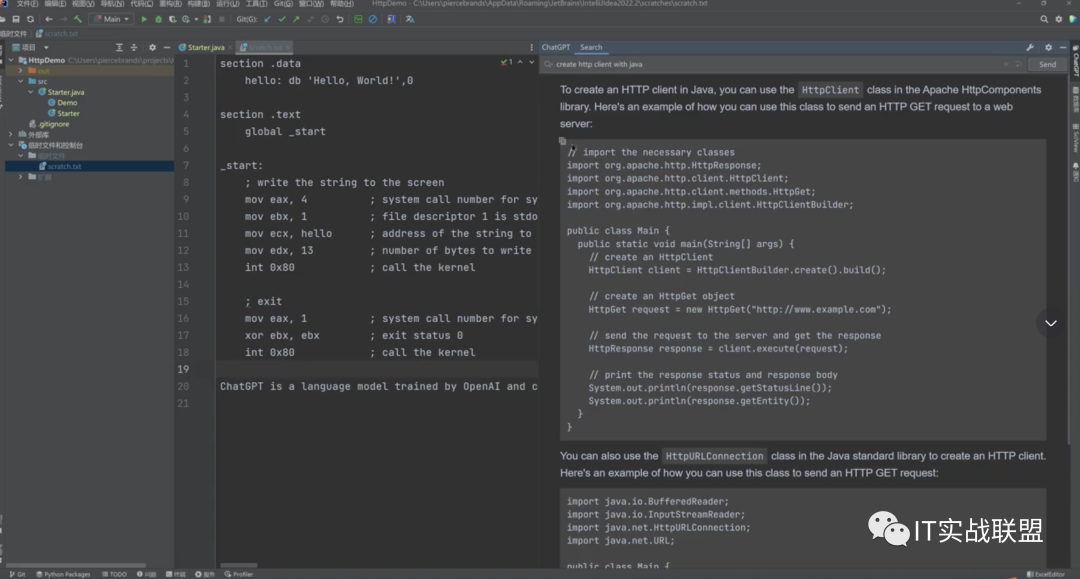
You can see the corresponding Java code has come out!
For more ChatGPT usage tutorials: docs.obiscr.com/article/GPT-QA

☞ Choosing the right tools allows you to leave work early; essential tools for programmers.
☞ A few lines of code to gray out the website.
☞ BAT Architecture (V): Production practice of Zcool based on service mesh ASM.
☞ Open source recommendation: A browser data export tool.