After several iterations, the extension capabilities of the Deepin file manager (dde-file-manager) have become stable. Seeing the increasingly rich new features in file management, as a technology enthusiast, I also wanted to write a plugin to extend the functionality of file management myself.
The development tool I chose is Deepin-IDE for two reasons: first, Deepin-IDE itself integrates the plugin template for file management, which means developers only need to create template code through guidance and then modify it, without having to read a large amount of file management source code. Another reason is that Deepin-IDE supports a considerable amount of AI capabilities, including adding comments, code translation, bug fixing, code explanation, code review, generating unit tests, and generating commit messages, which is a great opportunity to see how much efficiency can be improved.
First, let’s talk about the conclusion: with the help of templates and AI, the entire development process was very smooth, allowing me to add the functionality in less than two hours. Next, I will share the complete development process with everyone.
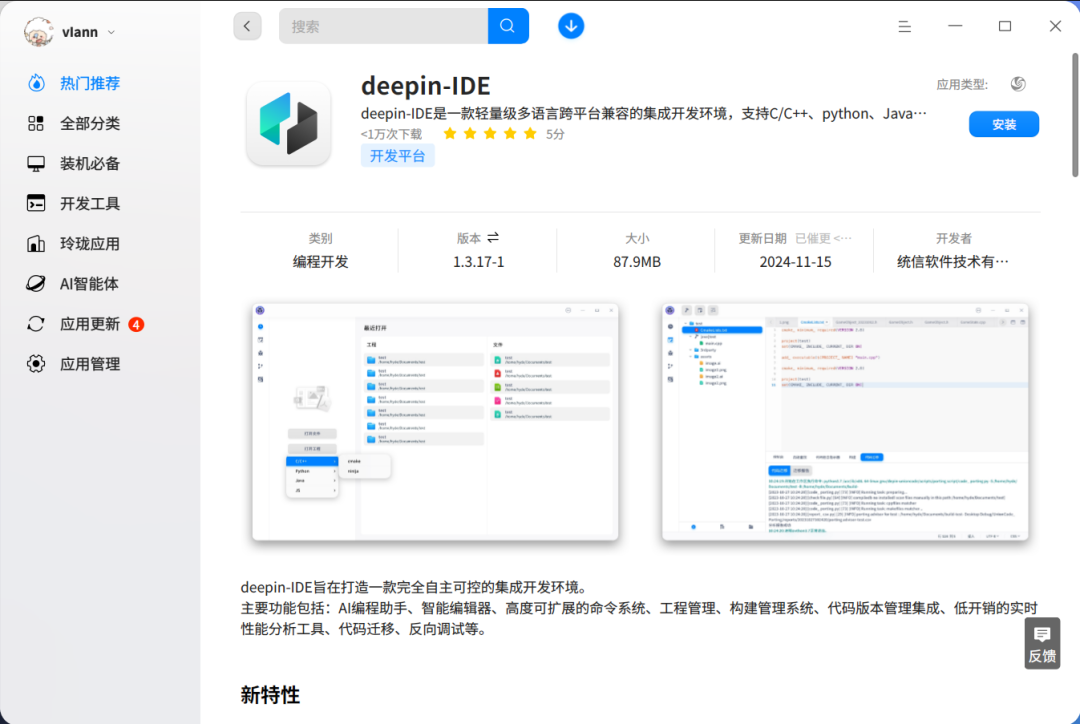
First, download the latest version of Deepin-IDE from the app store:
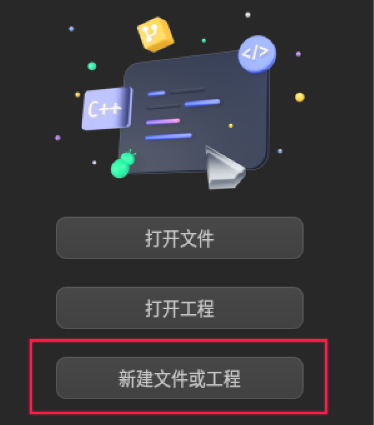
After starting Deepin-IDE, the first thing you see is the recent access page. Click the button in the image below, and in the pop-up guidance interface, select the file management plugin, then follow the wizard step by step to complete the configuration.
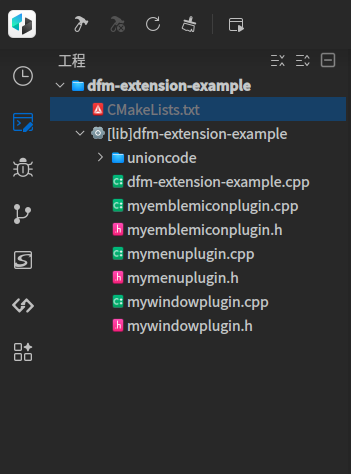
After the guidance is completed, you can see the code structure of the plugin template in the project tree:
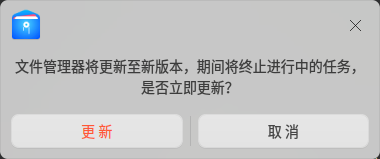
This template contains documentation. Follow the instructions to configure the project. After compilation, the plugin file will be automatically installed in the designated location, and the file manager will detect the plugin changes and prompt the user to update:
To test whether the plugin is installed successfully, open the file manager, right-click on a file, and you should be able to see the new context menu:
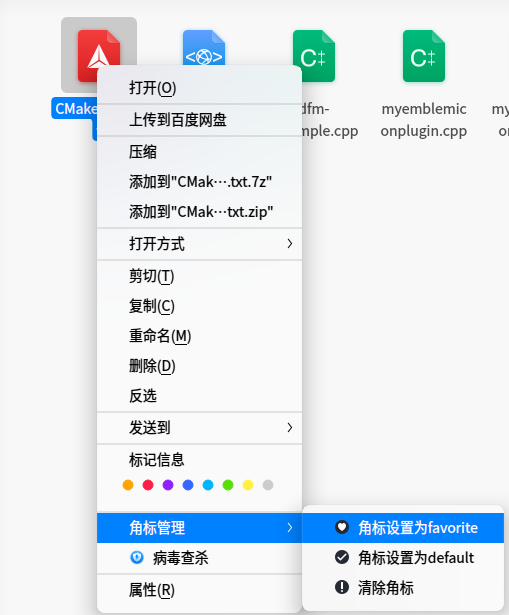
These context menu options are the functionalities already implemented by the plugin template. What we need to do is modify this code, and in this process, we can experience the AI-assisted programming capabilities of Deepin-IDE.
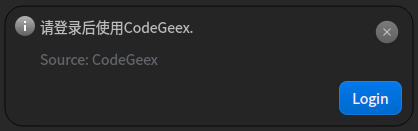
It should be noted that if you want to experience the complete AI functionality, you need to do one more preparation step, which is to log in to the website associated with the AI plugin: in the message interface of the IDE, a login prompt for the AI plugin will pop up:
Click the login button, and once logged in, you can use all the AI functionalities. At this point, all the preparation work is complete.
Part 2 Explanation Function
To add the encryption functionality, the first step is to add a right-click menu in the file manager. Find the corresponding source file, read the code, and locate the following position:
bool MyMenuPlugin::buildNormalMenu(DFMExtMenu *main, const std::string ¤tPath, const std::string &focusPath, const std::list &pathList, bool onDesktop) {...// Create action through proxy, this action is allocated in the heap, do not release it yourself to avoid memory leak!auto rootAction { m_proxy->createAction() };rootAction->setText("Emblem Management");// Create menu through proxy, this menu is allocated in the heap, do not release it yourself to avoid memory leak!auto menu { m_proxy->createMenu() };// Secondary menu is created in Hover to reduce the performance overhead of displaying the primary menurootAction->setMenu(menu);rootAction->registerHovered([this, pathList](DFMExtAction *action) {if (!action->menu()->actions().empty())return;auto favoriteEmblemAct { m_proxy->createAction() };favoriteEmblemAct->setText("Set Emblem as Favorite");favoriteEmblemAct->setIcon("emblem-favorite");favoriteEmblemAct->registerTriggered([this, pathList](DFMExtAction *, bool) {std::for_each(pathList.begin(), pathList.end(), [this](const std::string &path) {setEmblemIcon(path, "emblem-favorite");});});...return true;}
The code comments are very detailed, and the method for adding is simple: you just need to create a menu and an Action, and register it through the interface. The specific logic is handled in the callback of the Action, which will be executed automatically when the user triggers the menu.
The above understanding of the code is based on personal experience. In scenarios where the code is not very familiar, it is just right to try the AI explanation function.
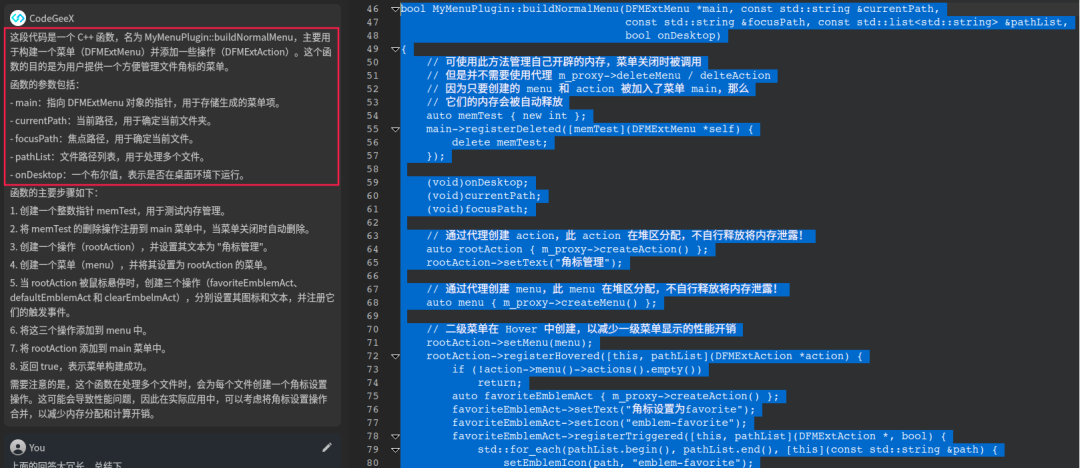
Select this piece of code, right-click and choose the explain code option, and you will get the following result:
Pay special attention to the content in the red box. The function description part is quite accurate and close to my understanding. In addition, AI also explained all the function parameters, which provides more information than reading the code myself.
However, this function still has its drawbacks; the specific steps listed later are somewhat cumbersome, not as direct as “show me the code”.
But think of it from another perspective: if I were reviewing code in other languages, or dealing with algorithms or shader code, the advantages of the explanation function would be highlighted, like the vernacular annotations in classical Chinese; they may not be necessary, but they are invaluable.
So, in the current context of dazzling AI functionalities, using them only in appropriate scenarios and with suitable needs will yield better results.
Having understood the general meaning of the code, the next step is the process of hand-coding.
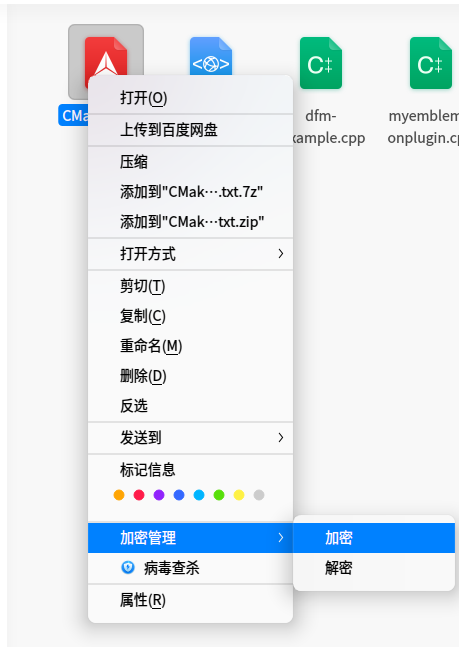
The first step is to modify the existing code in the template, such as removing unnecessary Actions, renaming the menu, etc., to meet my final requirements. The effect is as follows:
With the interface ready, the next step is to add the logic for encryption and decryption.
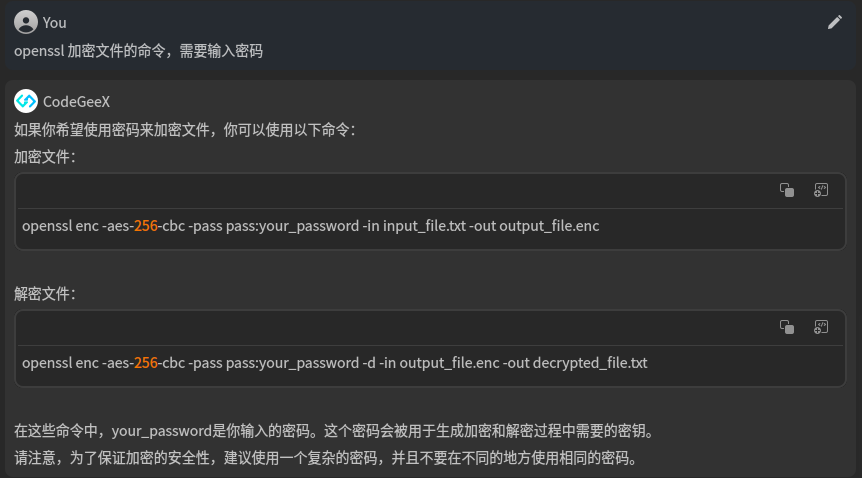
For developers who do not often use encryption tools, they may not know which encryption tool to use or what parameters to set. In this scenario, I believe most of my peers would instinctively open ChatGPT for Q&A operations.
However, this time, I am inside Deepin-IDE, so I directly expand the Q&A interface on the left side of Deepin-IDE to query. After multiple rounds of Q&A, I got the following answer:
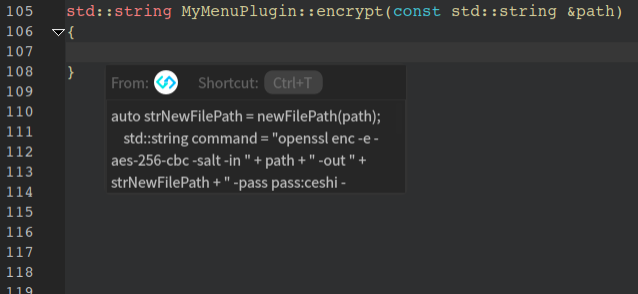
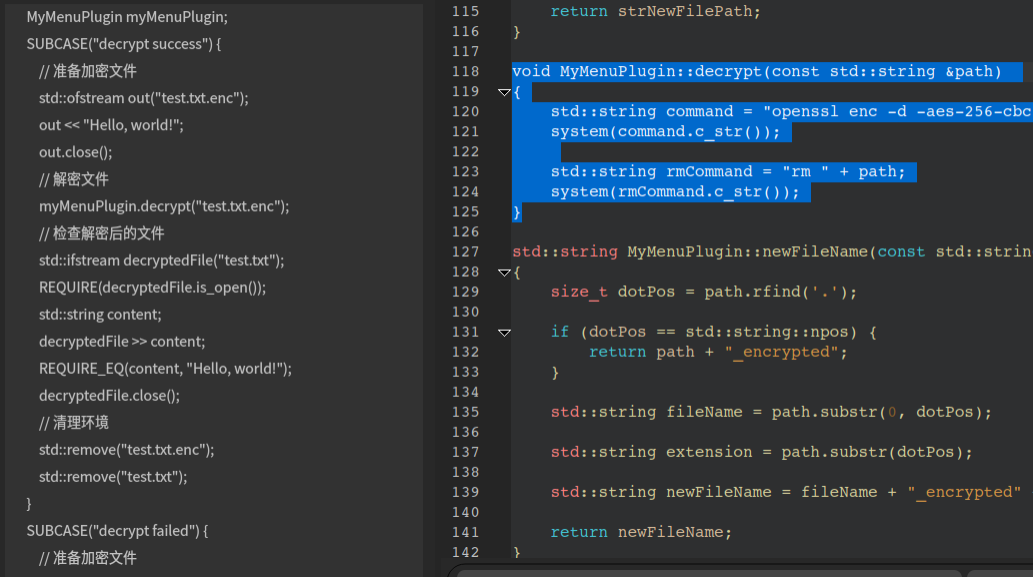
To integrate the encryption and decryption functionalities, I added two functions in the corresponding class, one for encryption and one for decryption. Then I started typing the code, and after pressing Enter at the end of the function body, I received a code completion prompt from Deepin-IDE:
By pressing the shortcut key Ctrl+T, I filled in the corresponding code, and then used this function again to quickly obtain the complete function code:
Using the same method, I also completed the code for the decryption function.
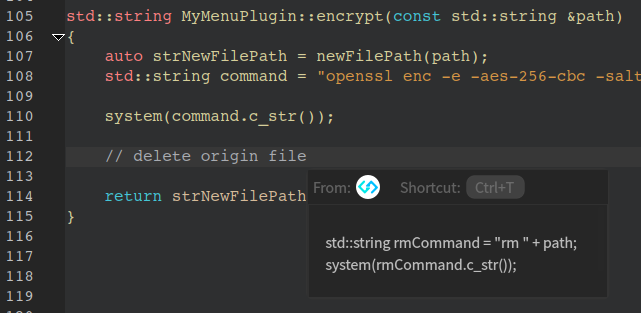
From my experience, the code completion feature resolved about 90% of my workload, but it did not fully meet the functional requirements, as the original files were still left on the local machine.
I first wrote a comment at the end, indicating that the original files needed to be deleted, and then lightly pressed Enter. Before I could react, the completion content was already presented:
To maintain the elegance of the previous implementation, I happily pressed the Ctrl + T shortcut key. Then, by repeatedly using the AI code completion feature, I implemented the remaining functions one by one.
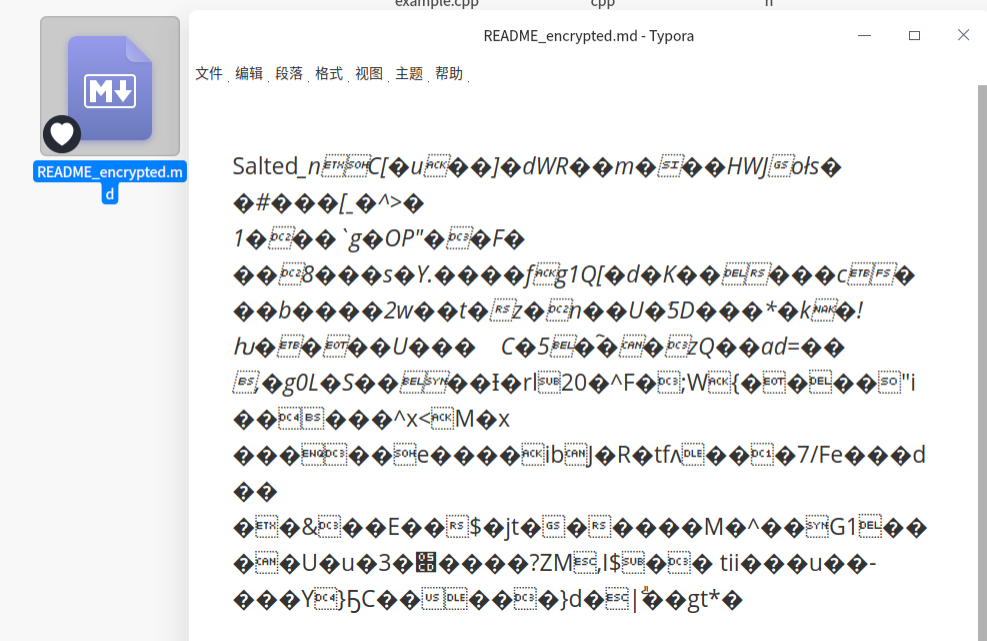
Finally, I compiled the entire project and randomly selected a “README.md” file to test the results. This is the original content of the file:
Next, I performed the encryption operation:
1. Right-click the file and select the encryption option.
2. A new file appeared in the current directory, with the name suffixed with “encrypted”, and the original file was deleted.
3. Opening this file, I found that its content had been encrypted and could not be read normally.
If you observe closely, you will find that a heart icon has appeared in the lower left corner of the file icon, indicating that this is an encrypted file. Decryption follows the same operation, which will restore the file name to its original name, and the encryption icon will disappear from the lower left corner.
The functionality has been completed, but to ensure code quality, unit testing is also an essential part.
Deepin-IDE also provides this feature; select a piece of code and let AI generate the test content to see the results:
This project did not use any testing framework, but AI still managed to set up the general structure of the test cases. Like most AI-assisted features, it still requires manual modifications. However, it is roughly estimated that this feature can save about 50% of the workload.
To complete the development loop, the next step is to submit the code to the repository.
In the conventional submission method, we summarize the modified content based on experience to form the commit message.
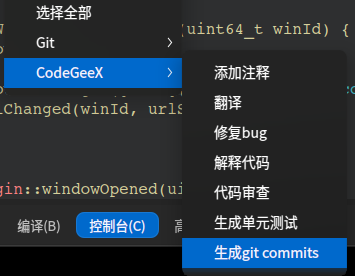
In Deepin-IDE, you can directly generate commit messages based on the modified content, even listing the basis for the summary. Right-click on CodeGeeX > Generate git commits, as shown in the image below:
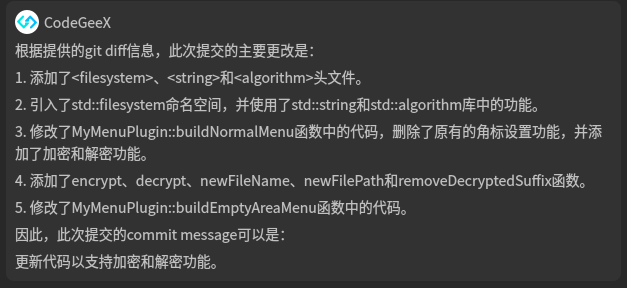
Then, in the intelligent Q&A interface, the commit message and basis will be output:
The final summary sentence can be said to be very accurate, and it also saves a lot of thinking time.
Of course, if you are afraid that the submitted PR will be violently reviewed by others, you can conduct a preliminary review locally.
This can be done through the built-in code review feature of Deepin-IDE. The method is still to select the code and trigger it from the right-click menu, resulting in the following:
Here I selected the code for the encryption function, totaling only 12 lines, but the AI functionality provided as many as 10 review suggestions. I was once skeptical about how my coding quality could drop to such a level, but upon closer inspection, the AI was indeed overly strict in its reviews.
It is recommended that developers treat it as reference information and extract useful parts for self-checking.
The AI capabilities in Deepin-IDE are continuously improving.During this use, I also utilized the plugin template feature provided by Deepin-IDE, which significantly reduced the difficulty of writing a file management plugin from scratch. As various system tools are integrated in the future, the improvement in development efficiency with Deepin-IDE will become increasingly evident.
Finally, a big thank you to community user Mozart for the submission, and everyone is welcome to actively submit and share your new discoveries and new ways to play.
GitHub: https://github.com/linuxdeepin/deepin-unioncode
Official website: https://ide.deepin.org/zh
to query. After multiple rounds of Q&A, I got the following answer:
To integrate the encryption and decryption functionalities, I added two functions in the corresponding class, one for encryption and one for decryption. Then I started typing the code, and after pressing Enter at the end of the function body, I received a code completion prompt from Deepin-IDE:
By pressing the shortcut key Ctrl+T, I filled in the corresponding code, and then used this function again to quickly obtain the complete function code:
Using the same method, I also completed the code for the decryption function.
From my experience, the code completion feature resolved about 90% of my workload, but it did not fully meet the functional requirements, as the original files were still left on the local machine.
I first wrote a comment at the end, indicating that the original files needed to be deleted, and then lightly pressed Enter. Before I could react, the completion content was already presented:
To maintain the elegance of the previous implementation, I happily pressed the Ctrl + T shortcut key. Then, by repeatedly using the AI code completion feature, I implemented the remaining functions one by one.
Finally, I compiled the entire project and randomly selected a “README.md” file to test the results. This is the original content of the file:
Next, I performed the encryption operation:
1. Right-click the file and select the encryption option.
2. A new file appeared in the current directory, with the name suffixed with “encrypted”, and the original file was deleted.
3. Opening this file, I found that its content had been encrypted and could not be read normally.
If you observe closely, you will find that a heart icon has appeared in the lower left corner of the file icon, indicating that this is an encrypted file. Decryption follows the same operation, which will restore the file name to its original name, and the encryption icon will disappear from the lower left corner.
The functionality has been completed, but to ensure code quality, unit testing is also an essential part.
Deepin-IDE also provides this feature; select a piece of code and let AI generate the test content to see the results:
This project did not use any testing framework, but AI still managed to set up the general structure of the test cases. Like most AI-assisted features, it still requires manual modifications. However, it is roughly estimated that this feature can save about 50% of the workload.
To complete the development loop, the next step is to submit the code to the repository.
In the conventional submission method, we summarize the modified content based on experience to form the commit message.
In Deepin-IDE, you can directly generate commit messages based on the modified content, even listing the basis for the summary. Right-click on CodeGeeX > Generate git commits, as shown in the image below:
Then, in the intelligent Q&A interface, the commit message and basis will be output:
The final summary sentence can be said to be very accurate, and it also saves a lot of thinking time.
Of course, if you are afraid that the submitted PR will be violently reviewed by others, you can conduct a preliminary review locally.
This can be done through the built-in code review feature of Deepin-IDE. The method is still to select the code and trigger it from the right-click menu, resulting in the following:
Here I selected the code for the encryption function, totaling only 12 lines, but the AI functionality provided as many as 10 review suggestions. I was once skeptical about how my coding quality could drop to such a level, but upon closer inspection, the AI was indeed overly strict in its reviews.
It is recommended that developers treat it as reference information and extract useful parts for self-checking.
The AI capabilities in Deepin-IDE are continuously improving.During this use, I also utilized the plugin template feature provided by Deepin-IDE, which significantly reduced the difficulty of writing a file management plugin from scratch. As various system tools are integrated in the future, the improvement in development efficiency with Deepin-IDE will become increasingly evident.
Finally, a big thank you to community user Mozart for the submission, and everyone is welcome to actively submit and share your new discoveries and new ways to play.
GitHub: https://github.com/linuxdeepin/deepin-unioncode
Official website: https://ide.deepin.org/zh
Scan or long-press to recognize the QR code to follow the official account,
and grasp the dynamics of the Deepin community in real-time
(^o^)/
D friends, please “like, share, and watch” to give the editor a big chicken leg~
Previous Selections | Selection in the past