Source: Deephub Imba


This article is approximately 2100 words long and is suggested to be read in 9 minutes.
This article will introduce two methods to apply augmentation to datasets in TensorFlow.
Direct Audio Augmentation
import librosa
import tensorflow as tf

def build_artificial_dataset(num_samples: int):
  data = []
  sampling_rates = []

  for i in range(num_samples):
      y, sr = librosa.load(librosa.ex('nutcracker'))
      data.append(y)
      sampling_rates.append(sr)
  features_dataset = tf.data.Dataset.from_tensor_slices(data)
  labels_dataset = tf.data.Dataset.from_tensor_slices(sampling_rates)
  dataset = tf.data.Dataset.zip((features_dataset, labels_dataset))

  return dataset

ds = build_artificial_dataset(10)from audiomentations import Compose, AddGaussianNoise, PitchShift, Shift
augmentations_pipeline = Compose(
[
AddGaussianNoise(min_amplitude=0.001, max_amplitude=0.015, p=0.5),
PitchShift(min_semitones=-4, max_semitones=4, p=0.5),
Shift(min_fraction=-0.5, max_fraction=0.5, p=0.5),
]
)def apply_pipeline(y, sr):
shifted = augmentations_pipeline(y, sr)
return shifted
@tf.function
def tf_apply_pipeline(feature, sr, ):
""" Applies the augmentation pipeline to audio files
@param y: audio data
@param sr: sampling rate
@return: augmented audio data
"""
augmented_feature = tf.numpy_function(
apply_pipeline, inp=[feature, sr], Tout=tf.float32, name="apply_pipeline"
)
return augmented_feature, sr
def augment_audio_dataset(dataset: tf.data.Dataset):
dataset = dataset.map(tf_apply_pipeline)
return datasetds = augment_audio_dataset(ds)
ds = ds.map(lambda y, sr: (tf.expand_dims(y, axis=-1), sr))Audio Augmentation During Forward Propagation
-
We can optimize the parameters for generating spectrograms during hyperparameter searches without having to repeatedly convert audio into spectrograms.
-
The transformations are performed directly on the GPU, making it faster in terms of the original transformation speed and device memory placement.
import kapre

input_layer = tf.keras.layers.Input(shape=input_shape, dtype=tf.float32)

melspectrogram = kapre.composed.get_melspectrogram_layer(
  n_fft=1024,
  return_decibel=True,
  n_mels=256,
  input_data_format='channels_last',
output_data_format='channels_last')(input_layer)from spec_augment import SpecAugment
spec_augment = SpecAugment(freq_mask_param=27, # F in paper
time_mask_param=100, # T in paper
n_freq_mask=1, # mF in paper
n_time_mask=2, # mT in paper
mask_value=-1, )(melspectrogram)spec_augment = tf.keras.applications.resnet_v2.preprocess_input(spec_augment)
core = tf.keras.applications.resnet_v2.ResNet152V2(
input_tensor=spec_augment,
include_top=False,
pooling="avg",
weights=None,
)
core = core.output
output = tf.keras.layers.Dense(units=10)(core)
resnet_model = tf.keras.Model(inputs=[input_layer], outputs=[output], name="audio_model")torchaudio
spec = get_spectrogram(power=None)
strech = T.TimeStretch()

rate = 1.2
spec_ = strech(spec, rate)
plot_spectrogram(spec_[0].abs(), title=f"Stretched x{rate}", aspect='equal', xmax=304)

plot_spectrogram(spec[0].abs(), title="Original", aspect='equal', xmax=304)

rate = 0.9
spec_ = strech(spec, rate)
plot_spectrogram(spec_[0].abs(), title=f"Stretched x{rate}", aspect='equal', xmax=304)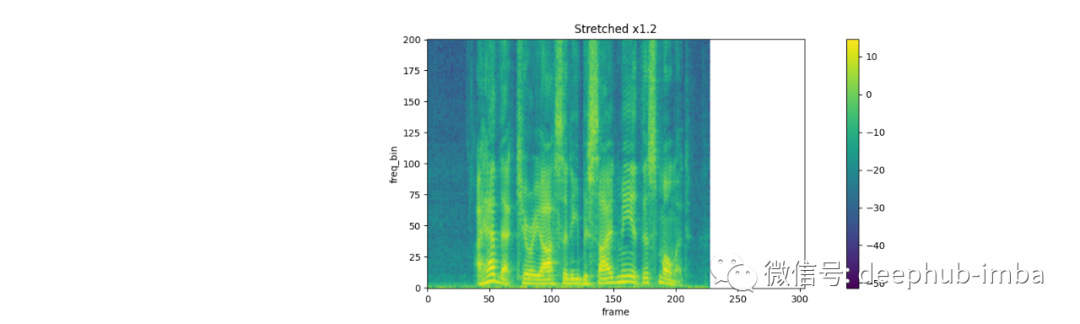
torch.random.manual_seed(4)

spec = get_spectrogram()
plot_spectrogram(spec[0], title="Original")

masking = T.TimeMasking(time_mask_param=80)
spec = masking(spec)

plot_spectrogram(spec[0], title="Masked along time axis")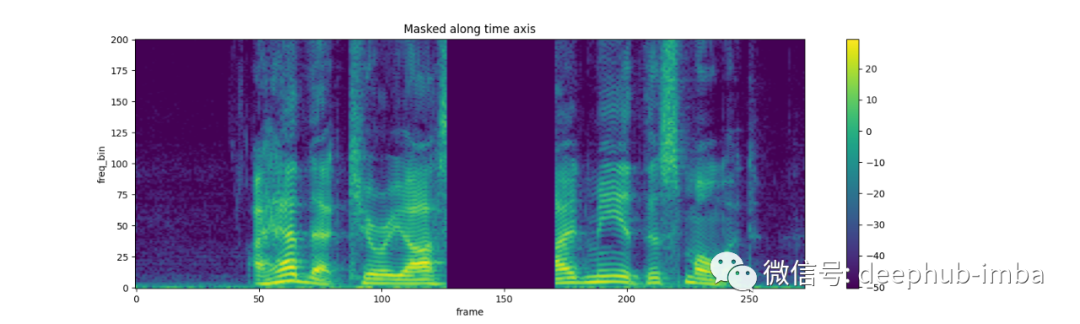
FrequencyMasking:
torch.random.manual_seed(4)

spec = get_spectrogram()
plot_spectrogram(spec[0], title="Original")

masking = T.FrequencyMasking(freq_mask_param=80)
spec = masking(spec)

plot_spectrogram(spec[0], title="Masked along frequency axis")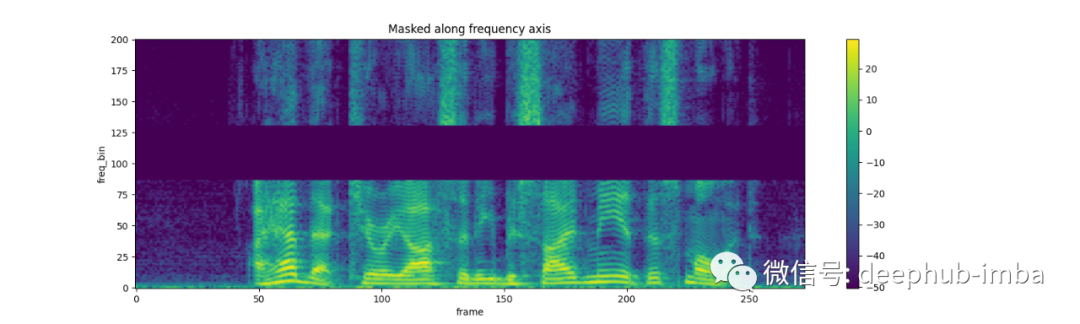
Conclusion
References
[1] Park et al., Specaugment: A simple data augmentation method for automatic speech recognition, 2019, Proc. Interspeech 2019
https://ai.googleblog.com/2019/04/specaugment-new-data-augmentation.html
Editor: Wang Jing